Archive for the Category ◊ Techniques ◊

Author:
• Monday, March 08th, 2021
sharpness for accurate work

When considering the benefits of beautifully sharp tools, what usually comes to mind is a smoothing plane producing a cosmetically flawless surface on the wood. This is often the impressive conclusion of a sharpening demonstration.  

Sometimes it is the joyful ease of pushing a sharp blade through the wood that compels us to accept our sharpening chores.  

No question, these are important reasons to hit the stones. However, I suggest that the foremost and most common reason to use a sharp tool is to be able to work accurately. I’m guessing that may not be what you usually have in mind when you go to the sharpening bench, but consider this: you pretty much always want to work accurately when you pick up an edge tool. You assume that.

It’s simple: a sharp tool immediately cuts the wood, and cuts just where you want. (And in small increments if needed!) The result equals the intention.

A dull edge is more likely to be diverted by the fiber structure of the wood, or tear the wood before it cuts it. Forcing a dull tool can cause you to overshoot or just miss the mark. Of course, all of these problems and others reduce accuracy.

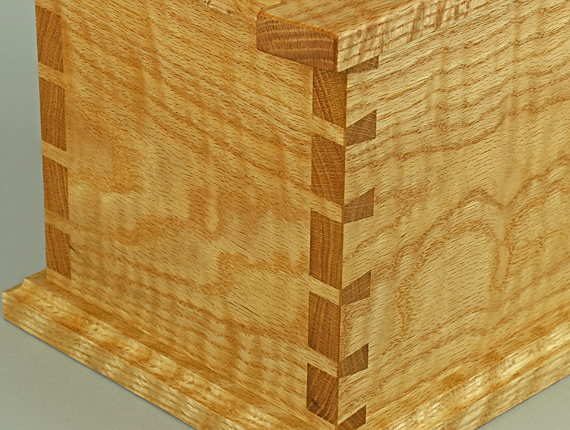
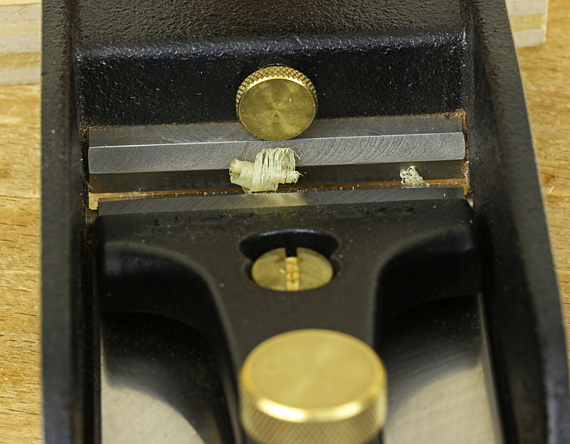
Here are a few examples. The final shavings with the jointer plane to produce an edge-to-edge joint must be easy, thin, and precise to produce that square edge with a tiny camber. Just a very few thou matter, and if your blade cannot easily pull thin shavings, you cannot dial in that accuracy.

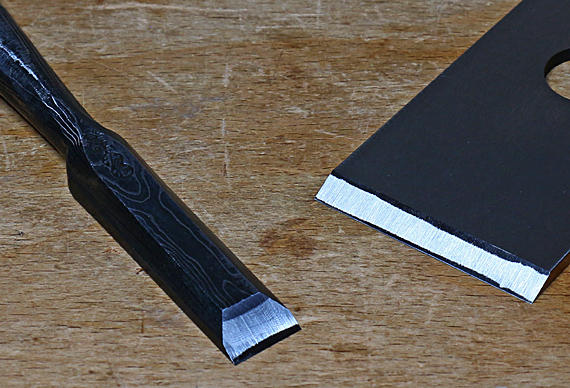
Similarly, trying to shoot an accurate end grain edge with a dull blade is like trying to produce calligraphy with a crayon. 

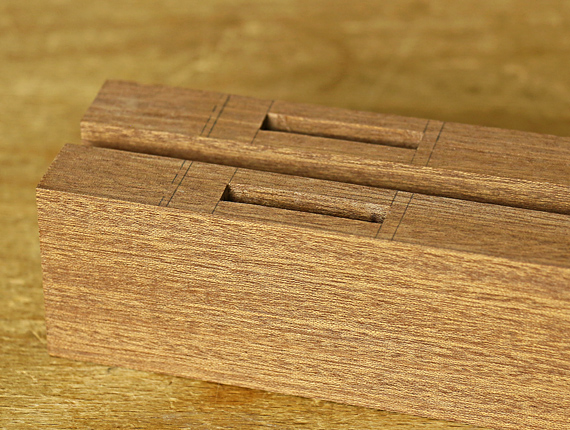
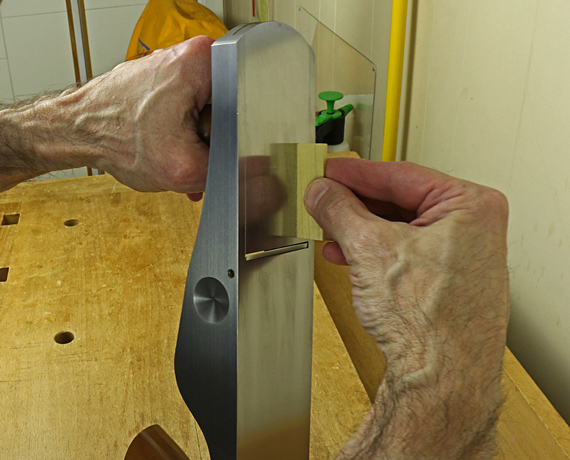
Consider paring a hinge mortise or a tenon cheek. You intuitively know that you want a sharp edge. Less obvious, consider chopping to the baselines of dovetails. You know the dull chisel is slower but think about that first entry where you want to avoid push back against the gauge line. Accuracy requires sharpness.

The same goes for sawing. Sure, the sharp saw is faster but most important, it is accurate.

And so forth. 

Working wood is way more fun than working tool steel (aka sharpening), so we need a darned good reason to get over to the sharpening bench. The foremost and most common reason is to work wood accurately.

Category: Techniques  | Comments off
Author:
• Thursday, February 04th, 2021
red oak dovetails

Several years ago I wrote more than 60 lengthy posts for a crafts instruction site called Craftsy. Woodworking was only a small part of their business, which dealt mostly in knitting, cake decorating, sewing, and so forth. Craftsy has since changed hands, first acquired by NBC Universal who called it Bluprint, at then by its present owner, TN Marketing, who returned it to the Craftsy name. It appears they are no longer actively involved in woodworking. 

Nine of the posts that I wrote were assembled into a 43-page “Dovetail Guide,” which was available for free as a downloadable PDF. This was (if I don’t say so meself) a very useful, at-the-bench instruction guide for cutting dovetails, helpful for beginners to experienced woodworkers alike. It covers the hands-on things you need to know in an intimate way that few other sources do. “From the sawdust and shavings at my bench,” as I say. 

The link to the PDF disappeared in the corporate shuffle and has not returned as of now, despite my requests. Many readers have contacted me looking for the Guide. 

Good news: the links to the original nine posts are available at this writing. So, you can get all of the information in the guide but you have to click on nine different links. If you are interested, I suggest you get a hold of this soon because it would not surprise me if it also gets lost in the corporate shuffle. 

Here are the links to the nine sections of Rob’s Dovetail Guide, in order, labeled by topic. Each will open in its own tab.)

1. Essential tools for dovetail joinery

2. Stock preparation and marking out a dovetail joint

3. How to saw dovetails – accurately!

4. Chop the waste with good chisel technique

5. Marking the pins from the tails

6. How to saw and chop the pins

7. Fitting the joint together

8. Assembling and gluing

9. Fixing errors and finishing up (Introducing the Woodshop Spy Cam)

The guide covers through dovetails but the skills are directly applicable to all variants of dovetail joinery.

My goal is simple: to help you experience the joy of our craft and the fulfillment of creativity. If you do use the Dovetail Guide, drop a comment or email me and let me know how it has worked for you or if you have questions. 

Author:
• Monday, December 07th, 2020
Suehiro Gokumyo 20,000

Disclaimer: Or what they do tell you but you might not notice.

Just as you cannot be a good woodworker without understanding a lot about wood, so too, you must be a highly capable sharpener. However, with all the available information and devices devoted to sharpening, it is easy to forget about the other end of the matter – blades get dull.

In fact, a plane blade, for example, starts to dull almost immediately when it is put to work. So, to be practical, you really should think of sharpening and dulling together as a system. Teaching demonstrations may finish with an impressive hair shaving flourish but that is not the full story of what you do in the shop.

The first step in an effective system is to consider the steel type and quality when choosing tools. For example, I value my Japanese chisels for how sharp the edges can be made but more for how long those edges last. The point is to think about how that nice sharp edge is going to play out when you are making things with it. 

Here are a few more hints in thinking about a system: 

  • Each sharpening procedure, including the edge geometry, should be customized to the tool, the steel, and the intended use.
  • For smoothing planes and paring chisels, plan your work to make the best use of a pristine edge. 
  • Consider the trauma incurred in the steel just behind the edge, especially when grinding a fresh bevel. I avoid grinding out to the very edge whenever possible. I refer you to Brent Beach’s site for more on this.
  • An edge rarely has to be perfect, and rarely is. Get to work
  • If your sharpening station is not easy to set up, you’ll probably be working with inadequate edges. 

Remember that the edge wears on both the beveled and the back (flat) sides. To get a sharp edge, you have to remove the round over on both sides. The back side of a plane blade can be surprisingly prone to neglect when sharpening, even if it was flattened well in preparing the blade when it was new. The solution is David Charlesworth’sruler trick.” I use it on almost all of my plane blades. 

One more thing: Still not enough attention is given in teaching materials to the need to adjust the amount of camber in plane blades according to the bed angle. I pointed this out more than ten years ago here

Category: Techniques  | Tags:  | 7 Comments
Author:
• Wednesday, September 30th, 2020
joinery

Disclaimer: Or what they do tell you but you might not notice.

Perfection is not the fundamental quality or even the goal of good joinery. Instructional promises of “perfect” joints, and especially “perfect every time,” are missing the point.

The skillful craftsperson is always is working within a sensitively understood range of tolerance. Understanding that range, and what lies beyond each end of it, are the keys to excellent work. You practice and refine your skills to develop that understanding and feel. You do not practice with an eye on perfection. The pursuit of “perfect every time” is naive and counterproductive because it misses the point. 

This is generally true in any field. The mason knows the idea is to make a good wall despite the imperfections inherent in every brick. The violinist continually makes tiny variances in the intonation of notes depending on the musical circumstances. I think if you ask a pitcher what is the perfect curve ball, he would say the one that ends up in the catcher’s mitt after the batter swings. 

And yet woodworking joinery seems to often be taught, and woodworking machinery promoted, as if the idea is to make, if you could, a 9000-micron tenon to fit into a 9000-micron mortise. And when you inevitably fail, you are supposed to keep practicing with that perfection as your target. 

I suggest instead that you practice to learn how much deviation to tolerate from flat, straight, square, on the line, etc. Learn how fit can vary and still function and look great. This is not to license sloppy work! Your work can and should be excellent. But learn when and how variance matters. Learn tricks to make small deviations cancel through the building process. Understand the concept of one-sided tolerance. (Please see this post.)

Appreciate too, that wood is compressible and this varies with the species so you must adjust your tolerances. Consider that the ideal (I don’t mean perfect) tenon fit where you gently and evenly swoosh, not force, the tenon into the mortise, and then it stays when you hold the assembly upside down. That involves slight wood compression, and you have to work with that. 

There’s another thing “they don’t tell you.” It is fine to practice making an individual joint such as a mortise and tenon but you have not mastered the joint until you can make it in context such as eight of them working together in a table. The same is true for case joints like dovetails. So, by all means, practice, but practice intelligently, and don’t forget that you have to also practice by making things.

Do not get distracted by perfection. Aim for excellence

Category: Techniques  | Tags:  | 7 Comments
Author:
• Monday, September 28th, 2020
understanding wood

Disclaimer: Or what they do tell you but you might not notice.

Unless you get really good at understanding wood, you cannot be a really good woodworker.

A chef without a deep appreciation for the ingredients will always be at a loss for making outstanding food. You’re a woodworker. You make useful, beautiful things. Wood is your medium. It offers the infinite variability of the biological world, which gives it profound potential in your hands. 

Read the books. Start with Understanding Wood, by the late Bruce Hoadley, and Wood, by Eric Meier. Use the Wood Handbook produced by the U.S. Forest Products Laboratory for reference. Here are some resources.

Observe wood “in the wild” in furniture everywhere. Develop a discriminating eye and taste. See how wood ages. To develop a healthy obsession would not be overdoing it. 

Most of all, get lots of different wood in your shop and mess around with it. See how different species and different boards react to planing, joinery, being four-squared, finishing, and so forth. Understand grain and figure, and how to make the best structural and aesthetic use of them. Be aware of the options in manufactured boards – that’s wood too. 

But Rob”, you say, “Chill out, I just want to make nice bookcases and house stuff in plain old pine that I pick up at the home center. I don’t need curly maple.” OK, great, good work, but which boards do you select? All flatsawn, or should you search through the stack for some rift or quartered stock? What is the moisture content of the wood in the store, and what will happen later? Why is the pine you bought this time acting differently from the stuff you bought last time at the same store?

Bottom line: you must know wood and know it really well. 

The next time you look at a project article in one of the magazines, the wood will probably get passing mention at most. Most woodworking publications, unless specifically on the topic of wood, discuss little about it. But if you want to build something and make it good, think carefully about the wood. Use your knowledge, search widely if necessary, buy carefully, and think it through

A corollary of this imperative is that what works structurally and aesthetically in one wood may not work in another. The wood selection should be integrated into the design and construction plan. The hands-on techniques employed will differ depending on the wood. Except for the design itself, wood selection is the most important stage of a project. 

One more thing: wood can and will disappoint you – sometimes, but more than you might expect. Maybe it turns out to have weird defects, it dresses too thin, or it just doesn’t look like you thought it would next to that other wood, and on and on. 

Don’t just buy more, learn more.

So, yea, get your tools, your shop, your designs, your joinery skills, and even your super-sharp edges, but it cannot be overemphasized: don’t forget to get really good with the wood, and always continue discovering more about it.

Author:
• Sunday, September 27th, 2020
woodworking insights

Disclaimer: Or what they do tell you but you might not notice.

Learning in any field takes place on at least two levels. First, there are the overt knowledge and skills that necessarily dominate the instructional material and the student’s efforts. Yet, there are always the unwritten, perhaps even unsaid, insights without which we never feel truly in command of the field. This is “Oh, now I get the idea . . .” — on the road to mastery. 

With all due respect for the many wonderful woodworking teachers out there, it is difficult to transmit these key points in the environment of most formal instruction, especially written. In fact, these essentials may more often be “discovered” by the student in the quiet reflections of “putting it all together.”

These are the sorts of things that despite all your training, you realize six months into the job. Or that the instructor casually mentions in conversation after class when he sees what an eager student you are. Or that dawn on you during a long nighttime drive back home. These are synthesis ideas.

There is a simple continuing theme of this weblog: I greatly enjoy woodworking and find it meaningful. I want to help you do the same, particularly by discussing matters from a viewpoint that is typically neglected in most woodworking publications. With that in mind, I offer this series of posts to present what I think are pivotal nuggets in the various aspects of woodworking. I hope they help you leap ahead to better woodworking or at least reinforce your woodworking mindset. 

Hey, I’m not so foolish as to think I know it all, so please do comment to share your insights on each of the topics as we go through them. The first topic will be, of course, wood. 

Author:
• Saturday, June 27th, 2020
long-grain shooting board

My new jig for long-grain shooting accommodates workpieces up to 36″, a big increase from the old jig’s capacity of 24″. I was motivated by a few occasions when I had to use the somewhat awkward setup of clamping a long workpiece to a support board and running the plane on the benchtop. 

I have found that shooting a three-foot long piece is really not a problem with a good setup. And the big jig imposes no disadvantages for shooting much shorter pieces. 

My 10/31/19 post is a discussion of long-grain shooting. 

Construction is simple from 3/4″ MDF: The workpiece platform is 6″ wide on top of the base, which is 9″ wide, to make a 3″-wide plane runway that is covered with thick PSA UHMW plastic. I like the Lie-Nielsen #9 but any bench plane would work.

The workpiece is controlled from the front by the end stop, and from the side with clamped scraps. I find no need for an elaborate, screw-mounted permanent lateral clamp board because while it would offer some convenience, it would also limit the functional range of the jig. Top (downward) control is supplied by your hand. 

long-grain shooting board

When shooting a narrow workpiece, such as a door stile, which might temporarily have a convex or concave non-working edge, there is the danger of the workpiece flexing against the straight edge of the lateral control board. The solution, shown above, is to use two separate lateral control boards, each butted against a section of the (non-straight or suspect) non-working edge of the workpiece. 

The cleat at the right end of the jig is an afterthought (you know what I mean: “Doh!”) that allows the jig to be clamped with dogs with a conveniently minimal opening of the tail vise, which is then tightened. 

It works beautifully.

Category: Jigs and Fixtures, Techniques  | Tags:  | 8 Comments
Author:
• Sunday, May 31st, 2020
setting hand plane cutting depth
Click on the photo to see a larger version.

It is not surprising that setting the depth of cut in a hand plane can be difficult to learn. After all, we are dealing with differences of as little as a thou or two with a smoothing plane, and even a heavy cut with a jack plane should have a balanced, efficient setting. 

Ultimately, the best gauge of the proper blade projection is the performance of the plane. You sense the bite of the blade, observe the shavings, and make adjustments.

Nonetheless, you want a good initial setting before the plane is brought to the workpiece to avoid lots of trial and error adjustments after starting to plane. Both the left-right balance and the overall depth of cut must be set. These initial adjustments can be made in two ways: visual and tactile.

To see the blade projection, sight down from the front of the sole at a very low angle with a lamp positioned in front of your forehead. The light will be diffusely reflected from the sole (metal or wood) but not from the protruding blade, which thus appears black. Subtly shift your viewing angle to see the thin black strip of the blade. (As a further optional visual aid, note that light will probably also be reflected from a neatly filed tiny wall at the back of the throat at the extreme sides of the mouth where the curve of the blade camber reveals it.)

The photo at top shows a moderately cambered jack plane blade projection. Click on it to see a larger version.

Adjust the blade for lateral balance with the lever, Norris style adjuster, or hammer, depending on the type of plane. Usually, this is easier to observe and manage with a substantial overall blade projection, which you can then back off to a shallow cutting depth. For a smoothing plane, I make this depth almost nothing and then increase it as needed when I start planing. For jack plane work, I usually go directly to a more aggressive cutting depth. 

For tactile confirmation of the visual adjustment or instead of it, use a small block of wood about 5/32″ thick as shown here. I learned this method from David Charlesworth. I prefer to use the edge, not the corner, of the block to pull shavings from each side and then from the center of the blade. 

testing plane blade depth

As with the visual method, get the lateral balance correct first, then go for a good overall depth of cut. The difference with the tactile method, however, is that it is easier to start with a minimal depth of cut to make the lateral adjustment. The assessment is made by feeling the pull of the cutting edge as it takes a shaving from the little block of wood.

Below is an example of the result. Note that this is to illustrate the principle. In practice, I do not usually bother to turn the plane over to look at the tiny shavings. The assessment is done by feel. You can see that this blade has a nice small camber but the lateral adjustment is not correct. The cutting edge pulled almost nothing on the left side in the photo. 

testing plane blade projection

For smoothing plane work, I’m more likely to use the tactile method because it directly gauges precise small adjustments that may be hard to see. For jack plane work with a moderately cambered blade, I’m more likely to use the visual method because the more prominent blade silhouette makes an adequate adjustment fast and easy.

For planes with a straight-edged blade, such as a rabbet block plane, the same methods apply but you are trying to get an even blade projection across the full width of the mouth.

Category: Techniques  | 8 Comments