Archive for the Category ◊ Wood ◊

Author:
• Thursday, April 22nd, 2021
joint failure

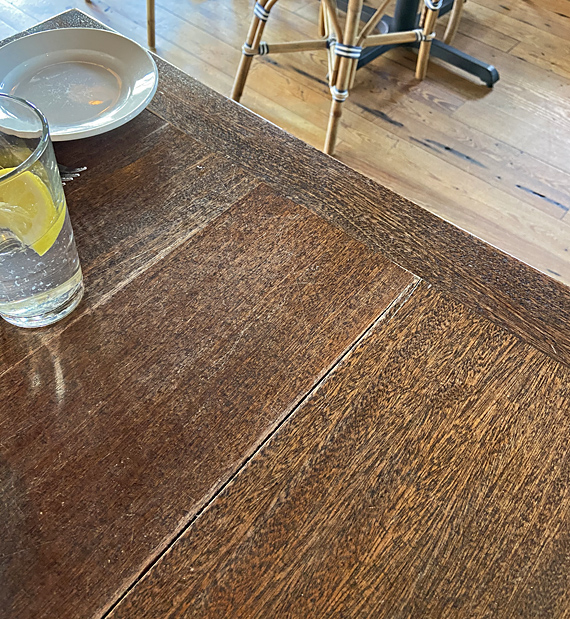
The companions seated at a restaurant table with an avid woodworker may find it odd that while they are studying the menu, the wood guy is studying the table. But much can learned by observing wooden structures in the wild, and so it was at a recent outing – just a few moments to choose the sashimi, but now let me see what’s going on with this table.

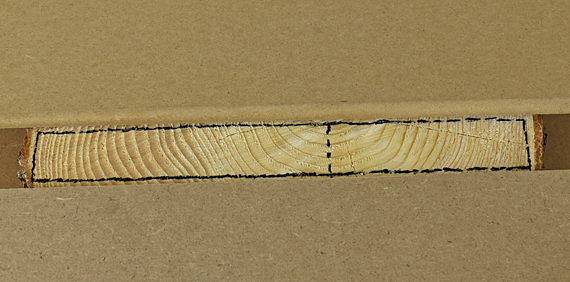
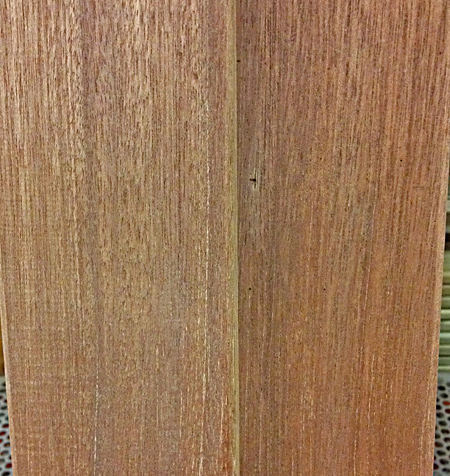
The big split (above) is easy to diagnose. There is a breadboard end cap running cross grain to the main section, and is no doubt glued along its entire length. It probably took only a year or less for the wood, probably dark red meranti, to split during a dry season when it was restrained from shrinking across the grain by the long grain length of the end cap.

Was the maker unaware of the problem inherent in the construction? Was it made just to look good at delivery without regard for its fate? One wonders. 

The split appears to be along an edge joint. As I have discussed in an earlier post, this is not a coincidence. The edge joint was weaker than the wood, a situation with many possible causes and that woodworkers try hard to avoid. My extensive series on the edge joint can help prevent this from happening to your work! 

table top warp

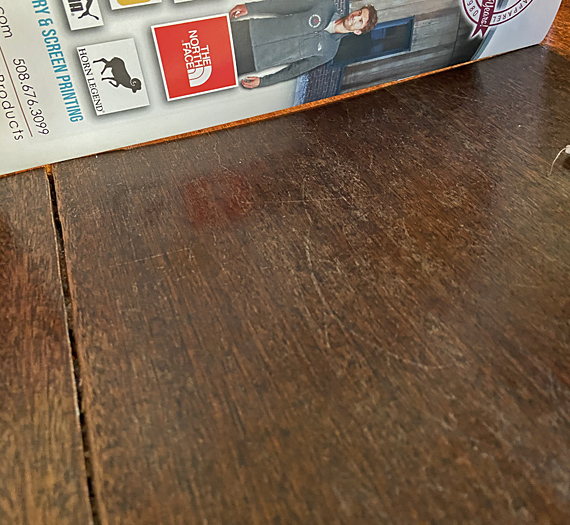
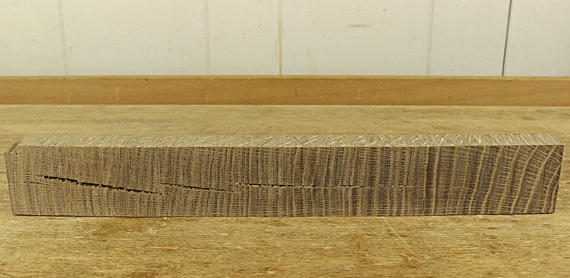
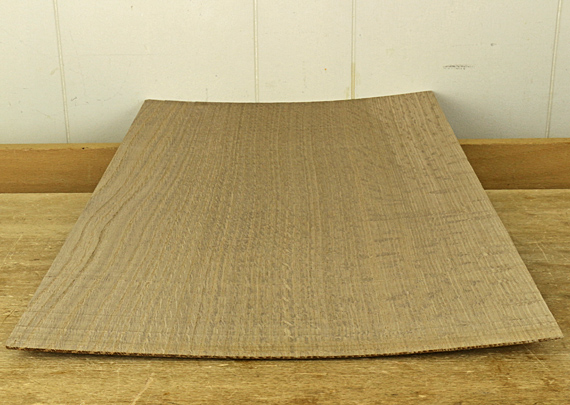
What about the concavity in the top surface? In the photo just above, I am demonstrating the warp in the surface using the straight edge of the spine of a brochure. (Sorry, I didn’t have my Starrett with me.) Seasonal movement of flatsawn wood perhaps? No, the wood does not look flatsawn, and I am almost certain this same cup is present year round, and eventually in most of the tables there. 

The finish on the tabletop eventually deteriorates from repeated wetting, scratches, and perhaps ultraviolet light exposure. Liquid water, inevitably and repeatedly on a restaurant table, can then enter the wood fibers near the top of the board and swell them. The top surface of the board wants to get wider across the grain. But each time the fibers swell, they are compressed against each other, probably aggravated by the top of the board being relatively restrained from expanding by the drier bottom of the board, along with other aspects of the construction. The fibers undergo permanent deformation; they get crushed. This is compression set.

Later, when the top of the board re-equilibrates to a drier state, the crushed fibers want to shrink the width of the board. The board thus becomes concave on its top surface. This effect is irrespective of the usual come-and-go of flatsawn cupping, which may be additive to it. 

It is important to realize that these hygroscopic forces of wood movement are stronger than the wood structure itself. 

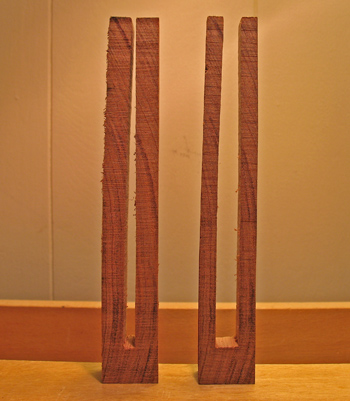
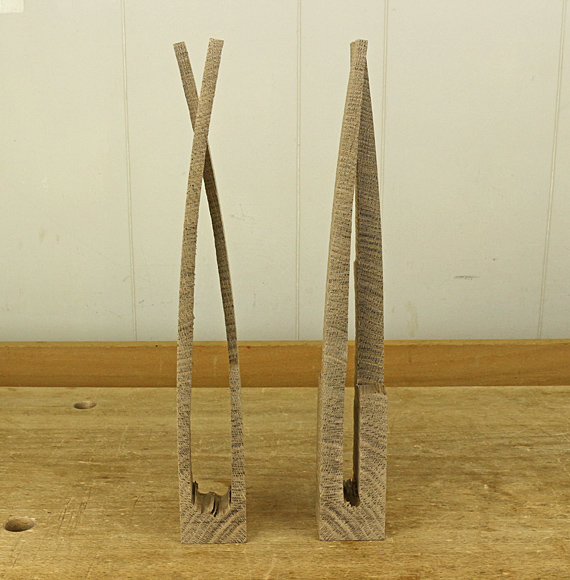
Taking a walk on a wood deck later that day, the boards showed another example of this.

We have to consider how the woodwork we make will fare long after it has left our hands. It is good to remember Yogi Berra’s advice, the title of this post.

[Who is the player with the most World Series championshhips in Major League Baseball history? Yup, it’s the great philospher himself, Yogi.]

Category: Wood  | 6 Comments
Author:
• Monday, September 28th, 2020
understanding wood

Disclaimer: Or what they do tell you but you might not notice.

Unless you get really good at understanding wood, you cannot be a really good woodworker.

A chef without a deep appreciation for the ingredients will always be at a loss for making outstanding food. You’re a woodworker. You make useful, beautiful things. Wood is your medium. It offers the infinite variability of the biological world, which gives it profound potential in your hands. 

Read the books. Start with Understanding Wood, by the late Bruce Hoadley, and Wood, by Eric Meier. Use the Wood Handbook produced by the U.S. Forest Products Laboratory for reference. Here are some resources.

Observe wood “in the wild” in furniture everywhere. Develop a discriminating eye and taste. See how wood ages. To develop a healthy obsession would not be overdoing it. 

Most of all, get lots of different wood in your shop and mess around with it. See how different species and different boards react to planing, joinery, being four-squared, finishing, and so forth. Understand grain and figure, and how to make the best structural and aesthetic use of them. Be aware of the options in manufactured boards – that’s wood too. 

But Rob”, you say, “Chill out, I just want to make nice bookcases and house stuff in plain old pine that I pick up at the home center. I don’t need curly maple.” OK, great, good work, but which boards do you select? All flatsawn, or should you search through the stack for some rift or quartered stock? What is the moisture content of the wood in the store, and what will happen later? Why is the pine you bought this time acting differently from the stuff you bought last time at the same store?

Bottom line: you must know wood and know it really well. 

The next time you look at a project article in one of the magazines, the wood will probably get passing mention at most. Most woodworking publications, unless specifically on the topic of wood, discuss little about it. But if you want to build something and make it good, think carefully about the wood. Use your knowledge, search widely if necessary, buy carefully, and think it through

A corollary of this imperative is that what works structurally and aesthetically in one wood may not work in another. The wood selection should be integrated into the design and construction plan. The hands-on techniques employed will differ depending on the wood. Except for the design itself, wood selection is the most important stage of a project. 

One more thing: wood can and will disappoint you – sometimes, but more than you might expect. Maybe it turns out to have weird defects, it dresses too thin, or it just doesn’t look like you thought it would next to that other wood, and on and on. 

Don’t just buy more, learn more.

So, yea, get your tools, your shop, your designs, your joinery skills, and even your super-sharp edges, but it cannot be overemphasized: don’t forget to get really good with the wood, and always continue discovering more about it.

Author:
• Friday, July 31st, 2020
case hardened wood test

Other posts here have addressed the issues of case hardening, its effect on resawing, and the problem of excessive case hardening. But here’s a new twist.

To review, slight case hardening is to be expected in kiln-dried hardwoods. Here’s a simplified explanation of what happens in the kiln. Think of the board in cross section. The outer shell loses moisture first, making it want to shrink but it is restrained by the still moist and swollen core. The shell is thus in tension and the core in compression. The shell eventually sets in size, so later when the core loses moisture and wants to shrink, it is in tension while the shell is in compression. This is case hardening

The kiln operator modifies the humidity near the end of the process to remove most of the case hardening but is careful not to go too far and create reverse case hardening, which is not practically correctable. Therefore, there is a bit of remaining case hardening in most kiln dried hardwood boards. It is not normally a problem. 

Excessive case hardening, usually from inadequate air drying before going to the kiln or rushing the wood through the kiln, is a problem. This manifests most notably if the board is resawn. Both halves will cup inward toward the sawn surface and may bow inward a bit along the length. We can predict this with a test fork

It is important to appreciate that this is not a matter of a remaining moisture content gradient across the thickness of the board! It is a physical stress caused by the drying process that releases when it can, which is typically right away or very soon after resawing or removing substantial thickness from one side of the board. 

But how long can it take for the release of tension and consequent distortion of the board to fully manifest? From everything I have experienced (and read), it is mostly almost immediate, or in some cases it can trickle on for a day or so.

But this case is different.

I recently resawed some 8/4 quartersawn sapele. The boards were straight and true with nice, even straight grain. There was absolutely no moisture gradient across the thickness of the boards, as proven with pin meter readings at various depths across the end grain of fresh crosscuts well into the length of the board.

Test forks looked great – little or no inward bend of the tines – so I did the resaw. But after a couple of days, I was shocked to see the tines hooked inward. (The photo above is how they ended up.) The boards themselves distorted over several days. They showed both the classic effects of case hardening, and more disturbingly, some twist. I hate twist. 

The wood seemed to settle down after a couple of weeks, so I dressed the resawn boards but then even several weeks later I could still find a small but significant amount of new distortion, primarily twist! Again, the grain of the boards was nice and straight. Furthermore, they contained no evidence of reaction wood, or other aberrations. The resawn wood was stored stickered and at a steady 50-55% relative humidity.

Why did it take so long for the distortion to fully manifest? I don’t know. Some online research and talking with experienced log millers, though hardly exhaustive, yielded no answers. 

Here’s my little theory. For the mechanical release of tension (that creates the distortion) to occur, I assume the wood fibers have to slide against each other. Perhaps that sliding is just “stickier” and slower to occur in sapele than in most woods. Perhaps related, I note that sapele is among the highest measured woods in shear strength (at 12% moisture content) listed by the U.S. Forest Products Laboratory. (Wood technologists and scientists, please comment!)

In any case, it happened. Wood stresses can be stressful. So, there it is, one more caution to take with wood.

Category: Wood  | 6 Comments
Author:
• Saturday, May 30th, 2020
wood moisture widget

Wood moves. We all know that. This simple gadget makes the hygroscopic movement of wood readily apparent. It reminds me of what is going on with the wood in my shop, and it’s fun to observe. 

The device is simply an offcut from a glued-up flatsawn red oak panel. The strip is mounted on a piece of plywood, which, of course, will not undergo hygroscopic change in its length. The oak is secured with a screw near one end, while a scale on the plywood with 1/16″ gradations straddles the free end. The strip is freely supported by a tiny brad about two-thirds the length from the fixed end in case the unit is hung horizontally, but I usually hang it vertically on a nail. 

At 8.6% movement across the grain (green to oven dry), tangential to the annual rings, red oak is in the midrange among wood species. The 15″ length of the strip plus the abundance of end grain exposure produce substantial and relatively rapid dimensional change.  

A change in relative humidity (RH) from 35% to 85% (at 70°) is calculated to produce about a 1/2″ change in the length of this strip. I try to keep my shop between 40% – 60% RH year round but even this range will produce about 5/32″ of movement. It is interesting to see what happens when I place the device in another room in the house for a day or two, especially during seasonal extremes.

This type of device can be upgraded by attaching an indicator needle to the end of the strip via pivots that convert its linear movement to an arc movement of the tip of the needle. That’s more bother than I want, and the movement of the strip itself is enough to be easily observed directly without conversion.

I consider the regular humidity meter on the wall to be essential shop equipment but this gadget is a nifty way to stay directly aware of wood movement.

Category: Wood  | One Comment
Author:
• Saturday, September 28th, 2019
compression wood

Being a woodworker, and thus appropriately obsessed with wood in all its variety, I could not resist grabbing a sample slice of a mildly leaning hemlock tree that was recently taken down on my property. 

On the left side of the slice, which was the underside of the leaning tree, note the darker, wider latewood in the enlarged growth rings. That is “reaction wood,” specifically called “compression wood” in softwood species. 

compression wood

How does this relate to shopping for wood? A board with end grain as outlined in the photo would show signs of trouble:

  • The deduced location of the pith is off-center even with an equal number of annual rings on each side of it.  
  • The width of the annual rings is asymmetric on opposite sides of the pith.
  • The wide annual rings contain that odd looking latewood. This will probably also be noticeable on the face of the board.

The compression wood is abnormally brittle and weak. It also shrinks a lot along its length, whereas normal wood has essentially no such shrinkage. This can result in splits, crooks, and finishing problems. This is a board that you do not want.

These boards are definitely out there lurking in stacks of softwood lumber (hardwoods have their version of reaction wood known as “tension wood”) and they’re just waiting to give you trouble. Leave them behind.

Category: Wood  | 4 Comments
Author:
• Sunday, March 17th, 2019
honeycomb lumber defect

As much as we love wood, it can hit us with some awful surprises. Honeycomb, a drying defect, is among the worst. Here I will recount my sad tale of 8/4 quartersawn white oak, hoping you will be spared the same fate. 

First, let’s briefly review a simplified version of the drying process

The outer part of the board – the shell – loses it bound water and shrinks earlier than the inner part of the board – the core. The shell is in tension because it wants to get smaller but is limited by the still moist and swollen core, which is thus in compression. If this happens too fast, surface checks may result, which later may close and go unnoticed.

The shell sets in size. Now, as the core loses its moisture, it wants to shrink but is limited by the surrounding shell. Thus, the core is now in tension and the shell in compression, a condition known as case-hardening

The kiln operator modifies the moisture content at the end of the drying process, and ideally, there would be no remaining stress. However, the irremediable state of reverse case-hardening must be avoided, so a bit of case-hardening is acceptable in the final state of most kiln-dried lumber, demonstrated by a slight inward curve of the tines of a test fork sawn from a cross-section sample of the board (below).

lumber test forks

Note that this is not a matter of a moisture gradient across the thickness of the board; it is physical stress. If you resaw lumber, you’ve certainly encountered this.

But what if the core dries too fast? Hygroscopic wood movement is a powerful force, stronger than the wood itself. Therefore, the core of the wood, desperately trying to shrink within the restricting frame of the shell, simply breaks. Honeycomb! (top photo)

Worst of all, this is not visible from anywhere on the outside of the board. The only clue you might get, which is inconsistent at best, is to note the board is oddly concave across its width on both sides. The cracks, revealed only when you crosscut the board, occur perpendicular to the annual rings in both flatsawn and quartersawn lumber.

So, what happened in this white oak board? Probably several factors conspired. 8/4 is, of course, much slower to dry than 4/4, white oak is a relatively difficult species to dry well, and quartered lumber is a bit slower to dry.  My guess is that this board was not sufficiently air dried before going to the kiln. Further, since 8/4 white oak is less common, this board was probably lumped together in the kiln with thinner lumber and/or faster drying species for which a faster kiln schedule would work. In other words, it was rushed to market. 

case-hardening test

What about using the parts of the board without honeycomb? Nope, best not. Even sections distant from the frank honeycomb were severely case hardened, as demonstrated by these test forks (above). Whether a lot or a little of the interior core was removed, the tines are bent over each other. It was amazing how forcefully they bent inward against each other before I halved their widths so they could cross over each other. Again, to be clear, there was no moisture content gradient across the thickness of the lumber.

case-hardening stress

Severe stress like this wreaks havoc in the building process. I tried to salvage the expensive board but as I would incrementally remove thickness, attempt to resaw, or shape the wood, it persistently distorted. I was constantly and futilely chasing true surfaces. Enough.  

Woodworker, beware.

Category: Wood  | 5 Comments
Author:
• Monday, October 29th, 2018

dark red meranti

Dark red meranti, pictured above, is a generally uninspiring reddish brown, rather uniform looking wood that does not therefore find its way much into fine woodworking. If you have not come across it as solid wood, you likely have seen it as the skin of middling quality plywood, where it is referred to as lauan or Philippine mahogany. It is about the same density as khaya and genuine mahogany, but a bit softer. It has several cousins in the Shorea genus, including the softer and even more forgettable light red meranti. Any claim of these woods as “mahogany” is untenable.

There is, however, one more wood that does have a strong claim as a mahogany substitute: utile, also known as sipo. Entandrophragma utile is in the same genus but not as hard as sapele, and easier to work. It is a generally consistent but not boring wood that can look quite nice, especially flatsawn, where you otherwise might have used genuine mahogany. Its darker ray lines sometimes also add interest. I’ve also seen some wild ribbon striped quartersawn utile.

The volumetric shrinkage of utile is 11.8%. That’s pretty good but no match for genuine mahogany’s freakish 7.5%. Still, with a nice T/R of 1.4%, you can expect utile to behave quite well.

Unfortunately, dear readers, I do not have any utile in my shop at this time, so I cannot offer you a photo. However, this is a good time to refer you to the magnificent resources created by Eric Meier. His huge website is a treasure trove of well-organized information, including beautiful and useful photos. As good as the website is, I highly recommend also buying his book, Wood!, which I think is the best book on wood available, and one of the best books in the entire woodworking field. [As always, my recommendation is unsolicited and uncompensated.]

If you are contemplating using any of the woods discussed in this series of posts – “genuine” mahogany (Swietenia macrophylla), African mahogany/khaya (Khaya spp.), sapele (Entandrophragma cylindricum), or utile/sipo (Entandrophragma utile), I offer these suggestions:

  • Consider each on its own merits rather than trying to imitate some other wood, namely “genuine” mahogany.
  • Pay close attention to the particulars of each board, including color, density, figure, and, of course, the orientation of cut from the log. There is much variation within each species.
  • Watch out for defects, especially compression failures. For this reason, and the point above, consider buying these woods planed or at least hit-or-miss planed if you can.
  • Scraping is a good way to tame the interlocked grain on quartered surfaces.

Enjoy building!

Category: Wood  | Tags:  | One Comment
Author:
• Sunday, September 30th, 2018

sapele

Sapele, Entandrophragma cylindricum, stands out as significantly darker, redder, heavier, and harder than the others in this bunch. Though it would often work in the same context as genuine mahogany, I suggest not thinking of it as a substitute for the venerable old boy, but rather as a wonderful wood in its own right.

The species offers some spectacularly figured wood. Most common is the neat ribbon stripe in quartersawn boards. The striping is finer and bolder than that of khaya, and can be obtained quite reliably. The pieces pictured above are unfinished, fairly middling stuff, but the ribbon figure will pop pretty well with oil-varnish mix, and the color will deepen considerably.

Also, consider ribbon-stripe face veneer plywood, which can be found reasonably priced in a variety of thicknesses, as a nice backing for a cabinet or for drawer bottoms. You know a wood has reached all-star status when you see it as fake veneer in an elevator in a fancy downtown building.

Sapele can also produce spectacular curly figure and pommele figure. The latter is similar to blister maple, sometimes in a finer pattern. The wood is popular with instrument makers.

On the other hand, flatsawn sapele, without special figure, is a decent wood but not something that really excites me on its own. Still, it may fit the bill as a predictable, diffuse-porous, reddish wood that can finish fairly dark and will darken further with time.

No pushover like genuine mahogany, sapele is about as hard as white oak and sugar maple, and nearly as dense. It machines pretty well as long as you take precautions to avoid planer tearout on the quartered rowed surfaces and burning from ripping on the table saw. For smoothing to a finished surface, I suggest skip the handplane and go with scraping and sanding.

Sapele is about as stable as black walnut, with a volumetric shrinkage of 12.8%. The T/R is a nice 1.5, but that offers little advantage when using quarted boards for the ribbon stripe.

Shopping at different dealers, I’ve had good luck with the sapele being fairly consistent, and it has seemed safe to buy in the rough. (However, check the comment in the first post in this series – compression failures may lurk.) I’ve also found it more expensive than khaya or utile but still significantly less than genuine mahogany. It is a popular wood.

How do you pronounce it? I’d been saying sa – ‘pay – lay (like the legendary soccer player), but most often I hear sa – ‘pee – lee, and sometimes, sa – ‘pell – lee.

There’s one more post coming up in this series.

Category: Wood  | Tags:  | 7 Comments