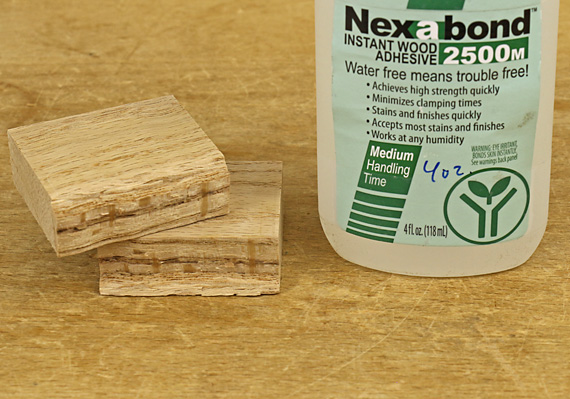
[Addendum 12/7/16: As of 3/1/16, “Nexabond” products are no longer available but the Nexabond 2500M (Medium set time) formulation is sold widely by DAP products as RapidFuse Wood Adhesive. The short and long set Nexabond formulations are no longer available.]
Does Nexabond cyanoacrylate glue make strong wood glue joints? In short, yes, but let’s take a closer look at that along with other properties of this glue.
Strength
Sirrus, the manufacturer of Nexabond, has graphs on their website that show has shown that white oak bonds made with their glues are as strong or stronger than those made with “water based wood glue.” They use an ATSM test protocol that involves lap shears and is different from the protocol for Titebond III presented on Franklin’s website.
Testing glue in this manner makes practical sense because the glue bonds in most woodworking joints are primarily stressed in shear. Sirrus kindly supplied me with additional data derived from this test protocol that compares Nexabond to Type I and Type II PVA emulsions, the categories of Titebond III and Titebond II, respectively. Again, they are all nearly identical in strength, though Nexabond 2500S measured very slightly, probably insignificantly, less than the others. The strength of all of the bonds exceeded that of the wood.
Endurance
After soak-bake cycling, Nexabond bonds held up almost as well as Type I PVA bonds and considerably better than Type II PVA bonds. In a moisture-UV torture test, Nexabond outperformed both of the PVAs. Still, Sirrus cautions that their glue is water resistant, not waterproof, and the website states “for interior applications only.”
Woodworkers would naturally like assurance that our glue bonds will survive for decades and generations but, of course, we cannot directly know that yet. Thus, for any new glue, like finishes, there is a degree of uncertainty that only time can fully eliminate. In the meantime, we have to rely on tests and chemists, which seems reasonable.
Impact resistance
I’ve noticed that little blocks that were glued in place with a general purpose CA, in reconfiguring my tool cabinet, for example, can be easily knocked free, usually almost cleanly. For me, that is enough of a clue to avoid those glues for structural joints in furniture.
Nexabond is different. Data from Sirrus shows that it equals the PVAs in the impact resistance of shear joints. Also, even after 30 days of 82°C (180°F) heat, Nexabond bonds held up better than PVA bonds, though I don’t know the practical significance of that.
Cold creep
Glue line flexibility (cold creep), to a degree, is good or bad depending on the application. The flexibility of PVA glue helps mortise and tenon joints survive their inherent cross grain conflicts, while the rigidity of urea-formaldehyde glue keeps bent laminations stable.
Sirrus tells me that, as of my inquiry three months ago, they have not specifically evaluated cold creep performance. They point out that CAs in general are rigid but additives in the Nexabond formula create some flexibility, so qualitatively, performance in this regard should land between PVA and UF glues.
Glue line and clamping
I wondered if the glue line with Nexabond can ever be too thin or if I should be concerned about overdoing it with clamp pressure, such as in an edge-to-edge glue joint where an invisible glue line is desirable. None of their work, they say, suggests issues with too much or too little clamp pressure. Use enough pressure to close the joint and make the parts meet tightly without gaps.
Informal shop tests
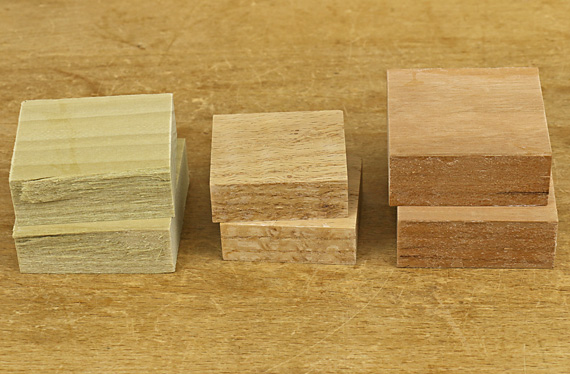
Now, here are a few unscientific trials from the Heartwood Joint Destruction Laboratory (no affiliation with NASA). Please don’t interpret these as anything more than me just wanting to “see for myself” in my own shop. I wanted to get a sense of the development of the bond strength in different woods.
All of the joints were carefully fit, glued with Nexabond 2500M, and clamped for 5-7 minutes. I broke apart each joint by placing the assembly in a vise with the glue line just above the jaws and then grasping the top piece with large pliers just above the glue line – basically stressing the joint in tension to failure. I used this method simply because it’s easy to do and tough on the joints.
I broke the first set right after removing the clamps. Shown below, even after setting only several minutes, the poplar joint held perfectly, as evidenced by total wood failure, but the red oak and cherry joints obviously needed more time.
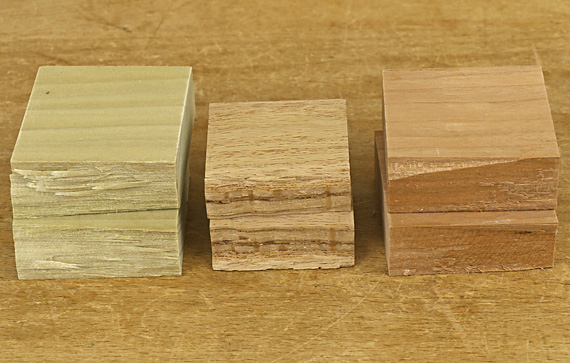
I broke another set one hour after removing the clamps, which is still not enough time to fully cure. Shown below, the poplar and oak joints held perfectly but the cherry joint was not ready.
I let two more cherry joints cure overnight before destruction. One shows about 90% wood failure and the other shows 100% wood failure, in other words, that joint held perfectly.
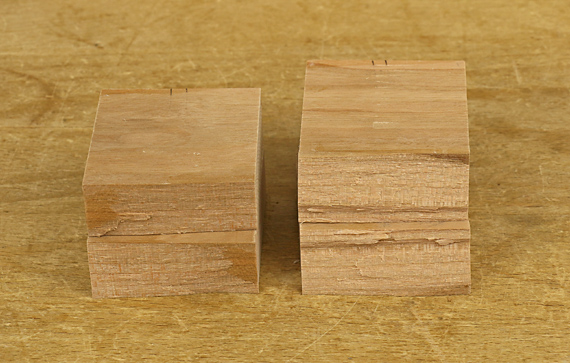
Again, this is obviously not a rigorous test but Nexabond seems to cure slower on cherry. I repeated the 5-7 minute and one hour breaks with cherry, again making sure the joints met perfectly, and the results were essentially the same as above. Perhaps Sirrus can advise on this.
In any case, I like to do these simple shop trials with unfamiliar glue just as I would with an unfamiliar finish-wood combination.
All in all, I’m very impressed with Nexabond glue. I’m convinced it is quite different – better – than any of the several other CAs I’ve tried over the years.
As a reminder, this review is unsolicted and uncompensated.
Coming up: let’s consider options for practical applications of this glue in the small woodshop.
I’ve also invited Sirrus to comment on these posts.