Founded in 2008, Heartwood is among the longest-running active woodworking blogs on the internet. It contains 266,000+ words of original content in 600+ posts, all written by me alone. (That is not including comments.) And there are 1400+ original photographs.
Here you will find plenty of serious woodworking instruction, information on tools, shop setup, and wood, along with musings about the craft. All for you to enjoy for free. No adds, no selling, no nonsense.
Very conservatively, there has been 6 million+ visits and 20 million+ page views (actual human visits, not bots, crawlers, etc.).
I am always delighted to hear from fellow enthusiasts and anyone exploring fine woodworking.
1. If you had a BU jack plane with a 20° bed, could you still use it on end grain? Sure. My Lie-Nielsen #9 “iron miter plane” has a bed of 20° and it works wonderfully on end grain, and so does my L-N shoulder plane with a bed of 18°. Perhaps this is so because resistance is indeed determined solely by the attack angle and not by the sharpening angle per se.
2. This is not about block planes, which, of course, also happen to be bevel-up. It is about BU smoothing planes and, to a lesser extent BU jack planes. Incidentally, I suspect one reason for the popularity of 12°-bed block planes over 20°-bed models is that the former are more compact and thus easier to manipulate with one hand.
3. This is not just a theoretical discussion. BU planes with 20-22° beds have been designed and are available from distinguished planemakers. Take a look at Karl Holtey’s #98 Smoother. Philip Marcou offers bevel-up smoothing and jack planes with 15° and 20° bed angles. [Drool, drool . . .] Though not it’s intended to be used as a smoothing plane, I’ve experimented with setting up my L-N #9 (20° bed) as a high-attack smoother. It works.
So, what’s the point of these four posts? It is simply this: a good addition to the Lee Valley and Lie-Nielsen product lines would be, at the least, the option of a bevel-up smoothing plane with a 20-22° bed. (22° would suit me just fine.)
To create higher attack angles, such as 55°, to reduce tearout with a bevel-up smoothing plane, here are more advantages to a 20-22° bed angle versus the commonly produced 12° bed angle.
1. A higher bed angle requires less camber in the edge to achieve a given “functional camber.” Please see my post that defines the terms I am using and explains the simple math, and this post that shows the effect of bed angle. A blade placed in a 12° bed requires about 75% more “observed camber” to achieve the same functional camber as when placed in a 22° bed. For example: you must grind .014″ camber to achieve .003″ functional camber in a 12° bed, but only have to grind .008″ to achieve the same .003″ functional camber in a 22° bed.
Putting camber in the blade edge takes time and it’s easier to do if there’s less of it.
2. As the wear bevel develops on the lower (flat) side of the blade, an adequate clearance angle is maintained longer when the bed angle is greater. Again, I reference Terry Gordon’s article in Furniture and Cabinetmaking magazine (November 2018, Issue 276, pp. 48-50) and Brent Beach’s website.
Here are two more possible advantages to a 20-22° bed versus a 12° bed, but these are speculative.
1. For a given attack angle, the narrower sharpening angle (as would be used with the higher bed angle) may produce less resistance in the cut. I’m not sure. Maybe resistance is instead determined only by the attack angle, as has been suggested to me by a planemaker. I do not have a way in my shop of making an apples-to-apples comparison. I’d need two planes, identical except for bed angle, then make the same attack angle in each – for example, one with a 22° bed and a 33° blade (=55°) and the other with a 12° bed and a 43° blade (=55°).
2. Perhaps the steeper 20-22° bed is an advantage in design and manufacturing in that it is sturdier and less likely than a 12° bed to deflect downward. I don’t make planes, so I don’t know.
In the previous post, I discussed how a 20-22° bed in a bevel-up smoothing plane can produce a wider range of useful attack angles without resorting to excessively high sharpening angles. The use of narrower sharpening angles has, in turn, several advantages:
1. Sharpening is easier. It is simply more difficult to get a good, sharp edge at, for example, 43° than 33°. It is also awkward to work at the higher angles, and the feedback from the surface of the stone is not as good. I think this is readily evident but some may disagree.
2. Based on my experience, and I think most woodworkers would agree, a blade with a very steep secondary bevel dulls faster than one with a more usual, narrower bevel, all else being equal.
—————————–
Sidebar: how an edge dulls
The profile of the sharp edge of the blade ideally starts out as two straight surfaces meeting at a clean, sharp point. As the edge wears, steel is abraded away from the surfaces near the edge, and the original point becomes rounded over. The worn surfaces of the blade that approach the blunted edge can be thought of as “wear bevels.” Thanks to Brent Beach and Steve Elliot for their development and detailed study of these concepts.
For both bevel-up and bevel-down planes, the wear bevel on the top side of the blade (the side facing away from the wood) is wider than that on the bottom side, because it is the top (front) of the blade that bears the brunt of the collision with the wood. The bottom-side wear bevel, which is on the flat side of the blade in a BU plane, is nonetheless important.
Brent Beach explains the value of removing the lower wear bevel when sharpening to regain a truly sharp edge, to maintain proper clearance of the blade edge from the wood, and to avoid the need to apply undue pressure when planing. David Charlesworth’s Ruler Trick is thus particularly helpful for bevel-up plane blades.
——————————-
3. A functionally sharp edge is preserved longer when the blade is sharpened at a narrower angle. This is consistent with point #2. Australian planemaker Terry Gordon explains this nicely in a recent article in Furniture and Cabinetmaking magazine (November 2018, Issue 276, pp. 48-50). It is best understood diagrammatically but the gist is that a skinnier edge retains useful sharpness longer by remaining narrow longer.
In summary, there are important advantages in sharpening and edge endurance when using the narrower sharpening angles permitted by a higher bed angle in bevel-up smoothing planes.
For example, if you want a 55° attack in your BU smoother, you’re better off being able to sharpen at 33° with a 22° bed (=55°) than having to sharpen at 43° with the 12° bed (=55°) in currently offered stock planes.
Coming up: still more issues. Can you tell that I’m building a case that I think L-N and L-V should hear?
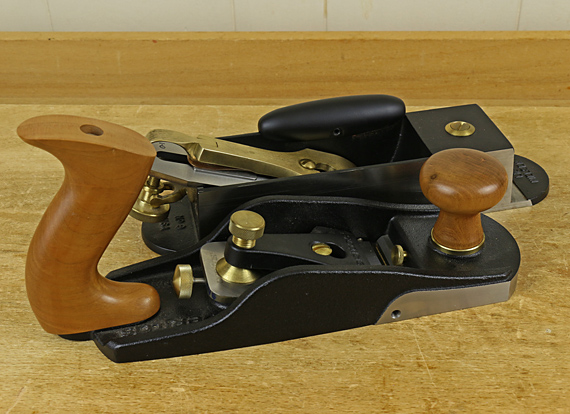
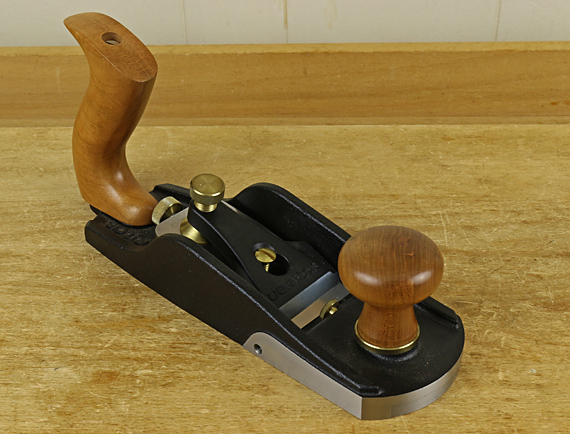
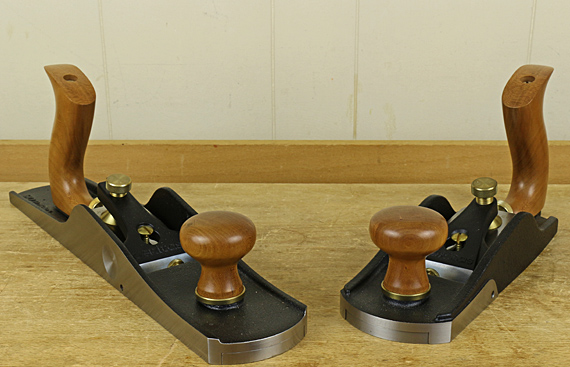
Lee Valley and Lie-Nielsen both use a 12° bed for their bevel-up (BU) bench planes. At least for smoothing planes, I think there are better options. I addressed this issue in a 2010 post but now would like to add additional reasoning.
Let’s start with the issue of attack angle.
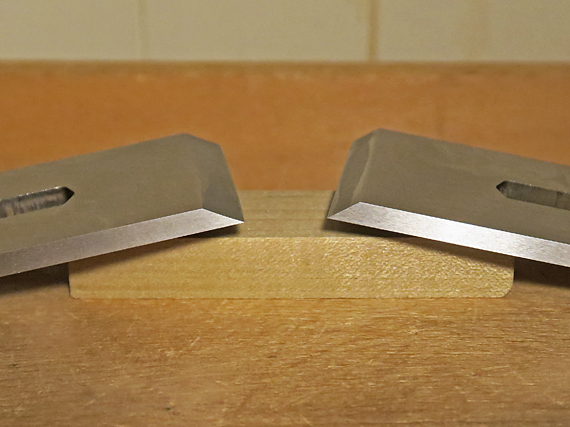
One of the advantages of BU planes is the attack angle (the angle between the wood and the leading surface of the blade) can be altered simply by changing the sharpening angle of the final microbevel. There is no need to change the frog and/or create a large back bevel (a large bevel on the normally flat side of the blade) as with a bevel-down plane. The attack angle is a key factor in how a plane functions, especially to control tear out.
In a bevel-up plane with a 12° bed, to achieve a 50° attack angle, a good all-around angle for a smoother, the sharpening angle must be 38°. (Note that all of the sharpening angles in this discussion are only the final, steepest microbevel, which is what actually interacts with the wood.) A 55° attack, a good choice to manage most figured woods, would require a 43° sharpening angle. A 60° attack, which is about as steep as you can go before the plane acts more like a scraper but is nonetheless useful for difficult woods, requires a 48° sharpening!
Alternatively, let’s consider a 22° bed for the bevel-up smoothing plane. Much lower sharpening angles can be used. For example, a 33° sharpening angle yields a 55° attack, which is a nice setup with an A-2 blade. The 60° attack requires a still-manageable 38° sharpening. On the other hand, if you want a lower attack, you could sharpen at 28° or 30°, such as with an O-1 blade, to yield a 50-52° attack. If slightly lower attack angles suit you, a 20° bed is a good, versatile compromise.
So, a 20-22° bed anglein a bevel-up smoothing plane allows you to a create a good range of attack angles without the excessively high sharpening angles required with a 12° bed.
For a BU jack plane, the case for a steeper bed is less compelling, though still interesting. A 12° bed with a 33° sharpening – typical for an A-2 blade that would often be found in a jack – gives a 45° attack, which many woodworkers consider to be a good all-around choice for a jack. Still, a 15° bed would increase the versatility of the plane in creating slightly higher attack angles without having to increase the sharpening angle too much.
To summarize the main point: a bevel-up smoothing plane with a 12° bed requires excessively high sharpening angles to achieve the very helpful range of attack angles that is one of the key advantages to this type of plane.
Much more to come on this topic in upcoming posts. Those excessively high sharpening angles produce several disadvantages. Furthermore, the lower 12° bed is a disadvantage in itself, and actually lacks a traditionally-cited advantage.
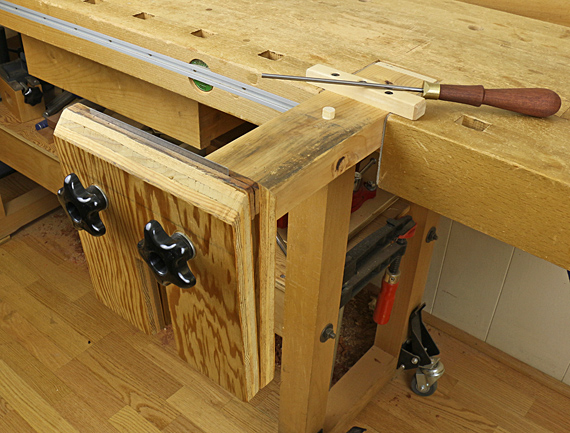
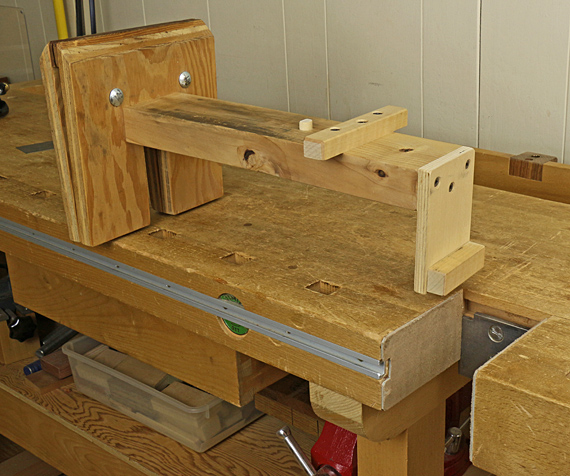
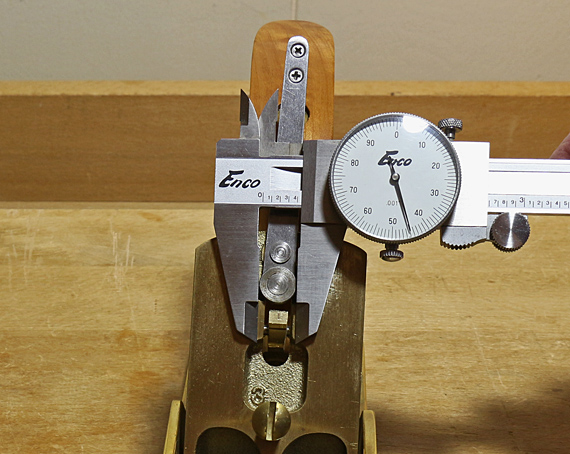
I built this as a saw-sharpening vise long ago from directions on page 16 of the 1979 book Tage Frid Teaches Woodworking – Joinery: Tools and Techniques. After considerable modification, it has long since become my dedicated scraper-sharpening vise.
In its original form, the vise was designed to secure the saw blade by the vise itself being clamped into the front vise of the workbench. I made the long notch in the lower part of the jaws to clear the vise screw but it is no longer functional. Now instead, the jaws are tightened by the two star knobs at the ends of carriage bolts.
The 8″ jaws are faced with hardwood, which allowed me to tune their apposition, including planing a slight camber along the length. The angle at the top of the jaws provides clearance for tools and hands. The jaws grip just fine without a leather lining, which would tend to grab and accumulate metal filings.
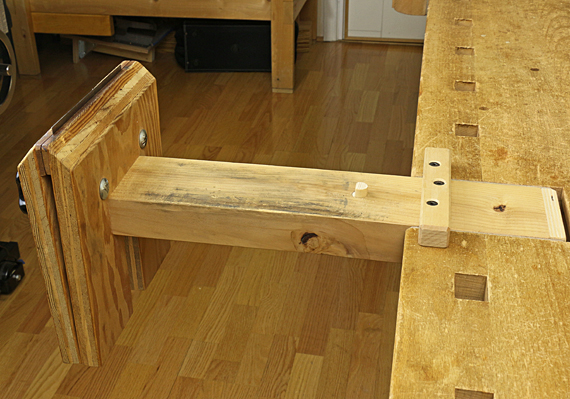
What makes my design really different is the vise is lag-screwed into the end of a 14″ length of 2×4. At the other end of the 2×4 you can see the L-shaped cleat that hooks under the steel plate of the tail vise. Along with the top cleat that contacts the bench surface, this makes the whole setup rock solid when the tail vise is tightened.
The 2×4 extension piece serves as a handy platform for diamond stones, and for running the burnisher along the side of the scraper. The removable dog acts as a stop. The extension also keeps the vise well away from the workbench to prevent metal filings from defiling it.
Of course, the vise is systematized with my method for sharpening scrapers. I do all of the work on the edges of the scraper – filing, diamond stoning, and burnishing – with the scraper clamped in this vise. I’ll save the details of that for another post but here I’ll say that scraper sharpening is easy, and I highly recommend a polished carbide burnisher.
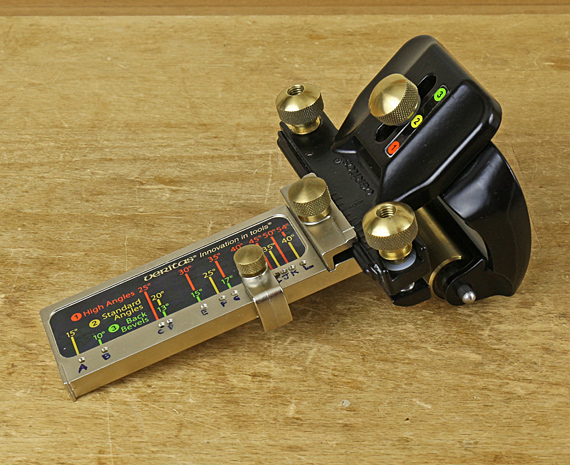
Like many woodworkers, I have a mixed view of honing guides. After many years of using a modified freehand technique involving simple shop-made angle setting blocks, I now use the Veritas Mk.II guide for much of my honing. Maybe it’s because I have more blades, maybe it’s a matter of less patience, but I do like to try to refine my systems and this is where I am now.
The main advantage of a mechanical honing guide is in reliably and accurately returning to a secondary bevel formed in the previous sharpening or within the same sharpening session. This comes at the price of more complexity in the system. Moreover, the versatility of the Veritas Mk.II makes it more complex than most other guides.
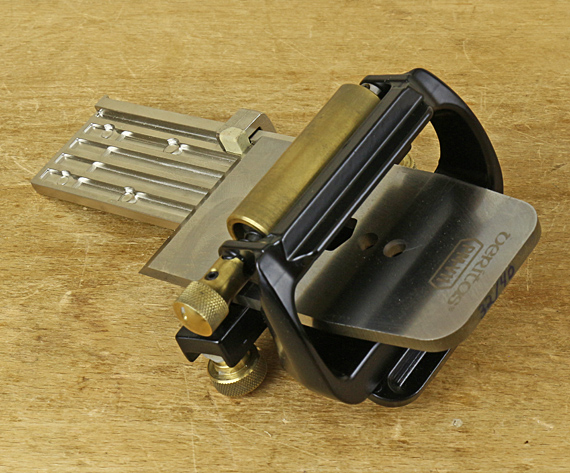
My attempt to simplify use of the Mk.II involves setting the extension of the blade from the front of the jig, which is one determinant of the honing angle. To register the extension (and square the blade to the jig), the MkII uses an attachment to the main guide that you have to slide on and tighten. Then you bring the edge of the blade up to a metal stop on the attachment. Once you have tightened the blade in place, the attachment is removed and you can commence honing.
The registration stop on the attachment is set in one of a dozen locations, each with a dimple to maintain repeatability. Each location of the stop allows several different honing angles depending on three possible settings of the clamping head on the roller base and four possible adjustments of the roller itself. The specific angles are in a table provided with the tool.
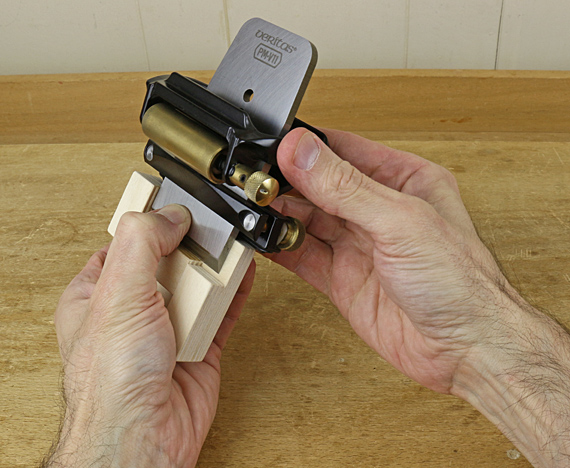
Ugh! But it’s not as bad as perhaps I’ve made it sound. In any case, 90% of my honing (and probably yours) can be accomplished with just two blade extension settings, specifically, the “H” and “I” extension lengths, which can render honing angles from 30° to 47.2°. (See Veritas’ instructions.) So, instead of fiddling with the attachment device, I use the simple wooden extension stop shown in the top photo. The little shim produces the “J” setting, which covers most of the other 10% of the angles I use.
I find this wooden stop to be faster than the Veritas attachment, and just as repeatable. It does take a little practice to coordinate the stop, blade, and Mk.II in your hands. Another advantage of the wooden stop is in avoiding metal near the edge of the blade, particularly if you have to repeat the setting in the same session for a partially sharpened blade that you want to work on further. It also works with the narrow blade clamp, which is especially helpful for Japanese chisels.
With this simple shop-made jig, I can enjoy the advantages of the excellent Veritas tool while avoiding some of its complexity.
Addendum 12/8/19: The letter designations, H, I, and J (referred to above) for the dimple positions on the Veritas blade registration jig that is used with the MkII honing guide are no longer used in the current version of their instructions, copyright 2018. In the original instructions, copyright 2011, which I have, they use letters to refer to the dimples in the jig. H is the 20-30-40° hole as labeled on the jig, I is the 45° hole, and J is the 35° hole. The blade registration jig and the honing guide have not changed, so the rest of the above remains applicable.
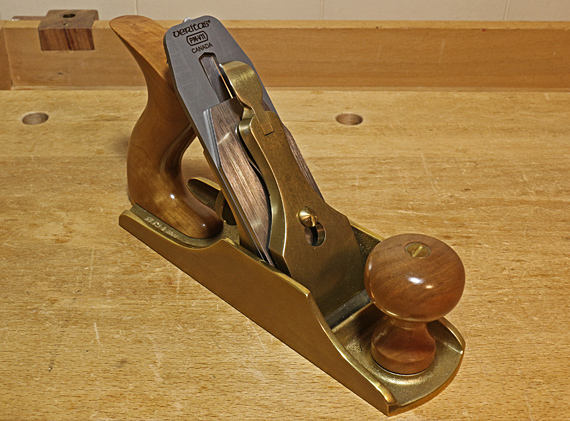
Will the PM-V11blades made for Veritas standard bevel-down bench planes work in a Lie-Nielsen plane? These are nominal 1/8″ thick blades, the same thickness as the L-N blades. I am not referring to Veritas PM-V11 blades made for “Stanley/Record planes,” which are .100″ thick (a little more than 3/32″).
Manufactured by Lee Valley/Veritas, PM-V11 is a wonderful steel that I’m glad to have in my Veritas bevel-up planes. Veritas offers lots of information about it, including their extensive testing, in a dedicated website.
First, here are my impressions from using PM-V11 blades in my LV BU planes. Though obviously not scientific, they differ somewhat from Veritas’ testing.
For ease of sharpening, Veritas found PM-V11 about the same as A-2 but, as we would expect, not nearly as easy as O-1. My sense is that PM-V11 is actually noticeably easier to sharpen than A-2. I don’t think it actually wears faster on my CBN grinder, diamond bench stones, and 0.5 micron ceramic finishing stone, but somehow I feel more confident in creating a reliable final sharp edge. This is completely subjective and perhaps is just a matter of how the steel feels on the stones.
As to the sharpness of a new edge, it’s hard to beat O-1 but I think A-2 can get pretty close. PM-V11 seems to me to be even closer to O-1, and probably equal. Again, this is subjective and perhaps is more of a matter of ease and reliability in getting to a pristine final edge.
Regarding edge retention, it seems odd that the Veritas testing found that A-2 barely beat O-1. With the caveat that A-2 blades vary considerably, I think most woodworkers find as I do that A-2 holds its edge significantly longer than O-1. My unscientific sense is in general agreement with the extensive Veritas testing that the edge in a PM-V11 blade indeed outlasts most A-2, though not by as wide a margin as Veritas found. I think the Hock A-2 blade that I have in my jack plane would give PM-V11 a run for its money. Still, you’ve got to respect the extensive testing that Veritas has done.
In short, there is good reason I’d like to use PM-V11 in my bevel-down Lie-Nielsen planes, which are, of course, absolutely fantastic planes.
In my L-N #4, the lateral adjustment button measures .445″ across. The slot in the L-N O-1 blade that I own is .455″ wide, and .452″ in my L-N A-2 blade. The slot in the Vertias PM-V11 was .441″ when I received it.
I simply widened the Veritas blade slot to .446″ using a 2″ x 6″ DMT extra-coarse diamond stone and cleaned up the resulting harsh edges with the other (coarse) side of the stone. Though this results in just minimal clearance of the slot around the adjustment button, the blade beds just fine. In fact, the reduced play in the lateral adjustment mechanism makes it a bit more responsive.
The Veritas PM-V11 and Lie-Nielsen blades are virtually identical in thickness (within one thou) at about 1/8″. There is no need to compromise by using a thinner blade. There is also no problem connecting the chip breaker, nor with the fit and function of the blade advancement pawl. The slot in the Veritas blade is longer than in the L-N blade but that does not matter as far as I can tell.
I think now I’ve got the best of both of these great companies in my good old #4.
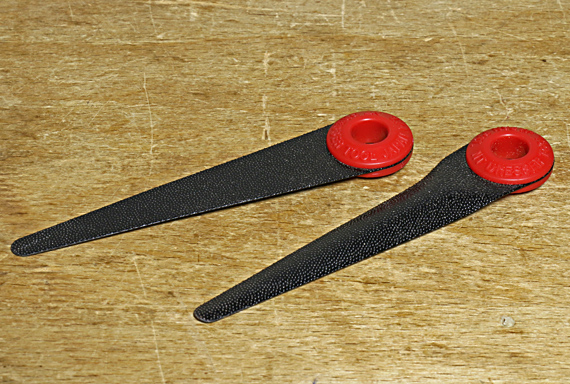
Here are a couple of handy little tools that might get overlooked. More important, they call to mind a similar shop-made necessity.
I got these NT Dresser mini rasps from Lee Valley, who call them “Japanese finger files,” as a last minute add-on to an order. No regrets though, because over the past year I have found them very helpful for finishing off details.
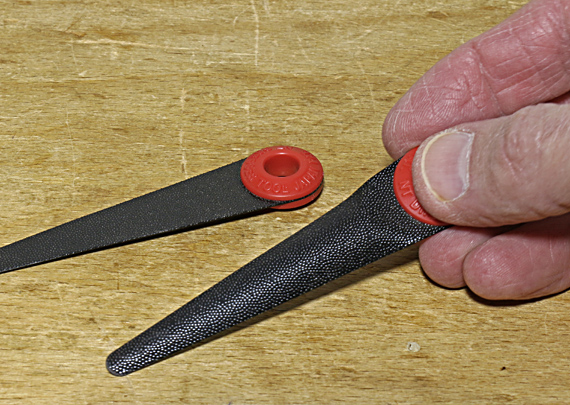
Made of stainless steel and only .023″ thick including the grit, they can get into very narrow recesses. Yet they are stiff enough, when backed up as needed with a finger, to apply adequate cutting pressure and to preserve crisp details. Below, I am holding the half-round mini rasp, which is, of course, stiffer than the flat one.
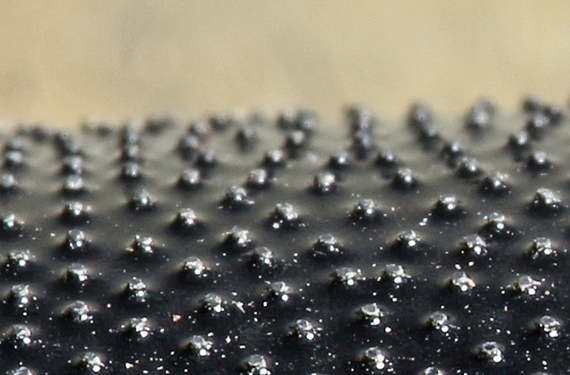
The “grit” is composed of tiny rough, tough knobs on the steel plate. Unlike conventional detail rasps, the NT Dressers cut in any direction so they can work in some places that those other tools cannot. I easily clear them of wood dust with the same stiff hog bristle brush that I use on regular rasps.
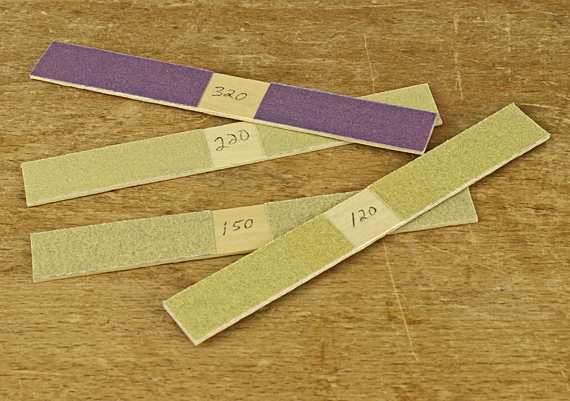
The “medium” grit sold by Lee Valley is actually quite fine. The tool feels about like 220-grit sandpaper but leaves a surface more like 320-grit sandpaper. These are not aggressive tools; they are for details.
NT Cutter (Japan) makes these in different shapes and grits, along with a line of larger tools.
I’ve always kept a set of these little shop-made sanding sticks, pictured below, for use in countless detail and touch-up situations. They are probably not in any book’s list of important woodworking tools but I consider them shop necessities. They’re just PSA sandpaper (or glued-on regular sandpaper) on a squared-off tongue depressor or similar sliver of wood. The NT Dresser tools are more nimble though, which makes them a good complement to the old standbys.
Made or bought, sometimes these humble little tools are just what you need.