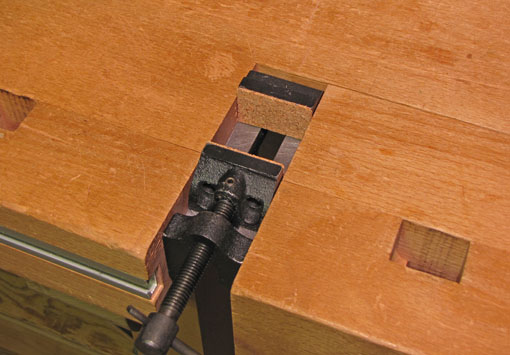
Ulmia used to make a small vise that could, among other uses, be held in the workbench tail vise to hold small or thin work pieces. It is Ulmia model #1812 “Hilfs-Spannstock” (auxiliary vise). [Note: one of the vise jaws is stamped “LSP-2816-4” and the other “LSP-2817-4” but I don’t think those are model numbers.] It can be seen in The Fine Art of Cabinetmaking, section 3, where the author, James Krenov, discusses Japanese saws (page 145 in my copy, the 1977 Van Nostrand Reinhold hardcover edition). I use two alternatives, neither quite as elegant as the Ulmia, but handy nonetheless since they hold small pieces of wood that would otherwise be problematic to work on.
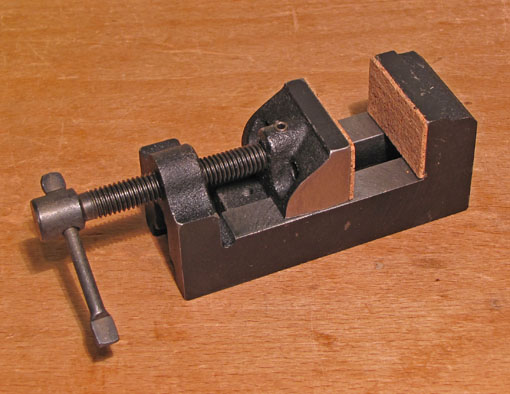
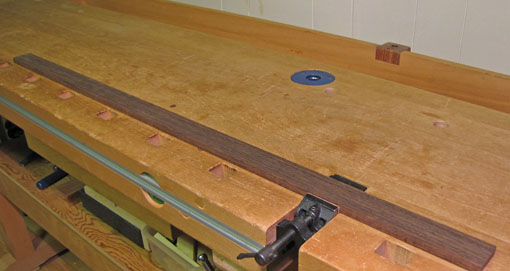
The first option is strorebought, quick, easy, and cheap. (How do like it so far?) Pictured above, it is a drill press vise (MSC #56451263, $21.32), 5″ long, with 1 1/2″ wide jaws. I filed the sides of the moveable jaw so it would move freely when clamped in the tail vise, and replaced the steel jaw faces with very thin cork. It is clamped in the tail vise with the jaws projecting enough above the level of the bench top to securely hold the work piece but below the level of the top surface of the work, so as not to interfere with a plane, chisel, scraper, or other tool.
Unlike the Ulmia, the screw feeds through a threaded portion of the base structure, and thus it projects outward as the vise is opened. This is why I chose the 5″ model over the 7 1/2″ model which, though it has a larger capacity, would tend to get in my way. The Ulmia’s moveable jaw is itself threaded underneath, so the knob remains stationary as the jaw is moved in either direction. There are more expensive precision-made drill press vises available but this one does the job just fine.
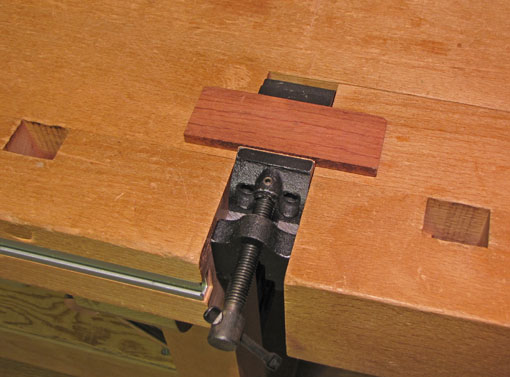
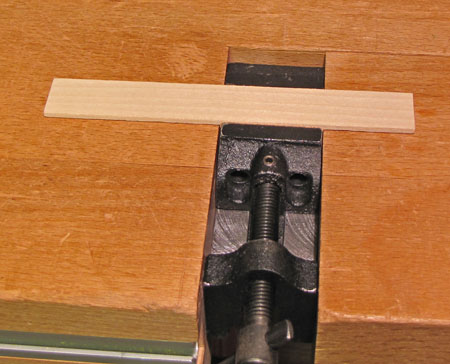
Below are some examples of what it can hold. The piece of maple in the second photo is less than 1/8″ thick.
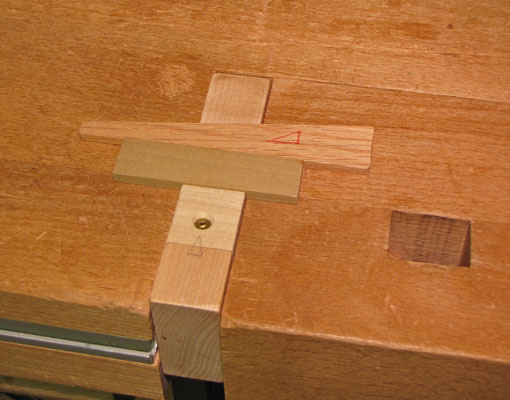
The second option is shop-made, fairly quick and easy, but costs next-to-nothing. (How’s that?) It is simply a 4 1/2″ x 2 1/4″ x 1″ block of hardwood with a 3/8″-deep recess with a 1:7 angled border. It is held in the tail vise with some of the recess projecting above the level of the bench top. A tap on a wedge of the appropriate thickness holds the work piece, tightening further as you push a plane on the work piece. Note the removable spacer, held by a screw, which can expand the width capacity of the vise. [My article in the November 2007 Popular Woodworking shows this and many other shop-made workbench accessories.]
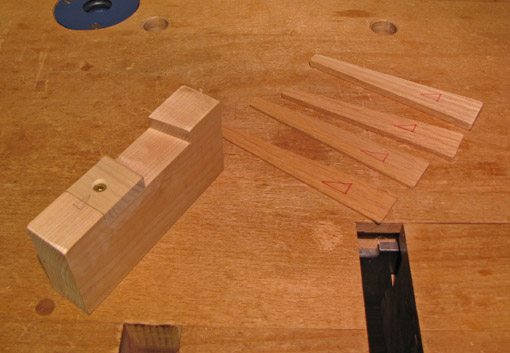
Here it is, set up:
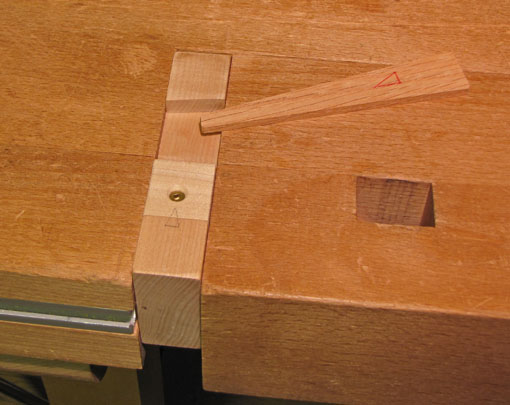
And, in use:
As always, I hope these tips will help you build things in your shop, and have a great time doing it!


Thanks, Rob. I really like the vise and can think of a few times when it would have come in handy.
With your mods and the extra money in my pocket, I think it’s pretty darn elegant.
Thanks, Robert. I hope it is helpful in your shop.
Rob
That is a really good solution to holding those thin parts.
I like the drill-press vise, but I like the home-made one even better. That’s something I can make and start using the next time I’m in the shop.
Question: why do you draw the red triangles on the wedges, and the little black triangle on the spacer block?
Joe,
The red triangle on the wedge shows me which side of the wedge to place against the work. The correct way, as shown, makes the end on the right square to the length of the bench. Then the tap on that end to tighten the wedge is directed properly. A bit compulsive, I admit, but it makes the system work cleanly, which matters for delicate work pieces.
The triangle on the spacer quickly shows me which way to place it to make its hole line up with the hole in the body of the vise.
This way of working makes my tools function efficiently so I can put my thought into the work at hand.
Thanks for the comment and thanks for reading.
Rob
That makes a lot of sense, actually.
I’ve spent much time trying to re-learn how to use a jig I made a months or years ago because I didn’t make notes on it.
Sometimes what seems obvious and simple… isn’t.