Archive for ◊ December, 2013 ◊

Author:
• Tuesday, December 31st, 2013

IMG_1158_edited-2

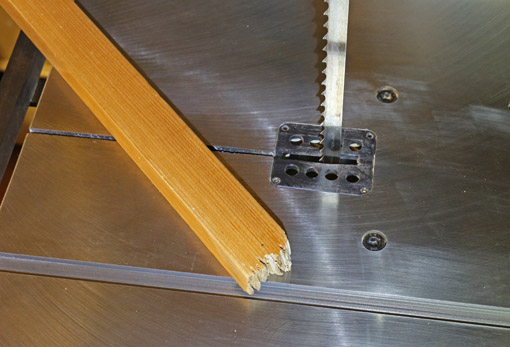
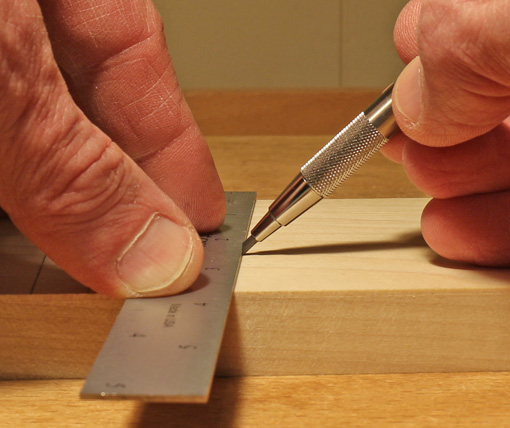
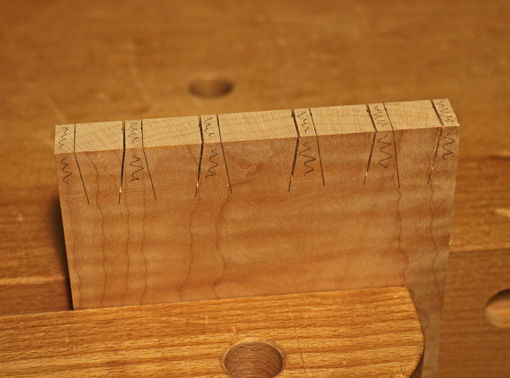
How and where would you start this saw cut? Do you start at the near or far end of the board, or attempt to score the entire width on the first stroke? Do you drag your Western saw backward or push your Japanese saw forward to preliminarily score the wood?

This is no small matter. Accurately starting the saw cut is probably the most critical manual step in dovetailing, especially when sawing pins that have been laid out from previously cut tails.

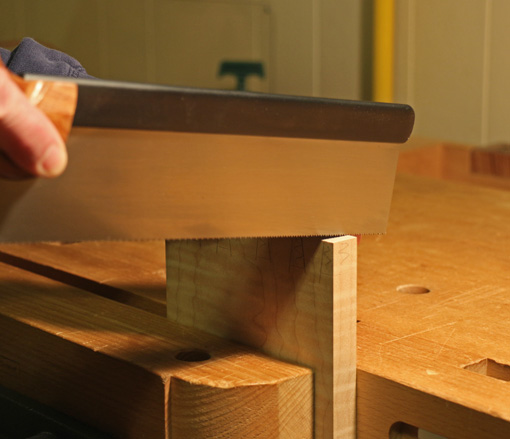
Without a doubt, the smoothest and most accurate method for me is to slightly raise the handle of my Western push saw and start the rip cut at the far end of the board. A Japanese pull-cut saw would be started at the near end. This also works for the crosscuts at the sides of the tail board, as well as for sundry other woodworking cuts.

Though I am empirically convinced of this, let’s explore why.

As the saw teeth approach the top surface at the far corner of the wood with the saw handle raised, the rake angle is effectively relaxed (a greater “negative” rake), which makes for a less aggressive and more controllable entry into to wood. Approaching from the near corner (with the saw handle lowered) would effectively increase the rake angle, creating a positive “hook” rake, which is aggressive and tends to catch and jump on all but the softest woods.

IMG_1159_edited-2

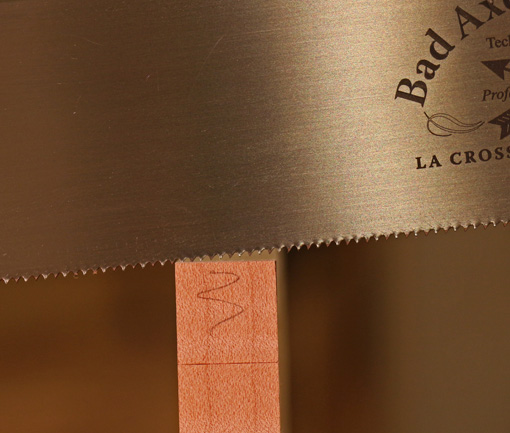
Now, the degree to which one should raise the handle varies with the saw, the wood, and personal feel. If the saw is held too flat on the wood, it may skid on the end grain as you try to engage too much wood at once. Held too steeply, the saw tends to catch the far corner of the wood. Goldilocks this – experiment with your saw and the particular wood at hand. A generally light touch, letting the saw do the work, is part of all this, of course. Bad Axe saws may come filed with a helpful relaxed rake at the toe, which must be taken into account.

As a bonus, this method, applied to either Western push or Japanese pull saws, deposits the sawdust away from, not into, the line that the saw is advancing upon.

Some woodworkers like to start a push saw at the near end, reasoning that this pushes down the fibers, much like planing with the grain. I find that factor is outweighed by the rake factor, making that approach less reliable for me.

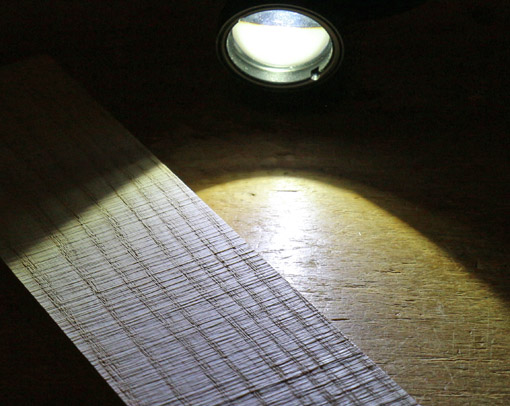
Likewise, I find that starting the cut by dragging/pushing the saw opposite to its normal cutting direction tends to make the saw skid and creates a kerf with a scalloped bottom that tends to catch the teeth when they are then propelled in the normal direction. It seems to me a generally mushy technique that is unnecessary with a good quality saw.

When we start a usual rip or crosscut on the flat surface of a board held horizontally, knee on the board, we are doing much the same as starting the dovetail cut in the manner that I prefer, though with a more aggressive angle, and the added advantage of sawing the fibers “down” when ripping. In fact, some people like to start the dovetail cut at the near side of the board with the saw held at an extremely low angle simulating ripping a board with a big ripsaw. The problems with that, in my opinion, is the business end of the work piece must be less rigidly held quite far above the vise jaw, and you have to start by following two lines at once.

The key point is to recognize the importance of a good start to the saw cut, experiment, and find what works best for you. Much of good craftsmanship is built on recognizing and managing the critical junctures of procedures.

And that, of course, leads to happy woodworking.

IMG_1162_edited-2

Category: Techniques  | 3 Comments
Author:
• Monday, December 23rd, 2013

First, the tips:

IMG_1131_edited-2

The cutoffs from thick curved cuts on the bandsaw will probably prove useful, so think twice before trashing them. With a little cleaning up, they can become clamp blocks, sanding blocks, or supports under the work pieces for hand tool work.

IMG_1135_edited-2

Camellia oil oxidizes very little but enough to make it somewhat gummy after a long time in a tool oiler or on the surface of infrequently used tools. Since adding a generous amount of vitamin E oil, an antioxidant, to my storage bottle of camellia oil, the problem has been all but eliminated.

IMG_1134_edited-2

After just a few weeks, the magnetic-mount LED work light from Lee Valley has become a shop favorite. I always use it for bandsaw work where the powerful magnet keeps it stable while the 18″ flexible neck stays put. At the workbench, it is easily set up for joinery work by using the mounting plate with the 3/4″ post in a dog hole. It is also invaluable for creating a low raking light for surface finishing tasks.

[Addendum: Over time I have found this lamp to be unreliable. High quality batteries seem to drain unusually fast and leaked in the original lamp and again in a replacement lamp. I no longer recommend it.]

IMG_1133_edited-2

IMG_1129_edited-2

I find this simple bandsaw push stick (above) handy and safe. The key is the hacked-up tip that grips a corner of the work piece. The tip is self-renewing as it gets passed into the moving blade (so my fingers won’t), until the stick gets too short, when it takes only a minute to make a new one.

Now, the irritations:

While A2 steel certainly has merits, it dulls differently than O-1, often with minute chip-outs, even with higher secondary bevel angles. I am also convinced that it must be very difficult to manufacture consistently with regard to carbide grain size, because I have some durable A-2 blades that almost never chip out and some that do so much more often, despite all being from highly regarded makers.

IMG_1136_edited-2

Jorgensen’s otherwise excellent #37 series heavy-duty bar clamps come with soft orange pads that leave oily stains on the wood when tightened hard. (On sanded mahogany in the photo below.) The stains do seem to get obscured by oil or varnish finishes, but are a risk and annoyance better avoided. The manufacturer acknowledged the issue when I contacted them, but I have seen no changes in the product in the more than one year since. I replaced the OEM pads with Bessey pads on the screw end and thin adhesive cork on the fixed end.

IMG_0742_edited-2

This one goes in the DAMHIKT file. I think I’d work outdoors in single digit temperatures rather than do topside routing of MDF in the shop, at least when a router dust collection attachment is impractical. It’s just not healthful.

IMG_1137_edited-2

Another one: Non-tapered sliding dovetails longer than about 3 or 4 inches should be considered a major risk factor for insanity. This was a situation where a tapered sliding DT would not work, but some things are just not meant to be.

It’s all OK though, because making things continues.

Category: Tools and Shop  | Tags:  | 3 Comments
Author:
• Saturday, December 14th, 2013

IMG_1116_edited-2

The 0.5 HB, despite limitations, is convenient and versatile to perform most layout work. However, as in most matters of woodworking, it is valuable to have a range of options to suit the tool to the task.

In the photo above, the line on the left was made with 0.5 HB, the next with a worn chisel point 2.0 mm 2H, and the three on the right with fresher chisel points.

What about the flat carpenter’s pencil? It won’t roll away while you are building on a roof but I do not like them for furniture making layout. The lead is too soft in the widely available regular ones, and though harder lead is available, I find them generally too coarse. A chisel point can be made with a knife, and renewed with sandpaper, but the process is slower and messier than the 2.0 mm and 0.9 mm 2H.

This is just personal preference and you may find you like them. Another option for sharpening the carpenter’s pencil is the clever Keson sharpener, which uses two blades in succession. Other sharpeners that bring the flat pencil to a rounded point are a good example of defeating a design with “improvements.”

Since only the timid and fools don’t make mistakes, those who use pencils must use erasers. The pink eraser on the end of a wooden pencil is adequate for spot use but it tends to smudge. The refillable white eraser on the end of the Pentel Twist-Erase is much better.

However, I like to make big, head-slapping mistakes so I keep two types of separate erasers available. A kneaded eraser is convenient in that it does not produce crumbs, and it lasts a long time, but often it cannot fully remove lines on wood. Its surface is refreshed by folding and kneading. More thorough is a white “plastic” eraser, such as the Staedtler Mars. It does produce crumbs but this serves to keep its surface clean and thus prevent smudges on the wood.

Finally, you might like this short video of great insight drawn from the humble pencil.

Category: Tools and Shop  | 2 Comments
Author:
• Saturday, December 14th, 2013

IMG_1098_edited-2

Lines made with pencils are a ubiquitous and essential part of woodworking, so it pays to take a close look at pencils, points, and how they are used.

The basic hexagonal wood pencil with HB (#2) lead, such as the classic yellow Dixon Ticonderoga is a handy workhorse for general non-critical layout and labeling. I stay away from round pencils and the annoyingly flexible cheap ones made from composite material.

The point wears quickly on the ol’ #2, so consider using a 2H art/drafting pencil. The harder lead retains a point better so it draws a finer line for a longer time. I find that pencils harder than 2H tend to dent many woods, or make lines that are too light.

For dark woods, I prefer a white pencil, though some like red. Colored pencils are softer than regular ones so must be sharpened more frequently. The Sanford/Prismacolor Verithin #734 seems to be the most durable white pencil.

A battery-powered sharpener at the front of the drawer under my bench top is fast and handy for these wooden pencils.

For a more consistently fine line, a 0.5 mm mechanical pencil is useful. The ratcheting style allows the point to be easily advanced with one hand, a significant advantage when the other hand is holding a square in place. My favorite is the Pentel Twist-Erase. It has a bulky rubbery grip and a robust eraser that is not hidden by a cap and has plenty of spare length. (It is the black pencil at the top left in the opening photo.)

For these pencils, I find HB lead to be the most practical. There is little advantage to the harder 2H since the line will always be about 0.5 wide anyway.

Unless the 0.5 mm lead is extended and held vertically against the layout tool, which is not always possible or desirable, one is not quite sure exactly what distal point on the lead will actually contact the wood, and thus how far from the tool the line will be drawn. This can make it difficult to accurately meet a previously drawn line or mark. Sometimes it helps to place the pencil point on the mark and then slide the layout tool up to it.

0.3 mm pencils make finer, more accurately placed lines, but I gave up using them a while ago because the lead is so prone to breaking, even Pentel Hi-Polymer. I have also found colored 0.5 lead to be too fragile.

The way to step up to greater accuracy when you need it is to use a chisel point. For this, I use 2.0 mm 2H lead in a drafting “lead holder.” (It is the silver pencil at the lower right in the opening photo.) Here is a close up of the point:

IMG_1104_edited-2

For tighter quarters, 0.9 mm 2H in a slim Pentel P209 drafting pencil is useful. (Below, and it is the yellow mechanical pencil at the top right in the opening photo.)

IMG_1115_edited-2

The chisel point is created with a single pass of 2-3 inches on 400 grit sandpaper with the pencil held at about a 45° angle. Use the location of the clip to consistently orient the pencil – I always keep it down and to the right.

The flat side of the chisel point is placed against the edge of the square to make a very fine line that is placed with near marking-knife precision. In situations where the pencil cannot be held at such a steep angle, the rounded side of the chisel point can be held against the tool or other layout edge.

IMG_1124_edited-2

A chisel edge can be made with a wood pencil but I find this is messier, slower, and lacks the same feel of precision.

Next: comparison of lines and more on the subject.

Category: Tools and Shop  | One Comment
Author:
• Tuesday, December 10th, 2013

IMG_1094_edited-2

The review of router tables and lifts in the Fine Woodworking Tools and Shops issue (#237, Winter 2014) prompted me to again think about the subject. I have to admit, after reading about all the nifty gadgets, I was tempted to complicate matters and foul up my happily working simple system, which is described here, here, and here.

Naaah.

I recently added a T-track system instead of F-clamps to lock the fence in place, and a while ago upgraded to heavy-duty locking casters, but otherwise the setup is the same. There is no removable plate, no router lift, no above-table height adjuster, no fence microadjuster, no miter gauge track, no above-table bit removal, and no insert rings. No shoes, no shirt, no problems.

So, how does this home grown model “Easy 2” stack up against the models reviewed in FW? Let’s look:

Price: At a total cost of about $180, which includes the extra Bosch base, the Easy 2 is $470 less than the “Best Value” and $920 less than the “Best Overall” system in the review.

Flatness: The E2 has an intended crown of .003″ over the full length of the table, and, owing to the lack of an insert ring, a deviation of less than .001″ in the critical area around the bit opening. This beats all the models tested with the possible exception of the Festool, which has a .002″ dip. I agree with the author that a slight crown is preferable to a dip. I disagree, however, that a dip as high as .030″ is acceptable for quality work.

The Big Easy achieves this fine accuracy by employing the wonderful flatness tolerance of stock MDF plus shims. Here is the undercarriage of the table with supports across the width of the table near the router base, along with blue tape shims, aka “microadjustments.”

IMG_1092_edited-2

Fence: The E2’s continuous fence is flat and square within .001″. A split-fence attachment is easily installed and removed with finger knobs.

Here is a rear view of the fence locking system:

IMG_1096_edited-2

Dust collection: With simple fittings available from Rockler, the E2 is probably as efficient as all of the tested models except the two with enclosures.

Bit height adjustment: The Bosch microadjustment dial easily allows at least .004″ adjustments with no discernible backlash using a dial that can be zeroed out at any time. Each of the easily visible increments on the black dial is equal to the thickness of a typical sheet of paper.

IMG_1097_edited-2

I do not have a device to measure vertical alignment as described in the article, but this is not likely to be a significant issue because the router base, which has been flattened on a granite surface plate using sandpaper, attaches directly to the MDF that is manufactured to excellent tolerances of flatness and thickness.

It is necessary to squat to reach under the table to attach the router motor and to make height adjustments. I do not mind a bit, but for those who prefer to avoid the latter, Bosch makes the router base usable with a simple hex key to allow height adjustments from above.

My intent is not to disparage the fine products reviewed in the article, but rather to demonstrate that there is a different, simpler way for those who might prefer. This router table system works – it allows me to build what I want.

IMG_1095_edited-2

[By the way, I disavow the detail in the plan drawing of the shop on page 58-59 of the same issue, which shows the woodworker’s router table with an insert plate and an insert ring. He also doesn’t own a two-wheel grinder and he wouldn’t lay a plane on its side. Nice shop though.]