The review of router tables and lifts in the Fine Woodworking Tools and Shops issue (#237, Winter 2014) prompted me to again think about the subject. I have to admit, after reading about all the nifty gadgets, I was tempted to complicate matters and foul up my happily working simple system, which is described here, here, and here.
Naaah.
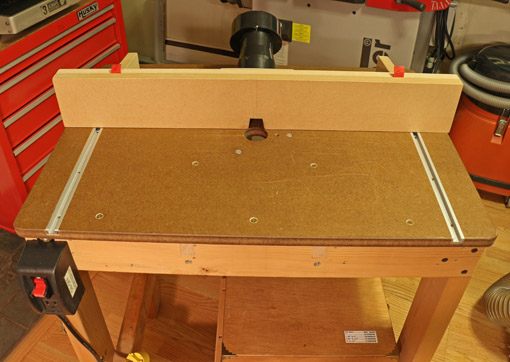
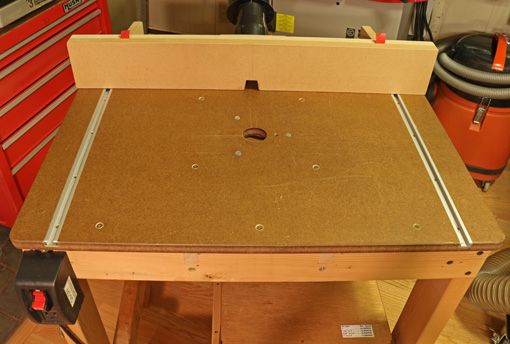
I recently added a T-track system instead of F-clamps to lock the fence in place, and a while ago upgraded to heavy-duty locking casters, but otherwise the setup is the same. There is no removable plate, no router lift, no above-table height adjuster, no fence microadjuster, no miter gauge track, no above-table bit removal, and no insert rings. No shoes, no shirt, no problems.
So, how does this home grown model “Easy 2” stack up against the models reviewed in FW? Let’s look:
Price: At a total cost of about $180, which includes the extra Bosch base, the Easy 2 is $470 less than the “Best Value” and $920 less than the “Best Overall” system in the review.
Flatness: The E2 has an intended crown of .003″ over the full length of the table, and, owing to the lack of an insert ring, a deviation of less than .001″ in the critical area around the bit opening. This beats all the models tested with the possible exception of the Festool, which has a .002″ dip. I agree with the author that a slight crown is preferable to a dip. I disagree, however, that a dip as high as .030″ is acceptable for quality work.
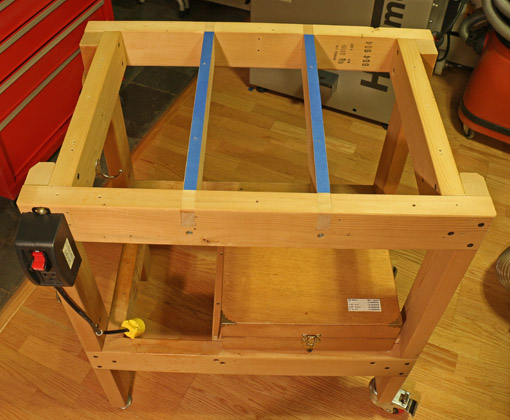
The Big Easy achieves this fine accuracy by employing the wonderful flatness tolerance of stock MDF plus shims. Here is the undercarriage of the table with supports across the width of the table near the router base, along with blue tape shims, aka “microadjustments.”
Fence: The E2’s continuous fence is flat and square within .001″. A split-fence attachment is easily installed and removed with finger knobs.
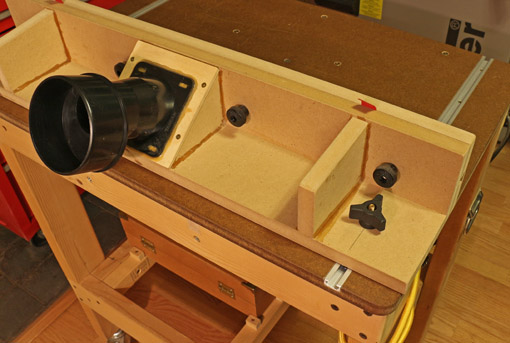
Here is a rear view of the fence locking system:
Dust collection: With simple fittings available from Rockler, the E2 is probably as efficient as all of the tested models except the two with enclosures.
Bit height adjustment: The Bosch microadjustment dial easily allows at least .004″ adjustments with no discernible backlash using a dial that can be zeroed out at any time. Each of the easily visible increments on the black dial is equal to the thickness of a typical sheet of paper.

I do not have a device to measure vertical alignment as described in the article, but this is not likely to be a significant issue because the router base, which has been flattened on a granite surface plate using sandpaper, attaches directly to the MDF that is manufactured to excellent tolerances of flatness and thickness.
It is necessary to squat to reach under the table to attach the router motor and to make height adjustments. I do not mind a bit, but for those who prefer to avoid the latter, Bosch makes the router base usable with a simple hex key to allow height adjustments from above.
My intent is not to disparage the fine products reviewed in the article, but rather to demonstrate that there is a different, simpler way for those who might prefer. This router table system works – it allows me to build what I want.
[By the way, I disavow the detail in the plan drawing of the shop on page 58-59 of the same issue, which shows the woodworker’s router table with an insert plate and an insert ring. He also doesn’t own a two-wheel grinder and he wouldn’t lay a plane on its side. Nice shop though.]

Rob—thank you. I have a roughly done floor-standing table with an old Porter Cable 1.5 hp router, adjusted with a twist of the motor from below and test cuts. It works but I too have been tempted by the shiny aluminum/polycarbonate tables and lifts. They are too expensive for my occasional use. Your series of articles is excellent and the construction feasible for me. You have a most excellent blog.
Bruce Mack
Thanks, Bruce. I hope this style of router table will help you build the things you want.
Rob
Rob thank you for your blog. I built my router table from your design, probably not as nicely finished but works just fine – I have no need for a commercial system, Ross
Great, Ross, I’m glad the blog helps with your woodworking. Don’t forget to finish the MDF table top with generous flooding coats of an oil-varnish mix to greatly increase its durability.
Rob
Hello Rob, Great blog I like to check you out time to time. I too have a home made table for the router. After 10 years of a cheap phenolic insert and mdf top and fence I finally rebuilt it. I was having inaccuracies from a crowned plate and the fence had lots to be desired. Sure I could edge profile and do some small runs of mouldings but really precise joinery I just was not doing well with. I finally found some discount formica ( Delta gray!) and made a table top with it and MDF. It’s quite nice and friction free and has some mass. No more waxing. The insert I would most recommend after buying and returning several was the Incra Magna loc. It was nearly dead flat, within .005″. And it is all of 3/8 thick. The magnaloc inserts are awesome and quick to use.
Then the fence I finally used some 3/4 melamine scraps and made an adjustable fence with the sliding sacrificial faces to allow adjustment of opening for different cutters.
I am exceptionally cheap. So buying the insert was a big deal at the time. And I too did not want to buy and fancy tables that would eventually add up to the cost of a nice used Italian Shaper. But the new table and fence with insert I am really happy with the accuracy. I will add a micro adjust like Pat Warner’s. Probably with out the micrometer attached though that is pretty cool.
Another truly necessary upgrade will be t tracks but I would run them parallel with the fence for hold downs. And another on the fence faces for top hold downs. Currently I have two short slots for the fence adjust secured with thru carriage bolts and lock knobs. Most router set-up only require moving the fence 1.5 ” as the biggest cutters are only 3″ dia.
My shop is so small I pop out the rouer set it on a shelf when not in use and hang the table on a nail in the wall. I just use it on horses for now. Still a pretty quick set-up. I use the Fein RT 1800 with it. Awesome router too bad them dropped it. Dewalt I think has it now rebadged.
Best. Thanks for posting.
Correy,
Thanks for reading and contributing.
The main thing for all of us is to gear our tools to accomplish the work we want to do, rather than going for a generically designed setup that supposedly can do it all. In fact, making personal choices in tools and setups is an essential part of craftsmanship.
By the way, Correy, I visited your site. What beautiful work! Please stay in touch and thanks again for reading.
Rob
Rob – Good piece. Mine is similar to yours, and I also was tugged towards wanting something fancier after reading the Tools and Shops guide. Congrats on that, by the way! Star of the show! Really enjoyed the piece on your shop and seeing a whole view after reading the blog for so long.
Thanks, Bailey.
Rob