Tag-Archive for ◊ carcase doweling ◊

Author:
• Tuesday, August 31st, 2021
carcase doweling jigs

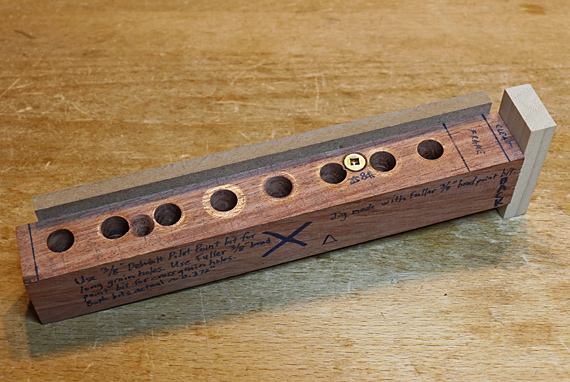
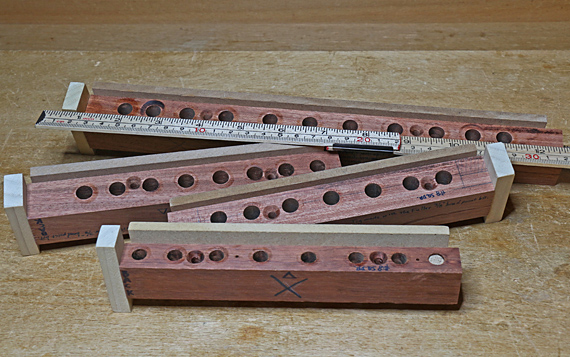
For designing this joint, I suggest 3/8″ diameter dowels for most work with boards about 3/4″ thick. For components 5/8″ thick, 5/16″ dowels are a better choice. The larger diameter dowels create more glue surface area but you do want to have some minimum meat around the dowel in the long grain workpiece. 

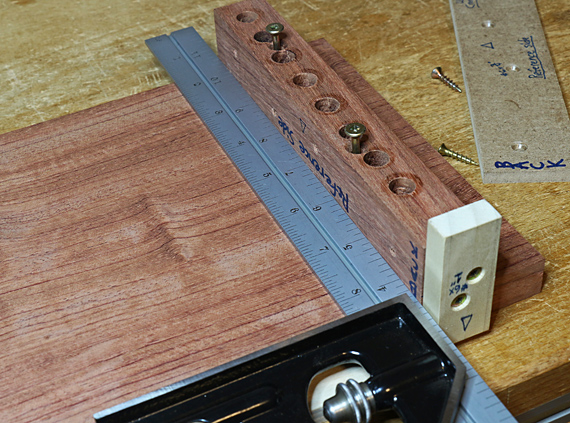
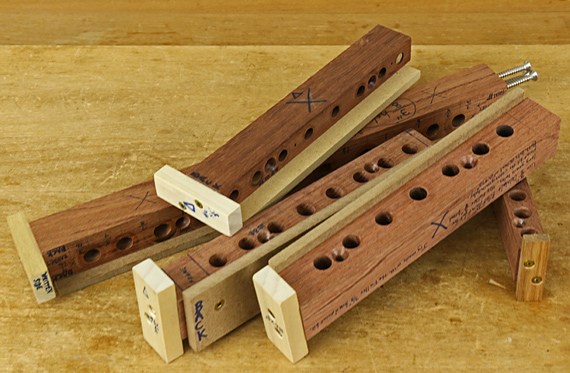
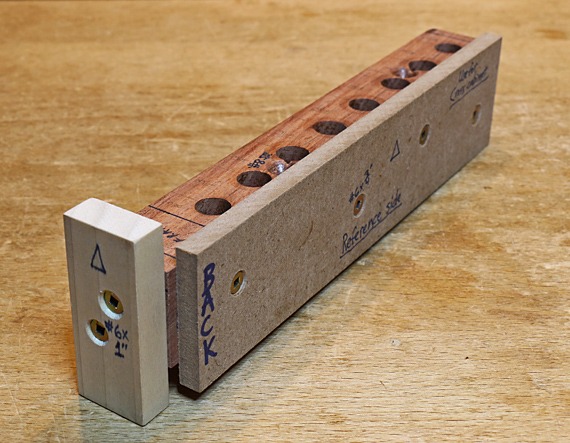
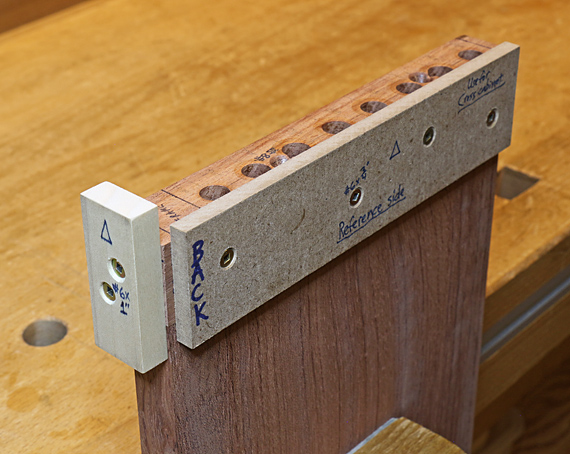
I usually space 3/8″ or 5/16″ dowels about 3/4″ to 1″ apart, on center, as you can see from the jigs, above. Generally, the dowels are closer toward the outer parts of the joint, and spaced wider at the middle of the joint. This is what Krenov taught though I think I am a bit more generous with the number of dowels. You can think of the dowels as individual dovetails. 

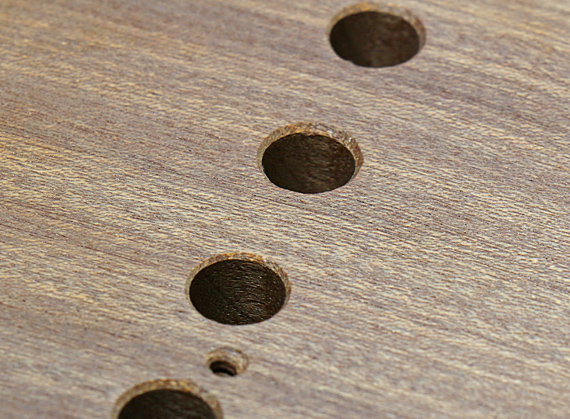
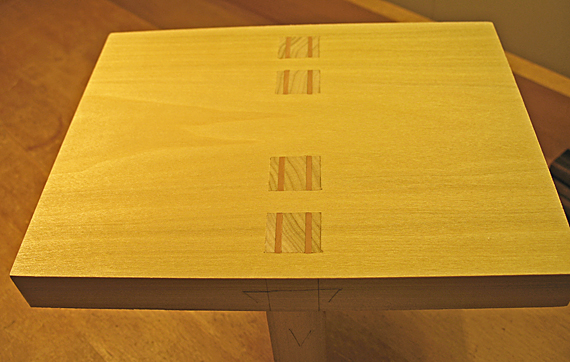
I suggest the longest dowel penetration into the side grain workpiece that is possible without getting too close to the outside surface. The hole should not go closer than 1/8″ from the outside surface, and actually more clearance is better. Don’t forget the penetration of the brad point of the drill bit, and the soaking of glue, especially in less dense woods. Many of the dowel joints in my pieces take advantage of an increase in thickness of the side grain piece at the joint as part of the design, which works with the structural needs. 

The penetration into the long grain piece is less critical because it is long grain-to-long grain gluing. It is not going to fail. 3/4″ is probably sufficient in all cases. 

dowels

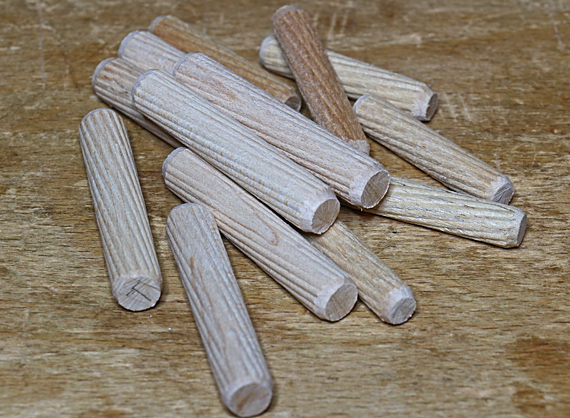
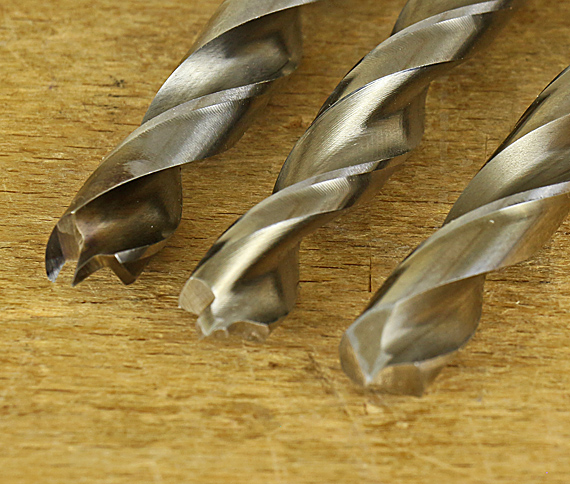
The best dowels ever were Laurier dowels (above). They were made with great precision and consistency. The compressed flutes expand when water-based glue is used in the joint, making for a tight, strong fit. The spiral configuration of the flutes serves to work the glue up and fully around the dowel as it descends into its hole. 

Unfortunately, these are no longer available. My stash is getting depleted. Here are some options, though I cannot vouch for any because I have not used these brands yet. None of these have spiral flutes, and the available dowels with spiral flutes are not compressed flutes, as far as I can tell.

Dowelmax

JessEm

Bear Woods

Lee Valley

When it’s time to for glue up, it’s worth rechecking the hole depths with a go/no-go setting on a calipers or just a stick. You really do not want to be caught in the middle of a glue up with a surprise dowel projection longer than all the others that prevents the joint from closing. If that happens anyway, grab a coping saw quickly.  

depth setting gauge

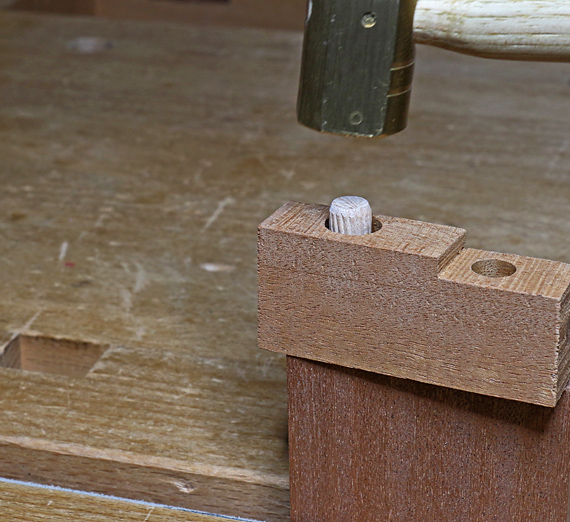
As for glue (PVA), avoid being too generous. Don’t ask me how I know this, but it is very easy to overload the holes and make a squeezed-out mess all over your carefully prepared components as you draw the joint together. A simple depth gauge with a hole helps to seat the dowels reliably.

I clamp the joint strongly, having prepared whatever pads and cauls are necessary for a true carcase. 

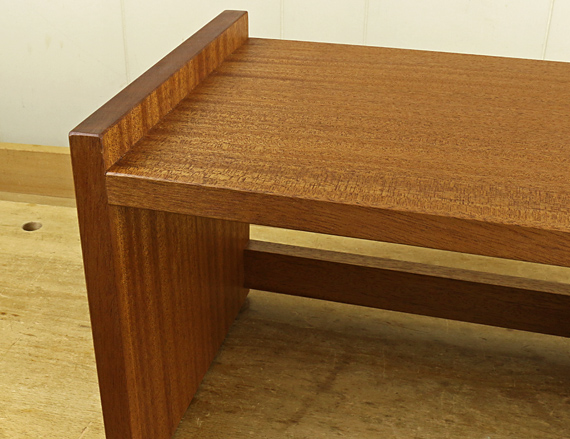
You can trust a well-planned and executed carcase dowel joint used in appropriate situations. It is not a difficult or complicated joint to make but precision and care are needed. And no, doweling is not cheating. The key is that it opens up design possibilities with practical construction. 

Category: Techniques  | Tags:  | 4 Comments
Author:
• Saturday, July 31st, 2021
dowel jig alignment

Continuing with the carcase dowel joint, shown above is the reference face of the jig being squared to the inside of the carcase. This is the same reference face of the jig to which the side piece was attached as the jig was screwed into place on the end grain workpiece. (See the photo in the previous post.) 

The jig’s end cleat references the placement to correspond with the end grain workpiece. Note that the end cleat should be a bit narrower than the jig itself to avoid interfering with the placement of the square, as seen above. I usually prefer to clamp the jig to the side grain workpiece and recheck it for square before screwing it down. 

Keep track of your references. You can see why I label the jig so much. In this build, the reference face of the jig corresponds to the inside faces of both workpieces. 

I drill all the holes with a portable power drill. I find no need to use a drill press or, if I had one, a horizontal boring machine. The carefully made jig ensures accuracy.

Below, left, the brad point bit is for the cross grain holes but it is slow and tends to burn when drilling along the grain. For that, the DeWalt Pilot Point (middle) bit is my favorite. The standard twist bit on the right works well enough too. Check the actual diameters of the bits to keep the holes consistent.

I have never seen an oversized good quality bit in these categories; they all seem to be made with a one-sided tolerance toward the small side. I suppose this is because all drilling systems have at least some runout, and you can make small holes bigger but not big holes smaller. 

drill bits for doweling

Please don’t use masking tape as a depth stop when drilling these joints. One slip of the tape can ruin a lot of work. And it will happen. So, is there a good drill stop out there? Yes, but you have to make it. But it’s easy. Please see this post

Add chamfers to all the holes – long grain and end grain. This will help with excess glue, and to prevent raised loose chips, which can prevent the joint from closing fully.

dowel holes on side grain
dowel hole chamfers

Next, we’ll look at dowels, gluing, and some joint design considerations.

Category: Techniques  | Tags:  | 4 Comments
Author:
• Wednesday, June 30th, 2021
shopmade dowel jig

It is reasonable to be skeptical of dowel joinery. After all, half the joint involves gluing the long grain of the dowel into a hole where the glue surface is partly end grain with limited true side-grain glue surface. However, the carcase dowel joint, used in the right circumstances and made properly, works and lasts without doubt. Joints in pieces that I have constructed as long as 20 years ago and have been able to observe since are still cleanly tight.  

We associate this joinery with the late James Krenov who wrote about it in detail in The Fine Art of Cabinetmaking. Here my attempt is to humbly add tips and refinements, particularly toward ensuring accuracy.

Making the jig is more than half the job for this joint. Use a very hard, fine-grained wood that will hold clean, sturdy holes to last through repeated use, including inevitably repurposing the jig for future projects. I have long used bubinga, though its availability is now limited. Your shopmade jig will be at least as accurate as manufactured jigs of this type, and it will be customized to your project. 

dowel jig

I usually make the block about 1 1/8″ thick (in the direction of the length of the holes) and about 1″ wide. The width does not need to match the width of either workpiece but will, in fact, be a little wider than the end grain workpiece to ensure good seating on the side-grain workpiece. The length will usually be a little longer than the width of the workpieces.

Employ every effort to make the block with two absolutely flat surfaces that are dead parallel to each other. This is critical because the jig will be used to drill from both directions. Any error in parallelism will be doubled when making the joint. 

A third face, the reference face, should be flat and dead square to the two faces with holes. The fourth face, which I mark with a big “X”, is not critical.

The holes should be drilled with a well-tuned drill press. This is cross-grain drilling, so a good brad point bit is the best choice. 

dowel jig references

A small, removable cleat on the end of the block serves as a physical reference against the workpieces. This can be augmented depending on whether the workpieces meet flush at their edges. 

Krenov’s description shows the block being nailed to the end grain workpiece, using the tablesaw top as a flat reference. I do not like this method. Instead, I use a removable side piece to reference the jig on the end grain workpiece. The jig is attached with two #8 screws going through countersunk clearance holes and penetrating the workpiece only about 3/8″. The jig is attached to the side-grain workpiece without using the side piece but instead squared and clamped to the workpiece, and then screwed in place. 

Below, the jig is placed on the endgrain workpiece using the back cleat and side piece to ensure solid referencing. (I have not screwed it in place for the photo.) Note that both the end cleat and the side piece extend beyond both hole-faces of the jig. This allows the jig to be used at both ends of the workpiece.

dowel jig in place

I mark up the jig all over: “back,” “Reference” face, “X” for the non-reference face, the size of screws to use, the drill bits to use, etc. 

Now, more than half done, next we’ll look at designing the joint, dowels, drill bits, etc.

Category: Techniques  | Tags:  | 11 Comments
Author:
• Monday, May 31st, 2021
carcase doweling

Consider the options for joining solid wood boards across their widths where the endgrain of one board meets within the length (not at the end) of the side grain face of the other. This is what you see in the pieces above and just below, which are constructed with dowel joinery.

A common situation is joining the sides of a cabinet to the top and bottom where the boards do not meet at the end of each. If they did, dovetail joinery is usually the best choice. Another common situation is an interior divider or fixed shelf of a cabinet or bookcase. 

carcase dowelling

Before delving into the topic of this series, here are some alternatives that might be used in the same situation as carcase dowelling. By the way, this series is not about post and rail joints with dowels, a different matter with its own considerations. 

1. The multiple wedged through mortise and tenon. This has plenty of side grain glue surface and the flared mortises coupled with the wedged tenons provide a mechanical lock. It does take a lot of work though, and the exposed wedged tenons may be a nice feature or unwelcome. The blind version of this joint is an exercise in masochism.

For an efficient method for this joint, see my article in Popular Woodworking, issue #170, August 2008, pages 62-65. 

multiple wedged through mortise and tenon joint

2. The tapered sliding dovetail. This provides a strong mechanical lock, and can be made efficiently with careful router setups and a bit of fine tuning by hand, though it does take some trial and practice to get it right. It can be designed to be invisible but only at one end. 

3. Nails and screws. We do not usually associate this approach with fine woodworking but not everything has to be high end. I have a 44 year-old large bookcase held together with nails and it is still rock solid. The nails are hidden (mostly) with the technique of raising an attached chip, driving the nail inside the tiny ditch, then gluing down the chip. I can do better now, but it’s not bad. 

Covering the heads of screws with side-grain tapered wood plugs is a decent option in plywood and could pass in solid wood utilitarian work if done judiciously.

4. Hidden knockdown fasteners such as cam fasteners. Nah, not where I want to go in solid wood; weak. 

5. Dado joints, fully housed or shouldered. Here we have no mechanical lock and no mating of side grain glue surfaces. Biscuits or dominoes would help but I still would not bank on the strength. 

OK, with the other options noted, let’s go ahead and look at the carcase dowel joint. Part 2 is coming up. 

Category: Techniques  | Tags:  | 2 Comments