As with any tool, especially a simple one, winding sticks must be used correctly to gain their full value.
The setup
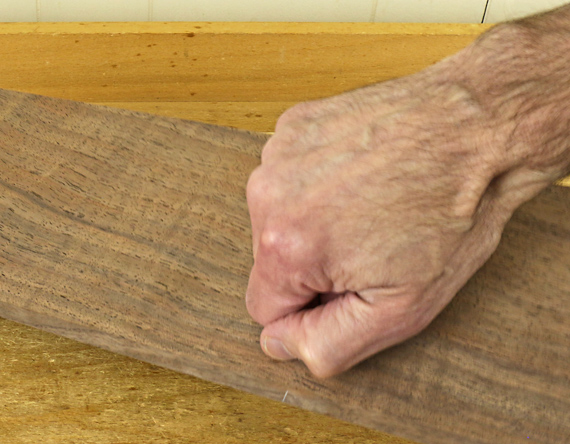
Place the darker stick on the near end of the board or surface in question, and the white stick parallel to it on far end. Shine diffuse light on the far stick to improve the visual contrast between it and the darker near stick.
As much as possible, ensure that the sticks are placed on unambiguous surfaces. The assessment will not be meaningful if, for example, one of the sticks is placed on the convex side of a cupped board, seated on one side of the “hill.”
The vision
Understanding some basic optics can help you use winding sticks with ease and precision that you may not have thought possible. On this, I can speak with special expertise, but here are the basics that matter.
Regardless of the optical status of your eyes, it is impossible to simultaneously maintain a clear focus on the near and far stick, unless they are both within the “depth of field.” Think of depth of field as simply the range – how close to how far – where things are in acceptably clear focus.
You want both sticks in focus (i.e., within the depth of field) so you can compare their top edges. Therefore, you want to make that depth of field large. Just as with a camera, do this by using a small viewing aperture (i.e. the hole you look through), and/or don’t position yourself too close to the nearest object (in this case, the near stick).
Viewing technique #1 – at least do this
Position yourself at least a couple of feet back from the near stick. This will give you a better chance to get both sticks within your eye’s depth of field. (For many reasons, this varies from person to person, and with viewing conditions.) Experiment, but avoid getting right up to the near stick.
Viewing technique #2 – this is the cool one
Artificially make your viewing aperture very small by viewing the sticks through pinholes. This is usually described in other sources as viewing through a single pinhole. This does not work well because your view is not wide enough to see the full width of the sticks, forcing you to move your head side to side to see them. The inevitable inaccuracy in this movement will degrade the assessment of twist.
Instead, use a trick that I have been using for decades, and also published ten years ago in Woodworking magazine (an excellent publication that has long since folded).
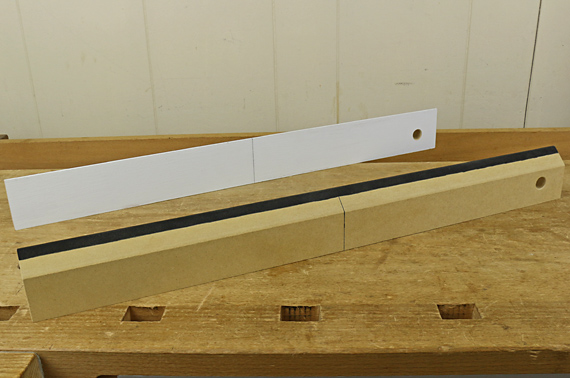
Cleanly drill a row of about seven 3/64″ holes, 5/32″ apart on center, in a 3 1/2″ x 2″ rectangle of 1/64″-thick brass, or similar clean-drilling material. Round the corners of the piece for safety. The completed tool looks like this:
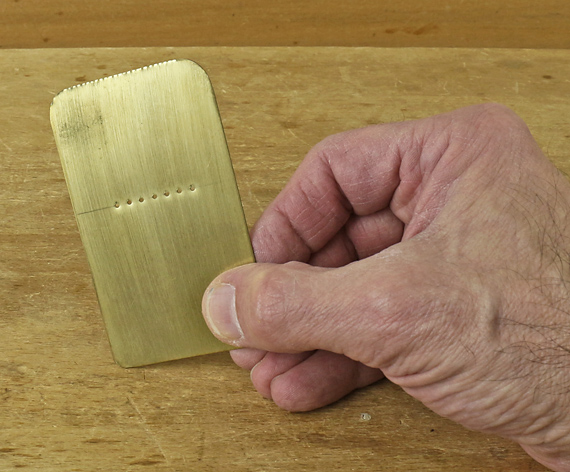
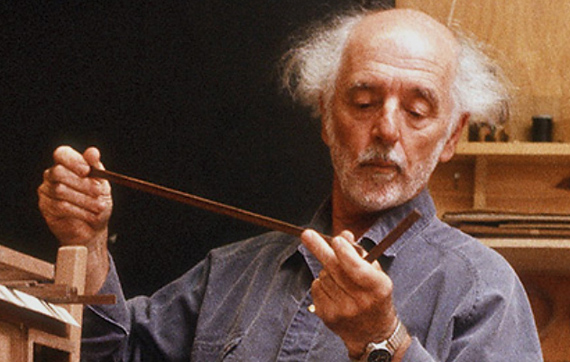
Get your face to the level of the sticks. Hold the row of holes horizontally up to your eye, and sight the sticks. The rectangular shape of the tool will help you orient the row correctly. Both sticks will be in clear focus, and you can view their full widths. It is quite surprising once you see it.
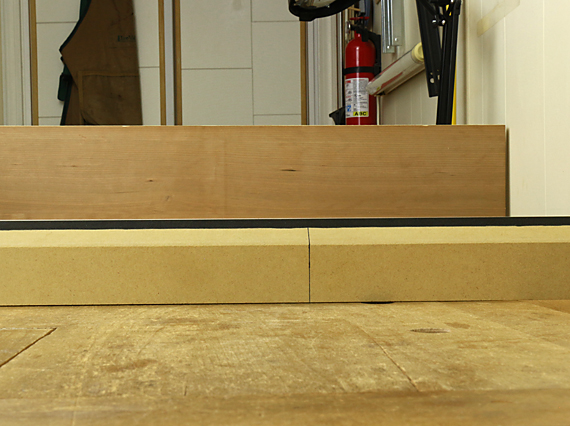
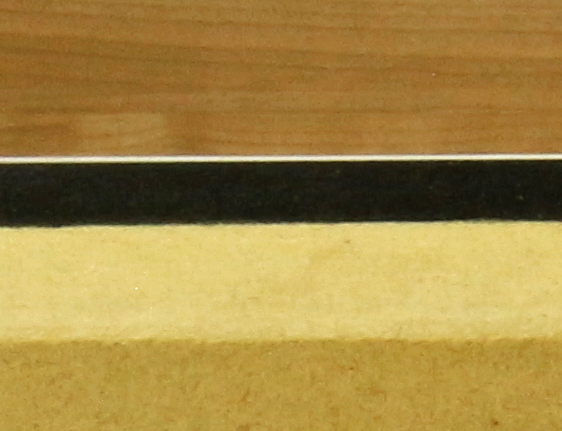
I simulated the eye’s view with photographic technique in the photo at the top of this post. Note the thin white line of the far stick peeking up just above the black line of the near stick. The sticks are a few feet apart. (The cherry board in the back is there just to block out the visual confusion of the shop background.) The photo below is of just the left side of the sticks in a magnified but not resharpened view:
Accuracy and utility
Using the pinhole technique is easy and quick. It is very helpful for woodworking where accuracy is important, and, I think it is essential for assessing reference surfaces such as jointer tables.
You can test your system for accuracy by placing thin shims under one stick, near its end. Depending on your setup, you’ll probably be able to detect a difference between one side of the sticks and the other side of .006″, maybe better.
The approach to winding sticks that I’ve described in this and the previous post is a good example of using a simple tool well.