Archive for the Category ◊ Techniques ◊

Author:
• Saturday, August 24th, 2013

IMG_0831_edited-2

Woodworkers estimate a 90° angle all the time in their work.

For example, as you follow the line when rip sawing by hand, you estimate by eye and feel the position of the saw square to the surface of the board.  Similarly, the initial placement of the tenon saw in the vertical plane, as the cut begins, is done by estimation. When chopping the baseline of dovetails, you estimate a 90° angle for the chisel, even if you then choose to slightly deviate from it to undercut.

I wondered, how accurate can we be with this kind of estimation? After doing some simple trials with a magnetic angle gauge, my conclusion is: amazingly accurate.

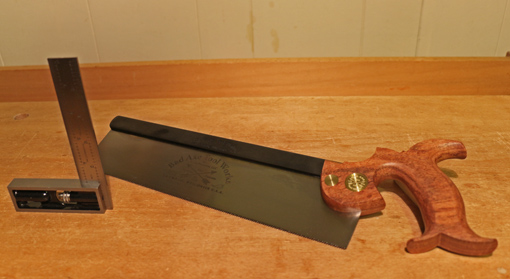
I placed the gauge in a position out of my view on the sawplate of my Bad Axe hybrid dovetail/small tenon saw, an exquisitely balanced, multi-purpose backsaw. I placed the saw, as if to start a cut, on a board’s straight edge, which was exactly parallel to the workbench surface. When I sensed the saw was vertically square to the wood, I asked an assistant to read the gauge.

Initially, the weight of the gauge on the right side of the saw tended to confuse me (a woodworking Heisenberg Uncertainty Principle?) but I was able to recalibrate my senses after several trials. As long as I paid attention to my senses of sight and feel, not allowing unnecessary thought to interfere, I was usually within 0.5° of 90°, despite the hindrance of the heavy gauge. I feel sure I could be even more consistent without the annoyance of the test gauge.

A 0.5° error would cause a deviation of only 0.009″ over the length of a 1 inch cut. A 0.25° angular error corresponds to a 0.004″ deviation – the thickness of a sheet of copy paper.

Of course, the initial estimation is validated or corrected as you saw, following the layout line on the face of the work piece. However, well begun is half done, and even as the sawing proceeds, I believe that a lot of ease in accuracy can come from retaining the sense of the saw’s initial placement.

The ability to estimate square is enhanced by awareness of peripheral vision references, close and far, such as the edges of the work piece, the horizontal top of the workbench, the vertical wall behind the bench, and even the front and back edges of the bench being parallel to the wall behind it. It is equally important to feel the balance of the saw in your hand.

Intuitively estimating square is one way of speeding up woodworking and getting into a working rhythm. I have not found it helpful to employ tricks such as observing the reflection of the work piece edges in the sawplate to determine perpendicularity. In addition to being unnecessary, it requires too much distracting shifting of the eyes and head.

Other experiments can be tried, such as crosscutting a board square by eye, or drilling a hole. The accuracy of the results may surprise you.

This is not a case against proper layout lines, and certainly it is not for setting up a jointer fence. The point is that in the course of our woodworking, we are routinely estimating square, and we can be pretty darn good at it.

Developing trust in your senses is one of the joys of craftsmanship!
Category: Techniques  | Comments off
Author:
• Monday, July 22nd, 2013

IMG_0629_edited-2

Surgeons employ a technique which woodworkers would do well do borrow.

Immediately prior to starting an operation, all action stops and the entire surgical team participates in a “time out.” Everyone takes a fresh look  – a figurative step back – and makes sure all details have been attended to. This includes technical matters such as physiologic indices and medications, but also seemingly obvious things such as patient identity, the procedure to be performed, consent, laterality, and operation site.

In other words, there is a deliberate break in the workflow to ground the situation – to stop and create clarity. No removing the wrong kidney from the wrong person.

A woodworker with a stack of boards ready to mill, or a set of mortises or dovetails to cut, is in a similar situation, ready to move into the next phase of a project. At the outset of the procedure, you must make plainly clear to yourself:

  • What you are trying to accomplish relative to the requirements of the project.
  • The critical steps that will determine success, and the critical things to avoid.
  • Are the basics all set?

If all of this seems just too obvious, let each of us recall his last forehead slap after a costly mistake performing a no-brainer procedure . . . let’s see . . .oh yea, that one . . . I’m done. OK, now we can talk.

Here’s an example. Imagine you are at the jointer and planer with a stack of boards. Stop. Time out. Name the task. Be more precise than just intending to dress the boards to 3/4″. Think, for example, that it is OK to be 1/64+” fat, but not OK to go under 3/4″, and minimizing tearout would save a lot of hand planing later. Since this is curly maple, the passes need to be thinner than usual. And oh yea, one piece needs to stop at 7/8″, so that one is marked and separated.

Is the machinery ready: jointer depth, guard in place, outfeed plan, and dust collection hooked up? Are all the boards oriented and properly marked as to face and end? Is this safe – what is my hand and pushing device procedure all the way through?

The point is that the while the content of the time-out thoughts or verbalizations are very simple, it is highly valuable to take a minute to do the time out. Most woodworking mistakes, and usually the biggest ones, happen because of a failure to heed what should have been apparent.

It takes just a quick time out to recognize that.

Happy woodworking.

Category: Techniques  | 5 Comments
Author:
• Sunday, July 14th, 2013

IMG_0528_edited-2

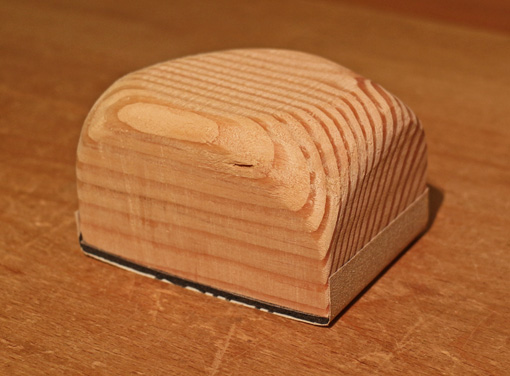
Sanding blocks with a curved face can be very effective for smoothing and, with coarse grits in the right circumstances, even shaping curved surfaces in furniture making. I use spokeshaves, specialty planes, rasps, and scrapers to shape and smooth curved surfaces, but not to the exclusion of the humble sanding block.

They can be made quickly and easily with the bandsaw or bowsaw. For working concave surfaces, the curve of the block should be slightly steeper than the steepest part of the curve of the work piece. For convex work, a flat block is adequate for working shallow curves. For working steeper convex curves, the block’s curve should be slightly shallower than that of the work.

IMG_0525_edited-2

The top of the block should be shaped friendly to the hand using saws and rasps. I like to steeply cut down the corner of the block near the base of my right thumb, as well as the diagonally opposite corner.

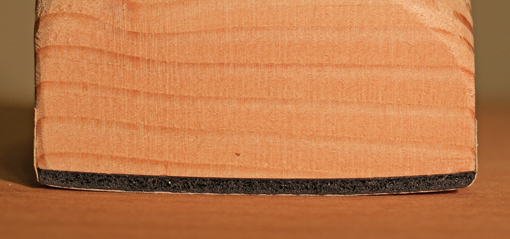
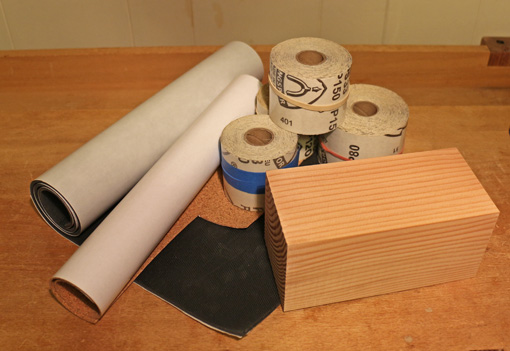
The backing surface for the sandpaper should be have some type of firm cushioning, similar to a random orbit sander. For most broad surfaces, I like the high-friction cushion material available in with a pressure-sensitive adhesive backing from Lee Valley. PSA-backed 1/16″-thick sheet cork is firmer and thus good for narrower, smaller scale, or more detailed work.

Cutting regular sandpaper sheets and wrapping them around these sanding blocks is particularly annoying because of the curved surface. I much prefer using PSA-backed sandpaper that comes in large rolls, such as that available from Klingspor. It is quick, effective, and wastes less sandpaper, especially if the block is made to the width of the sandpaper roll. It is also reduces hand fatigue because there is no need to grip the paper to the block.

IMG_0527_edited-2

A gum rubber block is usually associated with cleaning retained sanding dust from the sandpaper on power sanders, but it also works quite well on these sanding blocks, especially when doing heavy work.

As with any sanding, it is important to remember that only the coarsest grit – the first one in the sequence – should do any required  shaping. (Though most or all of the shaping will have already been done with other tools.) All the subsequent grits simply remove the scratches made by the previous grit until the surface is smoothed to your satisfaction.

In time, one accumulates a small collection of these curved sanding blocks, so some will coincidentally be just right for future projects. This is simple, effective woodworking – one more tool for working with curves.

Category: Techniques  | Tags:  | Comments off
Author:
• Thursday, April 11th, 2013

IMG_0986_edited-2

Measured drawings are an important step in bringing a woodworking project to fruition. However, like sharp woodworking tools, the drawing is not an end in itself, but a means to getting the project done well and efficiently.

For practicality, I make most drawings to reduced scale on 11″ x 17″ paper at my drawing board in the shop. I use mock-ups to sense the real size of the piece, space relationships, and the look of key features. I generally find it necessary to make full-scale drawings only of certain small key elements such as joinery or a critical curve, rarely of the whole piece.

Sometimes it is necessary to go further with full-scale drawings to deal with construction problems that are too difficult to reliably work out at reduced scale. So, if necessary, I will take the extra trouble to make big drawings. I try to keep it simple though.

Such drawings are too big for my small drawing board and 11″ x 17″ paper. A big portable drafting board with a sliding parallel straightedge is an option, but I use an inexpensive ad hoc setup.

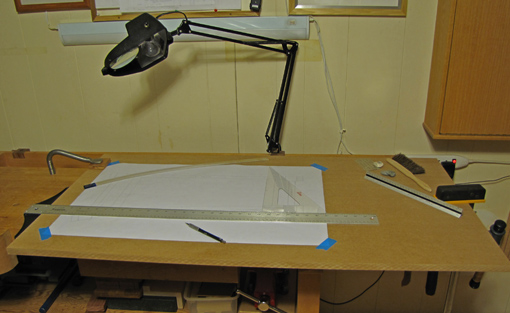
I simply use an adequate size piece of on-hand  3/4″ MDF with one clean straight edge – the factory edge is usually good enough – and clamp it to the workbench under an adjustable-arm lamp. 16 lb. drafting vellum, available at art supply stores in rolls from 18″ to 42″ wide, takes pencil and erasures well. Tape down the corners with #2080 blue tape.

The photo above shows a modest setup with 18″ wide paper cut to about 29″ long. This is just what I need for the project at hand – I’m only drawing one view of part of the piece to work out a particular problem.

An inexpensive T square works well enough. The blade should be reasonably straight but it is not critical for the joint to be a perfect 90°. You also can make your own. The T square works in conjunction with a large plastic drafting triangle. A graduated rule or even a tape measure will handle long measurements.

I prefer 0.5mm 2H lead in a mechanical pencil. Always at the ready are kneaded and white plastic erasers, an eraser shield, and a drafting brush. For drawing fair curves, I use the Acu Arc, my favorite, and French curves.

So, without too much equipment, expense, and hassle, I can break out of the 11″ x 17″ world when necessary. It can be freeing and clarifying to draw and solve problems at full size.

Category: Techniques  | 3 Comments
Author:
• Wednesday, February 20th, 2013

IMG_0909_edited-2

When fairing a curve by hand, you need tools that give continuous feedback about the curve you are forming – a closed-loop system. The tool must have sufficient rigidity and effective length to reduce unwanted bumps and span aberrant troughs. For concave curves, the rounded contact surface of the tool must be a bit steeper than the curve being formed in the wood. The other key point is to distinguish between the shaping and the smoothing processes.

There are plenty of options. Here’s what I use.

Shaping

The Veritas round-sole metal spokeshave and Auriou “curved ironing” rasps, 30mm-wide #8 grain and 20mm #10, are my go-to tools for concave curves. The ride of the blade and teeth changes as they meet the varying resistance of bumps and valleys, so I can sense beneath the tool when the curve is becoming fair. The effective length and contact surface of these tools can be altered on the fly simply by changing the skew angle.

Working the surface of a curved leg to a slight crown across the width makes it easier going with the spokeshave, and in fact, I often finish it with this shape for appearance.

For quick hacking of big bumps, which might be present if I was daydreaming at the bandsaw, the inexpensive Stanley Surform Shaver works well.

The convex side of a half-round rasp can be used with some success on concave curves but there are cautions. The skewed stroke presents a varying contact profile as you push along a varying curve, so short strokes may be better. If the rasp is skewed too much, the teeth act like tiny knives and deeply groove the wood.

Convex curves are simpler to manage. A regular flat-sole block plane and the flat side of a half-round rasp work very well.

Smoothing

Smoothing the shaped surface is a different matter, much like smoothing and jack planes perform different functions. Here, card (hand) scrapers, especially in 0.024″ thickness, are my go-to tools, followed by light sanding.

Scrapers excel at smoothing, not eliminating, bumps and troughs, and so are not good for shaping, with the exception of light use on small, tight curves. With skewing, they may work for larger curves but it can be surprising how many lumps they preserve even when they seem to be shaping well.

Curved sanding blocks can be similarly deceptive. When working concave curves on legs, I find they are best left for smoothing because I just do not get as good shaping feedback as from rasps, spokeshaves, and planes. However, I have had success using carefully shaped sanding blocks with 60-80 grit paper to do the latter stages of shaping of broad concave surfaces. Also, a simple flat cork block does well on shallow convex curves.

Since I’m usually dealing with curly woods, rowed mahogany, or tough bubinga, I keep the spokeshave as a shaper.

What about spindle sanders and vertical belt sanders? I like my Ridgid combination oscillating spindle/vertical belt sander for many jobs, but use it only with trepidation for critical shaping or smoothing. I find it is just not as sensitive as hand tools, and it is more risky. Still, there are some curves where it is the best tool for the job, such as steep concave changes.

Pattern routing or sanding (with the Robo-Sander) with a template is a good option for single-plane curves, but I think is impractically complicated for multi-plane curves. Anyway, handwork is still required to make the all-important template.

I hope these tips help you become more comfortable, confident, and efficient with using curved elements in your woodwork. Choose the tools that are practical for you. No straightedge can be the arbiter of rightness for this work. You are a craftsman, so trust your senses!

Category: Techniques  | Tags:  | Comments off
Author:
• Monday, February 18th, 2013

IMG_0960_edited-2

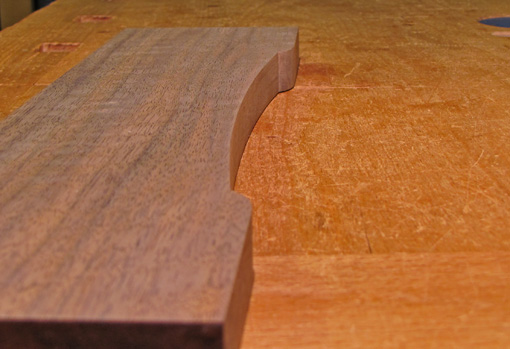
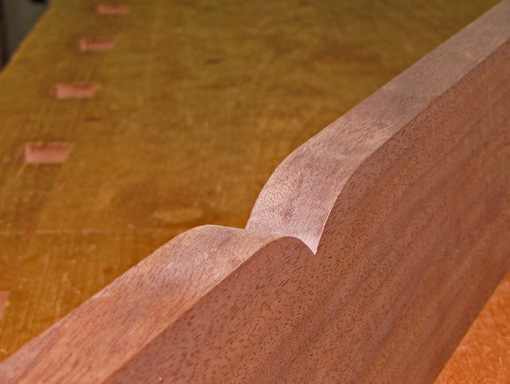
Almost all the woodwork I make contains several curves. In fact, a key curved component, such as the legs of a table, is often the initiating design idea.

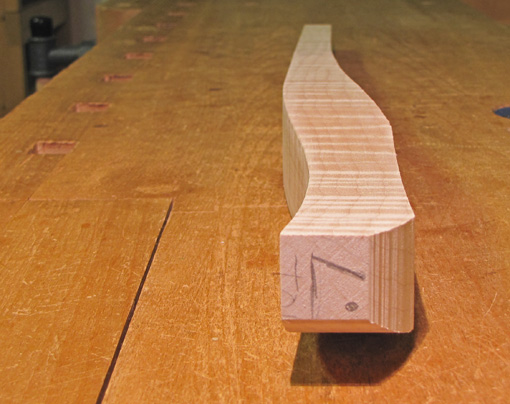
My usual approach to making curved parts is much like an athlete competing in a sport – lots of organized preparation followed by trusting the instincts when the time comes. For a table leg, for example, the work progresses from sketches, to mockups, measured drawings, careful construction of a template, milling a squared blank, and marking out the blank. Then I carefully bandsaw the curves up to the layout lines, but never destroying the lines.

Next comes “fairing” the curve – eliminating lumps and valleys to produce a smooth, pleasing curve. At this stage, working to the layout lines may be helpful but is definitely not sufficient to get the desired smooth curve. This is game time – you must trust your senses.

Look and feel: use your eyes, hands, and tools.

I am going to describe these in reverse of the order that they are used in fairing the curve. In practice, there is a dance among these techniques. (The examples pictured in this post are in various stages of formation.)

Look

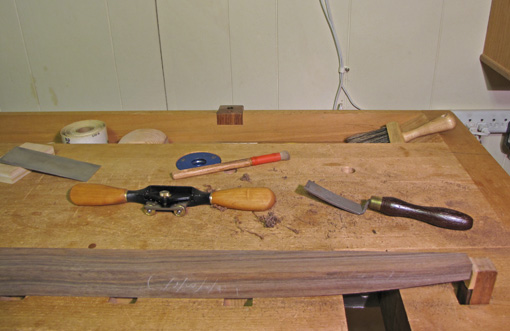
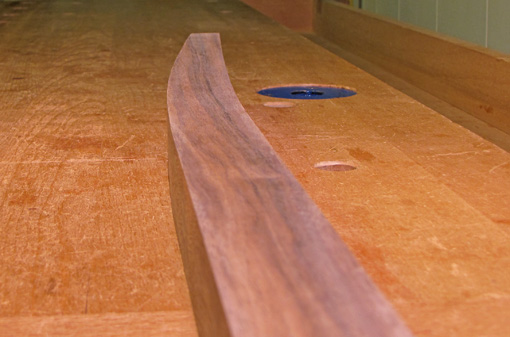
Position your eye near the work piece and sight along the curve, preferably against an uncluttered background. This vantage point makes aberrant bumps and troughs easy to see. Reach out and mark them because they will no longer be so obvious when you move away. You will know when the curve is right – it flows without doubts.

IMG_0957_edited-2

For my taste, the most interesting curves do not have a constant radius or are even portions of an ellipse, but are born of intuition with a rightness that is plainly and satisfyingly evident.

Feel

When the work piece is dogged in position for shaping on the bench, the working face is usually upward, making it awkward or impossible to do the look test. Repeatedly unclamping and lifting the work piece or bending yourself into awkward positions gets tedious. Therefore, use your fingers to test the curve quickly and frequently as the work progresses.

IMG_0914_edited-2

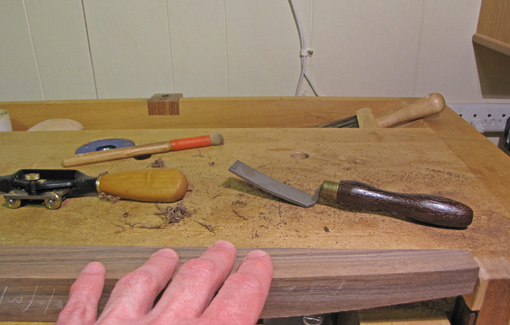
Here’s how to use this often-underestimated sense. The fingers may be tense and slightly desensitized after gripping a tool, so take a moment to reawaken the touch receptors by shaking or lightly fidgeting the fingers. Then “calibrate” your fingers by lightly swiping them on a clean area of the flat surface of your bench. Brush debris off the curved work surface. All this takes just a few seconds.

Now lightly “ride” the curve on the work piece with your fingers. The fingers should be mostly relaxed but with just the slightest tension to feel the changes in the ride caused by bumps and valleys. On concave curves, I find an uphill ride to be more sensitive than a downhill one.

I think you will find this to be remarkably sensitive. This is like tuning a musical instrument – don’t predict the next moment of sensory input, just let it in. Gradual deviations of less than 1/64-inch can be felt. You can check the look test to see how the two methods correlate.

However, along with these tests, it is necessary to feel what is happening under the tool as you are working, moment by moment, so you can efficiently remove wood with intent and direction. In the next post, I’ll discuss the tools that I find effective for fairing curves, and also why some common tools do not work so well.

IMG_0958_edited-2

IMG_0959_edited-2

IMG_0963_edited-2

Category: Techniques  | Tags:  | 3 Comments
Author:
• Sunday, December 30th, 2012

Even skillfully made, sound joinery may have occasional small gaps. These will probably summon little or no notice from people who view and appreciate the piece, but nonetheless disturb the vanity (oops, I mean genuine pride in craftsmanship) of the maker. The wood itself may also have small defects. As long as these imperfections are few and small they are not likely to disrupt the overall aesthetic impact of the work. Still, we want them to disappear.

This discussion deals with fine gaps, not craters, canyons, dents, or seriously mashed wood fibers. Keep in mind too, that you’re in trouble if you have to rely on fillers because your joinery is just plain sloppy, especially if its structural strength is compromised by poor technique.

Let’s look at various situations. (Caution: purists and fantasy woodworkers should stop reading here.) Where end grain and side grain surfaces adjoin, such as in dovetails, fillers can do a good job of hiding small gaps. The same is true where side grain surface meet along an irregular border, such as in artistic inlay. However, even small amounts of filler can be noticeable where the eye expects an unbroken linear border between side grain surfaces, especially if the grain directions are perpendicular to each other such as in a flush-fit tenon shoulder. It is much better to detect and correct that sort of problem after dry fitting. Finally, some problems are probably best just left alone.

Here are some materials that have worked well for me. Readers, no doubt you have your favorites.

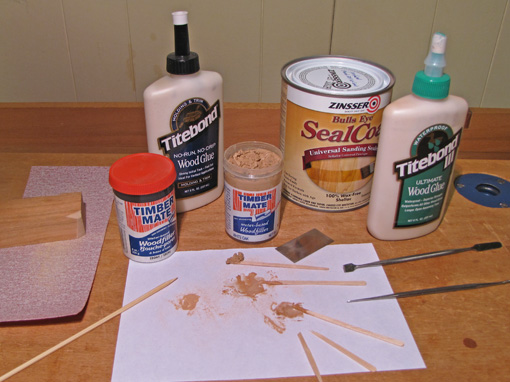
Timbermate, made in Australia, is the best premade filler I have found. It is ready to use, dries fast without shrinking, and takes stains and colorants in its wet or dry state. It is a water-based formula available in 13 colors plus a white tint base. An 8-ounce container is probably a lifetime supply for me. No worries, mate.

Of course, there is also the old sanding dust mixture routine. Most wood glues, such as Titebond III, make a good base. Titebond No-Run No-Drip produces a thick, fast-drying paste using less dust, and can make a lighter color paste. Zinsser Seal Coat dewaxed blond shellac makes a thin paste that dries very quickly. I find epoxy is too messy, and CA glues are quick but less controllable. Experiment.

Sand up a small pile of dust from a piece of scrap and mix in some glue or shellac. Use a file or fine rasp for coarser dust or if the possibility of grit in the paste is a problem. The key is to regulate the color and texture of the paste based on the glue or shellac, the tool used and thus the fineness of the dust, the species of wood used to produce the dust (which may not be the same as the project wood), the finish to be applied, and the anticipated long-term change in the color of the project wood.

For application tools, try toothpicks, tapered craft sticks, bamboo skewers, and so forth. I usually break the stick to produce a sharper end. Wax modeler’s spatulas, available from Lee Valley, are nice for precise work, though they superficially blacken Timbermate with continued contact. For removing excess paste and leveling the surface, I like to use a mini card scraper.

Wax filler sticks, available in lots of shades, are useful for quick touch up work after the finish has been applied. They have the advantage of color matching to finished work, but keep in mind that many woods darken over time.

I guess we can feel better recognizing that there is some art to covering up imperfections.

Category: Techniques  | 2 Comments
Author:
• Sunday, December 16th, 2012

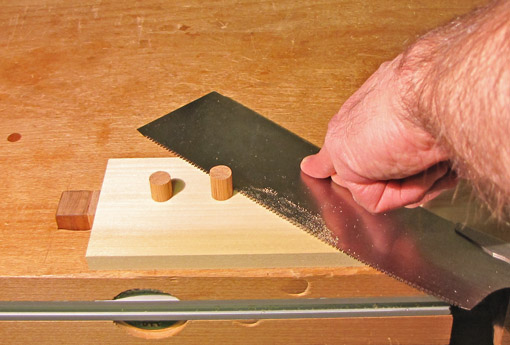
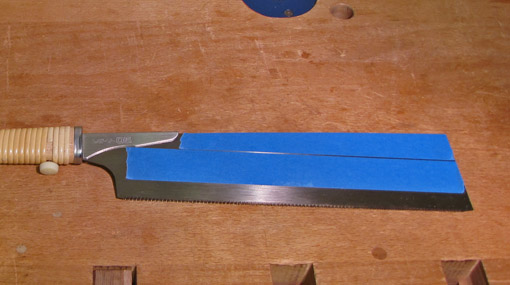
Finishing off dovetails, through tenons, and joint pegs often involves crosscutting projections of wood flush with the surface. Here I will discuss a few common ways to do this, each with its own set of problems, and present a simple solution that does not require a dedicated saw. Hint: the trick is hidden in the photo above.

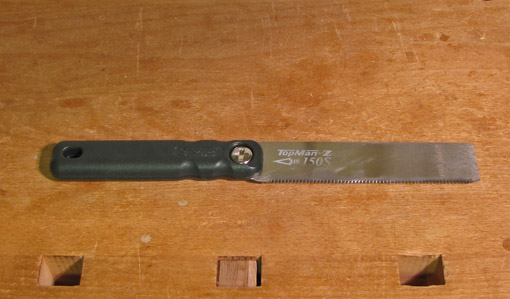
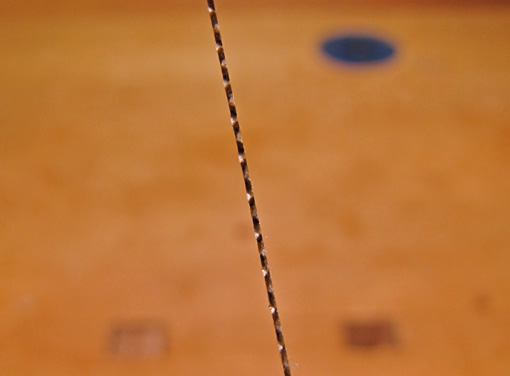
The flush cut saw is one approach. This is a specialized saw with no set (see photos below) on either side, most commonly with a Japanese-style crosscut tooth pattern. A portion of the very thin and flexible saw plate can be laid flat and pressed against the wood while the handle end is raised to grasp. If it is initially prepared for use by stoning away the minute burr from the manufacturer’s sharpening, it leaves a perfectly smooth surface, with virtually no cleanup paring required.

No set:

However, not surprisingly, this type of saw has a strong tendency to bind, even 1/2″ or less into the cut. For a through tenon, you can avoid binding by making multiple approaches at the projecting wood from different sides, but this is usually not possible with dovetails.

Veritas addresses the binding problem with their flush cut saw, which has set, but only on the upper side. Binding is eliminated, but the saw inevitably tracks away from the surface, leaving a significant amount of wood remaining to pare, especially in wider cuts. I find this annoying, and also do not like the lack of control when sawing. The set could be reduced but with a concomitant tendency to increase binding.

Here’s the simple solution using an ordinary flexible backless saw with a normal set. A Japanese crosscut kataba saw such as the Gyokucho 05 model works very well. It is very straight with very consistent set.

First, determine the amount of set. I used dial calipers. The 05 saw is .028″ thick at the teeth and .020″ on the plate, which means the set is .004″ on each side. Feeler gauges or trial-and-error could also be used.

Apply strips of blue tape on one side of the saw to slightly exceed the set. I used 3M #2080 tape, which is .003″ thick. I applied two layers, .006″, to build .002″ above the set. Enough of the saw plate is covered to give a reliable registration of the taped surface against the wood, while enough of the saw is free of tape to permit a useful depth of cut, about 3/4″ in this case.

Flex the saw against the work, taking care to apply light pressure with your fingers on only the taped portion (see photo at top). Saw with a gentle pull stroke and avoid pressure on the return stroke. Here’s what you get:

  • No binding, since the set can do its job.
  • No drifting, since the set works on both sides of the kerf.
  • It’s fast because it is a normal saw functioning in a normal manner of cutting.
  • There are no scratches on the work.
  • No specialized saw is required! Remove the tape when you’re done; it leaves no adhesive residue.
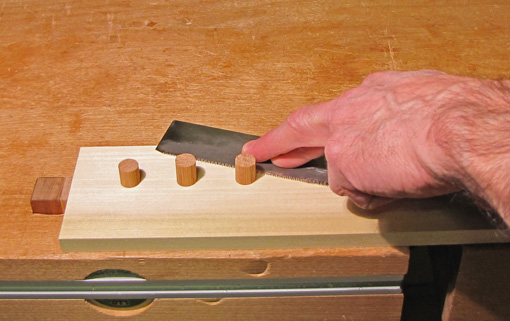
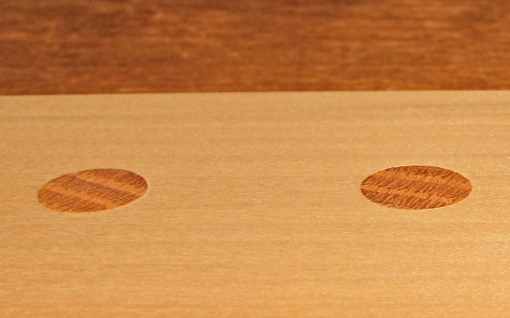
  • The amount of residual wood is miniscule. In theory, in my setup, it is .002″, but in practice it is less, barely a thou, and disappears with an extremely light pass with a paring chisel. In the photo below, taken before any paring, the oak peg on the right was sawn with a flush cut saw, the one on the left with the taped 05 saw.

One alternative is to position paper on the wood enough away from the projection to give clearance for the saw teeth. This may work but the paper can slide (and you may not see that), and if you press on an unsupported area of the saw, you can drive the side of the teeth into the wood. Another alternative, good for some situations, is to simply put tape on the wood, positioned clear of the saw teeth, but that is usually more trouble than preparing the saw with tape.

An awkward method is to put a card or paper under the saw, right up to the projecting wood. The problems are that the teeth scrape the card, and the elevation of the teeth above the surface will be inconsistent as you proceed. With thick card, the residual projection becomes too large and inconsistent.

Another option is to tediously rig a router, maybe using a flush trim bit for corner work, bring 22,000 screaming RPMs down upon your carefully-cut and almost-finished joinery, and say a prayer. You can if you want.

Category: Techniques  | 2 Comments