Archive for ◊ November, 2016 ◊

Author:
• Tuesday, November 29th, 2016

woodworking jigs

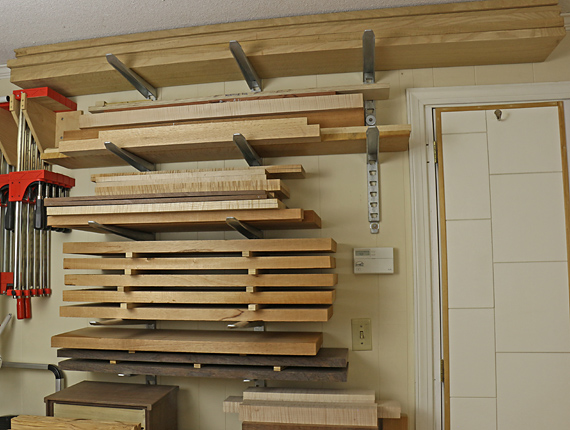
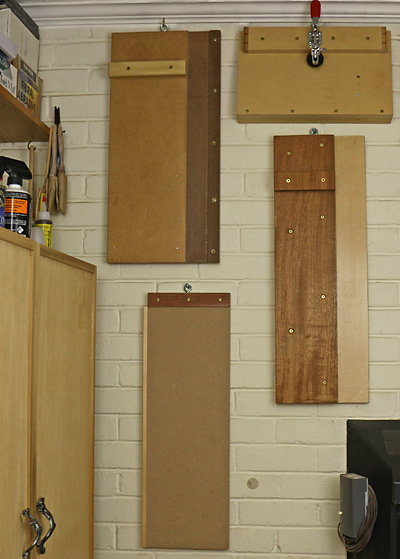
The previous post reminds me to catalog the Wall of Boards in my shop, as this may be a helpful reference for readers.

The most essential is the shooting board on the lower right. I cannot imagine working without at least a basic shooting board. Of course, it is used for long grain as well as end grain shooting. Go to this post for a few tips on shooting.

shooting board

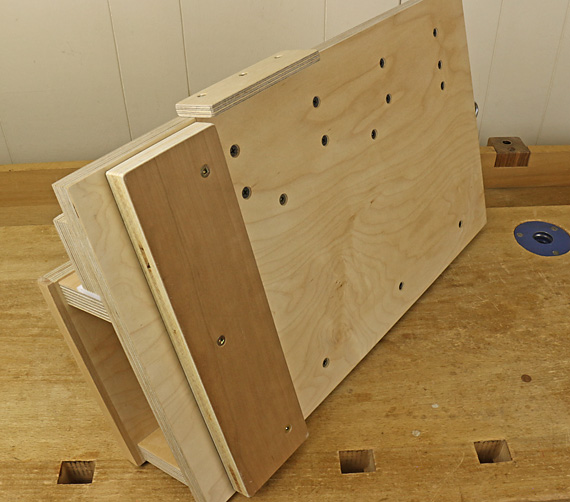
On the upper left is the least essential of the boards, but still quiet handy, the sanding shooting board, used with the Veritas Shooting Sander. It can save the day for small parts, thin pieces, and cantankerous wood.

shooting sander

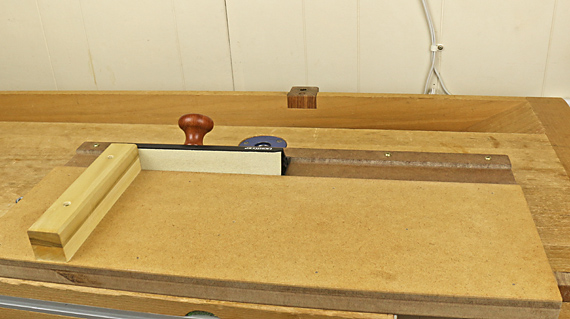
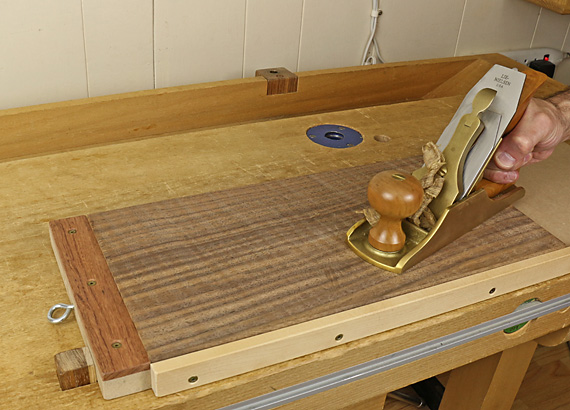
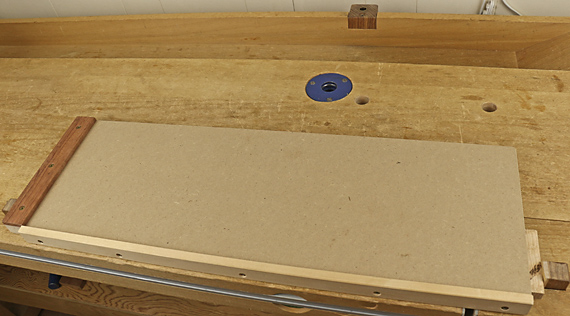
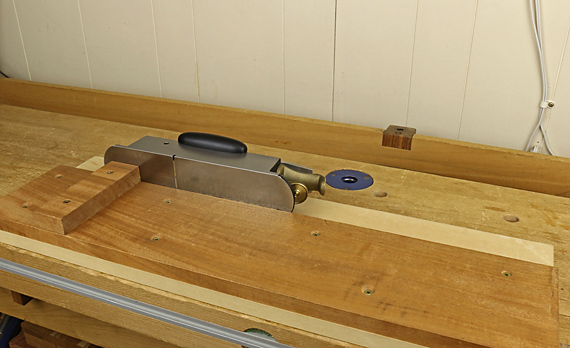
Speaking of shooting boards, Tico Vogt’s Super Chute remains a staple in my shop. (It is stored on another wall.) I attached two cleats, shown in the second photo below, that allow it to be clamped in the tail vise of my workbench. This keeps the Super Chute super steady and allows me to put my weight behind the plane when needed.

Super Chute

Super Chute attachment

By the way, the incline does matter. The skew reduces resistance in the cut, despite the assertions of some, and this is especially helpful when working endgrain. The ramp also results in wider distribution of wear on the blade edge, saving some trips to the sharpening bench.

The jig for trimming tenon shoulders is on the upper right, and the planing stop board is on the lower left.

For those in the early stages of learning woodworking (and we’re all in some stage of learning), using jigs such as these will be an empowering step up in your work.

Category: Jigs and Fixtures  | Comments off
Author:
• Tuesday, November 29th, 2016

handplaning thin wood

Handplaning thin boards, those less than about 1/2″ thick for most species, sometimes produces surprising frustration. The solution to many problems is to consider what is happening on the underside of the work piece.

I usually plane such wood, for example, a thin drawer bottom, on a very flat planing board with front and side stops only about 7/32″ high, or on a nice flat section of my workbench against a low-profile planing stop that inserts directly into the bench. This avoids distortion from the pressure of bench dogs and gives me a better feel for how the plane is meeting the wood.

planing stop board

The handplane sole acts somewhat like the feed rollers in a thickness planing machine. It presses on the flexible board and forces it downward to close gaps under the board. This effect varies, sometimes unpredictably, with the length of the plane and the skew angle of planing.

Suppose now we are trying to smooth plane the surface of a drawer bottom or panel and the underside is a bit concave. (Here I do not mean an even-thickness board that is simply cupped a bit.) A finely set plane will miss areas on the topside that are over the concavities underneath.

This is especially annoying if you are trying to clean up a few spots of tearout and the plane keeps missing them. The tolerances involved are quite small because in these situations the plane is trying to take a very thin shaving, say .001″.

shimming concave side

The solution is to be cognizant of the interaction of work piece and the work surface, and resort to good old shims. Sometimes I’ll use blue tape but more often just a few shavings stuffed under the board. or even some paper.

In fact, this little trick is handy even if the thin board is perfectly flat and you want to raise a small area to plane away a defect without having to plane down the whole surface just to hit the defect.

When using a shim, it usually is helpful to dog the board to keep the ends down and thus push up the shimmed area.

Note that if the work piece is of even thickness and just a bit cupped, this will usually not be an issue. The board will flatten against the bench as it is being planed, all areas will be hit with the plane, and the board will simply spring back to its cupped state when you are done planing. Within limits, that is not a problem because the panel will usually be easily coaxed into flatness by the frame or drawer grooves.

So, the real key in all of this is to not take your handplaning setup for granted but rather to be aware of the actual interaction between a finely set handplane blade, the plane sole, the work piece, and the work surface. With this awareness, it’s just a matter of common sense to diagnose and fix what otherwise could be vexing problems.

Category: Techniques  | One Comment
Author:
• Thursday, November 24th, 2016
Thanksgiving

Wood
From trees,
Ideas
From a free mind,
Tools and a workshop
From our labor.

And hands to put these together
To make things.

Gratefulness builds happiness.

To make things
Ad majorem Dei gloriam.

Category: Ideas  | Comments off
Author:
• Monday, November 14th, 2016

lumber rack

This upgrade of the main lumber storage rack in my shop has worked out well. Manufactured by Slacan Industries, based in Canada, it is designed to hold underground cable but is sold to woodworkers by Woodcraft and Lee Valley as a lumber rack.

The formed-steel brackets, U-shaped in cross section, are available in 10″, 14″, and 18″ lengths. They freely insert at 1 1/2″ intervals into the rolled-steel channel wall straps, which come in 55″ and 24″ lengths.

The versatility of this rack is the main reason I chose it. The movable brackets of different lengths make it easy to adjust the rack as storage needs change. It is now easy to create room to store wood by category or to make a pile with spacers between boards.

This thing is mega beefy – all parts are made from 3/16″-thick steel. Fuhgeddaboudit: a single 18″ bracket is rated by Slacan to support a 300-pound load applied one inch from the outer end!

What you cannot forget about is properly installing the rack. I consulted a structural engineer to make sure the wall studs could safely hold the anticipated load of lumber in the way I would set up the rack.

lumber rack

I have limited room in my small shop so there are two 55″ straps spaced 16″ apart on studs, plus a 24″ strap for the upper two or three levels that are more heavily loaded. I attached the straps to the studs with Simpson StrongTie 1/2″ x 3 1/2″ structural screws (#SDS25312), using 1/8″-thick x 1 1/2″-diameter washers to bridge the large bracket-insertion cutouts; there are no dedicated mounting holes in the 55″ straps (and those on the 24″ straps are large).

lumber rack parts

The galvanized finish on the straps and brackets is rough. I used a bastard-cut mill file to quickly ease the top surfaces of the brackets and their connection tabs.

I bought the rack from Woodcraft on sale as a set, which had a few more parts than I needed but was still cheaper than buying individual parts. With more storage capacity, I now have to resist buying beautiful wood that I don’t need (yet).

Author:
• Sunday, November 13th, 2016

crosscutting lumber

So often I bring to mind the admonition from James Krenov in the Fine Art of Cabinetmaking, “Cross-cutting should always be preceded by careful thought.”

When divvying up rough stock for a project, it is those early crosscuts, often particularly the very first one, that so much determine the successful use of the wood, and in turn, the entire success of the project.

We tend to let our guard down at this early stage because the lumber is rough and the cuts are rough, so it seems like little could go wrong. We are not naturally in a precision frame of mind as when approaching joinery work. Moreover, it seems like there is so much wood now, maybe much more than needed.

But beware, these early breakdown crosscuts will in large part dictate the figure and color matching of the wood in the finished piece. After The Crosscut – the one that felled the tree – and the sawing and drying of the boards, these initial crosscuts in your shop are critical to the efficient use of your expensive wood.

As with most matters in woodworking, winging it is not often rewarding. So think it through with the measured drawings nearby, and tape measure and chalk in hand. Be alert. Look at the wood, study the figure and grain, find the defects. Make thoughtful decisions.

The eternal woodworking quest for a board stretcher remains unfulfilled, so I heed the advice of the master.

Category: Wood  | 2 Comments