Long grain shooting does not get the attention this valuable technique deserves. A cousin to end grain shooting, it is just as simple in principle but more so in practice.
We are simply planing straight and square along the long grain edge of a board by laying it flat, elevating it, and using the plane on its side, which must be accurately square to the sole.
In general, this is most useful for workpieces about two feet long or less. This stock is often fairly thin, and may also be narrow. A good example is preparing quartersawn pieces to glue up for small to medium drawer bottoms.
It is difficult to balance a plane on the edge of a workpiece thinner than about 1/2″ held in the front vise. Shooting is a much more stable setup, and still allows a good sense of the nuances along the edge – straight or cambered. (An alternative is to plane two or more boards at once in the front vise.)
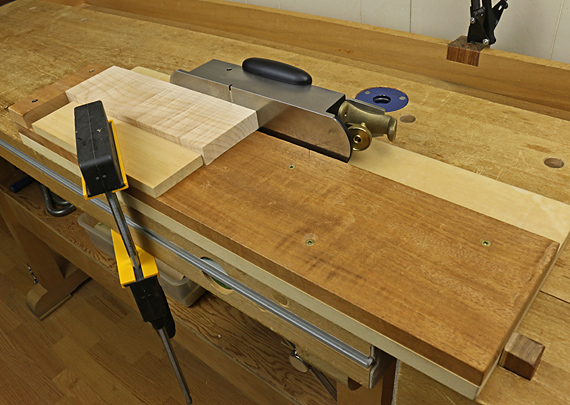
All you really have to do is lay the board flat on a support board with the long edge of the workpiece slightly overhanging the edge of the support piece. The sole of the plane is therefore riding only on the work piece, unlike with end grain shooting. In fact, a minimalist setup could be to just place a support board underneath the workpiece, and clamp the pair to the workbench, upon which the side of the plane will ride.
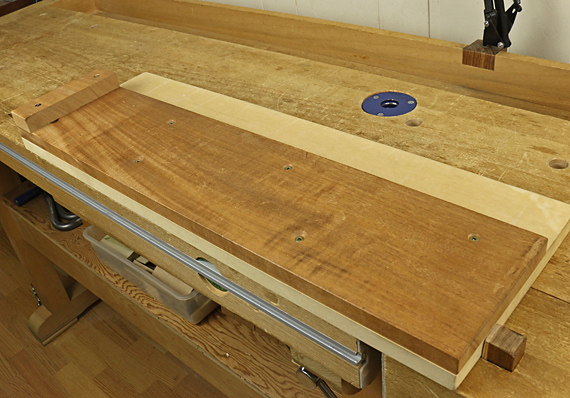
I use a dedicated long grain shooting board (below) that accommodates work up to about 24″ long. (Long time readers may recognize that it has been modified from its former role in end grain shooting.)

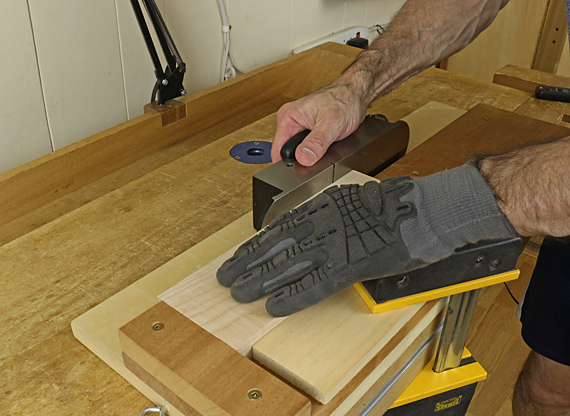
This arrangement allows me to reach over the workpiece and plane the edge that is facing away from me, which creates similar body mechanics to the usual way of pushing a plane. The PSA-backed UHMW slick plastic installed on the plane track makes the work easier.

The workpiece (the curly maple in the above photo) must be controlled in all directions. For lateral control along the length, I use an ad hoc arrangement with a scrap board clamped to the near side of the shooting board. Alternatively, you could make a more elaborate jig with a wider, permanent, adjustable, screw-mounted lateral-control board on the side away from you, and plane the edge facing you. This seems awkward to me.
The end of the workpiece meets the front stop. Ideally, this is a square meeting but that is not essential. Mild downward pressure on the workpiece is supplied by you. You may be able to get away without using the clamp and lateral stop board for small pieces. I find the grippy glove (top photo) makes the work easier for all setups, small or large, clamped or not.
There is no reason to over-complicate this technique. Keep it simple and use it often.
Next: planes for end grain and long grain shooting.


Luthiers do this all of the time, except with a lot thicker material (sometimes close to 2″ thick). Think of jointing a two-piece back and front of a double bass to appreciate that we have to get the surfaces perfect in order to have it seamless. I have several jigs that are used for violins, violas, cellos and basses. Your technique is exactly right.
Simple and efficient I like it. Looking forward to your next post. Thank you!