Archive for ◊ June, 2011 ◊

Author:
• Wednesday, June 29th, 2011


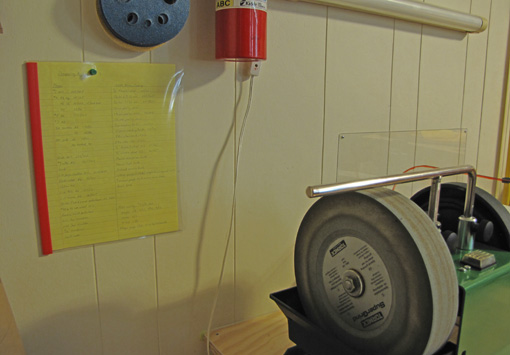
The yellow sheet, thumb-tacked to the wall near my sharpening bench, saves a lot of time and guesswork. On it, I’ve listed the primary and secondary sharpening bevels for each of my edge tools.

Writing or scratching this information directly on each tool is awkward and often hard to read. It’s much easier to keep this sharpening “recipe” list. It is written in pencil because I sometimes change the angles as I get to know the performance of the steel in a new tool, or if I prepare a tool for working different woods. It pays to observe the edge wear and feel of an unfamiliar tool, taking note of any chipping and the resistance of the tool in the cut, and account for these in the next sharpening. Thus, the recipe develops from knowledge of the type of steel and feedback from the performance of the specific tool.

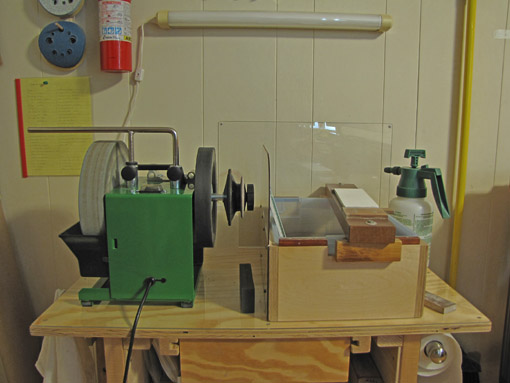
I grind the primary bevel on the Tormek, setting the angle from the recipe using Tormek’s proprietary gauge. I prefer to grind to just short of the tool’s edge which avoids unnecessary clean up on the coarse/medium waterstones. With the exception of most knives and some carving tools, I do not like the Tormek’s leather wheel for honing.

The Kell bevel gauge is handy to check tools, particularly since the Tormek gauge can sometimes induce inaccuracy if a lot of steel is removed during grinding. Most of the time, though, I just work directly from the recipe and try to get back to woodworking as soon as I can.

Category: Tools and Shop  | 5 Comments
Author:
• Monday, June 27th, 2011

If your shop is large enough to set up a tennis court after clearing out all the equipment, you may stop reading here. On the other hand, if you’re like most of us and could use more shop space but are limited by the building, such as your home, where your shop is located, here is an approach that may help: overlapping space.

The volume of a major machine itself is much less than the space required to use it, which includes the infeed and outfeed pathways. Thus, the functional depth of a portable planer is not just the two feet of the machine, but is about 12 feet to plane a 5-foot-long board. By altering and coordinating the table heights of the machines, shop space can be surprisingly expanded by effectively overlapping the working areas of the machines.

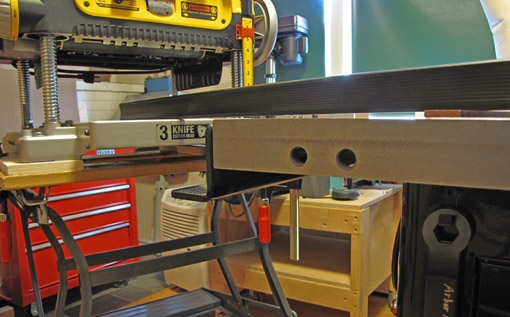
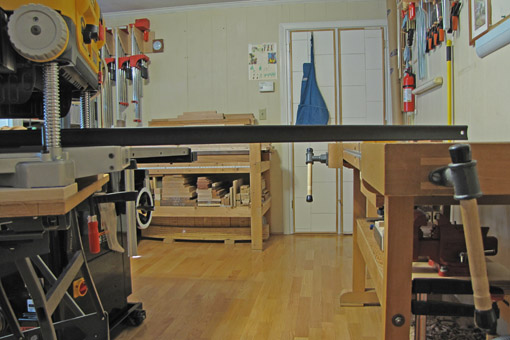
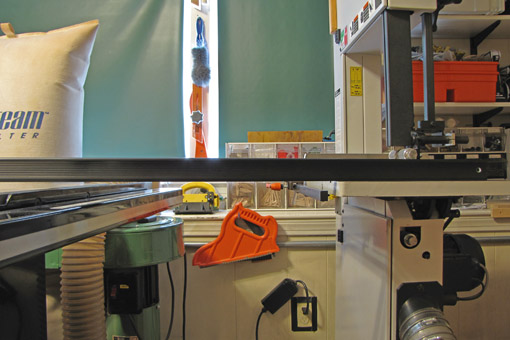
The photos show the DW735 planer with an attached 3/4″ plywood platform sitting on a Workmate. The additional height raises the planer bed so boards will clear the table saw and the workbench, as demonstrated with a long straightedge. The second photo below similarly shows my bandsaw table is slightly higher than the table saw. 


Of course, there is a limit to what can be accomplished with this – everything cannot be higher than everything else – but it pays to strategically work out shop systems with this idea in mind. Some heights cannot be easily changed, such as my bandsaw, but others are custom made, such as the router table. All of my major machines are on wheels except the DW735, but some are easier to move than others, so this also must be taken into account. The walk-around space also is a factor, such as being able to freely get around the planer from the infeed to the outfeed end.

When working this out, use a long straightedge, such as a jointed board, because the slope of the table tops can vary surprisingly, even in a shop with a level floor. Using only a tape measure to compare heights will be misleading.

Each woodworker will have to work this out for his own shop requirements, but the main idea is to think not just of the plan view of the shop layout, but also of the vertical relationships. Therein, more shop space can be found!

Category: Tools and Shop  | 3 Comments
Author:
• Monday, June 13th, 2011

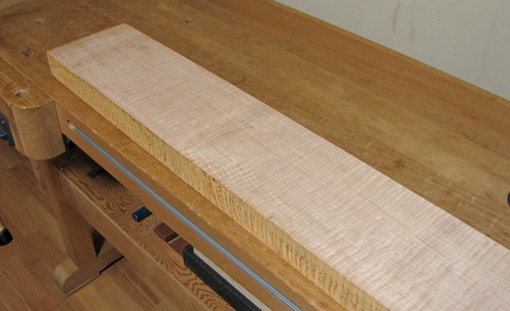
Look at the lovely curly maple above. #%$@! sticker stains – the shadowy bands of discoloration across the width of the board. They are seen at the regular spacing where stickers are placed in a stack of boards prepared for drying.

Whatever their cause, perhaps wet stickers and/or slow drying, they are common only in light species, especially soft maples, in my experience. The stains are not usually visible on the rough-sawn surface, but only after planing, and even then they may go unnoticed until the board is viewed from several feet away. The discoloration can penetrate surprisingly deep. Fortunately, in this board the discoloration is shallow and there is thickness to spare.

As evil as it gets, is honeycomb. I do not have a photo to share because I cannot stand keeping such wood in the shop. These are splits oriented along the rays in the core of the wood that reveal their hideous grin on the end grain after a board is crosscut. Honeycomb is basically an extreme form of case hardening caused by poor drying, usually in thick wood. I once brought a gorgeous 8/4 curly koa billet into the shop only to have my thrill doused to disappointment after crosscuting revealed extensive honeycomb.

Even common end checks can be tricky. Sometimes these can partly close, hiding the compromised wood that extends further than the open check into the length of the board. To be assured of using only sound wood, mark the location of a sizeable end check, then saw 1/4″ slices from the end of the board and observe where they break. When the slices are taken in sound wood, they can be snapped to break randomly, not at the location of the end check.

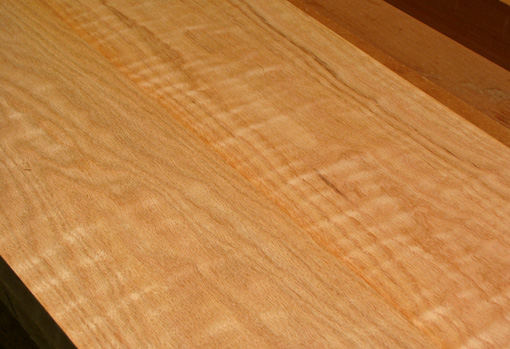
The two boards of curly red oak, below, are parts of batches that I bought at different times. They are both nice but the colors do not match. I will have to use them in different pieces or at least for different categories of parts in one piece.
In a perfect world, we could obtain all the wood of a species in a project at the same time from a single tree. The boards would be hit-or-miss planed to preserve thickness, reveal most defects, and allow for good color and figure matching. Skim planing and keeping boards organized by flitch are more work for wood dealers and add to cost, so, while available, they are not usual practices.

When new wood comes into the shop, I give it another once-over and then write on each board the date and moisture content as measured with a Wagner pinless meter. The boards get stored so air can circulate all around them. If the wood has particularly high moisture, is very thick, or is otherwise prone to end checking, I coat the ends with a wax emulsion such as Anchorseal 2. I then observe the wood for a few days to a few weeks, depending on the species, thickness, and initial MC, rechecking until the MC levels off.

When planning the parts for a project I think carefully before major crosscuts because those are usually big commitments. For thick stock, such as 8/4, I use a pin meter to check for any moisture gradient across the fresh crosscut.
So, while wood disappointments do come along, wood elations are much more frequent and they last a lot longer!
Category: Wood  | 4 Comments
Author:
• Friday, June 10th, 2011

When I design a piece, thoughts of the wood come early in the process. Sometimes, the inspiration from very special wood creates the energy to initiate a project. The form and the wood work hand-in-hand as nature’s gift of wood animates the design.

Yet nature can be cruel. Over the years, despite my continuous effort to learn more about and experience more wood, I have run into disappointments. Sure, I am careful picking boards at the local yard or consulting on purchases from afar, but sometimes the eye, judgement, or just plain luck fails in the quest for wood. It is wood, after all, and we have to take the good with the bad. Here is some of the bad.

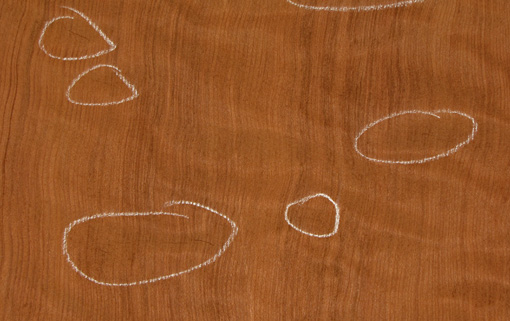
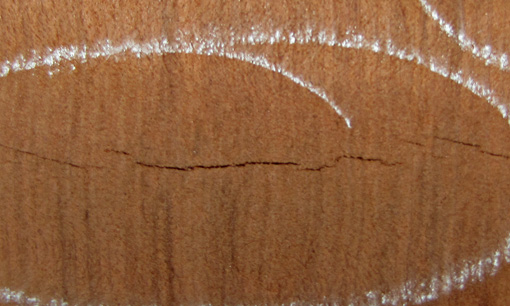
The top photo shows compression failures in an otherwise great slab of figured redwood. These are thin, irregular fatal compromises in the cell structure of the wood across the grain. They lurk invisibly on the rough-sawn surface only to reveal themselves after planing. They may occur when the tree is felled or from severe weather stress. I have also seen them in bubinga and mahogany, both large trees.

Below is a close-up photo of another compression failure in the same board, showing a characteristic wrinkly cross-grain split.

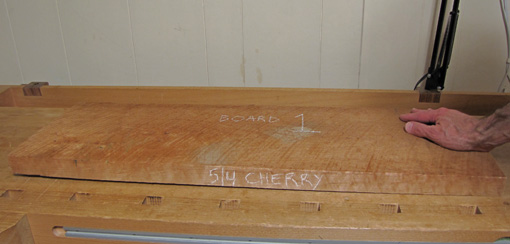
Notice the raised left side of the 5/4 cherry, above. It is easy for twist to go unnoticed in the commotion of the lumber yard. The full width of this board would probably be less than 3/4″ thick after dressing because the twist must be removed from both faces. To retain more thickness, this piece can be ripped into narrower sections – safely on the bandsaw not the table saw.

Similarly, thickness can disappear in surprising amounts when flattening a long bowed board or a wide cupped board. More commonly than any other problem, failure to retain the desired thickness, width, and length while removing distortion has destroyed my plans for wood parts.

A distortion that I stay away from is crook, which is fortunately easy to see – the board looks like a level road with a curve. Crook is a tip-off to the presence of reaction wood which is produced by tree trunks that lean. The pith is typically decentered which makes the widths of the growth rings markedly different on each side of a flatsawn board. These boards can unpredictably shrink along the grain and distort oddly. They are incorrigible miscreants that belong in wood hell, also known as the fireplace. Severely twisted boards should also be rejected because they certainly harbor some weirdness, with which you do not want to deal, that made them twist in the first place.

Sometimes, the wood and the woodworker just don’t get along. With great anticipation, I once started working with some beautiful curly makore. Within hours my nose and throat were scratchy and I felt strangely unsettled. Assuming that I was allergic or otherwise sensitive to this species, I decided to avoid unnecessary risk and get this wood out of the shop.

I’m afraid there’s more disappointments coming up in the next post.

Category: Wood  | 8 Comments