Tag-Archive for ◊ ruler trick ◊

Author:
• Sunday, April 30th, 2023

Ruler Trick for short blade

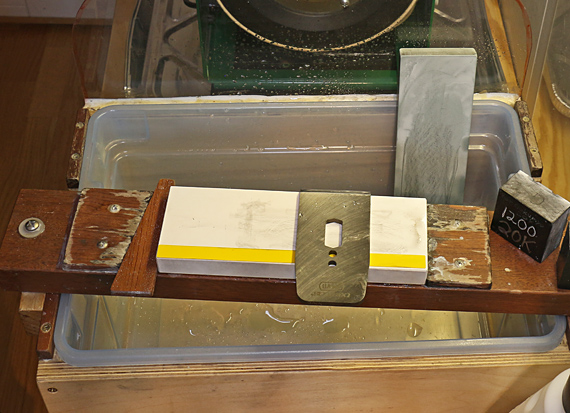
Ironically, I do not use a ruler for the Ruler Trick. As I described in a post about five years ago, I like a 0.020″ strip of plastic cut from shim stock and roughened on the bottom for a better grip on the stone. This is about the same thickness as a 1/2mm ruler.

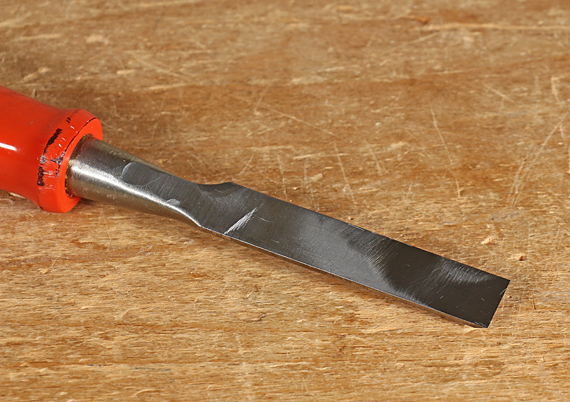
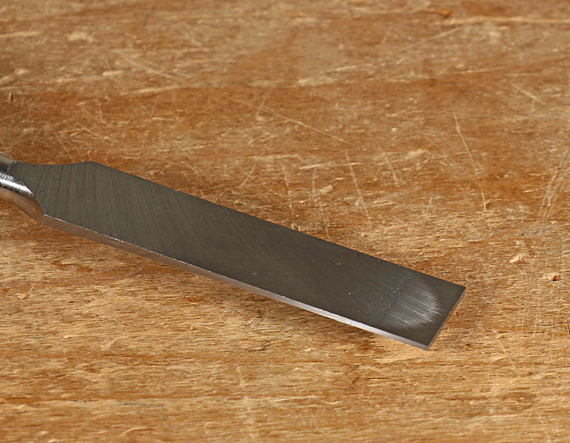
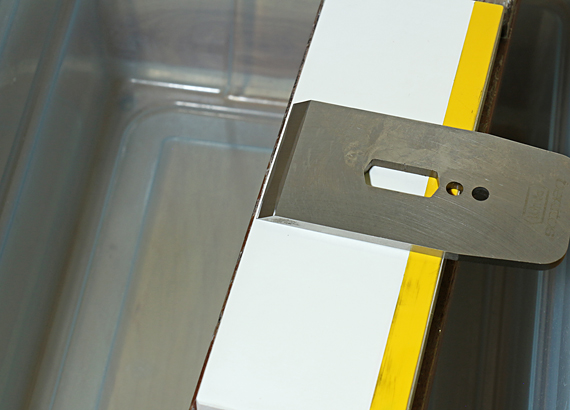
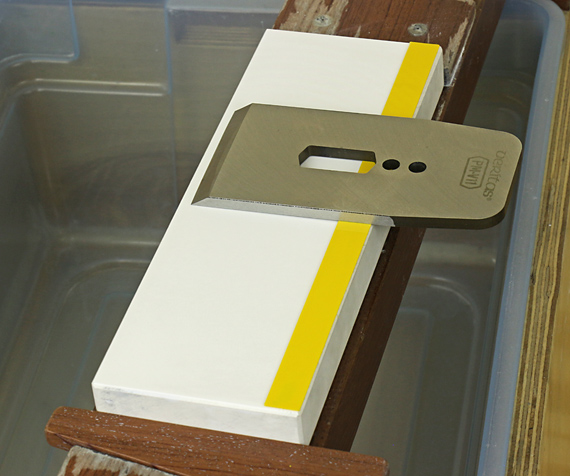
One advantage of using shim stock is for short blades. In the photo above, I am using a 0.015″ shim to raise the spokeshave blade to approximately the same angle as a 0.020″ shim raises a full size blade that fully straddles the stone. Perhaps this adjustment matters little but it helps keep my sharpening technique consistent and it is simple to do.

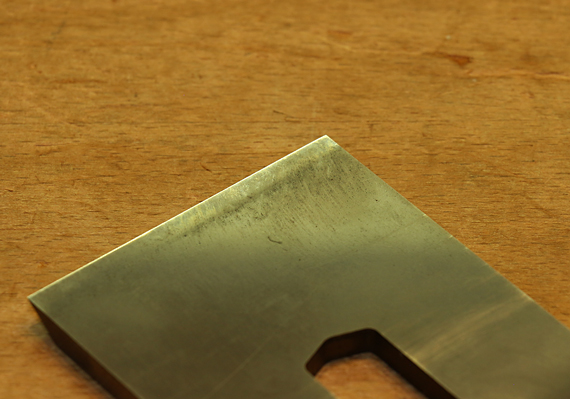
Many specialty and joinery planes have short blades, and many are bedded bevel up. Some of the bevel-up blades, such as side rabbet planes, have quite a low clearance angle. The Ruler Trick is especially helpful on these.

The blade of the wonderful Veritas router plane is detachable from its vertical stem for convenient sharpening. The clearance angle of the blade as installed in the plane is only about 5°. For this little blade, only about 1 inch long, a 0.005″ shim gives about same 1/2° back bevel as a ruler or 0.020″ shim under a full size blade.

Regarding the direction of Ruler Trick honing as discussed in the previous post, the spokeshave blade above is about the shortest I can practically use the across-the-edge motion. For very short blades like the router and for short skew-edged blades, the along-the-edge motion is more practical.

Woodworkers are indebted to the late David Charlesworth for the Ruler Trick and for the abundance of his other insightful teaching.

Category: Techniques  | Tags:  | Leave a Comment
Author:
• Wednesday, April 05th, 2023

Ruler Trick direction

Should your honing motion for the tiny Ruler Trick bevel on the back of the blade be parallel to the edge of the blade or perpendicular to it? Does it matter?

The late David Charlesworth demonstrates the technique in his You Tube video moving the blade perpendicular to its edge, i.e., across the edge. He starts with the blade edge beyond the long edge of the stone and pulls it back “two or three times.” He states that he does not “like to trap a wire edge underneath the blade.” He then moves the blade back and forth – barely over the edge of the stone and no more than 10mm onto the stone, which is a very short motion.

In the video, he previously honed the microbevel on the front of the blade using a guide, moving the blade perpendicular to its edge. Thus, the final minute scratches on the back of the blade meet up parallel with those created on the microbevel.

Ruler Trick

Others, in fact most, as far as I can tell, execute the Ruler Trick differently by moving the blade edge parallel along the length of the stone. This seems quicker and easier. It does mean that the final scratches on the back of the blade will be perpendicular, or at least at a large angle to, those on the bevel.

Another example of technique is from the outstanding teacher, Rob Cosman, who thinks through woodworking techniques so well. He hones the bevel in a vigorous circular/oval motion with the blade edge angled to the length of the stone. He then executes the Ruler Trick moving the edge parallel to the stone.

I used David’s original method for a long time and then drifted to using the parallel method because it is indeed easier. I began to wonder if the opposite directions of the final scratches on the front and back of the blade might weaken the durability of the edge. I lately have switched back to David’s method.

Does it matter? I cannot scientifically measure it but my shop experience is telling me that, yes, the pristine edge seems more durable using the Ruler Trick in the same direction as David demonstrated.

My only real point here is that you may want to try for yourself the different methods and consider the effects.

Ruler Trick bevel-up blade

Another question: Should you go back and forth from honing the bevel to the back? In his video, David very gently hones the microbevel, and then does the Ruler Trick, and that’s all. He does not return to the bevel.

For me, that works well if I am cleaning up an edge that is not too worn, which requires just gentle brief honing and is easy to get right. More often, especially if I want a really nice edge such as on a smoothing plane, I find myself returning to the bevel and then repeating the RT. This means having to unclamp and reclamp the blade from a honing guide, if that is what I’m using.

Again, my point is to suggest we should be aware of just what we are doing, observe the effects, and decide from there.

Next: suggestions for managing the Ruler Trick with small blades.

Category: Techniques  | Tags:  | Comments off
Author:
• Tuesday, March 28th, 2023
Western chisel back

Can the Ruler Trick be used for chisels? Yes. Should it be used for chisels? Depends. 

Yes, the RT affords an advantage similar as with plane blades in honing the flat side of the blade. The tiny 1/2° bevel created by the lift of the ruler makes it faster and easier for your finest grit stone to contact the metal on the flat side all the way out to the apex of the cutting edge. This makes resharpening easier. It also makes preparing a new chisel easier unless it fortunately has a minute hollow on the back to begin with. For example, I recently bought this DeWalt chisel (below) and set it up as a scraper chisel. Remarkably, it came with a nice slightly dished back.   

DeWalt chisel back

However, that 1/2° bevel on the back of a chisel has consequences in use. For paring, there is a less definite feedback to sense the angle at which the chisel will bite. We want to sense the lowest angle at which the chisel cuts wood. The long handle and a full flat back of the chisel aid that sense. A tiny bevel on the flat side confuses it a bit. 

Now, this is in my hands. You may find you can adjust and recalibrate your feel so you can pare just as effectively. 

For chopping, we often want to sense vertical, such as in dovetail work. The tiny RT bevel makes that sense slightly less definite. Again, you may find you can compensate and it is no problem at all. As with almost everything else in woodworking, there is more than one good way to do things but it is important to be aware of what is really happening at any cutting edge. 

All of this applies to Western style chisels. Japanese chisels do not need the Ruler Trick. The hollow on the back of the blade minimizes the area that contacts the stone and thus the amount of metal you have to remove to hone all the way out to the cutting edge. This is a huge advantage of Japanese chisels, and one of several reasons I use this style of chisel almost exclusively. 

Japanese chisel back

Next: There seems to be different opinions on the direction to apply the Ruler Trick honing – across or along the length of the edge. 

Category: Techniques  | Tags:  | Comments off
Author:
• Tuesday, February 28th, 2023
Ruler Trick bevel-up blade

The late David Charlesworth’s “Ruler Trick” is a wonderfully efficient addition to your sharpening methodology. For those unfamiliar with it, please see his short video – it is easier to appreciate than a verbal description. It basically is a simple way to hone the steel only just behind the cutting edge on the flat side of a plane blade without having to work the entire flat side. The resultant tiny bevel is only about 1/2°. (See the thin bright line in the photo above.) Thus, you create two meeting surfaces of finely honed steel to make a sharp edge. 

It is often promoted primarily as way of efficiently commissioning a new blade. The “trick” is that you do not have to flatten the entire back or any sizable area of it, just that thin strip near the edge. For that alone, it is invaluable but it is even more useful in subsequent sharpenings to remove the wear bevel.

Here I must credit Brent Beach and his incredibly extensive and informative website. The “wear bevel,” simply put, is the rounded wearing of the top and bottom of the blade just behind the apex of the cutting edge. For both bevel-up and bevel-down planes, as the lower wear bevel develops, it requires you to push down harder on the plane to get it to cut. As the wear progresses, you sense the plane blade getting more dull. Notably, the lower wear bevel is greater for higher bevel-side honing angles in bevel-up planes, which are often used to reduce tear out. 

When we sharpen the bevel side of the blade in bevel-down planes, we are rectifying that lower wear bevel. We remake two clean surfaces meet and reestablish the clearance angle just behind the edge apex. 

Ruler Trick

A particular problem comes in bevel-up planes. That lower wear bevel is only addressed inasmuch as you effectively work on the flat side steel just behind the edge apex. If you do not fix the flat side, you have not effectively prepared the blade for work.

The practical reality is that it takes too much work to remove a layer of metal, albeit quite thin, over the whole back of the blade to remove the wear bevel on that side. Enter the Ruler Trick. It does it quick and easy. Brent Beach describes a steeper, more complicated “back bevel” but I think the Ruler Trick is a good compromise in practice, though I cannot quantify this. 

So, here is my point: while the Ruler Trick is very helpful for sharpening bevel-down plane blades, it is, as a practical matter, essential for sharpening bevel-up plane blades. Note too, that many specialty planes are also bevel-up, such as shoulder planes and router planes. They need the Ruler Trick too.

Next: What about chisels?

Category: Techniques  | Tags:  | 7 Comments
Author:
• Saturday, February 10th, 2018

ruler trick

A strip of 0.020″-thick plastic shim stock, about 1/2″-wide and the full length of the stone, facilitates the Ruler Trick. The plastic is the same thickness and width as the 6″ steel ruler I had been using, but the blade slides on it more smoothly, and it allows use of the full length of the stone.

I lightly and uniformly scuffed the bottom of the plastic with 80-grit sandpaper, stroking perpendicular to the direction of the blade motion used in executing the ruler trick. I used fine sandpaper to soften the corners of the long edges of the plastic where the top meets the sides. This preparation, plus the low friction of steel on plastic, makes this plastic “ruler” surprisingly stable on the stone.

The Ruler Trick, taught by David Charlesworth, removes the “wear bevel” of a plane blade with greater speed and accuracy than by working the back of the blade fully flat against the stone. In other words, it helps in the necessary task of accurately creating two planes of steel that meet at a sharp edge. It is useful for nearly all plane blades but particularly valuable, almost essential, for bevel-up blades.

With the blade elevated on one side of the stone by 0.020″ and the edge reaching 2″ across the stone from the inner edge of the plastic “ruler,” an angle of only about 1/2° is created on the “flat” side of the blade. [tan-1 (0.020/2) = 0.57°] This amount has no significant effect on the bevel angle of the blade, nor on the attack and clearance angles of bevel-up and bevel-down planes. The facet is very narrow, perhaps 1/32″-wide, created with just a few strokes on only the finest stone.

[Addendum, February 14, 2018, updated: I received the April, 2018 (#238) electronic issue of Popular Woodworking magazine today, and note in the “Tricks of the Trade” section on page 12, a reader contributed essentially the same “trick” to the magazine as I have described here on my blog. He used plastic from a milk jug. His trick also appeared in the November 2016 PW.

The PW contributor obviously came up with the idea independently of my writing. I do believe I also came up with the idea independently, but now I think it’s possible that I was influenced by what I probably saw earlier in the November 2016 issue. I really am not sure. Therefore, I credit Jonathan White, the PW contributor, for the idea.]

Category: Techniques  | Tags:  | 8 Comments