Author Archive

Author:
• Sunday, August 05th, 2012

Drawers must work throughout the year. There is no virtue in constructing an ego-feeding science project with a “piston-fit” in February only to find that you, or worse, a client, are unable to open the drawer in August. Let’s take a closer look.

In the “High-End Drawers” ten-part series on this blog that ran intermittently from July to November 2009, and in the article “4 Steps to a Sweet-Fitting Drawer” in Fine Woodworking magazine #224 (January/February 2012), I describe a reliable process for producing a good drawer fit. But just as with a good suit, a good drawer fit means not too tight and not too loose. With wood, however, we have the added complication of the inevitable changes in moisture content that occur with seasonal humidity changes. A zero-tolerance “piston fit” in February will be all wrong in August.

Let’s think it through.

Consider the width of the drawer in its case. In both solid-board and frame-and-panel constructions, the width of the case remains essentially stable throughout seasonal humidity changes, since it is defined and limited by long-grain pieces. Even the expansion of the side walls of a solid-board drawer pocket will occur on the outsides, not within the pocket.

The drawer sides are oriented to expand laterally. (Their expansion in height will be discussed later.) As an example, hard maple, typically quartersawn for drawer sides, 3/8″ thick, will expand .012″ (12 thou) over a humidity increase from 35% to 80%. Drawer sides normally receive little or no finish, so these changes can, at least theoretically, occur rapidly. There are some mitigating factors though, including that the drawer spends most of its time secluded in the case, and the sides are somewhat bound by the joinery, usually dovetails. However, PVA glues retain some elasticity, as evidenced by the tiny elevation of tails above the endgrain of pins in very humid conditions. It should be noted, however, that this theoretical amount of expansion does not seem empirically to fully manifest.

Does this matter? Yes, it does. With the incremental construction method wherein the final step of fitting the drawer to its pocket is to plane the sides down to the level of the endgrain of the pins of the front and back, the drawer width can easily be fit to tolerances of a few thousandths of an inch.
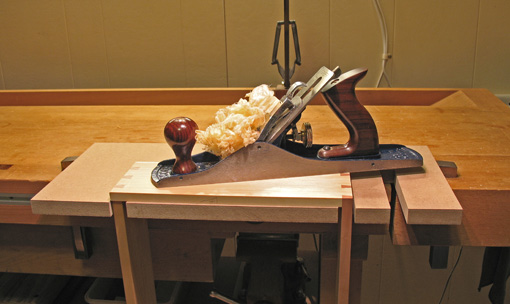
So, if during the dry months, the drawer width is fit like a piston with a clearance of say a couple thou between the sides and the case, it is sure to be too tight in the humid months.

Is this all just theoretical? Not at all. I can tell you from experience that it matters. Years ago, during a low-humidity season, I made some nice drawers with a piston fit. I felt proud and thought that since they were small drawers, all would be fine during the coming summer, and I could get away with this exercise in ego-stroking perfectionism. Not so. The following August, neither drawer could be opened.

That is not practical woodworking. The perfect defeated the good. That Fall, I made things right.

Right now, in an August steam bath here in the Northeast US, drawers in pieces that I made several years ago operate well but with almost no remaining clearance. That’s fine. In the dry winter, the fit of these drawers do indeed have more play in width, but are by no means sloppy.

In summary, if you are building a drawer during very humid weather, fit the width to be very snug. If you are building a drawer in the dryness of February, you must leave some allowance.

Ah, but how much allowance should you make when building in dry conditions? It depends on the thickness of the drawer sides (less for thin sides), the species of wood, and the conditions where the piece will be housed. More play is appropriate in large, practical drawers than in small, delicate drawers. It helps to keep your shop from getting too dry in the winter. This will reduce the range of estimating that you have to do.

To avoid a stuck drawer, stay on the safe side but don’t go so far as to make a clearance that feels at all sloppy in dry conditions. For a small drawer, building in dry conditions, I like to at least get a sheet of paper, maybe two, in there on each side. Experience helps a lot; I go by how it feels. The theoretical expansion amount calculated above will be too much allowance.

Of course, haha, if your piece will be placed in a climate-controlled museum, don’t worry about any of this!

Next, we’ll look at the height of the drawer and appropriate clearances. That’s important too, but less finicky.
Category: Techniques  | 3 Comments
Author:
• Tuesday, July 31st, 2012

This is a tool that we all use but gets little attention. As usual with tools, there is a range of quality from barely usable to excellent, and to do quality work, it pays to know the differences.

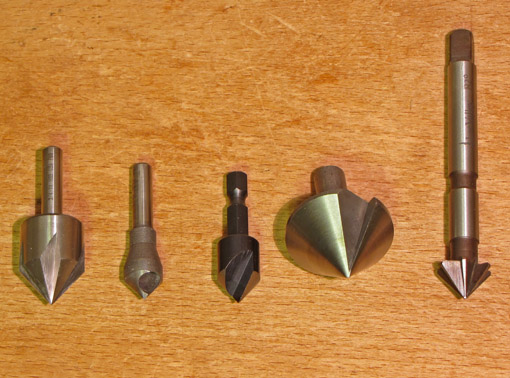
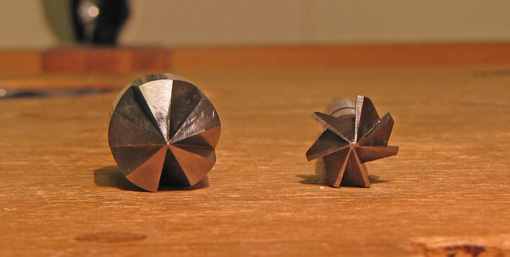
Let us consider the tools in the photo at the top, from left to right:

1. This type is the ubiquitous hardware store/home center DIY countersink which has little role in quality furniture making. Its five flutes are symmetrically arranged and present a thick, dull cutting wedge to the wood. For these reasons, it chatters badly, meaning that it bumps and jumps as it cuts, producing radial bumps on the countersunk wood surface. Save this one for home carpentry projects with CDX.

2. This is a countersink/deburring tool which is excellent for metal working, but also cuts quite smoothly in wood. It cuts fairly slowly in wood compared to the other designs, but it does not tend to chatter and leaves a good surface.

3. This is a quick-change hex shank bit which is quite sharp and generally cuts fast and well, though it has some tendency to tear the wood and chatter a bit, especially if it is pushed hard.

4. The Beall countersink is an excellent quality tool and a favorite of many woodworkers. The design and weight virtually eliminate chatter, and it cuts smoothly. I find it somewhat bulky for most work though. It certainly is handy for large holes.

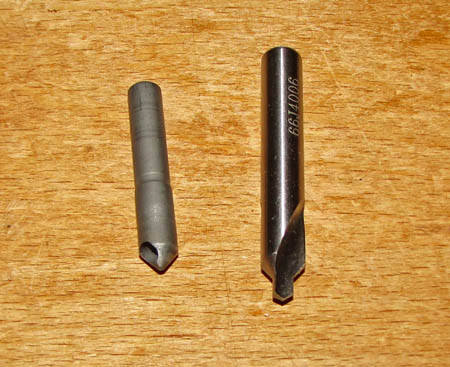
5. This is the best one. Lee Valley used to make these but I cannot find them anywhere now. As seen in the photo below, on the right, it has radially asymmetric flutes which present sharp, narrow cutting wedges to the wood at low angles. These design elements produce a countersink that never chatters or tears. It can be sharpened with a small diamond paddle. I wish Lee Valley would make them again.

The DIY clunker is on the left in the photo below.

Hey, I counted 18 countersinks here. Hmm, is it possible that I have a, ah, countersink problem?

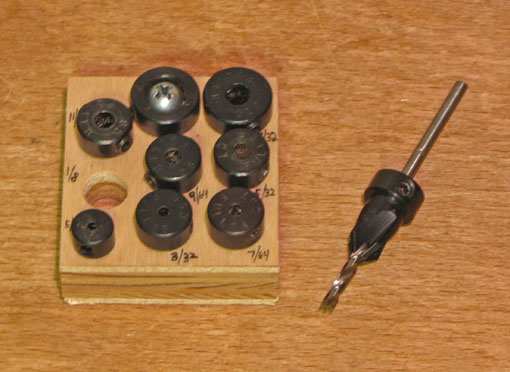
The Fuller set, below, are countersinks that attach with set screws to drill bits. These are most useful in a drill press to bore a hole and countersink in one pass to a specified depth. They can also produce a clean counterbore for plugging. They run chatter-free but have a tendency to clog. Excellent quality.

Below, left, is a narrow (about 1/4 inch) Weldon countersink, similar in design to #2, above. It is handy in tight spaces, using narrow screws. To the right is a piloted countersink that I use only for remaking holes in hardware. Lee Valley sells them in various sizes and they can really save the day for hardware problems.

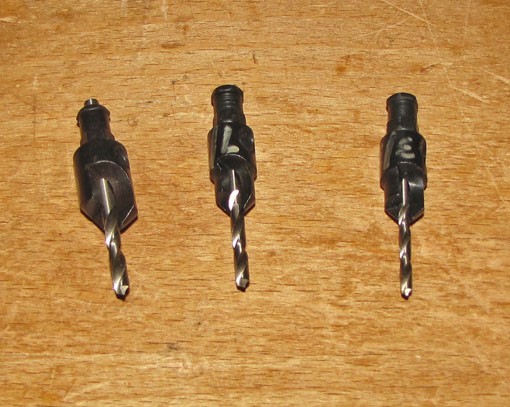
Finally, below are some more DIY tools for a quick change chuck available from Lowe’s. These are certainly not at the quality level of the Fuller tools, but are not bad for fast, less finicky work.

As always, match the tool to the job. And, again, hey Lee Valley, I wish someone would make a nice countersink like #5, above. If any readers have found one, please comment. In the meantime, the Beall is probably the best choice, or, for a smaller tool, the countersink/deburring design (#2, above).

Category: Tools and Shop  | 7 Comments
Author:
• Tuesday, July 17th, 2012

It’s time . . . for the table saw-bandsaw matchup for building a table. Most of this applies to other post-and-rail or leg-and-apron construction such as cabinets-on-stand, beds, benches, and frame-and-panel casework. I’m afraid this is going to be a brutal mismatch, but don’t worry, the referee is nearby.

The bandsaw has decisive advantages over the table saw for making the legs. First, it allows for the artful selection of long-grain figure unrestricted by its original orientation to the edge of the board.

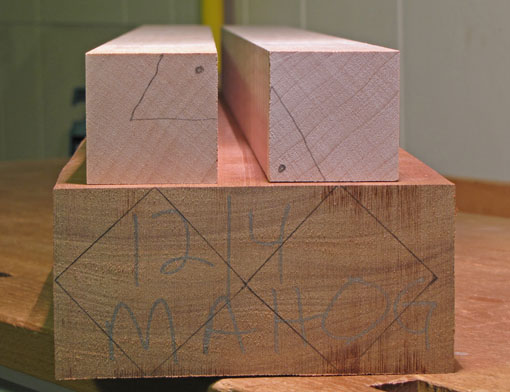
Equally important is the orientation of the end grain. As discussed in an earlier post, this is critical for shaped legs. In most cases, diagonally oriented annual rings in the leg blanks give the best look. Even if suitable riftsawn stock is unavailable, the effect can be created from thick flatsawn stock by ripping it at appropriate angles, as shown in the photo below. The 12/4 mahogany can be ripped as indicated by the squares drawn on its endgrain to yield the same desirable ring orientation of the maple leg blanks. (The markings on the maple are not cut lines.)

Of course, the ability of the bandsaw to cut curves allows infinite options beyond simple straight tapers. However, straight cuts in the thick stock usually used for legs are also more comfortably done with the bandsaw, used in conjunction with a jointer (hand or machine). Ripping 10/4 bubinga with even a 3HP cabinet saw is not fun.

Now just in case the faint of heart are wincing at this lopsided bout, I point out again that it is best to have a bandsaw and a table saw. As discussed in the previous posts, this match-up is really about the priorities that guide one’s approach to woodworking.

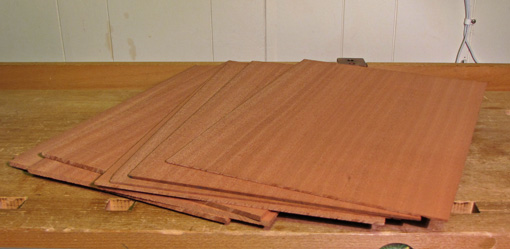
Moving on to the aprons and top, figure selection and options for resawing are again important. You might consider a bookmatched solid wood top for small tables. Curves in the rail members are also more likely to come from bandsaw thinking. Interesting designs can be created with thick veneer which can readily be produced with the bandsaw. The photo below shows 11″ wide ribbon-stripe khaya directly from my bandsaw. The pieces to the left will finish to 3/16″ thick after minimal planing, suitable for false drawer fronts, and the pieces to the right will finish to 3/32″, suitable for thick veneer. 

For mortise and tenon joinery, the heart of leg and apron construction, both the table saw and the bandsaw can make good tenon cheeks, though the table saw can also easily cut clean shoulders. Otherwise, there are few straight, clean, critical crosscuts required in building most tables, thus neutralizing one of the table saw’s strengths.

Don’t forget that in the design stage, as you unleash your creativity, the bandsaw makes mock-ups wonderfully fast and fun.

The referee steps in to stop the carnage and declare a TKO. (And, thankfully, also puts a stop to this ridiculous metaphor.)

Some woodworkers may be concerned that the bandsaw takes more setup, learning, and tuning. I do not think it is harder to set up a new bandsaw than a new table saw. Learning the bandsaw is mostly fun, with less intimidation than posed by the table saw. Further, there are many excellent sources of information, including books by Mark Duginske, Lonnie Bird, and Roland Johnson. I admit, however, that changing and cleaning bandsaw blades are among the least pleasant jobs in the shop.

I suggest get a steel frame bandsaw with at least 12″ of resaw height with motor power to match. Fortunately, bandsaws do not take up much space. Minimax and Agazanni are among the makers of excellent machines, and Grizzly and Rikon make very good, less expensive ones. If you have any money left over, consider buying a table saw; I hear they’re quite handy.

Finally, consider the wisdom of the late James Krenov, who wrote in The Fine Art of Cabinetmaking, “Of all my machines, the band saw has done the most to help me use wood the way I really want to.”

Author:
• Sunday, July 08th, 2012

Here – we – GO!

Let’s look at building a wall cabinet with two frame-and-panel doors. The style can be Krenovian, Arts and Crafts, Shaker, whatever you like. The same principles can be applied to other casework such as boxes and chests. I will make the somewhat artificial distinction between a table saw-centric and a bandsaw-centric craftsman. As discussed in the previous post, this is not a question of using one machine to the exclusion of the other, rather it is about which tool tends to guide your approach. Furthermore, this does not imply that one machine defines a craftsman’s entire methodology; obviously there are other tools in the shop.

Wood is selected, and the project starts with the case top, bottom, and sides. The table saw woodworker is likely to accept one of the sawmill’s edges of each board as starting points. After flattening a face and thicknessing, that edge is jointed and the opposite edge is ripped parallel.

The bandsaw guy is likely to start with more design freedom and not assume that the case will have straight edges, but even for a customary case with rectangular components, he has more opportunity to sensitively make the most of the wood. One of the most common pitfalls early in a project is automatically accepting the board’s edges that were sawn at the mill. The bandsaw guy studies the board and extracts the best parts, unfettered by the original orientation of the figure.

Resawing, the bandsaw’s forte, gives the freedom to seek out and use excellent wood in any thickness. For example, matched sides could be created from a figured billet.

Well fans, it looks like the bandsaw is doing moves the table saw has never seen. Ouch.

Wait, you say, isn’t it more accurate to rip the opposite edge parallel on the table saw? Yes, and if the table saw is available, use it. However, the advantage is small, especially with a well-tuned bandsaw. Furthermore, in both cases, the most accurate and well-surfaced final rendition of fitted edges will come from a handplane.

What about crosscutting? Again, the table saw has an advantage but it is only a little more trouble, and it is more controlled, to shoot the ends by hand which can be done after they come off the bandsaw.

The bandsaw is an MMA fighter and the table saw is a classic boxer.

Let’s consider making the doors. This is where the fight goes to the ground. With the bandsaw you can easily resaw a beautiful boardto make bookmatched panels that will be the best feature of the piece. Yes, you can resaw with the table saw but it is awkward and limited. Resawing is a gateway technique that can change how you think about wood.

Ha, you say, making the door rails and stiles has got to be where the table saw has the advantage. Yes and no. Once again, the all-important management of the wood is best done on the bandsaw. The figure in the wood used for the frame should be harmonious. Some craftsmen even like to resaw and bookmatch these pieces. The inside edges of the frame members will come off the jointer (hand or machine), and it is handy to then rip them on the table saw. However, for fine work, the width of these pieces will be cut a bit oversize and the final fitting of the doors to the case is best produced with a hand plane. A bandsawn edge is an adequate starting point for that.

Creative, interesting handles for the doors are more likely to come from a shop with a bandsaw.

And so the table saw taps out.

The main points are that the bandsaw facilitates more creativity in design, and far more artful use of wood. Though the table saw does have advantages in ripping and crosscutting accuracy, these are easily circumvented by using the bandsaw in conjunction with hand tools in an incremental, controlled approach to fitting the parts of a project. In short, a bandsaw-centric approach can produce better craftsmanship.

Next: The Rematch. Let’s look at how this applies to making a table. Now this could get ugly.

Author:
• Wednesday, July 04th, 2012

I have had many conversations over the years with woodworkers who were building or upgrading their shops and facing the question of where to place the higher priority, on the table saw or the bandsaw. Sure, with enough money and shop space, as well as time to set up, learn, and fuss with these tools, the most versatility is gained by having both machines. However, since we all deal with practical limitations, and shops are usually built incrementally, it is worthwhile to compare their merits. You might be able to buy only one of these two machines, or there might be a long wait before buying the second. If you are buying both, you might be wondering which one warrants a bigger share of your money.

More fundamentally, we tend to think through the building process, and even the design options, with our tools in mind. We steer our work toward the tools with which we are most comfortable – our “go-to” tools and skills. So this discussion is more significantly about which of these two machines do you mentally reach for first.

Let the sawdust fly.

The table saw excels at accurate ripping parallel to an existing straight edge. It can also very accurately crosscut at a chosen angle, usually 90º, to a straightedge. Some joinery can be accomplished, such at making tenons, slip joints, and dovetail work. Grooves and dadoes can be cut with the addition of a dado set.

The bandsaw can also rip and crosscut, but the sawn surface is generally not as exquisitely accurate nor as clean as that produced by the table saw. Truing and smoothing, sometimes tedious, are required. Using the bandsaw may seem like more work and even feel crude compared to the table saw.

I suspect this imagery is what causes some woodworkers to view the bandsaw as the second-banana sawing machine in the shop. They may figure that it is nice to have for cutting curves, but since they mostly make Arts and Crafts and Shaker style furniture, it gets dropped down on the priority list.

As you might guess, I strongly disagree with this “table saw-centric” view. Further, to those woodworkers who are making a priority decision as discussed above, I contend that placing the bandsaw first will, in most cases, make you a better craftsman.

Too often with issues like this, there is the tendency to think of the tool’s functions in isolation. It is more useful to think through the design and building processes, and how the tool can change what you can accomplish. So instead of listing what each machine can do, salesman-style, let’s look at real project scenarios using these machines.

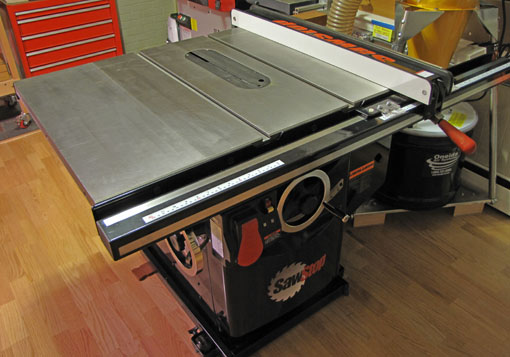
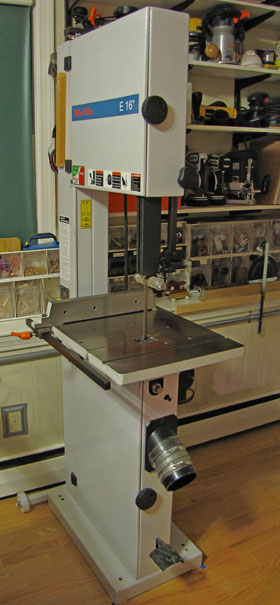
For the record, I own and happily use a Saw Stop 10″ cabinet saw and a Minimax 16″ bandsaw. This is not a question of one machine to the exclusion of the other but a matter of prioritizing which machine tends to guide your woodworking.

Next: Round 2, the real action starts. We’ll consider these projects: a wall cabinet with frame and panel doors, and a table with straight-tapered or curved legs.

Author:
• Friday, June 29th, 2012

It is handy to have an arsenal to scrape contours and details. This is mostly clean-up work done after routing or planing.

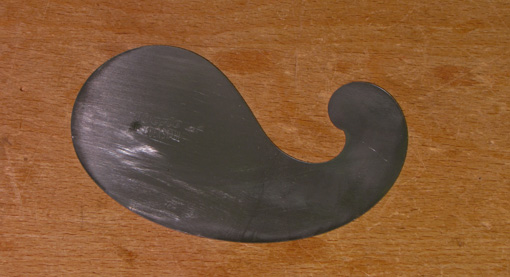
The “gooseneck” scraper, above, handles a lot of concave contours. This Eberle model is about 0.028 inches thick. I do not know the Rc hardness but it seems softer than the Rc 48-52 of my other scrapers. Lee Valley has nice choices.

Cleaning up a cove, on a raised panel, for example, can be done by setting this scraper into the cove and then angling it to make the edge match the contour. To understand this, hold a coin in front of you and observe how the visible curve at the bottom changes as you turn the coin on the vertical axis. Angling the scraper also facilitates a smooth cut, though too great an angle will cause the edge to slice the wood and create tracks.

By the way, does that scraper look like a goose neck to you? To me it looks more like a whale or maybe a goose body without its legs and head.

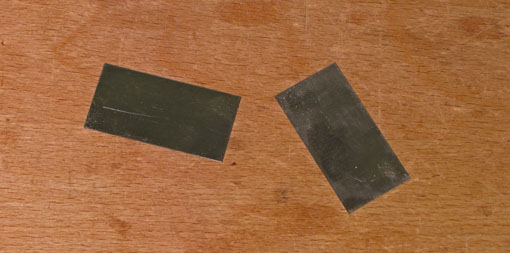
The two little guys below are handy for all sorts of clean ups such as scraping glue out of a corner. They are 1″ x 2″, 0.020″ thick, Rc 48-52, and available from Lee Valley. Because their small size makes them hard to bend, you might want to file a slight camber in one or two of the edges to avoid gouging by the corners when doing work on an open surface.

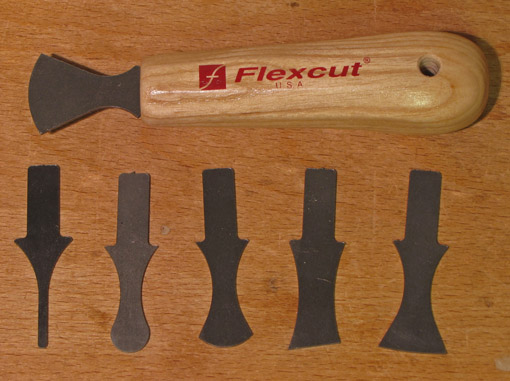
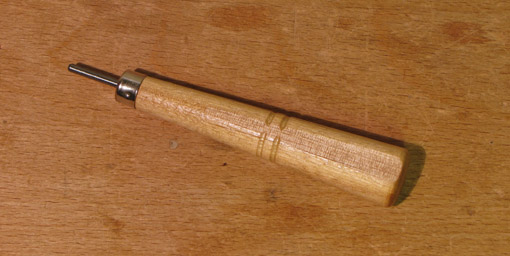
The set of Flexcut scrapers, below, are earning their place in the shop. The scrapers are inserted into the handle and secured without screws or hassle. At 0.050″ thick, they are quite stiff. The handle can be held in various ways – like a pencil, in a fist-grip, or a fist-grip with the thumb behind the scraper. Both the ends and the long side edges are useful. I don’t use this tool frequently but its versatility sure is handy when the need arises.

Lynx makes a set of contour-edged scrapers that looks like a good option, but I have not tried them. 

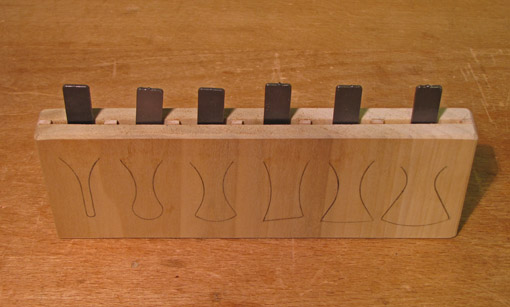
Here are the Flexcuts tucked away in the little holder I made for them.

Sharpening these small and curved scrapers can be awkward. The small scrapers do not necessarily need a burr but I find they work better with it. The short carbide burnisher, available from Lee Valley, is convenient for preparing these scrapers.

Once again, my purpose here is to present a range of options and discuss what has worked for me, with the hope that this will help you sort out what is useful in your shop where you are the supreme commander, king, lord, and unquestioned deity, unless of course, your spouse or pet happens by.

Category: Tools and Shop  | 2 Comments
Author:
• Tuesday, June 26th, 2012

The outward simplicity of the hand scraper belies the many options available for this wonderful tool. For a card scraper, several parameters influence its utility. These are: thickness, width, steel hardness, and, to a lesser degree, height. In this post, I will discuss the card scrapers that I find useful in my shop.

The 0.032-inch thick (usually listed as 0.80mm) scraper is the one most commonly referred to in discussion, instructional materials, and in catalogs, but is the one I use least. This is a thick scraper suited, in my view, primarily for heavy use on bare wood or for removing finishes. I have Bahco and Lee Valley versions, both Rc 48-52, 6″ wide, and 2 3/8 – 2 1/2″ high. One of them is filed to a slightly concave edge along its length for use in creating subtle convexity on the surfaces of legs.

For general use, this relatively stiff scraper does not afford the sensitivity of the thinner models. For my work, hand scraping is usually done near the end of the surfacing sequence when a delicate touch is desirable.

The 0.024-inch thick (0.60mm) scrapers are the most used in my shop. They are from Lee Valley. I like the 6″ width which makes it easy to camber sensitively for long work sessions. The same thickness available from Bahco is only 5″ wide which reduces some of that sensitivity, and just seems too narrow for my hands. I wish Lee Valley would make them taller than 2″. I own two and always sharpen them at the same time, giving eight edges ready to work. They are Rc 48-52 as are all of Lee Valley’s card scrapers. By the way, Lee Valley’s scrapers come with the edges ready for burnishing.

For especially delicate work, including touch-ups and error correction, Lie-Nielsen’s 0.020-inch thick (0.50mm), 6-inch wide, 2 1/2-inches high, Rc 49-51, is just right. It bends easily, allowing light shavings in a small area. This flexibility, however, makes it hard to avoid unevenness in larger areas of work. Lie-Nielsen also makes a 0.032″ model.

I also keep an 0.020-inch thick Bracht scraper as stock to cut and shape for special applications. Thin and soft at Rc 38-42, it is easy to cut and modify for dedicated use in a project.

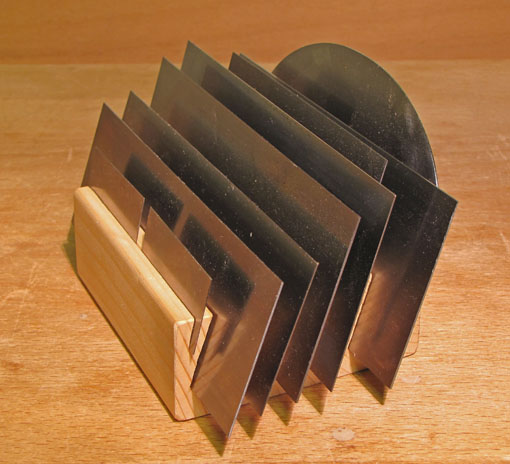
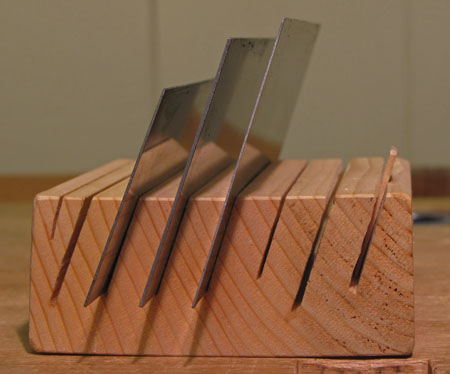
In the photo below, from left to right, are 0.024″, 0.032″, and 0.020″ scrapers. The holder is a hunk of 2×4 with some slots bandsawn at an angle.

In summary, my go-to scraper is 0.024″ thick, but the other options are still very useful. Most important, I want to call attention to the available options and encourage readers to try them and find what works best for them. These are just my preferences. Scrapers are inexpensive tools so I suggest get a bunch. Having one scraper is like owning one pair of socks.

Next: more sizes and shapes.

Category: Tools and Shop  | 3 Comments
Author:
• Monday, June 18th, 2012

It is not easy to make fine things from wood. Woodworking is a succession of mostly subtractive steps which requires careful planning. The critical differences between success and failure in most woodworking processes are subtle, often difficult to reliably articulate, and regrettably seem to require a bit of failure prior to the success.

Human nature creates a tendency to imagine an easy path to success, and, further, to seek this illusory path against all odds. Now certainly, woodworking can be taught and learned with reasonable diligence and, along the way, plenty of fun. Today, there is an abundance of excellent learning tools which admirably remove the unnecessary mystery from woodworking. Unfortunately, the woodworking student – and that means all of us – can be easily distracted by the allure of magic.

Magic is everywhere in the world of woodworking. Catalogs tout machine jigs, especially for the router, that guarantee “perfect” results “every time”, hinting that no real skill is required. Sharpening and finishing, perhaps because they harbor perceived mysteries, are particularly prone to the din of hype. Gurus demonstrate astonishingly fast technique making parts that are conveniently abstracted from the constraints of a real project.

Sure, there are places for time-savers, innovative devices, and instructive demonstrations. The point here is that the hype can lure you to squander your efforts seeking answers in the wrong places while neglecting the acquisition of true craftsmanship. Though the noble task is slower than we might like, and sometimes disappointing, it is ultimately joyful.

Consider this: the only magic tools are the ones attached to the ends of your arms, and they only do what your brain tells them to do. I suggest being cautious about where you invest your time and energy in developing your woodworking craftsmanship. You very likely have an intuitive sense of true skill and quality, especially if you have developed it in other fields. Follow that, not the hype.

That’s the way to happy woodworking.

Category: Ideas  | 3 Comments