Archive for ◊ March, 2013 ◊

Author:
• Friday, March 22nd, 2013

IMG_0979_edited-2

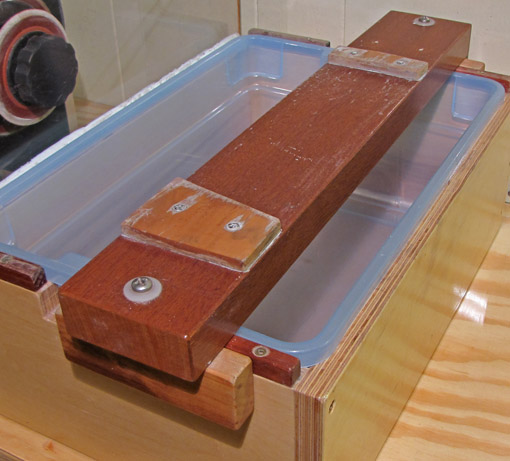
The bridge gets soaked repeatedly, of course, so to avoid wood movement and distortion as much as possible, I used quartersawn mahogany and finished it heavily with polyurethane. It is 3 3/16″ wide, 19″ long, and 1 3/16″ thick. Aluminum or painted steel might be good alternative material, though the wood has endured very well.

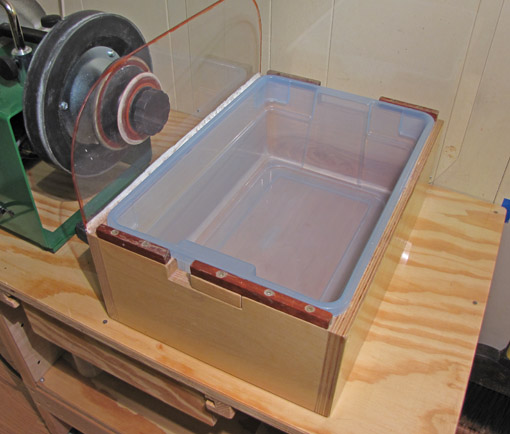
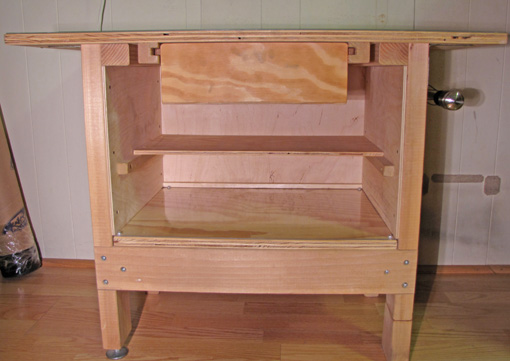
A key feature of this whole system is its absolute rigidity in use. The bridge must not shift at all while you work blades back and forth on the stone, yet must be easily removable for clean up while wet.

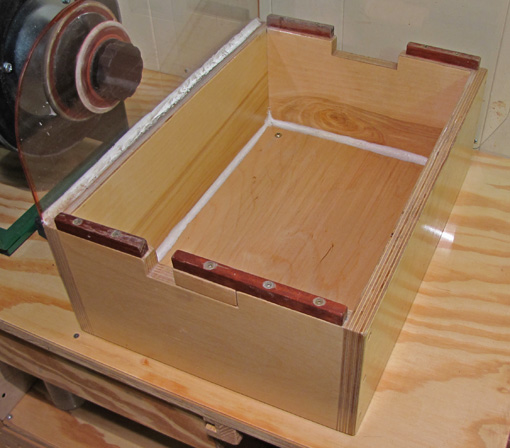
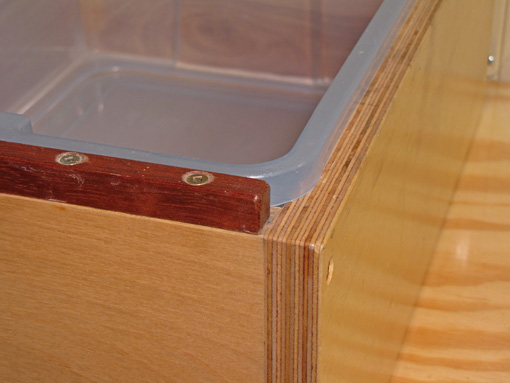
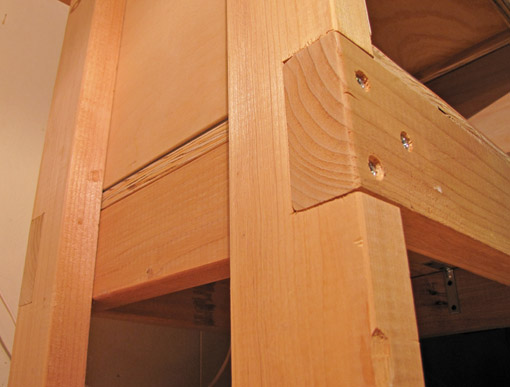
Cleats, 4 5/8″ long x 1 1/2″ wide x 3/4″ thick, are each attached to the bridge with a single stainless steel round-head wood screw and a nylon washer, just loosely enough to allow them to freely rotate. First, screw the rear cleat in place. Then, to position the front cleat for attachment, use a shim about 0.04″ (1 mm) thick (such as a non-flexible 6″ rule) between it and the outer wall of the box. This will create a slight gap.

In use, a firm sideways bump at the front end of the bridge, to angle it and thereby close that gap, makes it lock tightly to the walls of the box. An opposite bump releases it. This is quick, stable, reliable, and durable. If you prefer it to be less diagonal then shown here (which works well for me), use a thinner shim when attaching the front cleat.

IMG_0982_edited-2

The stone is held firmly in place on the bridge with a simple wedge system. Attached using SS screws, the rear cleat is at 90° and the front cleat has an angled edge, placed to position the stone slightly toward the front of the bridge. The cleats are about 5/32″ 9/32″ thick, which will keep them below the level of my Shapton Glass Stones for a long time.

The wedge angle of 10° works well; a shallower angle might make it hard to remove when wet.  The loose wedge is 4″ long so its ends extend beyond the sides of the bridge to allow easy tapping in and removal. I usually use the blade I’m working on to tap the wedge.

The cleats have been ideally placed for the 8 1/4″ long stones that I use, but the loose wedge is long enough to accommodate stones from about 7 3/4″ to 8 1/2″.

I’ve tested the stiffness of the bridge by leaning on it and using a straightedge and feeler gauge. It deflects only 0.0005″ (half a thou) at most. Nonetheless, to avoid error accumulation, I flatten the stones while wet after use, still in position on the bridge, using a diamond lapping stone.

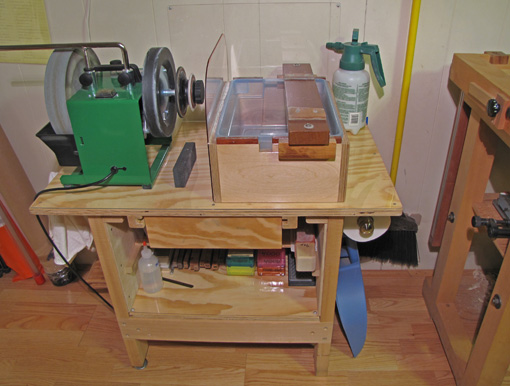
Next: I’ll describe how I use the system.

Category: Jigs and Fixtures  | Tags:  | Comments off
Author:
• Friday, March 22nd, 2013

IMG_0982_edited-2

This and the next installments of the series will describe the box-basin-bridge apparatus for hand sharpening. This setup is quickly put into service and can be left as is after finishing the sharpening session – the mess is contained and may be efficiently cleaned up later.

Good ergonomics are important to this system, especially proper height adjustments. The height of the bench and its components will depend on your stature and body mechanics, the grinder and stones you use, how you construct the box-basin, and your sharpening techniques. Therefore, if you are building a sharpening station like this (or any other kind), please do not accept my height specifications. Rather, experiment and adjust everything to your situation, then build. By the way, I am right-handed.

The basic idea is a plastic basin spanned by a bridge that holds the sharpening stone, but the basin is not nearly rigid enough, so a strong box must surround it.

Buy the tub first, then build the box to fit snugly around it. In my setup, I used a sturdy Rubbermaid brand storage container with outside measurements of 15 3/4″ x 10 3/4″ x 5 3/4″ high, including the 1/4″-wide x 1/2″-high lip that surrounds the top edge. The inside dimensions of the box are therefore 15 1/4″ x 10 1/4″, and 5 1/2″ gives a little extra space in height.

IMG_0975_edited-2

The box is made with butt-jointed 3/4″ plywood sides, and a 1/4″ ply rabbeted bottom, all glued, screwed, and finished with polyurethane. The inside seam where the bottom meets the sides is caulked. A polycarbonate spray shield, attached with screws, covers the left outer side and extends 6 1/4″ above it. The corners are rounded, the edge is made more visible with red marker, and the seam is caulked.

IMG_0974_edited-2

The box is screwed to the benchtop through the inside of the bottom near each corner. It is positioned just 1″ from the front of the benchtop for good ergonomics, with 5″ of handy space to the right.

IMG_0976_edited-2

Note the notches in the front and back walls of the box to permit easy removal of the basin. As you can see, I made them unnecessarily large and had to insert a patch at the front to extend the area where the bridge could grip.

The bridge must rest on a rock-solid footing, not the top edge of the basin, so hardwood risers, 3/8″ wide and slightly more than 1/2″ high, are screwed to the top edges of the box at the front and back. It is important that they are proud of the top edge of the basin and slightly shy of the outer walls of the box.

IMG_0978_edited-2

There is still plenty of room for the Tormek on the left side of the bench.

IMG_0984_edited-2

Next: the details of the bridge that holds the sharpening stones.

Category: Jigs and Fixtures  | Tags:  | Comments off
Author:
• Thursday, March 14th, 2013

IMG_0968_edited-2

The base frame is 23 7/8″ wide, 15 3/8″ deep, and 24 1/2″ high, built using the straightest, driest, clearest 2x4s I could find at the local home center.

The lower front and back rails are notched into the legs. The lower side rails are simply butt-jointed and screwed from the outside to the front rails, and from the inside to the legs. Use glue and #12 or #10 x 3″ deep-thread screws. A leveler is installed on the front left leg.

The spliced sections on the lower right legs are evidence of some of the evolution of the bench. There had been heavy-duty locking casters there, but I found I did not need them, and they slightly decreased the rigidity of the structure.

The 2×4 upper side rails are notched into their widths to accept the tops of the legs, and are glued and screwed in place. There are no front or back top rails. The back and sides are closed in with sturdy 1/4″ 5-ply, glued and screwed to the 2x4s for rigidity.

IMG_0969_edited-2

The top measures 33 7/8″ wide x 19 1/2″ deep, and is centered laterally but overhangs the front of the frame by only 1″. The surface of the lower shelf is 10 1/2″ above the floor. Both are 3/4″ exterior-grade SYP 5-ply attached with strong steel L-brackets. The top is also screwed to the upper side rails from underneath.

An important feature is the 3/32″ polycarbonate sheet over the top and lower shelf to protect them from water. (I use waterstones, but the surfaces should be likewise protected from oil if you use oilstones.) Acrylic can also be used. The top sheet is secured with small stainless steel flat-head wood screws, carefully countersunk, which is nicer than the round head aluminum screws and tiny rubber washers that I used for the lower shelf.

The upper (inner) shelf, 3/8″ 3-ply, is spaced 5 1/8″ above the lower shelf and is 10″ deep. It is screwed to simple side supports that are screwed all the way through into the legs.

The top surface of this sharpening bench is 25 1/4″ above the floor. This is what works for me (at 5’9″) with the box-basin-bridge apparatus (which I will detail later) for hand sharpening, and the Tormek machine. I can work comfortably, bringing body weight to bear as needed.

The height is a critical issue, but everyone is different and so you must decide what will work for you. I suggest, as the most reliable approach, going through the same sort of process that I have recommended for deciding on a workbench height. Yet, if after building and then using your bench for a while, you find that you misjudged, don’t worry, you can always shorten the legs or even splice on some extra.

The drawer is 15 3/8″ deep overall with a 12 1/2″ wide x 4 1/8″ high front. The construction is simple rabbet and groove using exterior plywood, glued and screwed. The front and back are 3/4″ thick, the sides 1/2″, and the bottom 3/8″. Inside depth is 3 3/16″. The drawer is side-hung, using 1/2″ x 1/2″ cherry rails that fit in matching grooves in the 1 3/8″-square oak supports, which are screwed to the top from underneath.

Go heavy duty on everything with this. This sharpening bench is the type of tough, practical, non-fussy shop fixture that I like. I think it also has its own rugged good looks that fit in well in a woodshop.

Next: the box, basin, and stone-holding bridge apparatus.

Author:
• Wednesday, March 13th, 2013

IMG_0971_edited-2

Sharpening is such an important part of woodworking that it deserves its own place in the shop. A dedicated bench is made with features conducive to efficient sharpening, such as an ideal height, just as your workbench is designed for efficient woodworking. Furthermore, bringing sharpening gear onto the main workbench interrupts the workflow of a project, and can create considerable mess where you do not want it.

In this series of posts, I will discuss my sharpening bench and setup, the product of many years of evolution, which I have been using in essentially its present state for about ten years. It works well for me but I hasten to add that there are lots of good ways to do these things. This series may be the source of only a single handy tip, or you may want to duplicate the entire setup.

Let’s start with the bench itself. The key features are:

  • It’s compact, with a projected footprint of only 4.5 square feet.
  • Very rigid and strong, it does not move or wobble when sharpening.
  • There is storage for all sharpening paraphernalia.
  • It is inexpensive and easy to build.
  • Most important, it is suited to the task.

The photo above shows the sharpening bench in its inactive state, nice and neat, though minus the Tormek’s cover. The edge of the tabletop is only 8 inches to the left of the woodworking bench.

Good lighting, an absolute must, is supplied by a fixture above the bench on the wall (just out of range of the photo), and by moving an articulated-arm lamp (with a large magnifying lens) into the workbench’s left-side shop-made bracket (visible near the corner of the woodworking bench).

Water is imported from a nearby bathroom using the pump sprayer bottle, seen on the right. The rear wall is protected from overspray and splashes by a polycarbonate (or acrylic) plate. Paper towels are close by on a dispenser on the right side of the bench, and there is a hook for rags on the left. A scraper/small saw vise is barely visible hung on the left side, in the back.

The yellow paper with a plastic report cover, tacked to the wall on the left, is my sharpening “recipe” sheet.

Thus, when standing in front of this bench, everything is at hand. True, I’d still rather be working wood, but I am ready to sharpen!

In the next post, I’ll discuss the details of the design and construction of the main unit. Later, I’ll cover the box-basin, and the various functionalities of the setup.