For an enjoyable woodworking experience visit the Lie-Nielsen Hand Tool Event, December 5&6, 2008 (Friday and Saturday) at the Sturbridge Host Hotel, Sturbridge, Massachusetts. Chris Becksvoort, Bob Van Dyke, and I will be among the demonstrators showing techniques and talking tools and woodworking. This is a fun and informative opportunity to try out top quality hand tools and pick up skills and tips at the many workstations. This is a relaxed, hands-on event. Admission is free.
Archive for ◊ October, 2008 ◊
Sharpening is, of course, a huge topic in woodworking where it should never be forgotten that there are many effective ways to achieve excellent results. As such, I will not stir up the debate as to whether one should use manufactured honing guides but simply state that, with rare exceptions, I do not.
For preparing a new edge, after flattening the back of a chisel or plane blade, I grind a primary bevel on the Tormek machine using one of Tormek’s handy jigs. I use the resultant concave bevel to feel the contact angle on the stone’s surface as I clean up, but still preserve, the grind. I use Shapton stones.
I refer you to Joel Moskowitz’ excellent discussion of sharpening, which, as you would expect from Joel, includes some interesting historical information. I almost always use a small secondary bevel on my tools. Joel discusses microbevels and here is where I will add my approach.
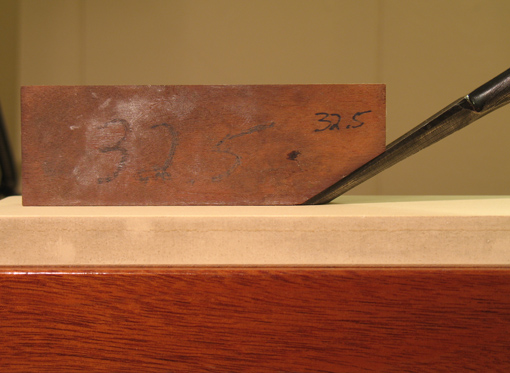
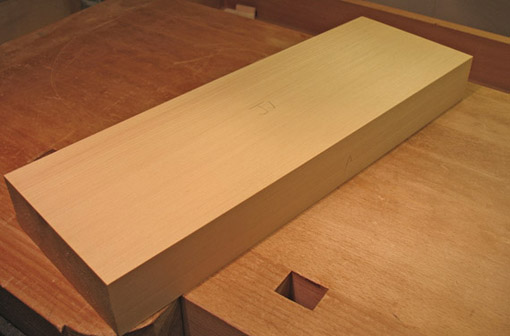
Let’s say I grind a chisel at 27 degrees, and use a 32 degree secondary bevel. The chisel is held freehand, yet consistently, against the stone at the secondary angle. I “set” this angle with a simple block of wood as shown above. I hold the block on the stone, slide in the chisel, lock one hand, remove the block, bring the other hand on the tool, and hone. I can precisely return to this angle as needed after flipping the tool and backing off on a finishing stone. Usually my hands remember the angle after a flip or two, but I can always return to the block to remind my hands.
When I resharpen the tool I hone just the small secondary bevel, sometimes first on a 5000 before going to my finest stone. Here’s the important point: I can reproduce the secondary bevel angle very easily with the block guide, a day later or a month later. I’m honing a very small area of metal that meets the stone precisely. Depending on the use of the tool, the secondary bevel lasts for several resharpenings before I regrind on the Tormek. I am careful to rinse the blocks to avoid contaminating my finest stones.
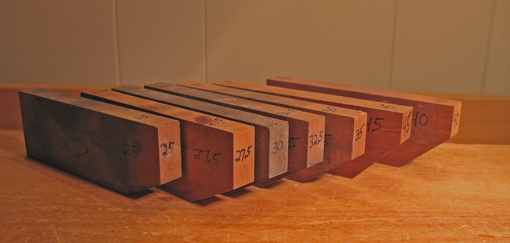
The blocks, about 4 ½” x 1 ½” x ½” are easy to make. They are also useful for creating a primary bevel using coarse stones for certain tools that I don’t grind on the Tormek. Most of these blocks have seen many years of use. Very simple, very effective – that’s the way I like things.
You’ve got some apple wood and want to know its shrinkage properties before working it into your project. Where do you go? FPL, of course. Here’s some more help in searching through this resource.
Forest Products Laboratory’s very helpful Tech Sheets, available for many wood species, are most easily accessed here which brings you to an index with categories of species. I am not able to find a direct link to this index on the FPL homepage. I emailed them suggesting they include this convenience.
Another route is to type the common name of the wood, e.g. “cherry”, in the Search box in the upper left corner of the homepage. For most species, you will find at least one item in the results with “Tech Sheet” which will lead you to either the sheet itself or an index from which you can go to the desired species.
Wood. It’s good.
I injured myself earlier this year doing a procedure in the shop that I knew full well was not safe. A story familiar to woodworkers, I thought it would be OK, just this once. I fed a short piece into the thickness planer which ejected it faster than an baseball umpire tossing a manager who kicks him in the shin. A corner of the wood hit the tip of my thumb creating a handsome gash. Funny thing, I saw the blood drops on the floor before I felt the pain. Not OK. I was lucky, however, especially considering that my thumb at the moment of impact happened to be at the midline of my body, directly in front of, ahem, valuable anatomical parts.
After a fun-filled trip to the emergency room for some embroidery on my wound, I did some stern attitude adjustment. I posted this sign at the outlets where I plug in all my machines. It tells me what I must first ask myself when doing procedures in the shop. I taped the hospital ID bracelet to the sign (for the photo, the blue tape covers my medical record number) to remind myself that bad stuff happens and it could have been a lot worse.
Machines are dumb, it’s the human who is supposed to be smart, I got it. Let this be my first and only significant woodworking injury. Perhaps post a sign in your shop, without the bracelet – and without the injury. Happy woodworking.
(WARNING: the following post contains graphic rationalizations for the purchase of new woodworking tools and should not be read by woodworkers carrying balances on their credit cards.)
I enjoy tools so much that sometimes I think I make things just so I can use good tools, but no, it’s really not that way. The desire to create artful things from wood is my primary driver. Still I admit, like most woodworkers, I have some tool “problems”, including an insatiable want for new and better tools, refining the ones I have, and conjuring implements that don’t yet exist. To keep all this from getting out of hand, I have to impose upon myself some rational discipline.
I govern purchasing or building new tools with one or more of several criteria. First and foremost, will the tool reasonably allow me to make something I eagerly want to make? For example, if I really want to make a walnut table with a nice handplaned finish, I need a good smoothing plane. Occasionally, the tool itself is the generator of a project. Probably no one would have thought of making bandsawn boxes without the bandsaw’s capabilities to suggest such a construction. Usually, however, the intended design drives the tooling.
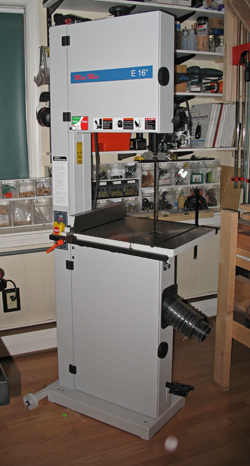
Second, will a tool substantially change the way I work and for the better? Having a shooting board gives me the means to fit drawers with an incremental methodology that would be difficult, if not impossible, to execute any other way. I’m a better woodworker for it. Having a nice Italian bandsaw with 12″ under the blade isn’t the only way to resaw wood, but it is so vastly more efficient than resawing by hand that it makes a qualitative difference in how I incorporate resawn wood into my projects.
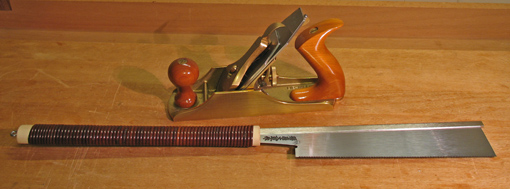
Then there’s the issue of quality. When I upgraded to a better quality Japanese dovetail saw my cuts became cleaner and more precise. Better tool, better work, but where does it end? I think the plotted curve of woodwork quality against tool cost approaches level as one considers some very high end tools. Choose your point on the curve according to your own desires but also at your own peril.
Finally, will a tool allow me to work faster? This is the danger zone and we’re generally talking power tools here. Is it really faster? I mean after you’ve read the instruction manual, tuned up all the machine’s idiosyncrasies, and set it up? Maybe. What portion of the total project time are you saving on that one operation? Is it more pleasant? Not likely. How applicable is the machine to different tasks? If I’ve got two angled tenons to cut I’m pretty sure I can do it faster and more peacefully by hand than by machine. Think through the whole project, not just the isolated processes, and see what time is saved and at what cost.
One more thing. I detest owning any tool that I never use. I guess it’s something like having a benched player on a professional sports team who just takes up salary cap space.
Good luck.
The workbench gets my vote for the most important tool in the shop. Beyond its obvious function of holding the workpiece, it establishes a reference surface to work against and really forms the basis of a woodworker’s approach to hand tool woodworking. For this reason, a craftsmen personalizes his bench even after taking great care in selecting its style and features. This refinement is bound to continue as a worker’s repertoire evolves.
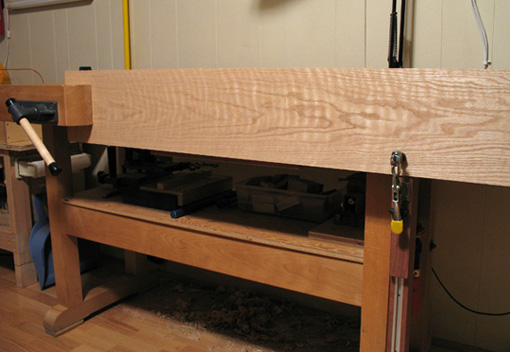
The beautiful board of curly red oak, above, is held both in the front vise and, with a supplementary device, at its right end. This system works for me far better than the traditional “deadman” supports because the right side of the board is not only supported from below but also secured laterally. This is done with a vertical support piece, held in the tail vise, inlaid with T-track which holds a sliding toggle clamp. I’ve detailed this workbench upgrade and many others in an article in the November 2007 issue of Popular Woodworking magazine. (Back issues are available in sets on CD or as individual downloads.) Each of the workbench add-ons in the article has stood the tests of time and practicality in my shop. Click here to view a short video demonstration of a few of the upgrades. I hope other woodworkers will benefit from them.
There are lots of ways to do this, written on seemingly everywhere. Here’s mine.
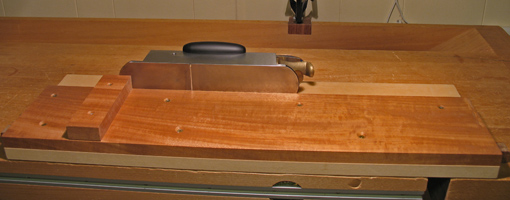
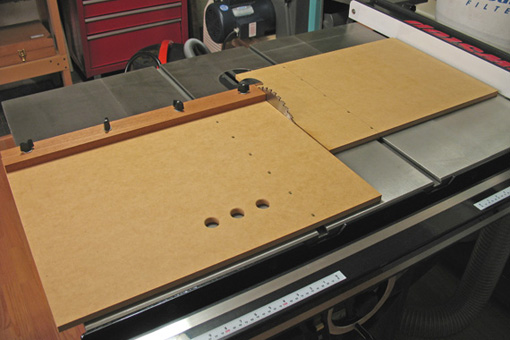
The jig is constructed from ½” MDF slabs with UHMW plastic runners snugly fitted in the miter slots and screwed from the top face. The left side carries the workpiece while the stationary right side prevents the cutoff from dropping. The fence is made from stable quartersawn mahogany with a handplaned straight working edge. It is secured with four flathead bolts inserted from the bottom, hand tightened with knob nuts. This allows the fence to be squared leisurely, after the initial cut of the MDF on its right side. I can get it very precisely square because it allows for retesting and readjusting. The three finger holes assist in retracting and carrying the jig.
Simple, easy, and works beautifully. That’s the way I like woodworking jigs to be.
It seems I’m always a bit flummoxed at the adjustments in technique required when working an unfamiliar species of wood. I suppose I should be used to it by now, woodworking is so tactile and good results very much depend on the nuances of the tool meeting the wood surface and realizing how a particular wood is responding. However, sound skills carry through varying circumstances.
That aside, Port Orford cedar is fun to work and I recommend it. I obtained thick, clear, straight-grained, old growth stock, which I resawed, from Northwest Timber , Oregon, who expertly process salvaged logs. The quartersawn surface has a meditative, simple beauty. The shop is filled with its strong, spicy fragrance.
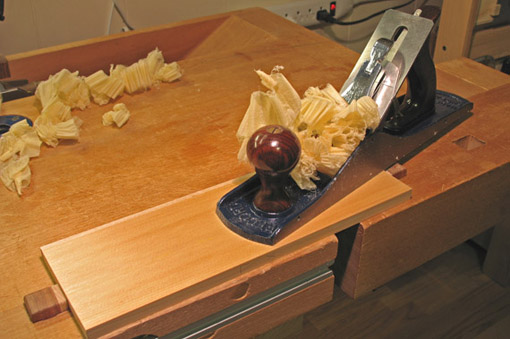
Port Orford cedar is a light wood which responds extremely well to a sharp hand plane. Its tangential and radial shrinkage figures are a relatively stable 6.9 and 4.6, respectively, with a low 1.5 T/R. That it is a soft wood does not imply it is entirely easy to work with, since it shows mistakes and crushes easily. I find low density woods (not necessarily softwood species) in some ways more problematic than friendly walnut or cherry. However, adapt your techniques and all should go well.
Forest Products Laboratory has good information on Port Orford Cedar.

