Tag-Archive for ◊ finishes ◊

Author:
• Monday, January 23rd, 2023
Renaissance wax

Adding paste wax over a shellac finish as described in Part 1 of this series makes for my favorite finish of all – when used in the right circumstances, of course. Wax also is a nice addition after satin wipe-on poly or satin water based finishes. 

Wax produces a beautiful luster and smooth feel. It does not, however, add significant protection for the wood. I would not use it on a tabletop. I actually wonder why I do not use it more often just on the outside of pieces such as a gently used cabinet or box. I guess I’m about satisfied with the appearance after, say, a gel varnish, and at that point in building maybe I’m getting lazy. 

I have always used Renaissance microcrystalline wax based on Krenov’s recommendation in The Fine Art of Cabinetmaking and I was reassured to read that it was Mark Schofield’s favorite of the 21 brands he reviewed in Fine Woodworking magazine #255 (July/August 2016, pp. 54-57). He found it easiest to apply, buffing was no problem, and it gave a medium sheen.

I apply it sparingly with a soft cloth and spread it in any convenient motion. Renaissance dries quickly so there is very little waiting to then buff off all the excess with a clean cotton cloth and produce that nice luster. Just like using Turtle Wax on dad’s car long ago, it is easy to apply too much wax or let it dry too long and thus create unnecessary work for yourself. 

Here I will mention a few other products that have worked well for me though I cannot offer comparative assessments. For mildly exposed outdoor work where UV protection is needed, I have had good luck so far with Epifanes Rapidclear varnish. It applies and flows out well.   

Epifanes

Once in a long while, I want black wood, just plain black, as a contrast trim element. General Finishes oil-based black Gel Stain works and beats dealing with an expensive exotic like Gaboon ebony. As a pigment stain, it is more reliable in the long run than a dye stain. 

black gel stain

For a low-key finish on food utensils, Howard’s Butcher Block Conditioner has done the job quick and easy. 

This is the last installment of this seven part series. By the way, now you can surmise which finishes I do not like for my work, including almost all stains and thick film finishes including French polish. 

The other aspect of finishing I do not like is the deliberate confusion and hype put forth by manufacturers, even some of those that make excellent products. Woodworking is rife with misleading nonsense from too many manufacturers of finishes and tools, which really exploits the long history and rich traditions of the craft. 

My goal here is to provide you with directly usable, honest, accurate, and clear information “from the sawdust and shavings of my shop.” I hope my efforts help your efforts in meaningful creativity.

Category: Techniques  | Tags:  | Comments off
Author:
• Monday, January 23rd, 2023
Port Orford cedar

A finish that gets little attention in books and articles about finishing is no finish. Consider it.

Here are two examples. The panel in the frame-and-panel back of the cabinet shown above is quartersawn Port Orford cedar. The surface is exquisitely smooth direct from the hand plane with barely a touch of superfine sanding. I think it is a terrific look but just as nice is the spicy fragrance that greets you when the cabinet is opened. Any finish would spoil the fine appearance and would block the fragrance. The rest of the piece is finished. 

Two Japanese-style toolboxes that I made about ten years ago primarily from quartersawn Douglas fir are doing just fine without any finish. Of course they get dinged from equipment and tools but I think they wear the wounds better without finish. I do not think any finish would enhance their appearance, which is meant to be tough but peaceful, or their function, which meets the same criteria.

I also have a few items in poplar around the house that are not refined work so I simply did not bother to finish them. Yet they maintain a surprisingly nice appearance as the poplar has turned a soft tan, and they have held up well. 

We finish wood to enhance its appearance and protect it. I certainly would not want to leave curly maple unfinished and miss out on popping the curly figure, nor would I leave a table top vulnerable to taking up spilled drinks or sauces. 

So, for the great majority of woodwork, yes, we want to apply a nice finish. But not always. The point is to consider why you are finishing the object. Are you actually enhancing its appearance? Does it actually need protection? Is there some aspect of the wood from which a finish will detract? How can you best surface the wood if it is to have no finish?

You may decide in a few cases that no finish is the best option for all or part of the piece.

Next and last in this series: a few finishes I use only occasionally and some things I just do not like.

Category: Techniques  | Tags:  | 2 Comments
Author:
• Tuesday, December 27th, 2022
GF Water Base satin

When I am considering no finish at all but just want to add some sheen, silkiness, and decent protection, I use a clear water based finish that produces no (or trace) color change and stays that way. The best example is pearwood to preserve its delicate beauty. Oiling pearwood should be considered a felony crime. Port Orford cedar, with its Zen-like beauty, is another example, though I usually use another finish for it, which I will discuss later in this series. 

General Finishes Water Based High Performance – Satin, a water based polyurethane-acrylic blend, is my go-to player for this. It is very transparent with only a trace of yellow color. It flows out and levels exceptionally well.

The method: I sand a tight diffuse porous wood like pear to 400 grit, which, when practical, may be nothing more than a light pass over a finish hand planed surface. I apply the finish with my Gramercy Tools Waterborne Finishes Brush. A Taklon brush is another good option but the GF flows out so well that even a foam brush works well enough. 

I lightly very fine sand when the first coat is dry enough to produce dry powder – about two hours if humidity is medium/low. Two fairly light coats are enough for the look I want. If I lay down the second coat carefully, it will need little rubbing out with a 2500 Mirlon pad and/or brown paper to end up with a silky surface. 

Other brand options that I have tried include: Hydrocote Resisthane Plus Pre-Catalyzed Lacquer, Clear Satin. This is an excellent product, nice and clear. It seems to brush close to as well as the GF, and is less expensive but not available local to me. I can pick up GF at my local Woodcraft but it is rather expensive. Minwax Polycrylic, also available locally, is also very clear but did not brush out as well for me. [Caution: I do not know if manufacturers’ formulations have changed since I last tried them.]

In summary, this is the finish I use when I want hardly any finish.

Next: a finish to consider that is hardly ever discussed in finishing books and articles

Category: Techniques  | Tags:  | 8 Comments
Author:
• Monday, December 26th, 2022
Sam Maloof poly-oil

You can go a little crazy trying to sort out “oil” finishes, mostly because there is rampant misleading and uninformative labeling among manufacturers who often try to create a mystique surrounding their products. 

There are a few key points to help keep things straight:

1. Varnish, including wiping varnish such as Waterlox Original, should not be termed an “oil” finish, even though oil (along with a resin) is used in its manufacture. Varnish is a film finish; it cures hard and builds into film thicknesses on the wood.

2. Actual oil finishes, such as linseed oil and tung oil, do not cure hard and do not build appreciably as a film thickness. The exception is polymerized oil.

3. Oil-varnish mixes are just that. The presence of free oil prevents substantial build into a film thickness. These products are notoriously mislabeled as “oil,” such as Watco Danish Oil. 

Again, I refer you to Bob Flexner’s wonderfully clear instructive writings, especially his book Understanding Wood Finishing

Here I am discussing oil-varnish mix. Advantages of this finish include: easy application, nearly mistake-proof, brings out the figure in wood, gives a low key “natural” look, and does not obstruct visual and tactile contact with the wood. One particular place I do not use oil-varnish is inside cabinets or boxes because the smell can accumulate and linger.

My favorite oil-varnish for more than 30 years has been has been Sam Maloof Poly-Oil from Rockler. What is in it? The label says linseed oil, tung oil, polyurethane, and solvents. In what proportions? Who knows? 

What I do know is that it has a nice, thick body in application, it brings out wood figure beautifully without overdoing it, and four coats produce a nice satin sheen after buffing out with a rag. If you want a bit more glow, you can finish up with a paste wax or an oil-wax blend.  

The method: For an oil-varnish finish, it pays to sand the wood out to 320 or 400 grit, especially for diffuse porous species like cherry. I slop the stuff on with a rag and wipe off the excess along the grain within a few minutes. Later, I keep checking for “bleed back” of oil from the wood pores of ring-porous species like oak or walnut. I wipe away any little blobs before they start to firm up. This is usually only an issue on the first coat. I keep checking until there are no more blobs because they are a nuisance to sand away if they firm up.

It is difficult to tell by sight or feel when a coat is cured and ready for another coat, so I gauge by smell – once it is nearly gone with a quick sniff test, then it is time for the next coat. 

In my experience of trying several oil-varnish finishes, I am not convinced it necessarily makes much difference which oil-varnish mix you use. Watco, for example, is cheaper and I have gotten good results with it. However, I did not like Tried and True because it cured so slowly, at least in its older renditions. I did not find Bush Oil to be anything special. Just my opinions. Still my favorite is Sam’s stuff – maybe because Sam himself was so awesome.

A couple more points regarding “bringing out the grain.” This can sometimes backfire such as on some cherry boards where an oil-varnish mix can produce an unpleasant blotchy look. On the other hand, a single coat of oil-varnish might pleasingly emphasize figure and then you can follow up with a few coats of wiping varnish. Note that the oil-varnish must be cured (the smell is gone). Of course, the great rule of finishing applies – test first. 

Next: water-based finish

Category: Techniques  | Tags:  | 2 Comments
Author:
• Sunday, December 25th, 2022
Minwax Poly satin

For tabletops that are expected to receive more punishment, there are two options that I employ as I briefly mentioned in the previous post. When I want the look of a non-film, “close to the wood” finish, I go with several coats of oil-varnish mix. This strategy sacrifices protection for easy reparability. Sometimes though, I want a more protective film finish, yet I still want to avoid an overbuilt, “plastic” look.

For this latter option I use a strategy that I first learned from an article in Fine Woodworking magazine #81 (March/April 1990), page 75, by Greg Johnson. He used one or two coats of brush-on polyurethane followed by two coats of wipe-on gel varnish. The idea is to get the film volume of brush-on poly with the surface finishing ease of the gel.

Here is my approach, which is essentially the same as that in the article but with slight differences.   

I use two coats of brush-on Miniwax Fast Dry Polyurethane, Clear Satin. I use a decent bristle brush but not my thoroughbred ox-hair brush for this because it is unnecessary, and it is difficult if not impossible to fully purge the varnish from it. (See this excellent discourse on brush selection by Joel Moskowitz.)

The method: After finish planing/sanding, I raise the grain by wetting the wood with a damp cloth, let it dry, and then lightly sand with 320 or 400 grit. I usually apply the first coat of poly without thinning it, knowing full well that there inevitably will be some streaks, bubbles, and dust no matter how careful I am. In fact, I don’t bother trying to be too careful. After it dries, I sand with 220 grit, cutting pretty aggressively to remove the defects. By the way, “dry” means that sanding produces a non-sticky dry powder. Then I apply a second coat of poly, trying to be more careful and nicely tipping off the finish. After the second coat dries, I sand to remove defects, this time less aggressively.

An alternative method is to apply the first coat thinned with mineral spirits in an attempt to minimize defects and thus minimize sanding. I have had less luck with this approach, so I use full-strength coats and concentrate mainly on getting a decent film on the wood. 

Next, I apply two coats of General Finishes Oil Based Gel Topcoat – Satin. Between coats, I lightly sand as needed with 320 grit. After the second coat of gel, the defects have been scaled down enough to make the final surface smooth and with minimal or no defects. I complete the sequence with a rubdown with brown bag paper.

GF Gel Satin

This strategy supplies good protection, a pleasant final film that does not look too thick, and circumvents most of the problems of using only brush-on polyurethane varnish. It will not protect as well as heavy duty two-part catalyzed finishes but is easier to deal with for small-scale woodworkers like me, easier to repair, and I think, looks better.

It is a nifty finishing strategy to have in your repertoire.

Next: oil-varnish mix

Category: Techniques  | Tags:  | One Comment
Author:
• Wednesday, December 21st, 2022
GF Gel Satin

Wiping varnish, a term coined by the Moses of finishing knowledge, Bob Flexner, is simply varnish thinned with mineral spirits to make it easy to wipe, rather than brush, onto the wood. The coats are therefore necessarily thin compared to brush-on varnish. 

So, the great advantage of easily applying virtually problem-free coats carries the possible disadvantage that the coats are less protective. Most of my work, such as a wall cabinet or the lower part of an occasional table, does not need lots of protection. For those situations where more protection is needed, such as a tabletop, wiping varnish is still wonderfully useful in conjunction with brush-on varnish. I will explain that technique in a future post in this series.   

Here are my three favorite wiping varnishes in order of how often I use them:

1. General Finishes Oil Based Gel Topcoat – Satin. Gel varnish is simply wiping varnish with a chemical thickening agent added. This stuff is about as easy as a film finish application can get. 

I use lint-free rags and nitrile gloves. Wipe it on, spread it around, and very soon wipe off the excess along the grain. That’s really about all there is to it. It imparts only a light amber tone.

Some planning is required to work on fairly small areas at a time because this dries quickly. I use a succession of rags, applying with a loaded rag and finishing off with a relatively clean rag. I do a bit of light fine sanding after the first coat and thereafter little to none. Three coats are usually enough, four at the most. I usually buff the final dried coat with brown bag paper

Waterlox Original

2. Waterlox Original Sealer/Finish – Medium Sheen. This is a high quality and reliable, though rather expensive, product. Depending on the contours of a piece, this liquid product can actually be easier to apply than the gel because its easier to wipe off the excess out of corners. 

Note that this is a dark amber varnish, almost like a light stain, so I use it with that in mind. I do not like the cans that it comes in, with the little opening at the top, so I transfer it to a clean regular finish can and tape on the orginal label.

3. Minwax Wipe-On Poly – Clear Satin or very occasionally, Clear Gloss. This is a quality product, inexpensive and widely available. I use it when I want a liquid but without the dark amber of the Waterlox. It is particularly handy when I do not want to mess with the gel on interior cabinet corners and I do not want the dark amber.

[Why no photo? Because I can find this stuff anywhere, anytime, so I don’t usually stock it in the shop.]

I do not like thick film finishes. I also think that protection is an overrated concern with the possible exception of tabletops. I have built household furniture items finished with only gel varnish that have gracefully withstood 20-30 years of regular use. Even for some table tops such as an occasional table or coffee table, trying to “protect” it with a thick film finish can create more problems as the finish inevitably becomes more and more scratched and the great enemy, water, gets in and it all looks bad. Sometimes, a non-building finish, like oil-varnish ends up looking better and is much easier to repair. 

Next in this (not-necessarily-contiguous) series: Brush-on varnish plus wiping varnish when you feel the need to protect.

Category: Techniques  | Tags:  | Comments off
Author:
• Wednesday, November 30th, 2022

shellac

This series will explain the wood finishes that I use. I will tell you the specific finish formula, how I apply it, and explain where and why it works. 

The finishing systems that I present here are anecdotal and based on my preferences and experience. I can tell you that through many years and many trials, I know these work for me and I think they will work for you as long as you use them in appropriate situations.

For expert comprehensive discussions of finishes, there is no better source than Bob Flexner’s book Understanding Wood Finishing

We’ll start with:

SHELLAC

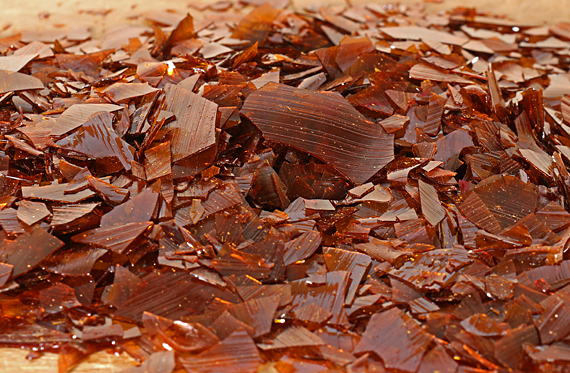
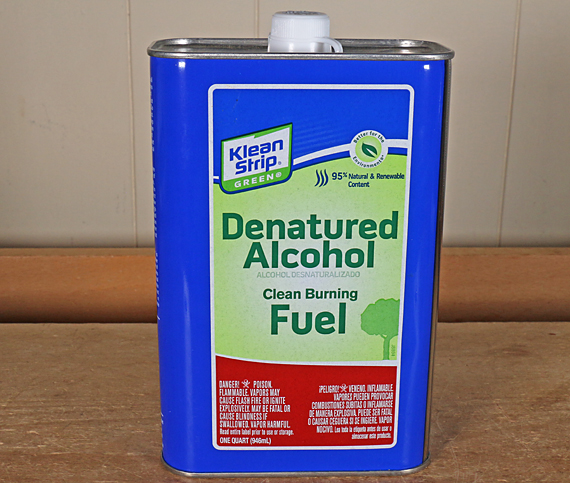
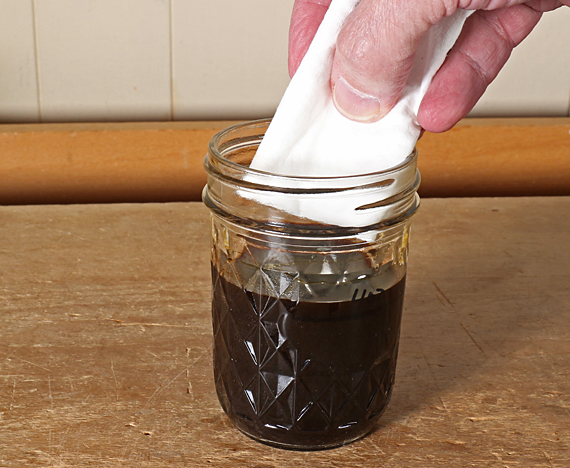
I turn dewaxed flakes into powder in a spice grinder and mix the powder into Klean Strip Green denatured alcohol. I use glass canning jars with two-piece lids to minimize the problem of ordinary lids sticking (you’ll see). Swirl the jar repeatedly over about 20 minutes or so to get all of the shellac to dissolve. Some will latter gum up on the bottom but that is no problem because it is easy redissolved. 

This is nowhere near difficult and has important advantages over premixed shellac. First, you can choose the shade that you like – super blonde, blonde, orange, ruby, garnet – to achieve the look you want. Of course, experiment on scrap wood. 

I also know that it will be fresh and thus dry properly because I bought the flakes from a reliable dealer and I know when I mixed it. I store the flakes in the refrigerator. I mix what I need for a project. Mixed dewaxed shellac will probably last at least six months but if you have any doubts, smear some on a smooth surface. It should dry hard quickly and not remain at all tacky.

There are several good shellac dealers. I have had good luck ordering from Shellac Shack

denatured alchohol

Why Klean Strip Green? The MSDS says it is 80-90% ethanol, which is very good. It evaporates quickly. In my opinion, there is no need to bother with exotic alcohol concoctions or Everclear from the liquor store. 

[Addendum: A reader has pointed out that the Klean Strip Green denatured alcohol product is no longer available. However, there are good alternatives available. Please see the Comments section below.]

I use a one-pound cut. [In shellac parlance, a one-pound cut is defined as one pound of flakes in one gallon of alcohol. This equals one ounce of flakes in 8 fluid ounces of alcohol.] That may sound thin but I usually use four coats. Each coat is very fast and easy to apply. I much prefer the reliable incremental approach of using thin, problem-free coats. Also, I do not like thick finishes in general. However, you can build to whatever thickness you want. 

As with everything in finishing, always test on scrap, including the number of coats. The color and look will change as you progress through coats. 

I prepare the wood surfaces by handplaning and/or sanding. For oak, 220 grit is plenty fine to stop sanding. For a finer-pored wood like maple or cherry, 320 is usually enough. Test and observe. Do the least sanding work possible; it’s boring.  

To apply the shellac, I use what I will call a cloth “pad-brush.” I find brushing surfaces with an expensive bristle brush no faster or better. In fact, after repeated experimenting, I get more reliable results with my padding method. For detail work such as moldings, brushing is better. 

I use lint-free cloth such as PFC Paint and Cleaning rags from the home center store. I fold a 6-8″ square of cloth three times to end up with an approximately 1 1/2-2″ x 3-4″ rectangle. The short end with the folds (i.e. not loose ends) acts like a combination pad-brush. I dip that end into the jar and pick up enough shellac to be just short of drippy. 

shellac pad-brush

The key now is to move fast! Mimic smooth, fast airplane landings and takeoffs with the cloth on the wood. Keep a “wet edge” and do not allow the shellac to flow over edges and ends. When practical, say for a 15-18″ long panel, apply shellac to the full length and then go to the next row. It is easier to neatly blend application strokes laterally than end-to-end. 

Do not be intimidated by what you may have read and do not make a big deal about this. Your job is to get the shellac on the wood thinly and smoothly without drips, sags, or ripples. Remember, this stuff dries extremely fast. Remember too, you can correct errors with sanding or by partially redissolving uneven runs or build-ups with an alcohol soaked pad-brush. 

After the first coat, I sand with usually 220 grit to remove grain raising, dust, and application imperfections. This goes better with just hand holding the sandpaper or using a very soft block (even cork is too firm). Use a light touch. 

I can usually get the second coat on by the time I have finished all the parts with the first coat, such as by 30-60 minutes or so. After the second coat, I lightly sand with finer paper, say 320 or 400. After the third coat, I very lightly touch up sand with 400. Do not overdo these sandings; some may not even be necessary. Shellac is a fast finish; not like the days of waiting with varnishes or oil-varnishes.

Depending on the sheen you want, you can sand after the final coat. It will probably already be smooth if you have done a good job but do not worry about slight remaining roughness, just remove it. I do not like high sheen finishes but I do like smooth finishes. I lightly use 2000 grit silicon carbide paper after the final coat. Sometimes a 2500 Mirlon pad gives me the look I want. 

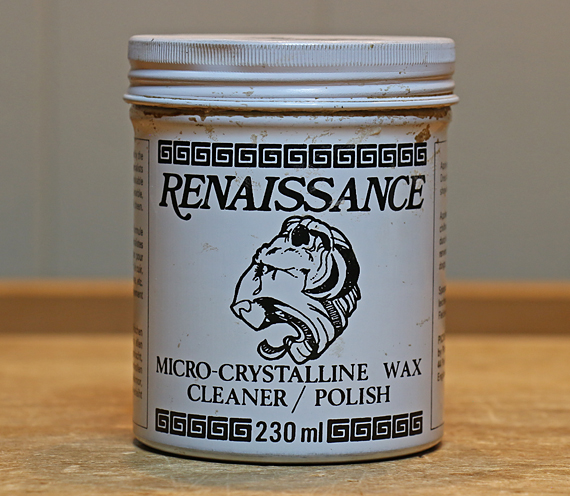
Usually that is all but sometimes, such as for mahogany or sapele, a buffed coat of wax gives a nice look. I still like Renaissance microcrystalline wax.

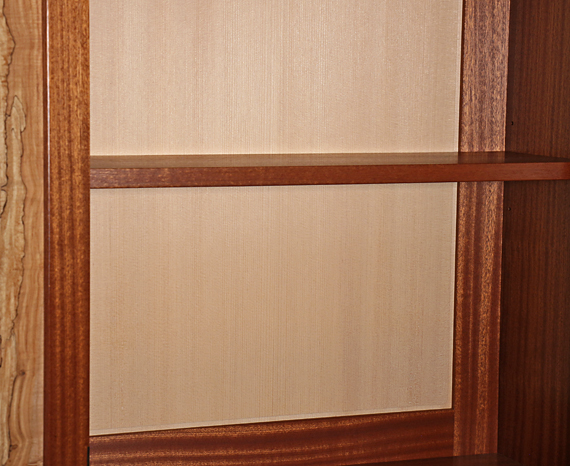
For some reason, there is commonly an intimidation factor with applying shellac. Forget that. It is not difficult. Give it a try. Applying shellac gives a wonderful sense of immediacy, and you can adjust the look to what you want within a wide range. Also, there is a certain authentic clarity that a shellac finish produces. 

Category: Techniques  | Tags:  | 6 Comments