The process I used to construct these markers ensured their accuracy.
I used bubinga but many dense, fine-grained hardwoods such as hard maple would do fine. Start with a 1 3/8″-thick, flat board without internal stresses, at least 12″ long and 5″ wide for safety, with a straight, squared long grain edge.
Using appropriate safety precautions, make a 1″ x 1″ rabbet on the long grain edge. I used many shallow passes with a 1″ diameter straight bit on the router table, finishing with a light pass over the entirety of the inside surface.
On the table saw, rip away a 1 1/2″ strip containing the rabbet.
For safety and accuracy, short pieces – the markers themselves – will be cut on the table saw from this long work piece.
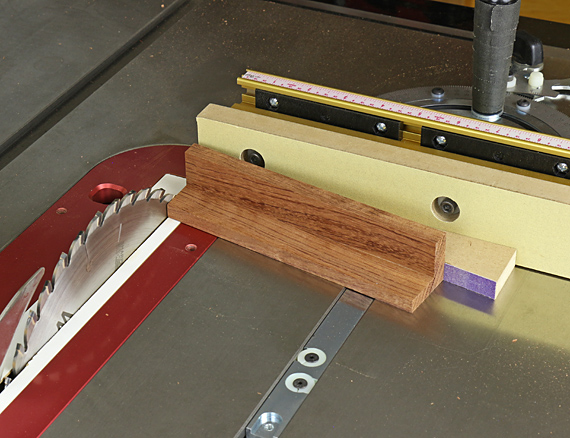
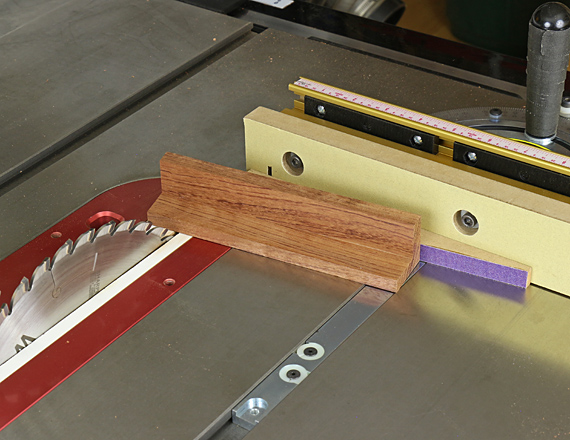
Two principles guide the process. We want to work with the rabbet always facing the blade to eliminate even the minor tear out that can occur at the trailing edge of a cross cut. This keeps the inside edges of the marker crisp. This also keeps the work piece stable against the fence.
We also do not want to reset the miter gauge in case there is even the slightest inconsistency from the right side to the left side settings.
So, prepare by making a wedge. Use the miter gauge to cross cut a squared edge on a piece of scrap or MDF. Then set the miter gauge at the desired dovetail angle and cut off a narrow wedge. Glue sandpaper to the angled edge, and to the straight edge if you don’t have sandpaper on your miter gauge fence.
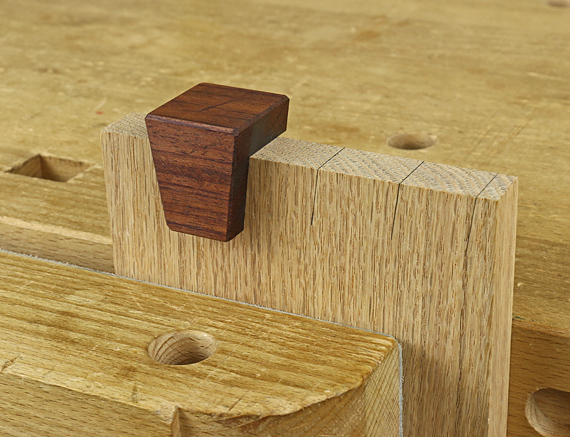
Use the wedge against the miter gauge fence, set at 90°, to cross cut the end of the work piece held against the wedge. This creates one side of the marker (as in the photo at top). Then, flip the wedge end for end, and cross cut to produce the finished marker about 1 1/4″ wide (as below).
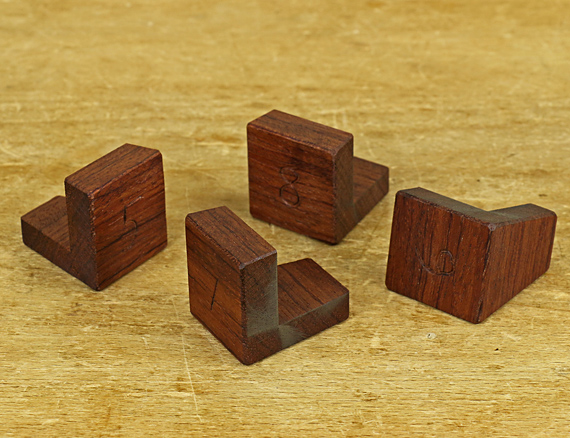
Check the marker with a square and bevel gauge. Both sides should be the same. Chamfer the non-working edges on the outside. Label it with the dovetail slope – I carved the numbers. The oil (non-film) finish has worked well over the years.
For reference: 5:1 = 11.3° 6:1 = 9.5° 7:1 = 8.1° 8:1 = 7.1°