Tag-Archive for ◊ curves ◊

Author:
• Sunday, July 14th, 2013

IMG_0528_edited-2

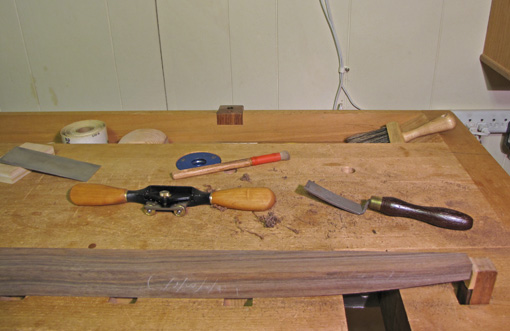
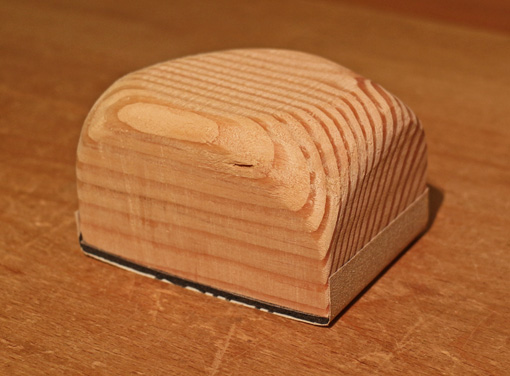
Sanding blocks with a curved face can be very effective for smoothing and, with coarse grits in the right circumstances, even shaping curved surfaces in furniture making. I use spokeshaves, specialty planes, rasps, and scrapers to shape and smooth curved surfaces, but not to the exclusion of the humble sanding block.

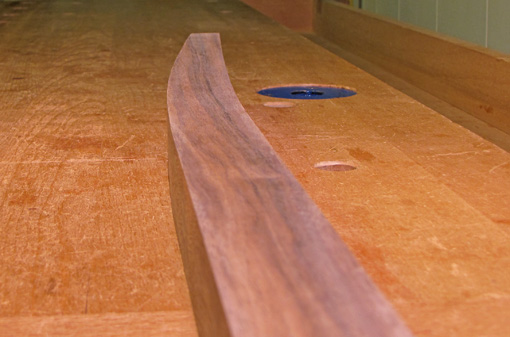
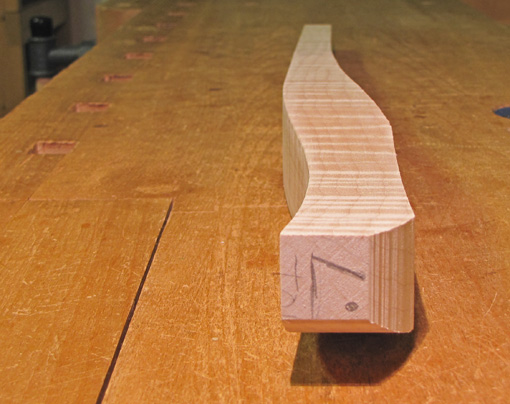
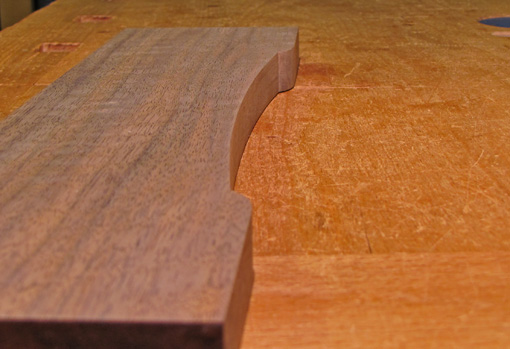
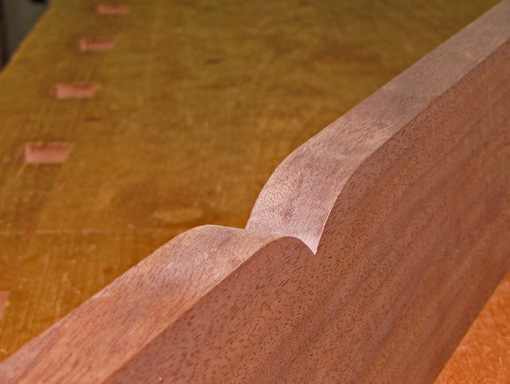
They can be made quickly and easily with the bandsaw or bowsaw. For working concave surfaces, the curve of the block should be slightly steeper than the steepest part of the curve of the work piece. For convex work, a flat block is adequate for working shallow curves. For working steeper convex curves, the block’s curve should be slightly shallower than that of the work.

IMG_0525_edited-2

The top of the block should be shaped friendly to the hand using saws and rasps. I like to steeply cut down the corner of the block near the base of my right thumb, as well as the diagonally opposite corner.

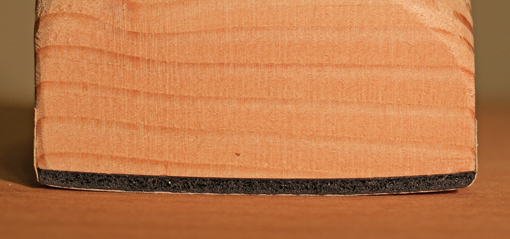
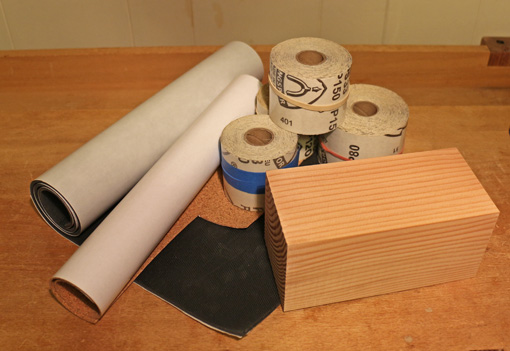
The backing surface for the sandpaper should be have some type of firm cushioning, similar to a random orbit sander. For most broad surfaces, I like the high-friction cushion material available in with a pressure-sensitive adhesive backing from Lee Valley. PSA-backed 1/16″-thick sheet cork is firmer and thus good for narrower, smaller scale, or more detailed work.

Cutting regular sandpaper sheets and wrapping them around these sanding blocks is particularly annoying because of the curved surface. I much prefer using PSA-backed sandpaper that comes in large rolls, such as that available from Klingspor. It is quick, effective, and wastes less sandpaper, especially if the block is made to the width of the sandpaper roll. It is also reduces hand fatigue because there is no need to grip the paper to the block.

IMG_0527_edited-2

A gum rubber block is usually associated with cleaning retained sanding dust from the sandpaper on power sanders, but it also works quite well on these sanding blocks, especially when doing heavy work.

As with any sanding, it is important to remember that only the coarsest grit – the first one in the sequence – should do any required  shaping. (Though most or all of the shaping will have already been done with other tools.) All the subsequent grits simply remove the scratches made by the previous grit until the surface is smoothed to your satisfaction.

In time, one accumulates a small collection of these curved sanding blocks, so some will coincidentally be just right for future projects. This is simple, effective woodworking – one more tool for working with curves.

Category: Techniques  | Tags:  | Comments off
Author:
• Wednesday, February 20th, 2013

IMG_0909_edited-2

When fairing a curve by hand, you need tools that give continuous feedback about the curve you are forming – a closed-loop system. The tool must have sufficient rigidity and effective length to reduce unwanted bumps and span aberrant troughs. For concave curves, the rounded contact surface of the tool must be a bit steeper than the curve being formed in the wood. The other key point is to distinguish between the shaping and the smoothing processes.

There are plenty of options. Here’s what I use.

Shaping

The Veritas round-sole metal spokeshave and Auriou “curved ironing” rasps, 30mm-wide #8 grain and 20mm #10, are my go-to tools for concave curves. The ride of the blade and teeth changes as they meet the varying resistance of bumps and valleys, so I can sense beneath the tool when the curve is becoming fair. The effective length and contact surface of these tools can be altered on the fly simply by changing the skew angle.

Working the surface of a curved leg to a slight crown across the width makes it easier going with the spokeshave, and in fact, I often finish it with this shape for appearance.

For quick hacking of big bumps, which might be present if I was daydreaming at the bandsaw, the inexpensive Stanley Surform Shaver works well.

The convex side of a half-round rasp can be used with some success on concave curves but there are cautions. The skewed stroke presents a varying contact profile as you push along a varying curve, so short strokes may be better. If the rasp is skewed too much, the teeth act like tiny knives and deeply groove the wood.

Convex curves are simpler to manage. A regular flat-sole block plane and the flat side of a half-round rasp work very well.

Smoothing

Smoothing the shaped surface is a different matter, much like smoothing and jack planes perform different functions. Here, card (hand) scrapers, especially in 0.024″ thickness, are my go-to tools, followed by light sanding.

Scrapers excel at smoothing, not eliminating, bumps and troughs, and so are not good for shaping, with the exception of light use on small, tight curves. With skewing, they may work for larger curves but it can be surprising how many lumps they preserve even when they seem to be shaping well.

Curved sanding blocks can be similarly deceptive. When working concave curves on legs, I find they are best left for smoothing because I just do not get as good shaping feedback as from rasps, spokeshaves, and planes. However, I have had success using carefully shaped sanding blocks with 60-80 grit paper to do the latter stages of shaping of broad concave surfaces. Also, a simple flat cork block does well on shallow convex curves.

Since I’m usually dealing with curly woods, rowed mahogany, or tough bubinga, I keep the spokeshave as a shaper.

What about spindle sanders and vertical belt sanders? I like my Ridgid combination oscillating spindle/vertical belt sander for many jobs, but use it only with trepidation for critical shaping or smoothing. I find it is just not as sensitive as hand tools, and it is more risky. Still, there are some curves where it is the best tool for the job, such as steep concave changes.

Pattern routing or sanding (with the Robo-Sander) with a template is a good option for single-plane curves, but I think is impractically complicated for multi-plane curves. Anyway, handwork is still required to make the all-important template.

I hope these tips help you become more comfortable, confident, and efficient with using curved elements in your woodwork. Choose the tools that are practical for you. No straightedge can be the arbiter of rightness for this work. You are a craftsman, so trust your senses!

Category: Techniques  | Tags:  | Comments off
Author:
• Monday, February 18th, 2013

IMG_0960_edited-2

Almost all the woodwork I make contains several curves. In fact, a key curved component, such as the legs of a table, is often the initiating design idea.

My usual approach to making curved parts is much like an athlete competing in a sport – lots of organized preparation followed by trusting the instincts when the time comes. For a table leg, for example, the work progresses from sketches, to mockups, measured drawings, careful construction of a template, milling a squared blank, and marking out the blank. Then I carefully bandsaw the curves up to the layout lines, but never destroying the lines.

Next comes “fairing” the curve – eliminating lumps and valleys to produce a smooth, pleasing curve. At this stage, working to the layout lines may be helpful but is definitely not sufficient to get the desired smooth curve. This is game time – you must trust your senses.

Look and feel: use your eyes, hands, and tools.

I am going to describe these in reverse of the order that they are used in fairing the curve. In practice, there is a dance among these techniques. (The examples pictured in this post are in various stages of formation.)

Look

Position your eye near the work piece and sight along the curve, preferably against an uncluttered background. This vantage point makes aberrant bumps and troughs easy to see. Reach out and mark them because they will no longer be so obvious when you move away. You will know when the curve is right – it flows without doubts.

IMG_0957_edited-2

For my taste, the most interesting curves do not have a constant radius or are even portions of an ellipse, but are born of intuition with a rightness that is plainly and satisfyingly evident.

Feel

When the work piece is dogged in position for shaping on the bench, the working face is usually upward, making it awkward or impossible to do the look test. Repeatedly unclamping and lifting the work piece or bending yourself into awkward positions gets tedious. Therefore, use your fingers to test the curve quickly and frequently as the work progresses.

IMG_0914_edited-2

Here’s how to use this often-underestimated sense. The fingers may be tense and slightly desensitized after gripping a tool, so take a moment to reawaken the touch receptors by shaking or lightly fidgeting the fingers. Then “calibrate” your fingers by lightly swiping them on a clean area of the flat surface of your bench. Brush debris off the curved work surface. All this takes just a few seconds.

Now lightly “ride” the curve on the work piece with your fingers. The fingers should be mostly relaxed but with just the slightest tension to feel the changes in the ride caused by bumps and valleys. On concave curves, I find an uphill ride to be more sensitive than a downhill one.

I think you will find this to be remarkably sensitive. This is like tuning a musical instrument – don’t predict the next moment of sensory input, just let it in. Gradual deviations of less than 1/64-inch can be felt. You can check the look test to see how the two methods correlate.

However, along with these tests, it is necessary to feel what is happening under the tool as you are working, moment by moment, so you can efficiently remove wood with intent and direction. In the next post, I’ll discuss the tools that I find effective for fairing curves, and also why some common tools do not work so well.

IMG_0958_edited-2

IMG_0959_edited-2

IMG_0963_edited-2

Category: Techniques  | Tags:  | 3 Comments
Author:
• Wednesday, September 28th, 2011

That title may make my spam-comment filter work overtime. Anyway, this post continues the discussion of managing figure in wood. Let’s look at the orientation of the annual rings in the rectangular blanks from which curved legs will be cut. Short sections of Douglas fir will be used to illustrate the principles.

All of this refers to legs which curve in three dimensions (planes). The curves may be cut on all four faces (e.g., a cabriole leg) or just two adjacent faces. Legs in which the curves are cut only on two opposite faces are curved in only two dimensions (picture the leg sandwiched between two flat sheets of plywood) and are a somewhat different matter. Bent lamination legs are an entirely different matter. Please do not ask me about legs which alter the time-space continuum.

The photo above shows the three possible basic orientations. The dot on the end grain indicates the inside corner of the legs. The two faces adjacent to this corner usually each have a flat portion where the aprons are attached with mortise and tenon joints.

In the three legs, from left to right, consider the endgrain patterns:

  • The annual rings are approximately parallel to one face and perpendicular to the other, producing one flatsawn face and one quartered face.
  • The annual rings are approximately 45° to all four faces and run “across” the inside corner.
  • The annual rings are approximately 45° to all four faces but run parallel to an axis from the inside corner to the outside corner.

For simplicity, I cut the curves into two adjacent faces. The effects would be the same if curves were cut into all four faces such as in a cabriole leg.

Let’s look at the results.

The leg on the left is bad news. The irregular figure produced by cutting a curve into the flatsawn face is unpleasant in itself, and the inconsistent figure among the faces distracts from the shape of the leg.

The middle leg is an improvement but, to my eye, the figure lines fight the curves of the legs. There is too much run-on and run-out of the annual ring lines.

I like the leg on the right. By cutting the blank from approximately 45̊ riftsawn stock and orienting the growth rings in this way relative to the inside corner, a good lookin’ leg arises. The shape of the leg (though uninteresting in this example) coordinates with the figure.

Here are closer views: 

Note that another disadvantage of the leg on the left is the exaggerated consequence of a small knot intersecting the cut line. Small pin knots, such as are common in cherry, can be difficult to avoid, but the middle leg demonstrates that they will have much less consequence with that grain orientation.

It is hard to find a thick, purely riftsawn board from which to make leg blanks, but most fairly wide flatsawn boards contain some effectively riftsawn stock toward the sides. I examine the end grain and face grain and carefully select the best sections of such boards. I pay attention to the straightness of the figure along the length of the board, recutting the edge to “straighten” the figure lines if necessary. I also try to somewhat coordinate bends in the figure with bends in the leg design.

Of course, you can choose however you like to use figure, but the key is to be aware of it and manage it. Making your design and the beauty of the wood work together, each enhancing the other, can bring class, beauty, and quality to your woodworking projects.

Happy woodworking to you.

Category: Techniques  | Tags:  | 2 Comments
Author:
• Tuesday, September 27th, 2011

Wood has figure that was created from life, which, in turn, helps bring life to a creation in wood. Throughout designing a piece, choosing wood, and building, I want to make the most of what the wood has to offer so a synergy develops between the design and the wood. This is not aluminum, Corian, or clay upon which a design is imposed; this is wood!

When cutting curves in wood, it is helpful to predict how the figure will change. The figure should work with, not fight, the contours of the piece. The interpretation of that task is subjective but it pays to be aware of and work skillfully with the figure. (Bent lamination, by the way, is a different matter.)

Here is a visual guide to some of the issues that arise in curved work. I used home center Douglas fir which has obvious figure lines created by the large difference between the earlywood and latewood. This is for purpose of illustration, it is not meant to be pretty.

In the photo above and the next two below, a concave curve (marked on the top surface) cut into the rift face causes the figure to bend. The end grain is emphasized with pen lines to show that the annual ring lines go downward as you go deeper into the wood. Thus, the concave curve creates a smiley bend from the straight face. A convex curve would do the opposite. 

Below is the result if we started with the block with the opposite face on top. (I just turned the same block upside down.)

Now let’s cut a similar curve into a nearly-flat-sawn face. The end grain lines meet the face at an extreme angle and so the figure changes rapidly as we cut the depth of the curve. The result is, to my eye, unattractive. Some of the figure lines run off the resultant face at the bottom and jump on at the top.

Now let’s cut the curve into the quartered face. Since the annual ring lines meet the face at about 90̊, there is almost no shift in the direction of the figure after the curve is cut. 

Of course, many other variables come into play, including the depth and consistency of the curves, and their placement in the piece. None of this would matter much in basswood which is nearly absent in figure.

The main ideas:

  • appreciate that the figure changes as curves are cut into wood
  • it is helpful to be able to generally predict how the figure will change
  • use this to the best advantage of the wood and the piece you are making.

Next, we’ll look at how this applies to curved legs. The appreciation of figure and legs, now there’s a worthwhile topic.

Category: Techniques  | Tags:  | Comments off
Author:
• Wednesday, November 17th, 2010

In nearly all of my woodworking projects, there are curves that can make or break the design. These are almost always curves without a constant radius, so I am relying on what looks “right” to my eye. I really sweat this aspect of the design process.

Acu Arc flexible curves are my favorite tools for laying out curves. French curves in regular and Woodhaven’s giant sizes are also helpful for sections of curves.

I do not like flexible rules or laths for laying out curves because it is awkward or impossible to control the contour in mid-curve. The curve is determined by the endpoints and at least one intermediary point and is then subject to the material properties of the layout device which may not produce the desired contour. I rarely use trammel points or a compass.

To design curves in a project, I start by gathering ideas and drawing in my sketchbook. I refine the promising sketches with scale drawings, repeatedly erasing and redrawing. To produce a full size mock-up, the results get transferred onto wood by measuring the key points and laying out a smooth curve using the Acu Arc. Sometimes I go from sketches to drawing directly on the wood. The mock-up is refined with spokeshaves, planes, and especially rasps.

I spend a lot of time looking at the mock up, leaving it, and returning to see how it strikes me at repeat visits. The bottom line: when it looks right and feels right, it is right, and that is a happy woodworking moment!

I transfer the key dimensions of the mock-up and drawing to make a template in quarter-inch MDF, using the Acu Arc again to refine the final layout. MDF works better than plywood, solid wood, or cardboard since it holds a clean edge and there is no grain to distract my eye or tools. The edges of the template should be square if it will be used on both faces for legs or as a template for router work.

Looking down the curve, as shown in the photo below, is a remarkably sensitive way to see bumps and lumps that must be eliminated to “fair the curve.” Running one’s hand along the curve, like a sleigh ride over the hills, is also a very good way to sense smooth transitions and detect lumps and bumps which must be removed.

The Acu Arc has a natural tendency to produce a curve without bumps as you shape it to your wishes. Then you can hold it on the wood, and trace only a nearby section of the curve with a pencil, hold it further along, trace more, and so forth, proceeding incrementally. It is stiff enough to hold its shape when it is carefully lifted and turned over to form the mirror image curve on the adjacent face, as is usually done for making legs. It is made of translucent colorless plastic but I would prefer opaque plastic that would show the curve better against the background of the wood.

The AcuArc is available from Highland Hardware in 24″, 48″, and 72″ lengths, and from Lee Valley in 18″ and 36″ lengths. (The top picture in the online LV catalog shows the pencil too far from the hold-down hand – the Acu Arc will move.)

I label the templates, save them, and sometimes reuse parts of them in other projects. In due time, a style develops, and, who knows, maybe someone will notice.

Category: Techniques  | Tags:  | 3 Comments