Founded in 2008, Heartwood is among the longest-running active woodworking blogs on the internet. It contains 266,000+ words of original content in 600+ posts, all written by me alone. (That is not including comments.) And there are 1400+ original photographs.
Here you will find plenty of serious woodworking instruction, information on tools, shop setup, and wood, along with musings about the craft. All for you to enjoy for free. No adds, no selling, no nonsense.
Very conservatively, there has been 6 million+ visits and 20 million+ page views (actual human visits, not bots, crawlers, etc.).
I am always delighted to hear from fellow enthusiasts and anyone exploring fine woodworking.
Disclaimer: Or what they do tell you but you might not notice.
For the last installment in this series, I present a simple idea that supports all of our work in wood. “They don’t tell you” this one because it is up to you, and maybe because it is obvious. Anyway, here it is: When you make something for a specific recipient or purpose or reason, you will be more energetic, you will concentrate more, you will be more efficient, and you will feel more joy. More, that is, than making something practically and in spirit only “on spec.”
Your reason for the project can range from furniture for your child/grandchild to just putting food on the table. (A table, by the way, that is probably not nearly as nice as the one you are making.) The reason may be internal such as your pure joy in building something, but is probably more powerful if it is also external to you. Maybe at the heart of it, your reason is ad majorem Dei gloriam.
So, as you develop a design, hunt for the wood, and fortify your shop, search also for your reason. Choose a good one and your chisel will be sharper and your saw will not tire.
Disclaimer: Or what they do tell you but you might not notice.
I offer for your consideration the following four points regarding learning woodworking:
1. No matter the amount of instruction you receive or the sources you consult, you ultimately have to get into your shop, and with your brain and hands, find your personal approach to building things with wood. This is not to say you should wing it, nor adopt a sophomoric attitude toward competent instruction, but you must find the way to deliver yourself – your talent, ambition, and, yes, courage – through your fingertips to the work on the bench.
2. Learning is continuous. Yes, you reach a point where the general principles of woodworking come together in mind and hand, and from there it is easier to add new skills. But new frontiers are always out there, and will always be humbling and challenging. For me, some examples are use of non-wood materials, art skills such as carving and marquetry, bent lamination panels, along with many more.
3. The corollary of the second point is to beware of being bedazzled by any so-called expert who you might think has seen it all and knows it all, and so can be relied upon for all definitive answers. Sure, there are some great woodworking teachers out there, but none that should supplant your common sense. We all have more to learn.
4. I’ve made this point before but it bears repeating. The most difficult part of making a piece is the big picture – putting all of the elements together. This is true, I suppose, of any field of endeavor.
The design must create enthusiasm. The wood, joinery, and construction plan must make sense to carry out the design. Each of the construction elements – stock preparation, joints, finishing, etc. – must be coordinated and carried out with cognizance of their roles along with particular attention to the critical junctures. Furthermore, you must be willing and able to make adjustments and corrections along the way based on continuous assessment of the work.
The only way to get good at this, which is what really makes you a “good woodworker,” is to build things!
Disclaimer: Or what they do tell you but you might not notice.
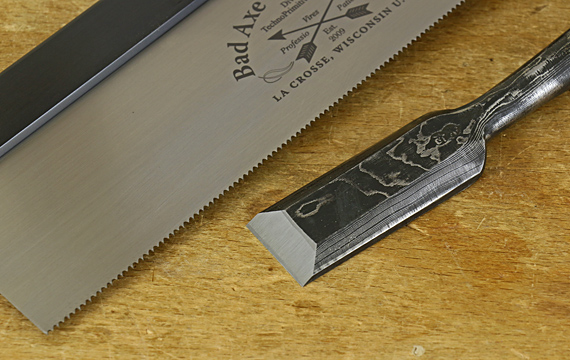
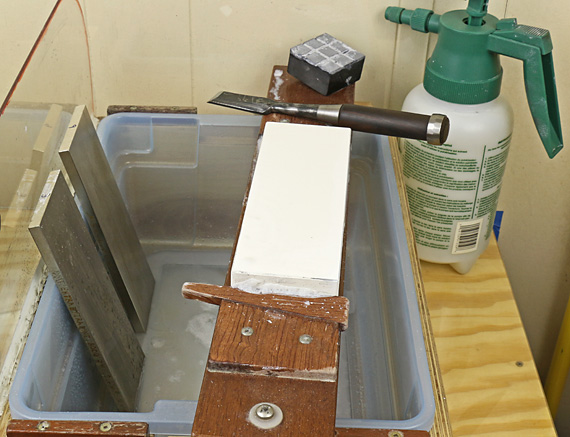
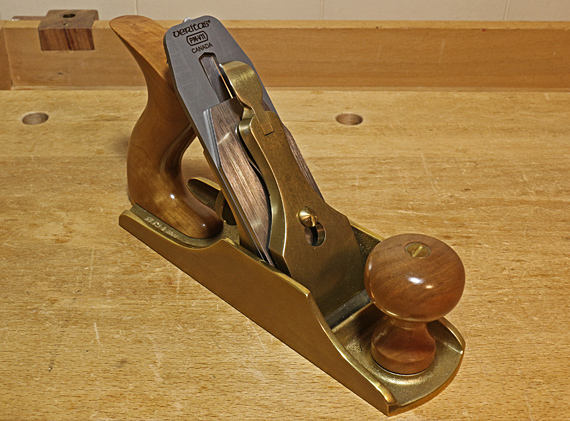
Just as you cannot be a good woodworker without understanding a lot about wood, so too, you must be a highly capable sharpener. However, with all the available information and devices devoted to sharpening, it is easy to forget about the other end of the matter – blades get dull.
In fact, a plane blade, for example, starts to dull almost immediately when it is put to work. So, to be practical, you really should think of sharpening and dulling together as a system. Teaching demonstrations may finish with an impressive hair shaving flourish but that is not the full story of what you do in the shop.
The first step in an effective system is to consider the steel type and quality when choosing tools. For example, I value my Japanese chisels for how sharp the edges can be made but more for how long those edges last. The point is to think about how that nice sharp edge is going to play out when you are making things with it.
Here are a few more hints in thinking about a system:
Each sharpening procedure, including the edge geometry, should be customized to the tool, the steel, and the intended use.
For smoothing planes and paring chisels, plan your work to make the best use of a pristine edge.
Consider the trauma incurred in the steel just behind the edge, especially when grinding a fresh bevel. I avoid grinding out to the very edge whenever possible. I refer you to Brent Beach’s site for more on this.
An edge rarely has to be perfect, and rarely is. Get to work.
If your sharpening station is not easy to set up, you’ll probably be working with inadequate edges.
Remember that the edge wears on both the beveled and the back (flat) sides. To get a sharp edge, you have to remove the round over on both sides. The back side of a plane blade can be surprisingly prone to neglect when sharpening, even if it was flattened well in preparing the blade when it was new. The solution is David Charlesworth’s “ruler trick.” I use it on almost all of my plane blades.
One more thing: Still not enough attention is given in teaching materials to the need to adjust the amount of camber in plane blades according to the bed angle. I pointed this out more than ten years ago here.
Disclaimer: Or what they do tell you but you might not notice.
I do not think I am much of a designer. I suppose that I am more of a composer, but certainly a woodworker. Metaphorically, I arrange the flowers but I do not breed and grow the blossoms. I might come up with a truly novel theme but I don’t count on that. I can recognize raw visual talent in others and their work but for as me, as Dirty Harry advised, “Man’s got to know his limitations.”
Anyway, looking at the body of work of most outstanding designers, there are typically just a few big ideas, maybe only one. The dedicated designer/artist/designer-craftsperson usually has to ride an idea for a long time through many iterations and refinements to bring it to full fruition.
If you default to making things only from plans, or making only reproduction work, or everything you make looks “Shaker” because you think you cannot come up with a decent idea of your own, think again and give it a try. Please, this is not in any way to disparage plans, reproductions, or Shaker! They are all wonderful endeavors if you choose them. However, I do think that many woodworkers gravitate to them just because they are intimidated to try their ideas and designs.
What “they don’t tell you” is that you can credibly venture into your own ideas.
Your idea does not have to be great, grand, original (are any truly original?), or even fully formed. Maybe you will rework or build upon other ideas. We can call that “borrowing” if you like. For example, in my work, I have repeatedly borrowed (and reworked) elements of the Japanese torii gate motif.
If you are inclined to take this route, I encourage you to give it a try. In the words of “woodworker” Sam Maloof, “You just have to try; you have to use your imagination.”
Disclaimer: Or what they do tell you but you might not notice.
Tools exist for making things. The same goes for your shop.
You need good tools to do good woodworking but there are plenty of forces pushing you, a woodworker, to exert undue attention on tools. First, woodworking tools are fascinating and cool. Then there is the constant pressure of tool marketing, often disguised as just “informational.” You know you are on the wrong track if you find yourself frittering away your valuable woodworking time fussing with tools to avoid the stress and uncertainty of actually making something.
I understand; I’ve been there.
It is fine to be a tool collector/restorer in addition to, or instead of, being a woodworker. But you might as well be clear about it.
The key to choosing tools is to understand that for each tool, there is a threshold of quality below which it cannot properly do its job. Do not buy below that threshold because you will be burdened with tool-like objects that have no purpose in this world. A chisel with cheesy steel will always be a cheesy chisel begging you to upgrade.
Above that threshold, tool quality fairly reliably improves with increased price. However, the gains in performance soon become smaller and smaller as the price rises.
So, recognize that threshold and find your comfort point above it.
One more thing: The best time and place to decide to buy a new tool is usually when you are working in the shop, where things are real. Tool stores and shows can be dangerous. That said, sometimes they do open your eyes to a new type of tool or a greatly improved version.
Bottom line: Keep your focus on making things and let your tools serve that purpose.
Disclaimer: Or what they do tell you but you might not notice.
Perfection is not the fundamental quality or even the goal of good joinery. Instructional promises of “perfect” joints, and especially “perfect every time,” are missing the point.
The skillful craftsperson is always is working within a sensitively understood range of tolerance. Understanding that range, and what lies beyond each end of it, are the keys to excellent work. You practice and refine your skills to develop that understanding and feel. You do not practice with an eye on perfection. The pursuit of “perfect every time” is naive and counterproductive because it misses the point.
This is generally true in any field. The mason knows the idea is to make a good wall despite the imperfections inherent in every brick. The violinist continually makes tiny variances in the intonation of notes depending on the musical circumstances. I think if you ask a pitcher what is the perfect curve ball, he would say the one that ends up in the catcher’s mitt after the batter swings.
And yet woodworking joinery seems to often be taught, and woodworking machinery promoted, as if the idea is to make, if you could, a 9000-micron tenon to fit into a 9000-micron mortise. And when you inevitably fail, you are supposed to keep practicing with that perfection as your target.
I suggest instead that you practice to learn how much deviation to tolerate from flat, straight, square, on the line, etc. Learn how fit can vary and still function and look great. This is not to license sloppy work! Your work can and should be excellent. But learn when and how variance matters. Learn tricks to make small deviations cancel through the building process. Understand the concept of one-sided tolerance. (Please see this post.)
Appreciate too, that wood is compressible and this varies with the species so you must adjust your tolerances. Consider that the ideal (I don’t mean perfect) tenon fit where you gently and evenly swoosh, not force, the tenon into the mortise, and then it stays when you hold the assembly upside down. That involves slight wood compression, and you have to work with that.
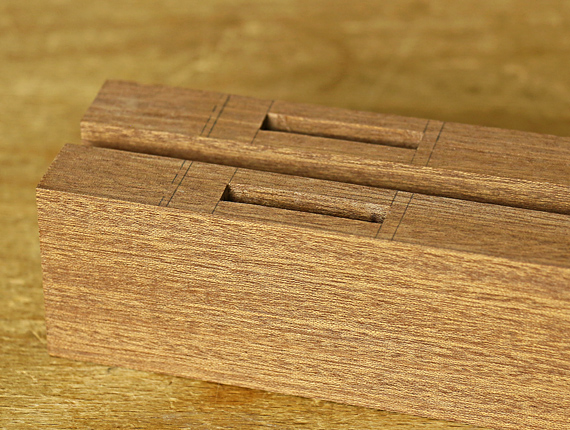
There’s another thing “they don’t tell you.” It is fine to practice making an individual joint such as a mortise and tenon but you have not mastered the joint until you can make it in context such as eight of them working together in a table. The same is true for case joints like dovetails. So, by all means, practice, but practice intelligently, and don’t forget that you have to also practice by making things.
Do not get distracted by perfection. Aim for excellence.
Disclaimer: Or what they do tell you but you might not notice.
Unless you get really good at understanding wood, you cannot be a really good woodworker.
A chef without a deep appreciation for the ingredients will always be at a loss for making outstanding food. You’re a woodworker. You make useful, beautiful things. Wood is your medium. It offers the infinite variability of the biological world, which gives it profound potential in your hands.
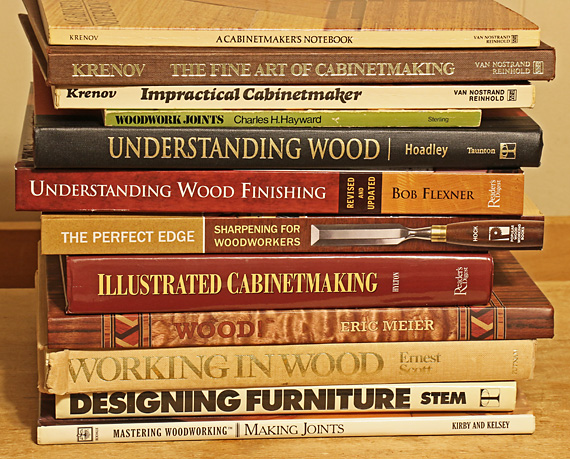
Read the books. Start with Understanding Wood, by the late Bruce Hoadley, and Wood, by Eric Meier. Use the Wood Handbook produced by the U.S. Forest Products Laboratory for reference. Here are some resources.
Observe wood “in the wild” in furniture everywhere. Develop a discriminating eye and taste. See how wood ages. To develop a healthy obsession would not be overdoing it.
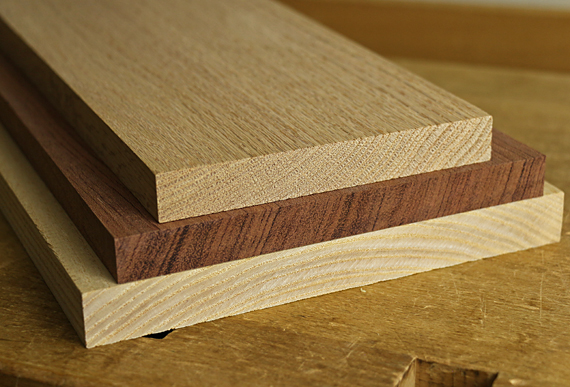
Most of all, get lots of different wood in your shop and mess around with it. See how different species and different boards react to planing, joinery, being four-squared, finishing, and so forth. Understand grain and figure, and how to make the best structural and aesthetic use of them. Be aware of the options in manufactured boards – that’s wood too.
“But Rob”, you say, “Chill out, I just want to make nice bookcases and house stuff in plain old pine that I pick up at the home center. I don’t need curly maple.” OK, great, good work, but which boards do you select? All flatsawn, or should you search through the stack for some rift or quartered stock? What is the moisture content of the wood in the store, and what will happen later? Why is the pine you bought this time acting differently from the stuff you bought last time at the same store?
Bottom line: you must know wood and know it really well.
The next time you look at a project article in one of the magazines, the wood will probably get passing mention at most. Most woodworking publications, unless specifically on the topic of wood, discuss little about it. But if you want to build something and make it good, think carefully about the wood. Use your knowledge, search widely if necessary, buy carefully, and think it through.
A corollary of this imperative is that what works structurally and aesthetically in one wood may not work in another. The wood selection should be integrated into the design and construction plan. The hands-on techniques employed will differ depending on the wood. Except for the design itself, wood selection is the most important stage of a project.
One more thing: wood can and will disappoint you – sometimes, but more than you might expect. Maybe it turns out to have weird defects, it dresses too thin, or it just doesn’t look like you thought it would next to that other wood, and on and on.
Don’t just buy more, learn more.
So, yea, get your tools, your shop, your designs, your joinery skills, and even your super-sharp edges, but it cannot be overemphasized: don’t forget to get really good with the wood, and always continue discovering more about it.
Disclaimer: Or what they do tell you but you might not notice.
Learning in any field takes place on at least two levels. First, there are the overt knowledge and skills that necessarily dominate the instructional material and the student’s efforts. Yet, there are always the unwritten, perhaps even unsaid, insights without which we never feel truly in command of the field. This is “Oh, now I get the idea . . .” — on the road to mastery.
With all due respect for the many wonderful woodworking teachers out there, it is difficult to transmit these key points in the environment of most formal instruction, especially written. In fact, these essentials may more often be “discovered” by the student in the quiet reflections of “putting it all together.”
These are the sorts of things that despite all your training, you realize six months into the job. Or that the instructor casually mentions in conversation after class when he sees what an eager student you are. Or that dawn on you during a long nighttime drive back home. These are synthesis ideas.
There is a simple continuing theme of this weblog: I greatly enjoy woodworking and find it meaningful. I want to help you do the same, particularly by discussing matters from a viewpoint that is typically neglected in most woodworking publications. With that in mind, I offer this series of posts to present what I think are pivotal nuggets in the various aspects of woodworking. I hope they help you leap ahead to better woodworking or at least reinforce your woodworking mindset.
Hey, I’m not so foolish as to think I know it all, so please do comment to share your insights on each of the topics as we go through them. The first topic will be, of course, wood.