Archive for the Category ◊ Techniques ◊

Author:
• Sunday, April 17th, 2016

biscuit alignment

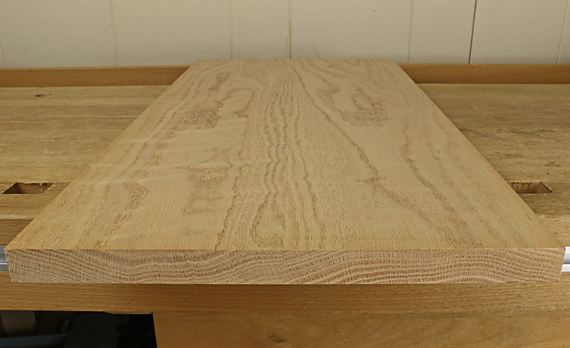
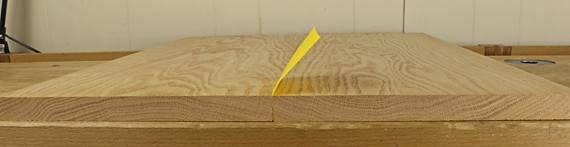
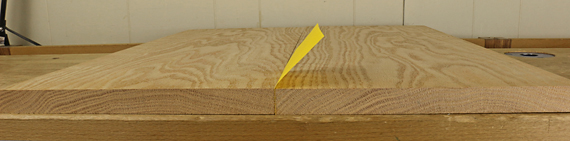
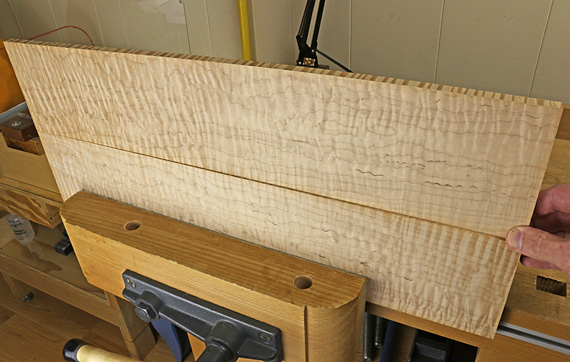
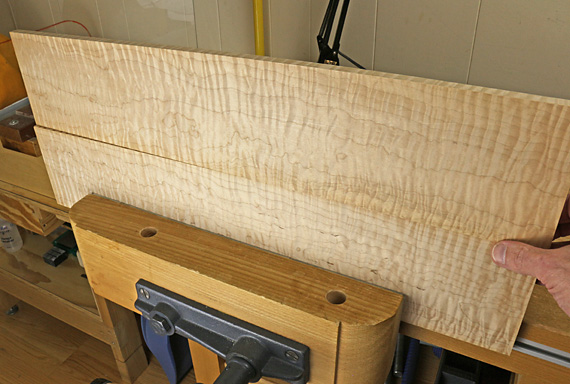
When gluing up edge joints, you want to maintain proper alignment of the boards to produce a flat panel. Especially for small shop woodworkers, it takes a lot of work to flatten glued up panels, which accounts for the proliferation of specialized clamps and devices designed to keep the boards aligned during glue up.

Maintaining alignment

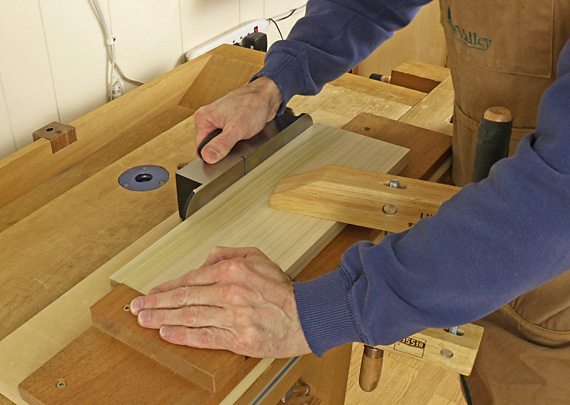
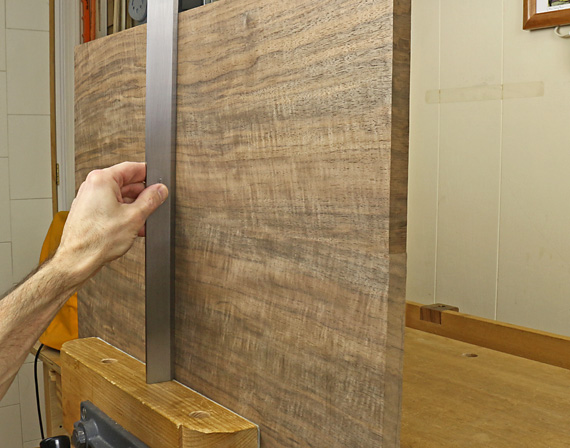
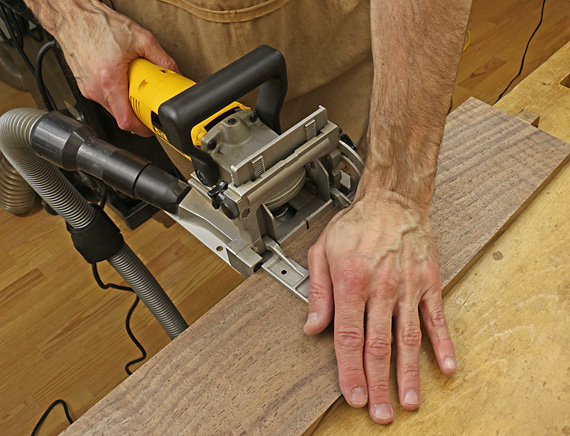
The simplest reliably effective answer is a tool you probably already own: the biscuit joiner. Start with flat boards and good edge joints. Place #20, #10, or #0 biscuits typically 8-12″ apart and just a couple of inches or so from the ends. Remember to account for the trim allowance so you do not leave an exposed biscuit in a tabletop.

The most consistent results come by pressing the joiner’s fence against the reference face of the board, which is secured slightly overhanging the edge of the workbench. Even for “standard” 3/4″ stock, this is easier and more reliable than trying to register the board itself against the bench and using the sole of the joiner as a reference.

Make sure the fence is flat and exactly square to the joiner’s face. Test to make sure the fence is also parallel to the blade/slot and if necessary, shim the fence with tape to achieve this. You can even use a 5/32″ slotting bit in a router to make the slots if you don’t have a dedicated joiner.

The biscuits are not necessary for strength. A well-made edge joint is strong enough without them, though they can’t hurt and offer some insurance against imperfections especially near the ends of the joint. The goal is minimize the work of flattening the glued up panel.

Some authors recommend hammering the boards into alignment during glue up. With the partial exception noted below I do not like that method. Time is very limited once the edges are brought together. Using a hit or miss process while playing with clamp pressure, rushing, and hoping are not my style of woodworking, particularly when a very fast and reliable alternative is available.

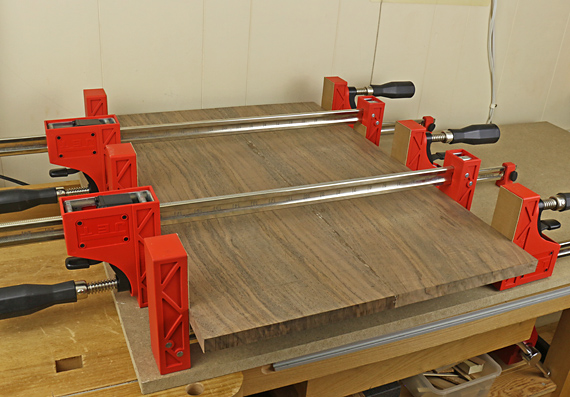
At glue up, squeeze glue in the slots before spreading it on the joint edges. If you reverse the order, the coat of glue on the edge has time to start skinning over while you are fiddling with the slots. Another option is to forgo gluing the slots, but why?

Later, when you are ready to plane or sand the panel, remember to avoid sunken areas above the biscuits by giving the extra moisture and consequent wood swelling time to dissipate. Use a pinless moisture meter or just check for remaining swelling with a small rule. Anyway, before working the surface of the panel, you have to wait for the immediate area of the glue line itself to loose its swelling but this small added delay for the biscuit areas is about the only real disadvantage of using biscuits.

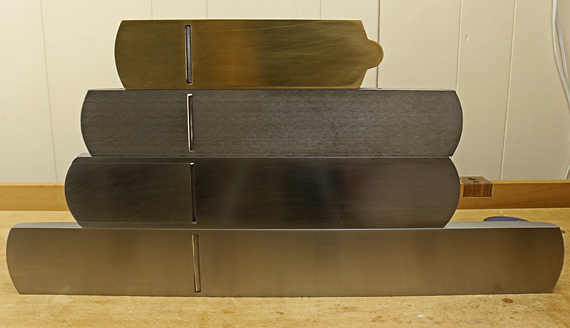
I do not use any of the following: special over-under clamps, cauls, pinch dogs, dowels, Dominos, splines, or incorrigibly distorted wood that does not belong in a panel.

Thin panels

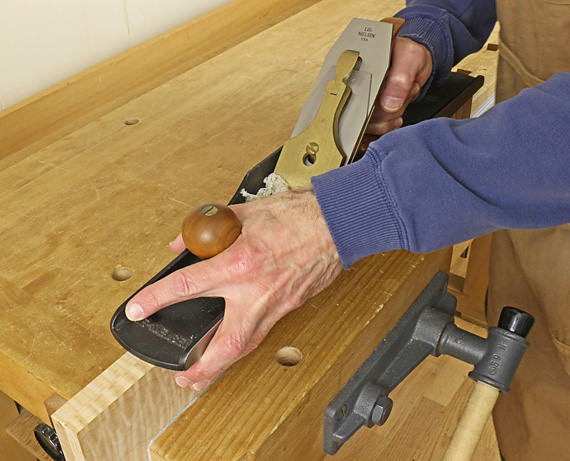
What about thin panels such as drawer bottoms that will not accommodate a biscuit? Here is a straightforward method using simple shop-made blocks to control the boards near their ends that will cover most of those situations. Depending on the length of the panel, a bit of tapping in the interior of the joint is usually necessary to align the boards but this is usually easy because it is a small panel with relatively light clamp pressure.


For shops that need to make lots of panels efficiently, such as dining tables and large frame and panel doors, the Plano Glue Press is one specialized tool that looks worthwhile.

The other major aspect of reliable alignment is clamp set up, which we’ll look at next.

Category: Techniques  | Tags:  | Comments off
Author:
• Tuesday, March 29th, 2016

handplanes

Hand plane?

I almost always use a hand plane for the final preparation of the wood surface prior to edge gluing.

To hand plane to a final edge as efficiently as possible, I prepare the edge on a well-tuned jointer, my Hammer A3-31, or in a few cases, my cabinet saw. By doing the power tool work accurately, it can take as few as two shavings with the hand plane to finish the edge. Yet they are important shavings because they produce the truest edge and leave the best quality surface for glue adhesion, unmatched by even the best machine.

A production shop using a dedicated ripping setup with a power feeder can produce excellent edges directly from the saw but they are no better and often not as good as those produced by a skillful small shop woodworker finishing with a hand plane. For less critical work, the edge from a tuned small-shop tablesaw may suffice but for high-end work I always use a hand plane, which affords the most control of the process.

Which plane?

The photo above of the plane soles shows, from the top, a #4 smoother, a #5 bevel-down jack, a Veritas bevel-up jack with its longer infeed sole, and a 22″ #7 jointer with a 2 3/8″ wide blade. Unless you are doing only small work, it is worth having the jointer because its length will bridge valleys and level hills and so make it much easier to produce an accurate edge. You may prefer the massive 24″ #8 jointer with its 2 5/8″ blade but the #7 seems to suit my mostly medium-scale work.

It is important to realize that a very sharp blade is essential for accuracy. As the blade dulls, accuracy suffers because the edge deflects more, the shavings have to be thicker, and you have to push the plane harder with less control.

Methods

For boards up to about 2 feet long, especially if they are 1/2″ or less thick, I find that long grain shooting is the most efficient method. Close the two boards like a book and plane both edges at once so any deviation from 90° is self-correcting when the edges are later joined. Thicker boards can be planed individually, each in its book-match orientation to achieve the same benefit. Occasionally, the grain directions won’t work out but usually you are working on an edge with minimal figure runout and thus without a strong directional grain angle.

long grain shooting

You don’t even need a shooting board because the plane sole rides on the work piece, not on the edge of the shooting board. A flat bench top would suffice. Clamp the boards so they don’t shift. Use a shooting plane or an appropriate bench plane.

Similarly, you can plane two boards at once held book-closed in the front vise of the workbench, as shown below. If you have done a good job machining the edges and align them together accurately in the vise, the combined width will give consistent support to the plane while the self-correcting geometry will ensure a good joint.

I spread my front hand widely across the plane to be able to sense any lateral tipping of the plane. I am not really using my fingers as a 90° fence but simply aim for consistency along the length of the cut. Errant tipping of the plane will introduce twist in the planed surface and an inaccurate joint.

edge planing

If planing two boards at once is unmanageable due to their thicknesses or lengths, plane each edge individually. Use a deadman or a jig in the tail vise to support the lead end of a long board while the opposite end is in the front vise.

Then, one option is to plane freehand, using your front hand as a fence. Your goal is to keep the sole of the plane at a consistent angle, hopefully 90°. Check your progress with a square. If your last shaving was the full width of the edge but the square shows the edge is a bit off, do not make the correction by taking a guess and tilting the plane differently. Rather, maintain the same supposed 90° and shift the plane laterally to use the slight camber of the blade edge to take a thicker shaving from the appropriate side. Since there is likely to be some systematic error in your attempt at 90°, it may help to plane the mating board in a self-correcting orientation, if possible.

I prefer to use my shop-made plane fence to get the job done faster and more predictably. Below, the fence is attached with three hand bolts entering tapped holes in the sidewall of my Lie-Nielsen jointer plane. Lee Valley makes plane fences. This method has worked for me for 30 years.

jointer plane fence

Note that even with the fence method I still use a slight camber in the blade edge. This prevents any possibility of a concave (or supposedly straight) blade edge producing joint surfaces that kiss in the interior of the joint with hairline gaps at the outsides.

Use the method that gets the job done for you with the work at hand. With all these methods, try to finish with a full-length shaving.

Upcoming: edge joint alignment, clamp setup, and more.

Category: Techniques  | Tags:  | 3 Comments
Author:
• Saturday, March 12th, 2016

edge-to-edge joints

Board orientation

When gluing up flatsawn boards to make a panel, is it important to alternate the growth ring orientation of the boards? The short answer is no.

In general, I suggest go for the best appearance. The reasoning usually given for alternating heart and bark faces is that the full depth of the cupping in any season is confined within each board, and thus is particularly helpful in unrestrained panels. The case usually given for orienting all the boards alike is that cupping will want to produce one large curve, which is more easily kept flat in, for example, a leg-and-apron table.

There is truth to both assertions, though unless appearance strongly dictates one or the other, I tend to favor alternating the boards. Just thinking geometrically (see the endgrain photos below), I wonder if the restraint of a presumptive large arc of like-facing boards is inordinately stressing the joints in tension on the heart face of the panel in the dry season, and vice versa in the humid season.

You can avoid the issue by using quartersawn or near-vertical riftsawn boards. With flatsawn boards, you can minimize problems by assembling the panel from equilibrated boards in a workshop in the midrange of humidity, using narrow boards, choosing species with a low T/R ratio and volumetric movement, and avoiding aberrant boards such as those with crook or substantial twist.

If you alternate the heart and bark faces of flatsawn boards, pay attention to the grain orientation if you plan on planing the glued up panel by hand or machine. Look at the glue up in the top photo. The board on the left will be planed away from the viewer – “pith side, plane with the points” – and so will the board on the right – “bark side backwards.” (Thanks to R. Bruce Hoadley for the mnemonics.) In the photo below, the endgrain growth rings are also alternated but the proper planing directions of the faces are opposing. Thus, if you alternate rings, you’ll probably also want to alternate the cathedral points.

growth rings

You also have to pay attention to grain direction if heart and bark are not alternated but the choice is more apparent. The boards in the photo below are correctly oriented in this regard (plane toward the viewer).

growth rings

The camber question and how to check the joint

This is one of those perpetual arguments among woodworkers. Here’s my view.

I aim for just a trace of camber (hollow), simply as a one-sided tolerance. I do not want any kissing in the central length of the joint, which might create separation tension across the joint line at the outer ends where it is most likely to open. I would be satisfied with two perfectly flat edges but that is nearly impossible to reliably observe.

With any method of planing the edges (options discussed in the next post), I want to finish with a continuous shaving to ensure there are no localized bumps or troughs in the edge. Then the best test of the joint is to set the edges against each other as in the photos below.

Move the upper board by its end. It should barely pivot at the opposite end as in the first photo below. The gap in the middle of the closed joint should be nearly invisible but you know it is there by the pivot.

In the second photo below, the pivoting shows that the boards are kissing within the length of the joint. No good.

edge joint test

poor edge joint

Also, check for twist within the joint by gently trying to rock the top board across opposite-end corners of the joint. Significant twist of the joint faces against each other will produce a subtle but surprisingly detectable rocking.

Check for flatness in a few places as below, again being aware of any rocking.  Ultimately, this is far more sensitive than directly checking if the joint surface itself is square to the face of the board.

If all is well, you know you have a joint that wants to be together and is not being forced into submission by clamp pressure.

edge joint test

Some woodworkers like to produce a more pronounced camber to be able to clamp the joint with a single clamp across the midpoint of the length of the joint. I acknowledge that this can work but unless one has a shortage of clamps, I consider this to be an unnecessary and awkward method with several disadvantages for most work.

Also, making a substantial camber in the joint on the assumption that insufficiently equilibrated wood will dry faster at the ends is basically starting off on the wrong foot.

Upcoming: options for hand planing, and more.

Category: Techniques  | Tags:  | 3 Comments
Author:
• Friday, March 11th, 2016

edge joint

From tabletops to drawer bottoms, edge-to-edge joinery is found throughout furniture making, so it is worthwhile to explore the issues involved in preparing, cutting, and gluing up these joints.

For most of the steps there are a variety of good approaches, particularly based on the size of the joint and the available tools. The outright errors usually come from injudicious wood selection or inattention to the key tolerances in the joint.

As we woodworkers can’t help but notice, edge joints that have opened up can be found everywhere. But why? After all, if the bonded glue line is really as strong as the wood itself, it should not have any more propensity to split than the adjacent wood.

One of the large drawer fronts at the factory-made red oak desk where I am typing has a small edge joint failure. A cross grain conflict with the particleboard sides is stressing the solid wood front but why is the split at the glue line?

split edge joint

Whether due to luck or skill, pieces that I made 25 years ago have fully intact edge joints but, again, why?

So let’s think about this fundamental joint in a short series of posts.

Keep in mind that a little split here and there usually does not affect the function of the piece. My workbench, which I’ve used for more than 30 years, has several splits in its top that don’t bother me one bit. In fact, they seem to function as built-in stress relievers that probably help maintain the remarkably consistent flatness of the top throughout the seasons.

Wood selection

It is surprising how often we see mismatched glueups in otherwise fine work. A door panel with flatsawn cathedral figure running out at a glued edge adjacent to straight rift figure looks like it came from a factory, not the shop of a craftsman. Below is a factory-made door panel that is devoid of human finesse.

poor wood selection

It is best to match the figure at adjacent edges and generally avoid edge runout of flatsawn figure. Join rift to rift and quartered to quartered. Cathedral figure boards are best joined where there is rift figure beyond the width of the arches – ideally where the figure lines are nearly straight. Where this is not possible, try to have the figure lines flow into each other across the glue line. In this way, attention is not called to the joint line and the completed panel looks harmonious.

Below, even in this book-matched panel where the halves are necessarily mirror images of each other, the boards blend together and the joint line (indicated by the pencil) is barely detectable.

book match edge joint

Joining a quartered-grain edge with a flatsawn-grain edge, for example, not only looks poor but the thickness of each board at the glue line will undergo different seasonal change because of the different orientation of the growth rings. This can produce a tiny but disconcerting step on the surface at the joint line. The joint is stressing itself from this conflicting movement.

In summary, join similar edges to produce visual and structural harmony.

Next: Should you alternate the growth ring orientation of flatsawn boards in a glued up panel? Also, we’ll consider the camber question.

Category: Techniques  | Tags:  | 3 Comments
Author:
• Sunday, January 31st, 2016

wood finishes

Good job! You developed a compelling design, skillfully employed sound construction techniques, and lavished care on your baby – I mean woodworking project. And of course, you applied a finish that made her look fabulous when she – uh, it – left the shop.

Well, it’s not over because it’s a jungle out there. Consider especially that pretty finish in which you sent your furniture/accessory oeuvre out into the world.

Think about the likely use and possible abuse of the piece. Sure, a wall cabinet for art objects will not suffer as will a dining table, but will that hall table display family photos or have keys and wet umbrellas tossed onto it? Will later owners of the piece value it as much as the original owner?

A key issue is that the durability and reparability of a wood finish are generally inversely related. For example, oil-varnish mix is not very durable but is easy to repair, while a tough polyurethane film finish is more difficult to repair.

I think in many cases it comes down to which is more tolerable: dented, scarred wood or a dented, scarred thick film finish. Ultimately, water, abrasion, and ultraviolet light can break down any finish, resulting in something like the table top below. When dirt and grime get into the grain of the wood, restoration gets even more difficult.

deteriorated finish

One approach, which is gaining appeal with me in some cases, is to take it easy and apply a few coats of oil-varnish mix. I like Rockler’s Sam Maloof poly-oil because of its high solids content and amber color that is not too dark like some oil or varnish products such as Waterlox. It leaves a low-key sheen that allows one to “take pleasure in the wood surface,” as the late, great Sam said.

The car key abrasions probably will look better – and maybe even add character – in a wood surface finished with oil-varnish mix that can be easily touched up by anyone, than in the layers of a heavy film finish that will probably never be repaired by anyone.

There are always trade-offs. The point is to think it through the long term when choosing a finish.

walnut finish

Category: Techniques  | 5 Comments
Author:
• Sunday, November 29th, 2015

power tool safety

Here is a palpable way to look at power tool safety.

This occurred to me as I was holding in my hand the DeWalt DWP611 compact router. It is so easy to wield this little machine with one hand – it’s easier to grip than a youth-size football – that I sensed a bit of over-confidence sneaking in as I was preparing to put it to the wood.

This little beast, however, has a tail that plugs into an electrical outlet, so it can generate 1.25 HP. Question: are you more powerful than a horse?

Moving over to the table saw, here’s another question. The tip speed of a 10″ blade at 3450 RPM is 103 MPH. Think about kickback. Are you faster than that?

There is no way the woodworker is strong or fast enough to beat an out-of-control power tool. Therefore, the operation to be performed must be fully controlled and fully predictable. There is no room for doubt or hoping. You must know what is going to happen before it happens.

It is difficult to over-emphasize: we ultimately must control our power tools with our brains. Knowledge, proper setup, patience, and alertness are absolute requirements.

Without them, we’re just not good enough.

Category: Techniques  | 5 Comments
Author:
• Saturday, October 10th, 2015

mortise and tenon

In building furniture, woodworkers wonder if the joints will be strong enough to withstand the many years of rigors to which they will be subjected.

As we parse the elements of joint design, figuring if a tenon is long enough, dovetails deep enough, and so forth, we rely upon hundreds of years of cumulative experience in furniture design and observation of how pieces have fared over the years. We also can benefit from some of the joint testing done by the magazines, data from the Forest Products Laboratory, and of course, a healthy dose of intuition.

However, there is a shortcoming in viewing joint design too narrowly.

Assuming competent joinery skills, answers to structural strength questions are more likely to come from broadening one’s view beyond the joint under consideration and looking at the whole structure of the piece. This will make the requirements for a particular joint more evident.

Here we must ask:

  • What is going on in the overall design of the piece that will transfer stress to that joint, and on the other hand, help it to resist stress?
  • How will normal use, and perhaps abuse, stress the joint?

table design

For example, this table has fairly narrow legs that allow only shallow mortise and tenon joints. Force applied to the lower part of a leg produces considerable moment at the joints. Racking in the horizontal plane could also be a problem.

However, looking beyond the leg joints shows they have plenty of help. The two cross stretchers are joined to the aprons with sliding dovetails, and there is a corner block behind each pair of leg joints.

table design

As another example, in a bookcase, the joints attaching the horizontal to the vertical members are subject to huge racking forces. Yet, a thin plywood back fastened to the back changes everything.

The point is that when designing furniture and wondering if a particular joint will be strong enough, let the big picture inform your engineering decisions.

Category: Techniques  | Comments off
Author:
• Sunday, August 16th, 2015

sawing warm-ups

There are lots of recommendations available for warming up to saw joinery but here I will concentrate on two aspects:

  • The progression of the warm-up
  • Core muscle activation

The progression

Any good warm-up should include aspects of the main event. To prepare for sawing dovetails, for example, saw to a series of lines that mimic dovetails. As you begin, recall and concentrate on basic technique and mechanics without being primarily concerned about hitting the lines perfectly. You’re like a baseball player before a game, at first taking easy batting practice pitches while just trying to execute sound form and make good contact. Address any neglect of the fundamentals.

Then bear down and try to make a couple of dead-on cuts. Observe the results, sharpen your mind, and clean up your technique accordingly. Find your familiar physical and mental groove.

Make sure there are no deficiencies in your tools and setup, including the lighting. The warm-up also gives you a chance to sense the density and grain of the particular wood at hand and make appropriate adjustments in technique.

For work that you do frequently, the warm-up should be very brief. Even if you’re a bit rusty, it should only take a few minutes, provided your skills are fundamentally sound.

An exercise to engage the core

sawing warm-up

Only when the core – glutes, hips, upper back – is strong, engaged, and balanced, can the peripheral parts – shoulder, arm, and hands – move with accuracy and precision.

Try this exercise. Make a small, shallow pile of sawdust on your benchtop or scrap of wood. Attempt to create “kerfs” in the pile by pushing the dust with the teeth of your saw without the teeth making contact with the benchtop.

It can only be done with your core muscles engaged, along with a balanced stance.

When sawing joinery with a backsaw, the saw should not be helping to support you. If it is, it is being partly diverted from its primary function, which is to make a kerf, and it won’t be as consistently accurate.

The hand without the saw can rest on the bench or work piece to aid in balance. It should bear the weight of no more than itself and the arm.

By the way, core activation does not mean being stiff. Think of the shock absorbers on a car. They are very strong but allow movement, always maintaining an equilibrium that allows all the other parts of the car to function smoothly and precisely. This discussion is about sawing with a backsaw but even with a handsaw where the entire body moves more, the core is still in primary control of all the motions.

Note to readers: Uncommon tips 1-6 can be found here. More on the way.

Category: Techniques  | Tags:  | 5 Comments