Archive for ◊ December, 2022 ◊

Author:
• Tuesday, December 27th, 2022
GF Water Base satin

When I am considering no finish at all but just want to add some sheen, silkiness, and decent protection, I use a clear water based finish that produces no (or trace) color change and stays that way. The best example is pearwood to preserve its delicate beauty. Oiling pearwood should be considered a felony crime. Port Orford cedar, with its Zen-like beauty, is another example, though I usually use another finish for it, which I will discuss later in this series. 

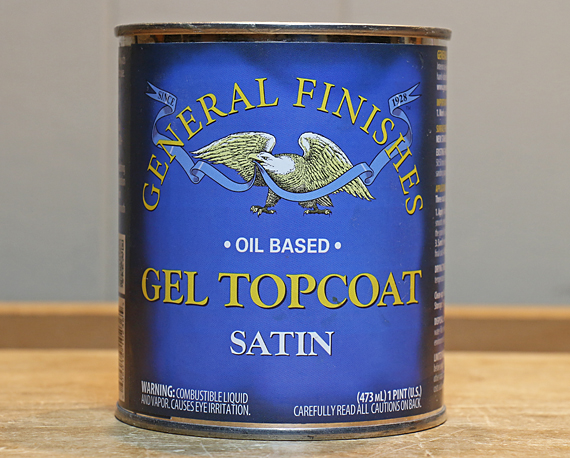
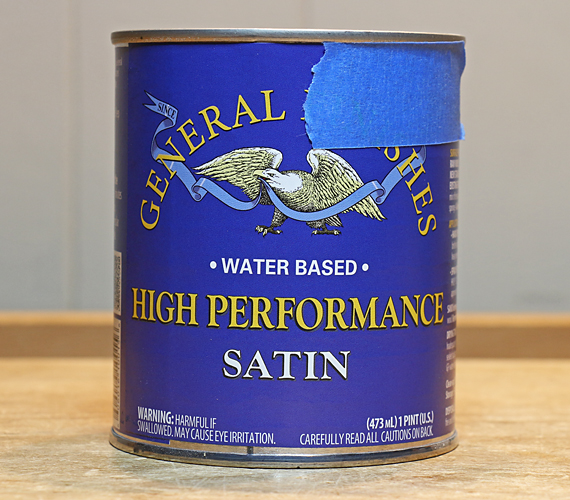
General Finishes Water Based High Performance – Satin, a water based polyurethane-acrylic blend, is my go-to player for this. It is very transparent with only a trace of yellow color. It flows out and levels exceptionally well.

The method: I sand a tight diffuse porous wood like pear to 400 grit, which, when practical, may be nothing more than a light pass over a finish hand planed surface. I apply the finish with my Gramercy Tools Waterborne Finishes Brush. A Taklon brush is another good option but the GF flows out so well that even a foam brush works well enough. 

I lightly very fine sand when the first coat is dry enough to produce dry powder – about two hours if humidity is medium/low. Two fairly light coats are enough for the look I want. If I lay down the second coat carefully, it will need little rubbing out with a 2500 Mirlon pad and/or brown paper to end up with a silky surface. 

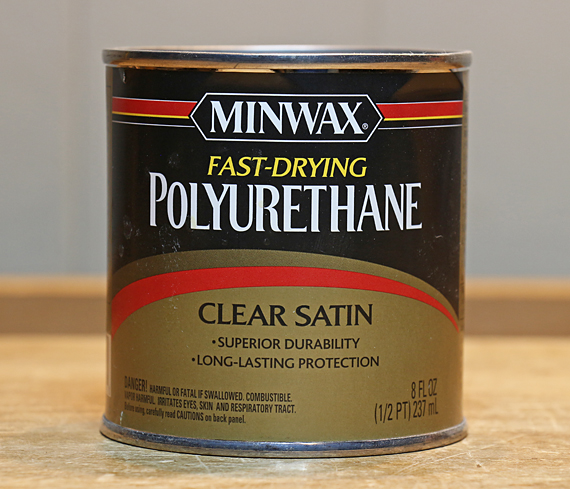
Other brand options that I have tried include: Hydrocote Resisthane Plus Pre-Catalyzed Lacquer, Clear Satin. This is an excellent product, nice and clear. It seems to brush close to as well as the GF, and is less expensive but not available local to me. I can pick up GF at my local Woodcraft but it is rather expensive. Minwax Polycrylic, also available locally, is also very clear but did not brush out as well for me. [Caution: I do not know if manufacturers’ formulations have changed since I last tried them.]

In summary, this is the finish I use when I want hardly any finish.

Next: a finish to consider that is hardly ever discussed in finishing books and articles

Category: Techniques  | Tags:  | 8 Comments
Author:
• Monday, December 26th, 2022
Sam Maloof poly-oil

You can go a little crazy trying to sort out “oil” finishes, mostly because there is rampant misleading and uninformative labeling among manufacturers who often try to create a mystique surrounding their products. 

There are a few key points to help keep things straight:

1. Varnish, including wiping varnish such as Waterlox Original, should not be termed an “oil” finish, even though oil (along with a resin) is used in its manufacture. Varnish is a film finish; it cures hard and builds into film thicknesses on the wood.

2. Actual oil finishes, such as linseed oil and tung oil, do not cure hard and do not build appreciably as a film thickness. The exception is polymerized oil.

3. Oil-varnish mixes are just that. The presence of free oil prevents substantial build into a film thickness. These products are notoriously mislabeled as “oil,” such as Watco Danish Oil. 

Again, I refer you to Bob Flexner’s wonderfully clear instructive writings, especially his book Understanding Wood Finishing

Here I am discussing oil-varnish mix. Advantages of this finish include: easy application, nearly mistake-proof, brings out the figure in wood, gives a low key “natural” look, and does not obstruct visual and tactile contact with the wood. One particular place I do not use oil-varnish is inside cabinets or boxes because the smell can accumulate and linger.

My favorite oil-varnish for more than 30 years has been has been Sam Maloof Poly-Oil from Rockler. What is in it? The label says linseed oil, tung oil, polyurethane, and solvents. In what proportions? Who knows? 

What I do know is that it has a nice, thick body in application, it brings out wood figure beautifully without overdoing it, and four coats produce a nice satin sheen after buffing out with a rag. If you want a bit more glow, you can finish up with a paste wax or an oil-wax blend.  

The method: For an oil-varnish finish, it pays to sand the wood out to 320 or 400 grit, especially for diffuse porous species like cherry. I slop the stuff on with a rag and wipe off the excess along the grain within a few minutes. Later, I keep checking for “bleed back” of oil from the wood pores of ring-porous species like oak or walnut. I wipe away any little blobs before they start to firm up. This is usually only an issue on the first coat. I keep checking until there are no more blobs because they are a nuisance to sand away if they firm up.

It is difficult to tell by sight or feel when a coat is cured and ready for another coat, so I gauge by smell – once it is nearly gone with a quick sniff test, then it is time for the next coat. 

In my experience of trying several oil-varnish finishes, I am not convinced it necessarily makes much difference which oil-varnish mix you use. Watco, for example, is cheaper and I have gotten good results with it. However, I did not like Tried and True because it cured so slowly, at least in its older renditions. I did not find Bush Oil to be anything special. Just my opinions. Still my favorite is Sam’s stuff – maybe because Sam himself was so awesome.

A couple more points regarding “bringing out the grain.” This can sometimes backfire such as on some cherry boards where an oil-varnish mix can produce an unpleasant blotchy look. On the other hand, a single coat of oil-varnish might pleasingly emphasize figure and then you can follow up with a few coats of wiping varnish. Note that the oil-varnish must be cured (the smell is gone). Of course, the great rule of finishing applies – test first. 

Next: water-based finish

Category: Techniques  | Tags:  | 2 Comments
Author:
• Sunday, December 25th, 2022
Minwax Poly satin

For tabletops that are expected to receive more punishment, there are two options that I employ as I briefly mentioned in the previous post. When I want the look of a non-film, “close to the wood” finish, I go with several coats of oil-varnish mix. This strategy sacrifices protection for easy reparability. Sometimes though, I want a more protective film finish, yet I still want to avoid an overbuilt, “plastic” look.

For this latter option I use a strategy that I first learned from an article in Fine Woodworking magazine #81 (March/April 1990), page 75, by Greg Johnson. He used one or two coats of brush-on polyurethane followed by two coats of wipe-on gel varnish. The idea is to get the film volume of brush-on poly with the surface finishing ease of the gel.

Here is my approach, which is essentially the same as that in the article but with slight differences.   

I use two coats of brush-on Miniwax Fast Dry Polyurethane, Clear Satin. I use a decent bristle brush but not my thoroughbred ox-hair brush for this because it is unnecessary, and it is difficult if not impossible to fully purge the varnish from it. (See this excellent discourse on brush selection by Joel Moskowitz.)

The method: After finish planing/sanding, I raise the grain by wetting the wood with a damp cloth, let it dry, and then lightly sand with 320 or 400 grit. I usually apply the first coat of poly without thinning it, knowing full well that there inevitably will be some streaks, bubbles, and dust no matter how careful I am. In fact, I don’t bother trying to be too careful. After it dries, I sand with 220 grit, cutting pretty aggressively to remove the defects. By the way, “dry” means that sanding produces a non-sticky dry powder. Then I apply a second coat of poly, trying to be more careful and nicely tipping off the finish. After the second coat dries, I sand to remove defects, this time less aggressively.

An alternative method is to apply the first coat thinned with mineral spirits in an attempt to minimize defects and thus minimize sanding. I have had less luck with this approach, so I use full-strength coats and concentrate mainly on getting a decent film on the wood. 

Next, I apply two coats of General Finishes Oil Based Gel Topcoat – Satin. Between coats, I lightly sand as needed with 320 grit. After the second coat of gel, the defects have been scaled down enough to make the final surface smooth and with minimal or no defects. I complete the sequence with a rubdown with brown bag paper.

GF Gel Satin

This strategy supplies good protection, a pleasant final film that does not look too thick, and circumvents most of the problems of using only brush-on polyurethane varnish. It will not protect as well as heavy duty two-part catalyzed finishes but is easier to deal with for small-scale woodworkers like me, easier to repair, and I think, looks better.

It is a nifty finishing strategy to have in your repertoire.

Next: oil-varnish mix

Category: Techniques  | Tags:  | One Comment
Author:
• Wednesday, December 21st, 2022
GF Gel Satin

Wiping varnish, a term coined by the Moses of finishing knowledge, Bob Flexner, is simply varnish thinned with mineral spirits to make it easy to wipe, rather than brush, onto the wood. The coats are therefore necessarily thin compared to brush-on varnish. 

So, the great advantage of easily applying virtually problem-free coats carries the possible disadvantage that the coats are less protective. Most of my work, such as a wall cabinet or the lower part of an occasional table, does not need lots of protection. For those situations where more protection is needed, such as a tabletop, wiping varnish is still wonderfully useful in conjunction with brush-on varnish. I will explain that technique in a future post in this series.   

Here are my three favorite wiping varnishes in order of how often I use them:

1. General Finishes Oil Based Gel Topcoat – Satin. Gel varnish is simply wiping varnish with a chemical thickening agent added. This stuff is about as easy as a film finish application can get. 

I use lint-free rags and nitrile gloves. Wipe it on, spread it around, and very soon wipe off the excess along the grain. That’s really about all there is to it. It imparts only a light amber tone.

Some planning is required to work on fairly small areas at a time because this dries quickly. I use a succession of rags, applying with a loaded rag and finishing off with a relatively clean rag. I do a bit of light fine sanding after the first coat and thereafter little to none. Three coats are usually enough, four at the most. I usually buff the final dried coat with brown bag paper

Waterlox Original

2. Waterlox Original Sealer/Finish – Medium Sheen. This is a high quality and reliable, though rather expensive, product. Depending on the contours of a piece, this liquid product can actually be easier to apply than the gel because its easier to wipe off the excess out of corners. 

Note that this is a dark amber varnish, almost like a light stain, so I use it with that in mind. I do not like the cans that it comes in, with the little opening at the top, so I transfer it to a clean regular finish can and tape on the orginal label.

3. Minwax Wipe-On Poly – Clear Satin or very occasionally, Clear Gloss. This is a quality product, inexpensive and widely available. I use it when I want a liquid but without the dark amber of the Waterlox. It is particularly handy when I do not want to mess with the gel on interior cabinet corners and I do not want the dark amber.

[Why no photo? Because I can find this stuff anywhere, anytime, so I don’t usually stock it in the shop.]

I do not like thick film finishes. I also think that protection is an overrated concern with the possible exception of tabletops. I have built household furniture items finished with only gel varnish that have gracefully withstood 20-30 years of regular use. Even for some table tops such as an occasional table or coffee table, trying to “protect” it with a thick film finish can create more problems as the finish inevitably becomes more and more scratched and the great enemy, water, gets in and it all looks bad. Sometimes, a non-building finish, like oil-varnish ends up looking better and is much easier to repair. 

Next in this (not-necessarily-contiguous) series: Brush-on varnish plus wiping varnish when you feel the need to protect.

Category: Techniques  | Tags:  | Comments off
Author:
• Sunday, December 18th, 2022
sketch book

You have an idea for a piece – a compelling, strong idea. The more you think it through, the more it grows and the more you think, “I can do this. It’s going to be worth it.”

You research design options, wood, and joinery. Things seem to be coming together. Along the way, however, you find some dangerously impressive work of the general type that you have in mind. This happens to me when I look at woodwork by Tim Coleman, John Cameron, and Craig Vandall Stevens, to name a few. How did they do that?

And you begin to wonder: “OK, it’s not a competition but, good heavens, I love that piece that I’m looking at on the internet and I know, or at least I feel pretty sure, that I will not love mine as much when I finish it – if I make it at all, that is.”

Now what to do? Sometimes it is difficult to avoid outright copying strong ideas – to simply build again what has already been built just fine – but that is not what you set out to do, and not your road to fulfillment. 

Or do you give up part way into the design process and say “Good enough. I know I could do better but why bother?” Will you tank the design, knowing that no one else will know? Or don’t sing at all if you’re not Pavarotti? 

That’s silly. You have a voice. Use it, plain or fancy, innovative or derivative. If you work at it, if you do not lull into laziness, the piece you have in mind is going to be at least good, maybe very good, and who knows, maybe even great. Humility and confidence are willing partners. 

But here is what you do not expect. If you really put mind, hand, and heart into it, I will bet that the piece is going to be better than you think. 

This is perhaps the biggest secret and the magic of creative work. Trust yourself! Yes, it could flop but if you are diligent and you have developed a decent level of skill, the odds are actually in your favor. You are working hard, you are necessarily taking a risk, and you do not, you cannot, know quite what the outcome will be . . . 

Until it is there!

And when it is there, it will be more than the sum of your ideas and your craft. In fact, you likely will look at it sometime hence and think, “How did I do that?”

Category: Ideas  | 2 Comments