It is reasonable to be skeptical of dowel joinery. After all, half the joint involves gluing the long grain of the dowel into a hole where the glue surface is partly end grain with limited true side-grain glue surface. However, the carcase dowel joint, used in the right circumstances and made properly, works and lasts without doubt. Joints in pieces that I have constructed as long as 20 years ago and have been able to observe since are still cleanly tight.
We associate this joinery with the late James Krenov who wrote about it in detail in The Fine Art of Cabinetmaking. Here my attempt is to humbly add tips and refinements, particularly toward ensuring accuracy.
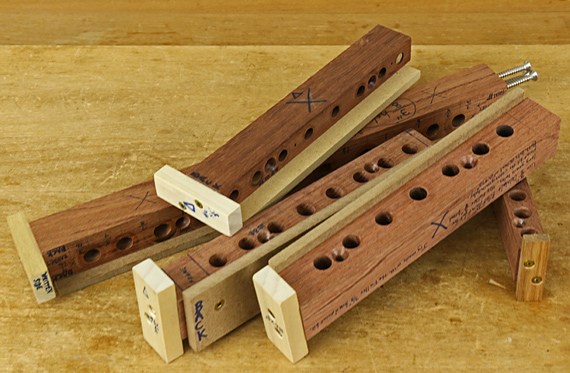
Making the jig is more than half the job for this joint. Use a very hard, fine-grained wood that will hold clean, sturdy holes to last through repeated use, including inevitably repurposing the jig for future projects. I have long used bubinga, though its availability is now limited. Your shopmade jig will be at least as accurate as manufactured jigs of this type, and it will be customized to your project.
I usually make the block about 1 1/8″ thick (in the direction of the length of the holes) and about 1″ wide. The width does not need to match the width of either workpiece but will, in fact, be a little wider than the end grain workpiece to ensure good seating on the side-grain workpiece. The length will usually be a little longer than the width of the workpieces.
Employ every effort to make the block with two absolutely flat surfaces that are dead parallel to each other. This is critical because the jig will be used to drill from both directions. Any error in parallelism will be doubled when making the joint.
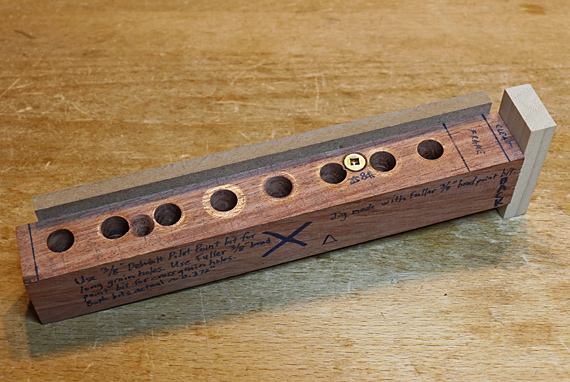
A third face, the reference face, should be flat and dead square to the two faces with holes. The fourth face, which I mark with a big “X”, is not critical.
The holes should be drilled with a well-tuned drill press. This is cross-grain drilling, so a good brad point bit is the best choice.
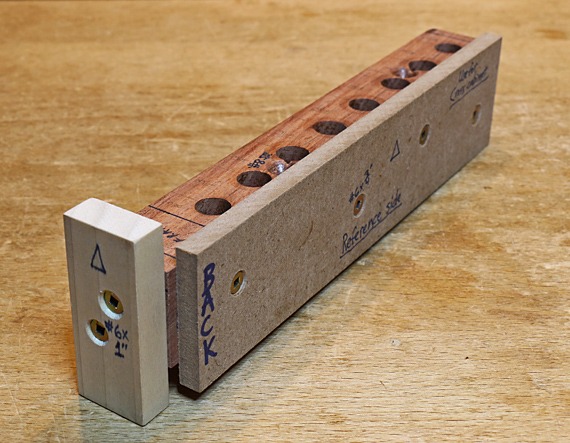
A small, removable cleat on the end of the block serves as a physical reference against the workpieces. This can be augmented depending on whether the workpieces meet flush at their edges.
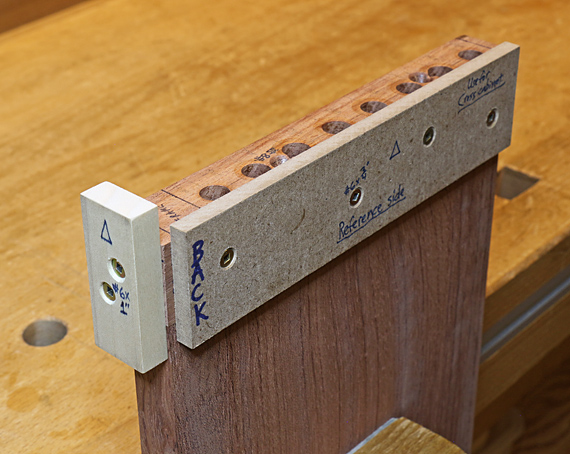
Krenov’s description shows the block being nailed to the end grain workpiece, using the tablesaw top as a flat reference. I do not like this method. Instead, I use a removable side piece to reference the jig on the end grain workpiece. The jig is attached with two #8 screws going through countersunk clearance holes and penetrating the workpiece only about 3/8″. The jig is attached to the side-grain workpiece without using the side piece but instead squared and clamped to the workpiece, and then screwed in place.
Below, the jig is placed on the endgrain workpiece using the back cleat and side piece to ensure solid referencing. (I have not screwed it in place for the photo.) Note that both the end cleat and the side piece extend beyond both hole-faces of the jig. This allows the jig to be used at both ends of the workpiece.
I mark up the jig all over: “back,” “Reference” face, “X” for the non-reference face, the size of screws to use, the drill bits to use, etc.
Now, more than half done, next we’ll look at designing the joint, dowels, drill bits, etc.
