These are so eminently practical that it seems they should have been around for a century but it has been just several years since Lee Valley started manufacturing Chris Becksvoort’s clever idea. Since then, I’ve been using them whenever there is a need for a substantially long slot to accommodate the movement of a screw caused by dimensional changes in wood related to humidity.
One of the most common uses is for screws that go through cross grain support pieces and secure a table top. Another is at the back of drawer runners that are cross grain to the sides of a case.
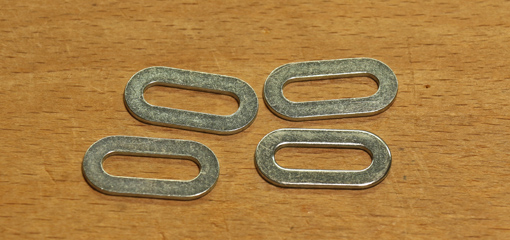
The washers come in two sizes, designated #10 and #14, and both are thoughtfully made to convenient dimensions. The #10s shown here are slightly less than 1/2″ wide and 1″ long, with a slot slightly greater than 3/16″ wide. They are 3/64″ thick.
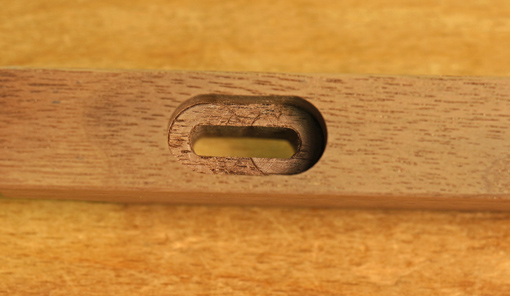
It is possible to rout slots for these but I find it easier to simply drill two 1/2″ holes with their centers 1/2″ apart using a Forstner bit in the drill press. Pare away the remaining web with a 1/2″ chisel. Next, without changing the fence setting, drill 3/16″ through holes on the same two centers. Then drill overlapping holes in between and gradually drill away the waste to form the slot.
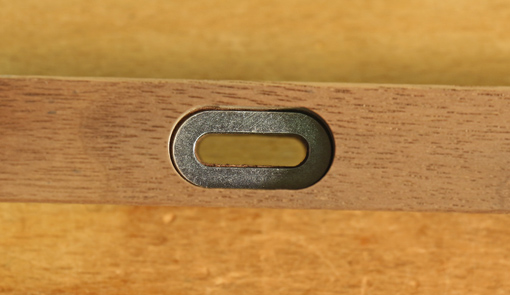
The finished slots, and the washer and screw in place are shown below.
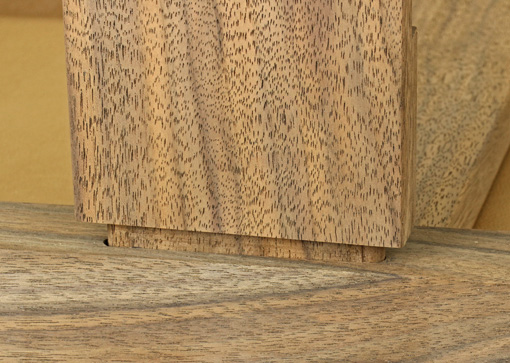
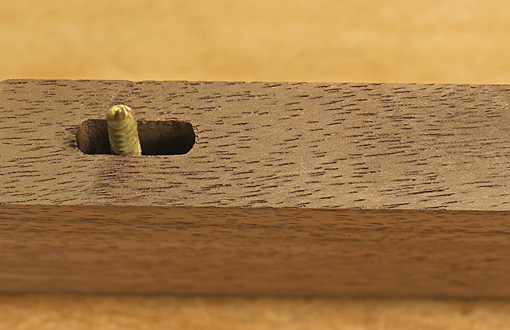
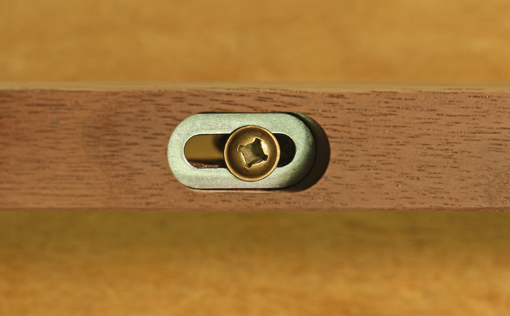 For this type of assembly, I prefer square drive, hardened, deep-thread, washer head screws, #8 in this case, available from McFeely’s. (Technically, this is a combo drive head but who in his right mind, given the choice, would use a Phillips driver instead of a square driver.) Of course, the depth of the large slot must be worked out according to the thickness of the stretcher or runner, the thickness of the piece that the screw will bind to, and the length of the screw. The view from the other side is shown below.
True, the same slot construction can be done without the washer and in fact, those that I have so made have functioned well for many years. And there are other good approaches to this issue. However, when sizable dimensional swings must be accounted for, it has always been too careful a setup done with some doubt about the possibility of the screw head binding. Perhaps if it was socked down too tightly in dry wood, I’ve wondered, it might get stuck in the swell of wood around it and not slide.
These washers make things simple and remove any doubts. The screw head will not catch on the metal washer. The construction is clean and sure. Thanks to Chris and Lee Valley for this handy hardware item that should be in routine use.