Archive for ◊ February, 2014 ◊

Author:
• Tuesday, February 25th, 2014

IMG_0635_edited-3

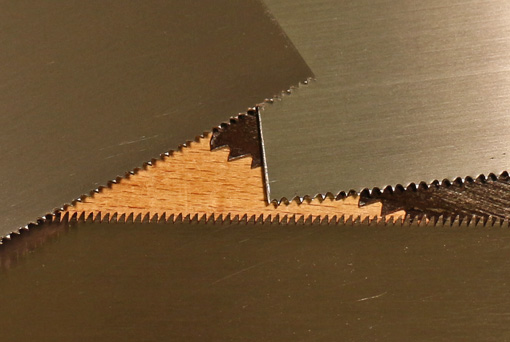
Is a thinner kerf saw more accurate? Does that make a skinny saw better? After all, we associate thin with accurate, such as thin pencil lines or thin gradations on a rule.

Accurate sawing means a clean, neat kerf that consistently splits the layout line, with the kerf in the waste wood. This comes from teeth of appropriate design and pitch for the task that have a small, consistent amount of set. Further, the saw plate must be produced straight and stay straight throughout cutting. The sides of the teeth should also be cleanly free of burr.

The sawyer must employ good mechanics, aided by good tooth geometry, saw balance, hang angle, and other mechanical factors. With all that on your side, you can physically sense true cutting, split the layout line, and visually monitor the progress with accuracy.

But is thinner kerf width, per se, more accurate? I don’t find this to be so. As an example, my .012″ plate Japanese rip dozuki holds no advantage in accuracy by virtue of its thinner plate over my .018″ plate Western dovetail saw. In fact, because of other factors, I find the latter is more accurate. Yes, this is an apples-to-oranges comparison but my eyes and hands can tell that factors other than plate thickness are the deciding ones in determining relative cutting accuracy between these saws.

Similarly, my carbide tip bandsaw blade makes a considerably wider kerf than my steel blades but it cuts more accurately. We also don’t think of thin kerf table saw blades, whatever their other advantages, as being more accurate than standard kerf blades.

Now, I’m not saying get a dovetail saw with a .042″ plate, nor that thin plate saws are necessarily bad choices. I do think confusion arises in assessing and choosing saws because thinner plates are sometimes associated with other factors that promote accuracy such as nicely set fine teeth, or comparing a good quality thin Japanese saw with a poorly made thicker Western saw.

Within limits, however, one ought not assume that, all else being about equal, a thinner plate is more accurate. In some cases, contrary to the assertions of some vendors, it may be less accurate.

There are many factors that produce an effective, accurate saw. You may, for various reasons, prefer a thinner plate saw. But I suggest don’t get charmed by skinny saws. Rather, consider the whole picture, I’d say, and see how the saw really saws.

Category: Tools and Shop  | Comments off
Author:
• Friday, February 21st, 2014

IMG_1169_edited-2

In saw descriptions and discussions, there is often the implicit assumption that a thinner saw cuts proportionately faster than a thicker saw. At the risk of setting this up as a straw man case, the assumption goes that, as an example, with all else being theoretically equal, a .012″ plate will cut twice as fast as a .024″ plate. Further, it follows that a thin-kerf saw has, within limits, this distinct advantage, assuming that its other sawing parameters can be controlled to maintain good function.

This would be analogous to a 24″ wide swath of snow being twice as hard to push as a 12″ swath, all else being equal. However, I don’t think saws work like that!

Let’s think about what a saw tooth does. A rip tooth cuts and plows the wood at the bottom of the kerf. In this, kerf width is probably roughly proportional to the effort, and thus inversely proportional to speed. At the sides of the kerf, the tooth shears the wood, and there the task is approximately the same regardless of kerf width.

The crosscut tooth severs the wood fibers at the sides of the kerf where, again, the task is approximately irrespective of kerf width. At the bottom of the kerf, where it is a lesser task of shuffling away the broken wood, the work is probably about proportionate to the kerf width.

Thus, in both cases, especially crosscutting, this simple idealized analysis suggests that, all else being equal, twice the kerf width does not mean half the sawing speed. It is not like pushing snow.

In reality, all else is never equal, of course, and the dynamics are surely more complicated than described here. Nonetheless, this way of looking at it at least gives some basis to explain my real world observations using many saws that, within limits, thinner kerf saws do not seem to give a proportionate advantage in cutting speed over thicker kerf saws.

Again, my argument is against this as an assumption that may be made by some when comparing saws. This is applicable in comparing among Western saws, and generally comparing Western with Japanese saws.

Further, as plate thickness is reduced too much, especially in Western saws, disadvantages ensue. Among these, depending on other design parameters, is a tendency to distort in the heat and action of sawing. Also, energy intended for cutting seems to get wasted in vibrating the skinny saw plate, somewhat akin to action of a thin or poorly supported plane blade.

In summary, skinnier is not as attractive as it might seem. It is important to look at the whole picture when choosing saws.

Next: Ah, but is the thinner kerf saw inherently more accurate, all else being equal? Does that make skinny better?

Category: Tools and Shop  | 2 Comments
Author:
• Tuesday, February 18th, 2014

NWA image_edited-1

The NWA’s 23rd Annual fine woodworking Showcase, attended by 5000-6000 woodworking enthusiasts each year, will be held Saturday and Sunday, March 29-30, 2014 at the Saratoga Springs City Center in Saratoga Springs, NY.

The event features:

  • Lots of free classes and demonstrations to help you broaden your woodworking skills.
  • A large trade show with tools and materials from national manufacturers and local suppliers for exhibit and sale.
  • An exhibit of over 500 pieces of woodwork by amateurs and professionals ranging from small accessory items to large furniture.

This year, as one of the featured demonstrators, I will present two topics on each day, Saturday and Sunday: “Hand Planes – Choices, Set Up, Use,” and “Drawer Fitting – Steps To Success.” The demo schedule is here. Of course, I will also be around for chatting, questions, and enjoying the Showcase.

Heartwood readers, I hope you have a chance to attend and I will see you there. Saratoga Springs is about 30 miles north of Albany, NY. If you are there but don’t happen to attend my presentations, please do say hello anyway.

Category: Resources  | 3 Comments
Author:
• Monday, February 17th, 2014

IMG_1185_edited-2

Sometimes in woodworking, especially in unusual constructions, there comes a deflating realization that things would be a lot easier now if a different turn was made several steps earlier in the process. It’s not an abject mistake but it is time for the fix-it crew.

Here are several notable tools among the many whose modest bearing belies their performance in the clutch.

The pair of left and right-handed crank-neck 3/8″ skew chisels get into vertically and horizontally restricted areas to remove small amounts of wood that are preventing parts from fitting well. Widely available and inexpensive, I find them more useful than straight skew chisels.

For precise paring in more accessible locations, long paring chisels allow much finer control than a regular bench chisel. Using the dominant hand at the back end, the tool’s length allows fine control of the attack angle of the edge to produce clean cuts.

The Japanese azebiki saw has short, curved rip and crosscut edges. It’s great for starting cuts on a flat surface, and for getting into restricted areas. I adjust the set to a bare minimum on my saw.

The very flexible .020″ hand scraper is easier to use than thicker scrapers to clean up localized surface defects that can arise in the late stages of building from planing tearout or handling dings.

I’m almost embarrassed to say how often I use the little 1″ x 2″ .016″ mini scraper for fix-ups. I keep some edges with a hook and some without, and use it pulling, pushing, angled, skewed, or even flat against a surface to solve all sorts of problems.

The low-profile ratcheting driver is another tool that I might be lost without. It accepts 1/4″ hex-shank bits and can be used for driving and, patiently, for light drilling when necessary. With this tool and with a right-angle attachment for a power drill, it is very handy to have shorty drill bits available.

Of course the most important tool in a jam is the one on your shoulders. Pause, step back, collect, think, and be optimistic – there’s probably a solution!

Category: Tools and Shop  | 2 Comments
Author:
• Saturday, February 01st, 2014

IMG_1176_edited-2

These practical Japanese toolboxes with characteristically clean design and clever functioning are based mostly on Toshio Odate’s article in the October 1995 issue of American Woodworker magazine, pages 58-59, available online.

Overall dimensions of my version are 32 1/2″ long, 13 1/2″ wide, and 10 3/8″ high. The primary wood is quartersawn Douglas fir, obtained as dimensional 1-by stock. The tight grain reminds me of the raked sand in a Japanese zen garden.

IMG_1179_edited-2

The sides and ends are assembled much like Odate’s but using deep thread screws instead of nails. The lower edge of the end “handle” is undercut with a 15° bevel to help the four fingers grab it reliably for lifting the box while the thumb comes over the top end piece. I added a like-sized piece below it onto the main end piece for extra rigidity.

The bottom is 3/8 Baltic birch plywood fit into a rabbet, glued, screwed, and nailed. I preferred the plywood to avoid seasonal dimensional conflict posed by a solid wood bottom fixed cross grain to the end pieces. True, nails allow some give but the modern material avoids the risk of splits and is strong. Eight hard plastic feet will minimize abrasion wear on the bottom as the boxes are inevitably slid on hard floors.

IMG_1181_edited-2

For the top, I similarly went modern with cherry veneered 3/4″ plywood. I found it by chance on sale but I like its looks with the Doug fir. The plywood allows a tighter tolerance between the top and the sides than would be possible to maintain with solid wood. The sliding-lock top is based on the traditional version as described by Odate, but with a very clever wedge lock described by George Snyder in an article on the Woodcraft blog. (Thanks to Wilbur Pan for the link.)

IMG_1183_edited-2

IMG_1177_edited-2

I added contoured undercuts on both edges of both top battens to make the top easier to handle for insertion and removal.

IMG_1178_edited-2

I’ve had the Odate article bookmarked on my web browser for years, so I’m glad I finally got around to building these boxes. The decision to use plywood for the top and bottom, and the wedge lock for the top resolved my reservations with the traditional design as presented by Odate. Then, finding the beautiful Doug fir got me building.

These toolboxes will no doubt see plenty of rugged use but with their bombproof construction they should be up to the job. They were fun to build.