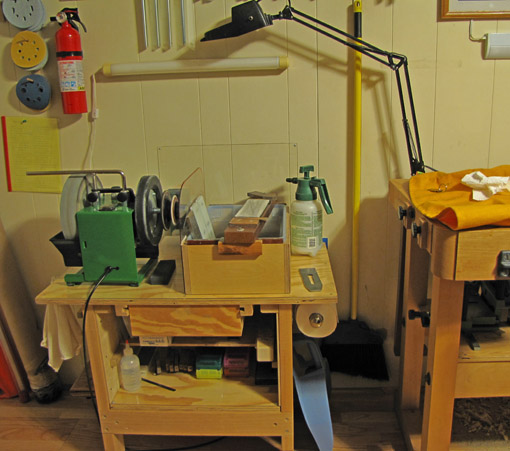
Having covered the design and construction of the sharpening station in the previous four posts, I will now discuss how I use the system. This is not meant to detail my sharpening techniques, but, in general, I want to get an excellent edge on the tools as efficiently as possible so I can get back to working wood.
First, I gather the dull tools and assess their requirements. Then I make a trip to the bathroom to fill the pump spray bottle, get water to fill the Tormek tray if I will be using it, and do any emptying required on my part since failing to attend to this last necessity will surely interrupt the rhythm of a sharpening session.
At this point, the entire operation is independent of a water source. I get the Shapton stones out from their dry storage and select the shopmade angle gauges needed after consulting my recipe chart. I bump the bridge into a fixed position, then secure the first stone in place with a tap on the wedge from the tool to be sharpened, and then give it a little spray of water. I lean the other stones on the left wall of the basin with their bottoms facing outward. I store the tools on the right side of the sharpening bench or, if there are several, on the left end of the workbench on top of the Tormek cover.
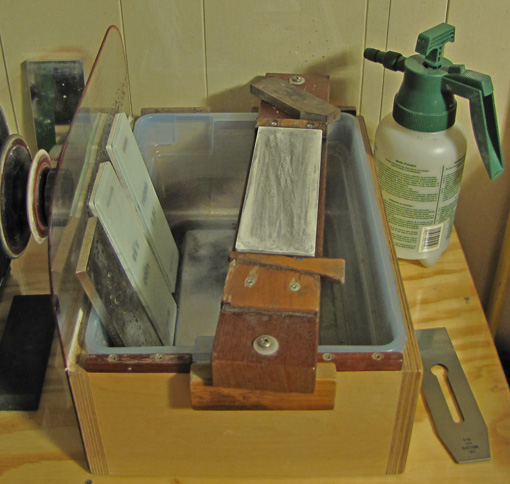
Grinding on the Tormek is done first if needed, but most sessions involve only honing secondary bevels. I work through the succession of stones, spray clean each when done, and lean it against the basin wall. Depending on the number and types of tools being sharpened, I may go through all the tools with each grit, or bring one blade through the whole process. In any case, I avoid letting wet steel sit for long because corrosion can start quickly, especially in O-1 steel.
Some blades, such as a smoothing plane iron, get a light stropping with diamond paste on leather.
Before leaving the bench, I reflatten each stone on the bridge with the Shapton diamond plate (trying to forget what I paid for it, even when it was cheaper than now), then rinse and pat dry the stones, and store them leaning against the wall or the outside of the sharpening box. Later, I return them to their boxes.
Just about all of the mess and water is contained in the basin, which can be emptied now or later. Since I generally like a tidy shop, I wipe away any errant mess on the sharpening bench with a rag or paper towels.
I oil the tools as soon as possible. Most important, I get back to working wood with sharp tools as soon as possible!
Once again, I emphasize that this is the setup and system that works quite well for me. I have presented it in hopes that readers will find it helpful for anything from gleaning a few tips to using the entire design. In any case, as I always emphasize, craft is necessarily personal, and each woodworker must find what works best for him or her.

I like your set-up Rob. I plan on builing a station for my garage workshop over the summer, using this as a starting point.
Do you think there’s any reason to store water stones in water between uses? My 600 and 1,200 grit are King and I keep them permanently wet. The higher grits are Norton and I store them dry.
Mark,
Great, I hope the sharpening station works out. Remember to test different heights and plan it out.
As you know, the coarser Kings absorb a lot of water, so storing them wet allows you to use them right away, without having to wait 5-10 minutes for them to soak up water. It’s just a matter of convenience. This is not much of an issue with the finer Nortons or Kings. So it sounds like what you are doing makes sense.
The Shaptons of all grits, and some grits of some other brands, are stored dry and can be used right away with just a splash of water.
One tip: flatten the stones in the state in which you use them for sharpening.
Rob