Author:
• Tuesday, October 21st, 2008


(WARNING: the following post contains graphic rationalizations for the purchase of new woodworking tools and should not be read by woodworkers carrying balances on their credit cards.) 

I enjoy tools so much that sometimes I think I make things just so I can use good tools, but no, it’s really not that way. The desire to create artful things from wood is my primary driver. Still I admit, like most woodworkers, I have some tool “problems”, including an insatiable want for new and better tools, refining the ones I have, and conjuring implements that don’t yet exist. To keep all this from getting out of hand, I have to impose upon myself some rational discipline. 

I govern purchasing or building new tools with one or more of several criteria. First and foremost, will the tool reasonably allow me to make something I eagerly want to make? For example, if I really want to make a walnut table with a nice handplaned finish, I need a good smoothing plane. Occasionally, the tool itself is the generator of a project. Probably no one would have thought of making bandsawn boxes without the bandsaw’s capabilities to suggest such a construction. Usually, however, the intended design drives the tooling.

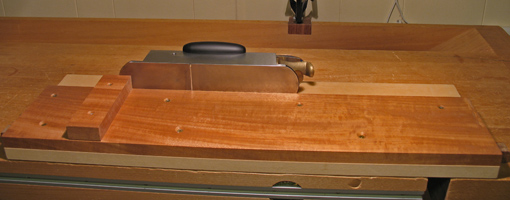
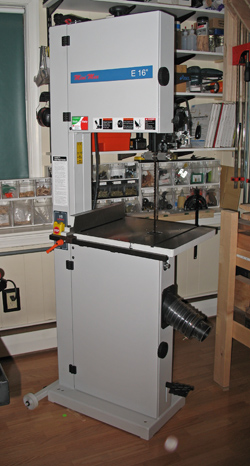
Second, will a tool substantially change the way I work and for the better? Having a shooting board gives me the means to fit drawers with an incremental methodology that would be difficult, if not impossible, to execute any other way. I’m a better woodworker for it. Having a nice Italian bandsaw with 12″ under the blade isn’t the only way to resaw wood, but it is so vastly more efficient than resawing by hand that it makes a qualitative difference in how I incorporate resawn wood into my projects.

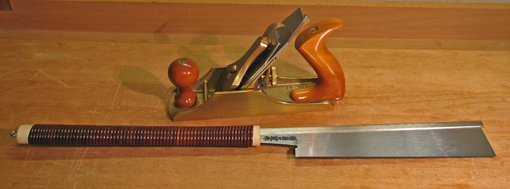
Then there’s the issue of quality. When I upgraded to a better quality Japanese dovetail saw my cuts became cleaner and more precise. Better tool, better work, but where does it end? I think the plotted curve of woodwork quality against tool cost approaches level as one considers some very high end tools. Choose your point on the curve according to your own desires but also at your own peril.

Finally, will a tool allow me to work faster? This is the danger zone and we’re generally talking power tools here. Is it really faster? I mean after you’ve read the instruction manual, tuned up all the machine’s idiosyncrasies, and set it up? Maybe. What portion of the total project time are you saving on that one operation? Is it more pleasant? Not likely. How applicable is the machine to different tasks? If I’ve got two angled tenons to cut I’m pretty sure I can do it faster and more peacefully by hand than by machine. Think through the whole project, not just the isolated processes, and see what time is saved and at what cost.

One more thing. I detest owning any tool that I never use. I guess it’s something like having a benched player on a professional sports team who just takes up salary cap space.

Good luck. 
Category: Tools and Shop  | 6 Comments
Author:
• Saturday, October 18th, 2008


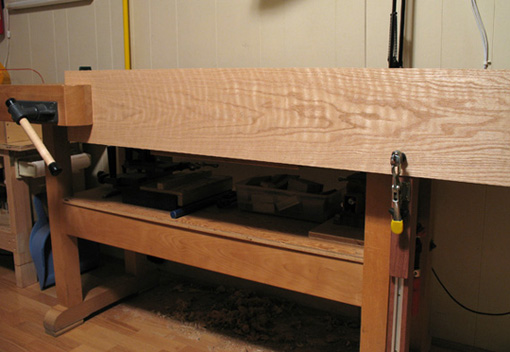
The workbench gets my vote for the most important tool in the shop. Beyond its obvious function of holding the workpiece, it establishes a reference surface to work against and really forms the basis of a woodworker’s approach to hand tool woodworking. For this reason, a craftsmen personalizes his bench even after taking great care in selecting its style and features. This refinement is bound to continue as a worker’s repertoire evolves.

The beautiful board of curly red oak, above, is held both in the front vise and, with a supplementary device, at its right end. This system works for me far better than the traditional “deadman” supports because the right side of the board is not only supported from below but also secured laterally. This is done with a vertical support piece, held in the tail vise, inlaid with T-track which holds a sliding toggle clamp. I’ve detailed this workbench upgrade and many others in an article in the November 2007 issue of Popular Woodworking magazine. (Back issues are available in sets on CD or as individual downloads.) Each of the workbench add-ons in the article has stood the tests of time and practicality in my shop. Click here to view a short video demonstration of a few of the upgrades. I hope other woodworkers will benefit from them.

Category: Jigs and Fixtures  | Comments off
Author:
• Tuesday, October 14th, 2008


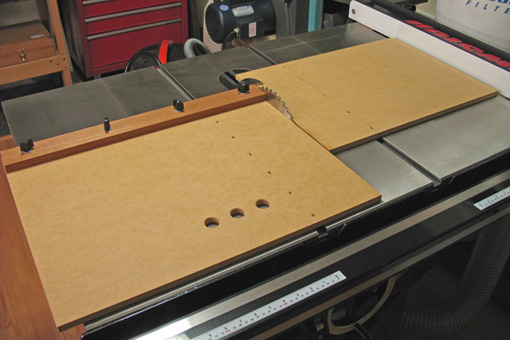
There are lots of ways to do this, written on seemingly everywhere. Here’s mine.

The jig is constructed from ½” MDF slabs with UHMW plastic runners snugly fitted in the miter slots and screwed from the top face. The left side carries the workpiece while the stationary right side prevents the cutoff from dropping. The fence is made from stable quartersawn mahogany with a handplaned straight working edge. It is secured with four flathead bolts inserted from the bottom, hand tightened with knob nuts. This allows the fence to be squared leisurely, after the initial cut of the MDF on its right side. I can get it very precisely square because it allows for retesting and readjusting. The three finger holes assist in retracting and carrying the jig.

Simple, easy, and works beautifully. That’s the way I like woodworking jigs to be.

Author:
• Tuesday, October 14th, 2008

It seems I’m always a bit flummoxed at the adjustments in technique required when working an unfamiliar species of wood. I suppose I should be used to it by now, woodworking is so tactile and good results very much depend on the nuances of the tool meeting the wood surface and realizing how a particular wood is responding. However, sound skills carry through varying circumstances.

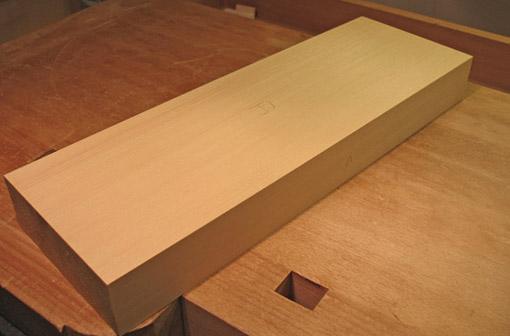
That aside, Port Orford cedar is fun to work and I recommend it. I obtained thick, clear, straight-grained, old growth stock, which I resawed, from Northwest Timber , Oregon, who expertly process salvaged logs. The quartersawn surface has a meditative, simple beauty. The shop is filled with its strong, spicy fragrance.

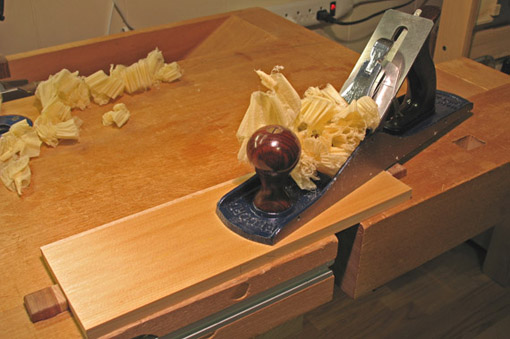
Port Orford cedar is a light wood which responds extremely well to a sharp hand plane. Its tangential and radial shrinkage figures are a relatively stable 6.9 and 4.6, respectively, with a low 1.5 T/R. That it is a soft wood does not imply it is entirely easy to work with, since it shows mistakes and crushes easily. I find low density woods (not necessarily softwood species) in some ways more problematic than friendly walnut or cherry. However, adapt your techniques and all should go well.

Forest Products Laboratory has good information on Port Orford Cedar.

Category: Wood  | Tags:  | 2 Comments
Author:
• Saturday, October 11th, 2008


Trees, equipment, and a plan. That sounds a lot like woodworking but also applies to hiking in New Hampshire’s White Mountains, seen here. One of the great satisfactions of woodworking is the clear linkage through planning, tools, technique, and very evident results. The woodworker knows and controls what he does and takes responsibility for the outcome, which lies in plain view. A virtuous universe.

The shop, and the mountains, are good places to be.

Category: Ideas  | Comments off
Author:
• Friday, October 03rd, 2008

The Forest Products Laboratory is the best source of information on that wonderful stuff that we woodworkers cherish so dearly – wood. As I graze the woodworking literature in print and online, it seems the FPL does not get the attention it warrants. It is an authoritative and amazingly extensive source.

From the FPL website the entire Wood Handbook, all 15 MB and 508 pages, can be downloaded. I keep the pdf copy on my hard drive. This book is a treasure chest of wood information – structure, physical properties of various species, grading, fasteners, gluing, finishing, etc. It does not spell out woodworking technique but it provides the kind of hard data that can form the basis for rational woodworking methodology. Making a frame and panel and want to know the shrinkage values for butternut? Page 59. Hmm…about like cherry, I’m familiar with cherry, so ok …

Look up the Tech Sheet for a species and you will get to a Technology Transfer Fact Sheet with more information than you may ever want about that species.

And on and on, there’s a ton of useful and interesting information here. (Did I mention that it’s free?)

Category: Resources  | 3 Comments
Author:
• Sunday, September 28th, 2008

Here’s a 6 mm Japanese chisel that I like for chopping tails. The diagrams show possible cross sections for Western style chisels with the sides at 78 degrees to the back.


Category: Tools and Shop  | Comments off
Author:
• Sunday, September 28th, 2008


The question of chisel geometry for chopping out dovetails has received a lot of attention. This is one of those woodworking matters that I think lends itself to analysis and I think a reasonable conclusion can be reached. The problem, as I see it, is that almost all chisel manufacturers are ignoring a sensible solution. Here’s my breakdown.

The concern has to do with the sides of the chisel. It is said that if the sides of the chisel meet the back in a relatively wide bevel (the height of the side), the tool will not properly fit into the recess between tails and thus will damage the walls of the tails. This is true if the sides meet the back at a 90 degree angle, as in almost all chisels, though only for the tail portion of the joint where the angle to be chopped and trimmed is less than 90 degrees, typically 80-83 degrees. This is not an issue for chopping and trimming pins since the wall of a pin meets the base of the socket at 90 degrees.

An influencing factor is the saw kerf for the tail ideally reaches exactly to the baseline, in which case is does provide sufficient clearance for some square-sided chisels. However, I certainly cannot consistently stop my saw kerfs so precisely; can anyone? There’s also a problem with damaging the walls of the tail socket when simply cleaning it up.

A recent review of chisels in Fine Woodworking magazine, issue #200, gives measurements of the height of the side flat (to the thousandth of an inch!) for each of 23 chisels, noting that a short side is an important desirable factor in choosing a chisel. The angle of the sides is not specified. I guess they are all 90 degrees. As the side height of the chisel gets very short, it is unfriendly to handle.

David Charlesworth provides an excellent discussion of this issue on page 116 of A Guide to Hand Tools and Methods. He discusses a sensible method to use a square-sided chisel to chop and clean up tails. However, the method of making a “release cut” may be difficult for narrow-pin dovetail layouts. He also mentions and diagrams a “custom” ground chisel with sides at 80 degrees.

There’s a simple solution to all this: chisel makers could just make the sides of the chisel at 78 degrees to the back. Why on earth don’t chisel manufacturers make this type of design available? There is no need to have sides that are .025″ high, or .010″ (ouch). Just make the sides a comfy 3/32″-1/8″ high and at 78 degrees to the back. This will work for dovetails as steep as 5:1. Since tail sockets are usually narrow, a set of 1/8, 1/4, 3/8, and maybe ½ inch, chisels with this configuration is all you need for the tails. Thickness of such a chisel would reasonably be about 1/8″-5/32″ for the smaller sizes, and perhaps 3/16 for the largest size.

Problem solved. Chop and trim the base of your tails with this type of chisel. I use a Japanese version. You would not need to custom grind them and these chisels would be just fine for general bench chisel work.

In the meantime, Hida Tool carries a chisel of this sort. Go to Woodworking>Chisels. Scroll down to the “arinomi” chisels. The sides are at 75 degrees to the back.

Category: Tools and Shop  | 2 Comments