These saws solve problems.
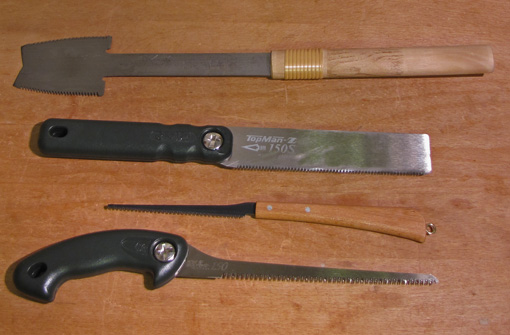
The Japanese azebiki saw, at the top in the photo, has curved tooth lines designed to start a cut in the middle of a board. One side is rip, the other crosscut. The neck is thicker toward the handle, which, along with the short cutting length, makes this saw fairly stiff for a Japanese saw.
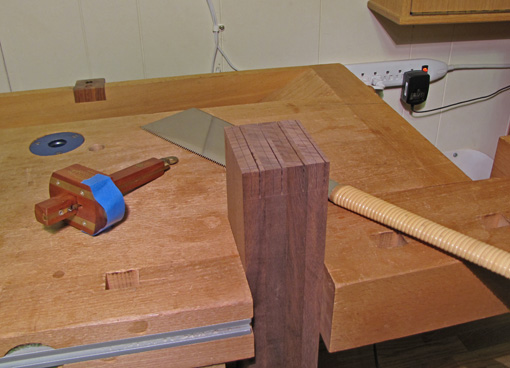
The azebiki works well cutting against a straightedge wood guide to make kerfs for starting grooves and dados, including sliding dovetail sockets. Use a chisel to clear the waste and a router plane to true the bottom. I prefer an electric router for this work but sometimes it is too risky or awkward, so it is good to have hand tool options.
For all sorts of odd small-scale sawing tasks, the azebiki saves the day. It is inexpensive and worth having in the shop.
The Z brand 6″ keyhole/compass saw (S-150), at the bottom in the photo, has Japanese three-bevel crosscut-style teeth (17 tpi) with variations in the set to help clear waste. This saw cuts more smoothly than other Japanese and Western keyhole saws that I have tried.
At .035″ thick, it is stiff enough to maintain control when sawing curves, as long as the stock is not too thick. Of course, it cuts on the pull stroke, which occasionally is a disadvantage when jabbing into a small hole to start a cut.
I bought the skinny keyhole saw with the wooden handle many years ago, and it hangs around waiting for an odd situation where there is only a tiny hole or narrow slot to sneak into with the nose of the saw. It would be expecting a lot for a saw of this size to cut smoothly, and indeed, it does not.
The little guy keeps his place on the roster because, though infrequently, he continues to make plays when needed. And he doesn’t take up much space on the bench.
Second from the top in the photo is a Z brand flush cut saw (S-150). You might not need this type of saw if you use the trick I discussed in an earlier post, but I still like having it as an option. The .016″ thick plate is very flexible, so it can be bent to allow the handle to be lifted away from the work surface, as you use the fingers of your other hand to press down on the saw blade.
To prevent scratching the work, the three-bevel crosscut style teeth (21 tpi) have no set whatsoever. I prepped the saw by lightly working each side on a medium sharpening stone to ensure that any trace of burr would be gone. As discussed here, binding can be a problem with this saw but it works well enough for shallow cuts.
Z brand saws are well made. The replaceable blades are inexpensive, so there is no worry if you occasionally abuse them when desperately trying to do an awkward job.
This part 8 concludes the My Saws series. Or does it? Our current woodworking world has some great saw makers at work, modern technology, and an expanding appreciation of the woodworking wisdom of our forebears, so a new saw for my shop is always a possibility. The bottom line will always be: how the tool can help me make things that I so dearly want to make.
Note: The entire series, parts 1-8, of “East meets West: My Saws” can viewed on a single page via this link.