Sharpening is, of course, a huge topic in woodworking where it should never be forgotten that there are many effective ways to achieve excellent results. As such, I will not stir up the debate as to whether one should use manufactured honing guides but simply state that, with rare exceptions, I do not.
For preparing a new edge, after flattening the back of a chisel or plane blade, I grind a primary bevel on the Tormek machine using one of Tormek’s handy jigs. I use the resultant concave bevel to feel the contact angle on the stone’s surface as I clean up, but still preserve, the grind. I use Shapton stones.
I refer you to Joel Moskowitz’ excellent discussion of sharpening, which, as you would expect from Joel, includes some interesting historical information. I almost always use a small secondary bevel on my tools. Joel discusses microbevels and here is where I will add my approach.
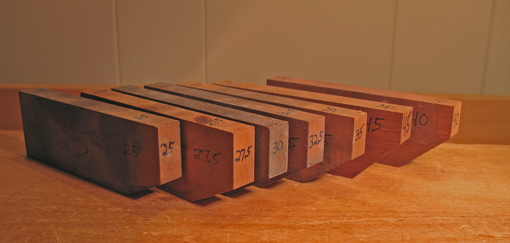
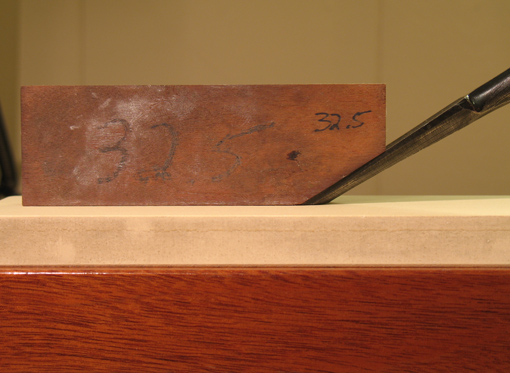
Let’s say I grind a chisel at 27 degrees, and use a 32 degree secondary bevel. The chisel is held freehand, yet consistently, against the stone at the secondary angle. I “set” this angle with a simple block of wood as shown above. I hold the block on the stone, slide in the chisel, lock one hand, remove the block, bring the other hand on the tool, and hone. I can precisely return to this angle as needed after flipping the tool and backing off on a finishing stone. Usually my hands remember the angle after a flip or two, but I can always return to the block to remind my hands.
When I resharpen the tool I hone just the small secondary bevel, sometimes first on a 5000 before going to my finest stone. Here’s the important point: I can reproduce the secondary bevel angle very easily with the block guide, a day later or a month later. I’m honing a very small area of metal that meets the stone precisely. Depending on the use of the tool, the secondary bevel lasts for several resharpenings before I regrind on the Tormek. I am careful to rinse the blocks to avoid contaminating my finest stones.
The blocks, about 4 ½” x 1 ½” x ½” are easy to make. They are also useful for creating a primary bevel using coarse stones for certain tools that I don’t grind on the Tormek. Most of these blocks have seen many years of use. Very simple, very effective – that’s the way I like things.