Archive for ◊ January, 2013 ◊

Author:
• Wednesday, January 30th, 2013

In a recent post on the Fine Woodworking website, FW Senior Editor Matt Kenney questioned if employing jigs and shortcuts to achieve excellent results constitutes “cheating” at woodworking. His emphatic answer is that the result, not the method, is what matters. He encourages each woodworker to unapologetically find the methods that work best for him to produce the furniture of his desire.

By and large, I agree with Matt. Judging from the numerous comments on the post, this question concerns many woodworkers.

But it got me thinking, is there cheating  of another sort in woodworking? I believe the answer is yes, there is.

Cheating in woodworking is pretending that what you made is better than you know it to be, or that it meets your standard when you know it really does not.

Honest craftsmanship, at whatever level, is a result consistent with an intention. It is not necessarily a precisely realized prediction of each procedure, or of each element of the design, but at least the concept, the core idea, of the piece should be successfully expressed. That, after all, was your purpose in building it.

Now, there is always some unpredictability, and thus risk, involved in craftwork because until the piece is completed, its full impact cannot be felt. In other words, despite all of a craftsman’s designing and workmanship, he never can fully grasp what he has gotten himself into until the piece is done and stands there before him.

You may have chosen to make a simple functional bookcase or a high-class cabinet. The piece may have involved a novel design that you were not sure would “work,” or may have pushed the limits of your skills.

In all cases, there is a reckoning that comes when the work is done.

Is the piece within the range of what you intended? Has your concept – your core idea – been expressed? If so, was it a good idea in the first place? And the workmanship: is it of such level to carry that expression? Put simply, did you make what you really wanted to?

I know if I did or did not. It’s not an absolute judgment, but there surely is a discernible threshold – an overall truth about the piece. Cheating in woodworking would be to kid myself about that.

Fortunately, there is no need to cheat. Just get a pencil, more wood, and sharpen your tools, including the one on your shoulders, and get back to work.

Category: Ideas  | 9 Comments
Author:
• Sunday, January 27th, 2013

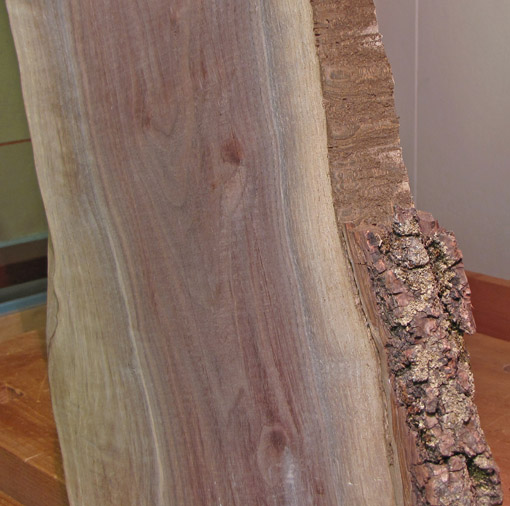
Projects featuring live edge wood can be fun and liberating as the gifts of nature guide the woodworker’s design. Though preferences vary in managing live edge boards, I like to remove all of the bark down to the sapwood surface, retaining and exposing the wonderful natural undulations of the wood.

Live, or “natural,” edge boards may have been dried with all of the bark on, or after most of it was removed. During the growing season, the cambium layer is fragile, making the bark easier to shear off. Either way, my goal is to remove all remaining bark without damaging the natural contours of the wood.

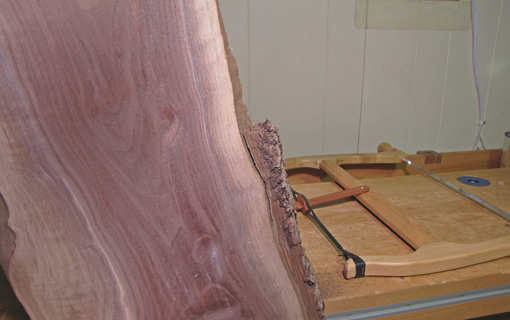
The walnut board shown here was dried with all of its bark so I began by removing the bulk of it with a bowsaw. A drawknife may also work well. This is not a job for a bandsaw or jig saw because you want the maneuverability and feel of a hand tool. In the soft inner bark, the saw almost feels like it is going through Styrofoam; the harder resistance of wood is a sign of going too far. To save work later, I get as close as I safely can to the wood, intermittently checking both sides of the board. It is easier to work with the board held vertically, if possible.

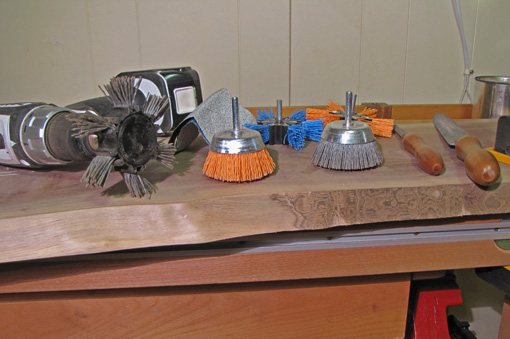
The next step is to use abrasives. Dico Nyalox brushes used in an electric hand drill work ideally. They are aggressive enough to remove remaining bark but not enough to reshape the wood. In most cases, an 80-grit (grey) flap brush is a good start, followed by the orange 120-grit. I brace the drill against my body and wear a dust mask.

Next, I use the less aggressive cup brushes, which, as I ramble the drill along the edge, act almost like a random orbit sander. The 80 and 120-grit cup brushes, followed by a light pass with a blue 240-grit flap brush, finish the job.

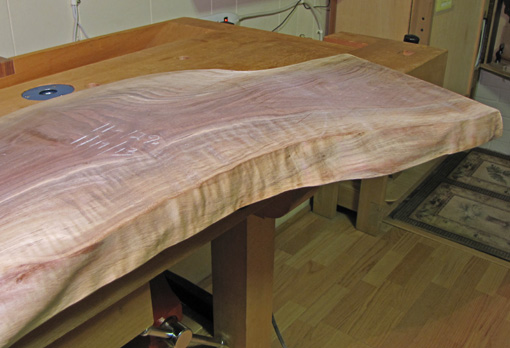
 The photo below shows the result I like: cleaned up, but ruggedly natural.

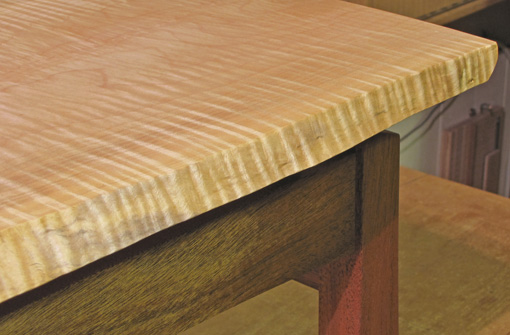
The edges of curly wood require special caution. The coarser flap brushes seem to impact the peaks of the bumpy, wavy edge to gouge tiny horizontal grooves that are difficult to remove. Depending on the species, I’ve found it better to work mostly with the cup brushes for curly wood. The photo below shows the edge of curly big leaf maple in a finished piece.

Notice the rasps and sandpaper in the photo showing the tools. “Natural” is nice, but occasionally I’ll “improve” on nature with a little cosmetic surgery using a coping saw, rasps, sandpaper, and maybe even fillers to alter a shape or defect that I don’t like, and to get the look I want. That’s part of the fun.

Category: Wood  | Comments off
Author:
• Sunday, January 20th, 2013

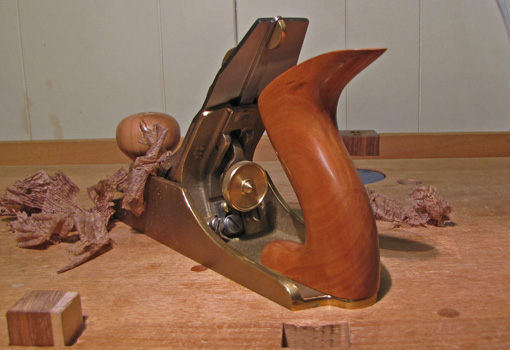
The Lie-Nielsen bronze #4 has for years been one of my favorite tools in the shop, but is now even better with an aftermarket tote and front knob made by Bill Rittner. Now, this is not a situation like I have previously described with the Veritas totes. The L-N OEM tote is very good. The upgrade, however, is in another category: heavenly.

It may be hard for readers to understand my effusiveness about a shaped piece of wood without being able to reach into the above photo and pick up the plane, so I recommend visiting Bill’s website and reading about his tool making background and how he has refined plane handles. In working with Bill last year evaluating some prototypes, I was amazed at the level of refinement to which he has brought this work.

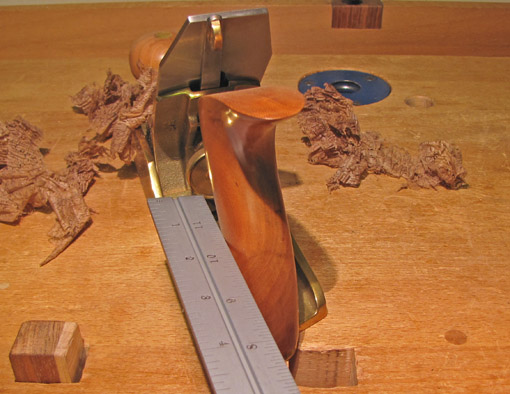
As demonstrated in the photo below, the tote does not have any flat on its side. (Check your planes’ totes.) The cross section is actually elliptical, which fills the hand satisfyingly.  The fit and finish are superb. If you enjoy and appreciate the nuanced work of a sophisticated craftsman, this is a luxury that is well worth it. Really, I find myself eager to use the plane just so I can hold it.

As I have mentioned in several other tool recommendations on this blog, this review is unsolicited and uncompensated. I just like to support craftsmen making honest offerings of great products.

Author:
• Monday, January 14th, 2013

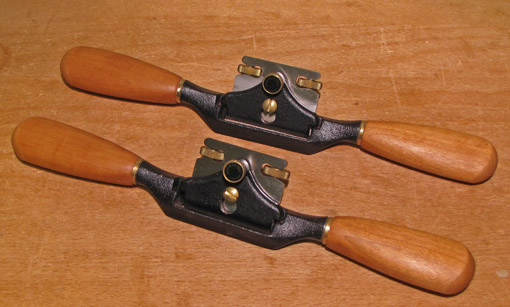
The Veritas flat and round metal spokeshaves are excellent tools that have performed well for several years in my shop. However, I greatly dislike the handles on these tools as supplied by Veritas. I will explain. 

The OEM handles are round in cross section, and rather small. This makes it difficult to control the spokeshave in the most critical aspect – its rotational pitch on the long axis of the tool with respect to the wood surface. This means how you tip the spokeshave to effectively engage the blade into wood. The smallish round handles make it hard to find and maintain proper positioning. The tool tends to rotate unless it is gripped tightly, leading to undue fatigue.

This is true even if you place your fingertips on the body of the spokeshave, as many woodworkers prefer. The fingertips are fine tuners, while stability and power comes from the body of the hand against the handles.

Fortunately, the Veritas design facilitates installing user-made replacements, which I did soon after I bought the tools, using hardware available from Veritas.

I made my handles larger and, most importantly, flatter – vaguely like a chubby beaver tail or an elongated cactus branch. I can feel and maintain the registration of the spokeshave against the wood better than with the OEM handles. My handles originally were longer but I shortened them, so now I can tuck the rounded end against the outer part of my palm.

The flatter handles are a tricky to install because you want them to attach in a specific orientation, unlike the round-cross section OEM handles. One end of the hanger bolt used to attach the handle goes into the tool body with machine threads. Coarse wood threads on the other end go into the wooden handle. The wood threads must enter just right amount into the handle so it will be in the desired position when the machine threads are tightened into the body. There are right hand threads on both sides of the body, and therefore they tighten in opposite directions as they face each other.

I eventually got it right after trial and error. Making the two faces of the handle symmetrical doubles the opportunities to align the two handles.

Perhaps a tang with machine threads on one end that attach to the body would make it easier to align user-made handles that are not round in cross section. I wonder if Veritas would consider such an accessory.

I made the handles from cherry. I like a woody, not slick, feel to tool handles so I applied a single coat of oil-varnish.

As always, woodworkers will have their personal preferences in these matters of the hand and the tool, but here I have explained the reasons for my preferences. Now the Veritas spokeshaves are just right in my hands!

Category: Tools and Shop  | 5 Comments