Tag-Archive for ◊ Marking cutting and mortise gauges ◊

Author:
• Saturday, January 07th, 2017

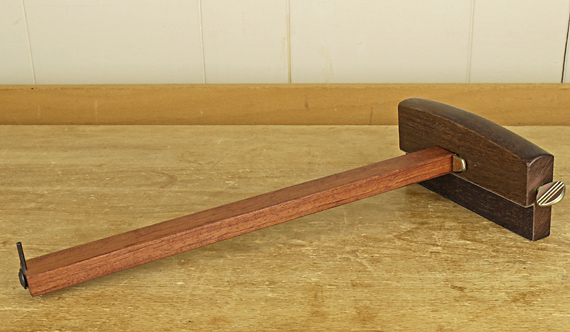
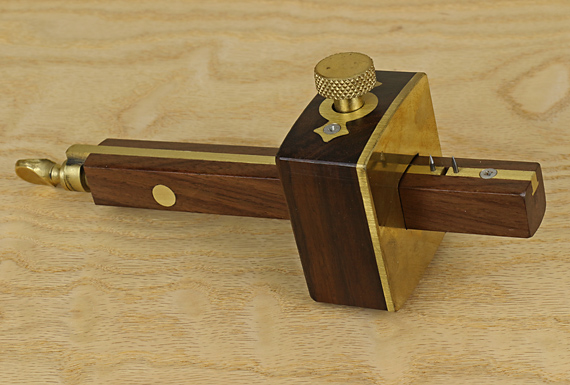
mortise gauge

Unlike the almost all of the cutting and marking gauges discussed in the previous four installments of this series of posts, mortise gauges generally do not have either scribing point at the end of the stem. To gain better visibility of the marking action, I prefer to push a mortise gauge.

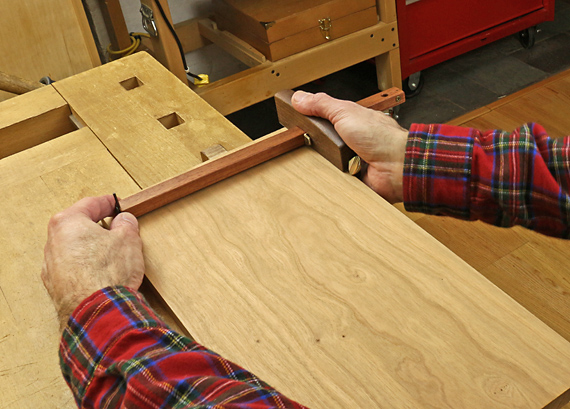
In use, tilt the gauge to make the marking action smoother and to prevent the points from jumping and creating errant marks. Control the angle and pressure based on the hardness of the wood and the desired depth of the mark. Consider supporting the far end of the stem depending on the resistance of the wood. Marking out is important so take a moment to clamp the work and do it right.
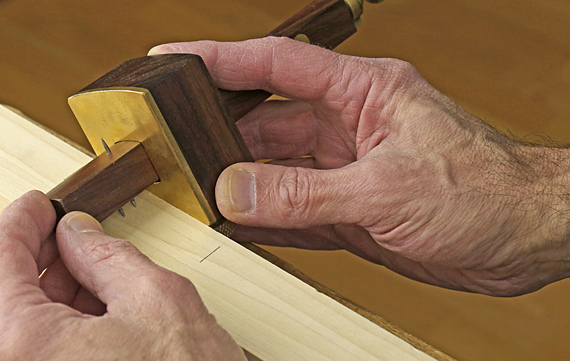
using a mortise gauge

Points, knives, and sorta knives

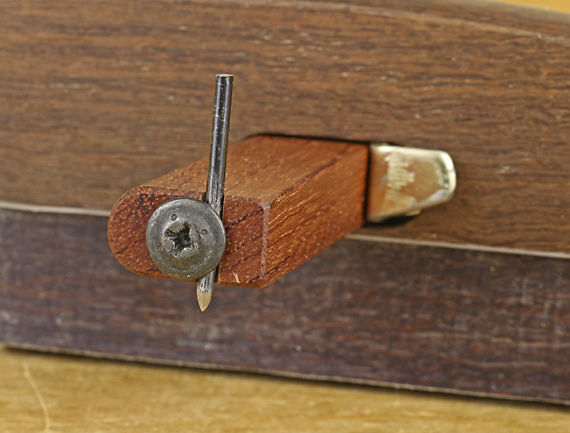
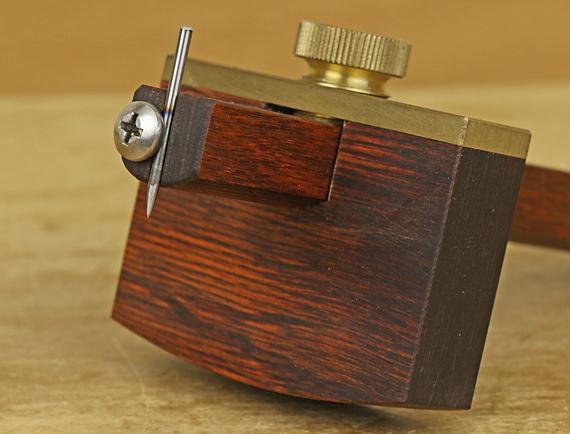
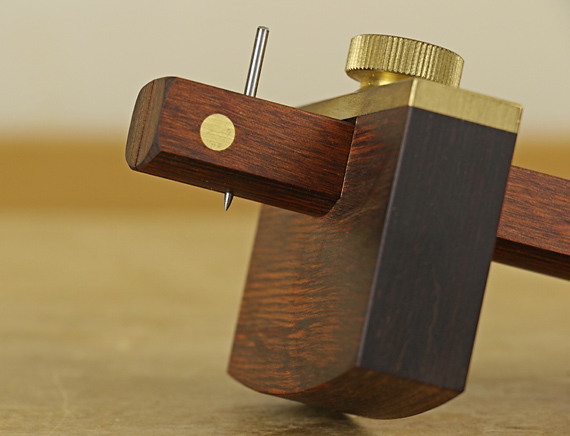
Because a mortise gauge is used along the grain and on end grain, I prefer simple conical points, mostly because I can see its mark better but also to keep things simple and consistent. Some gauges employ half-conical points that are sharpened like tiny knives. I find their marks harder to see.
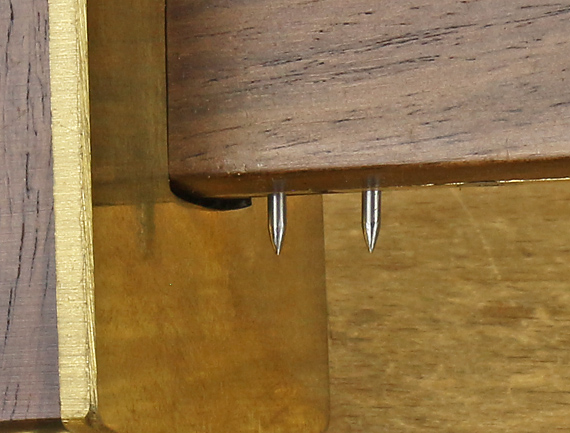
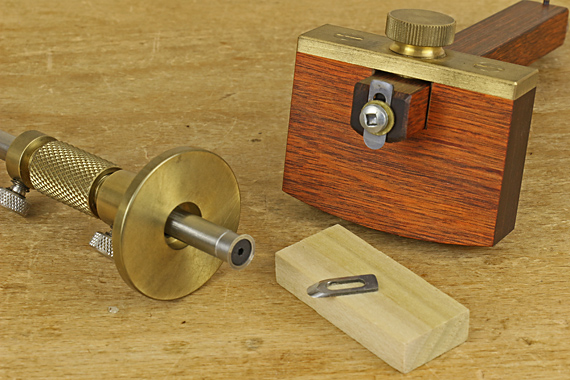
mortise gauge points

One type of Japanese mortise gauge employs two L-shaped actual knives, which makes the marking action easy to see, but I find those knife lines hard to see and follow. I do not like knives in a mortise gauge.

The marks made by conical points, which are actually V-shaped grooves, are easy to fill in with a pencil to further improve their visibility. Here is a refinement that you might want to experiment with (but is hard to photograph). Run a relatively blunt pencil in the groove such that the walls, but not the full depth of the groove, receive the lead, effectively creating two separate but very closely spaced pencil lines. Saw to make one line in the keeper wood and the other in the waste.
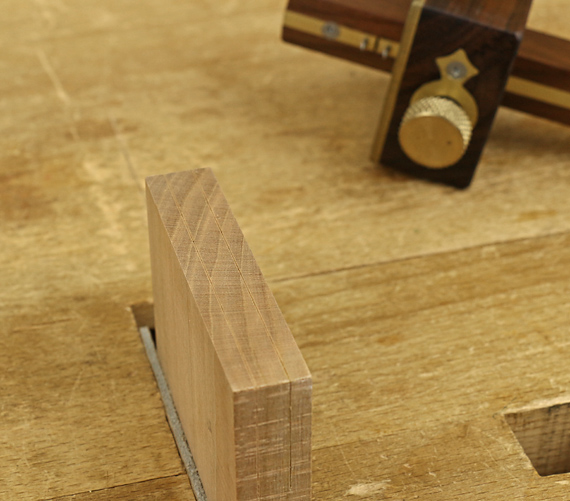
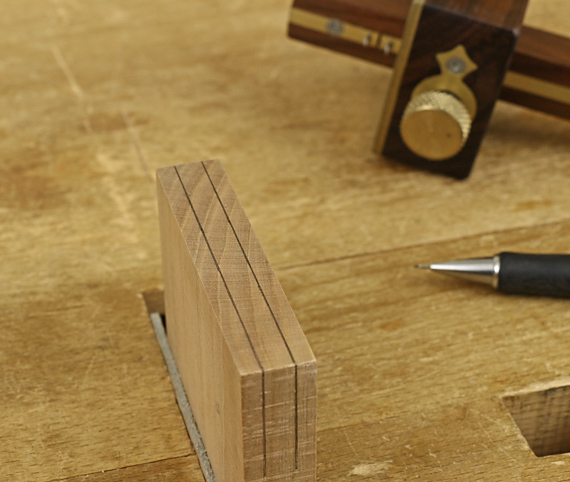
tenon layout

tenon layout

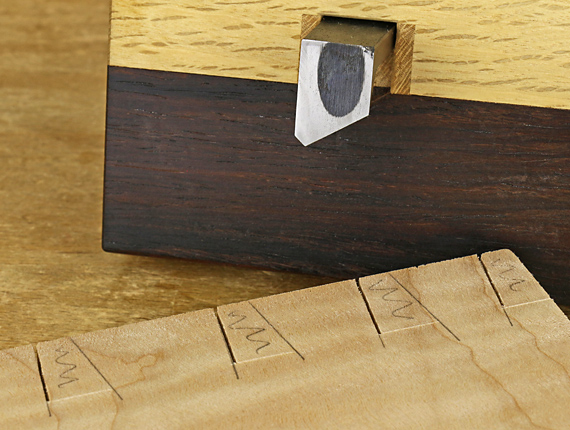
Preference in the type of markers will depend on how you do mortise and tenon work. Tiny knife points (sharpened half-cones) with the bevels facing each other may have a marginal advantage over conical points for setting the gauge to a mortise chisel and laying out the mortise with the bevels in the waste.

I almost always machine mortises. The flats of the tiny knives, which are facing outward, can be accurately set against the mortise walls and the spacing transferred to the tenon piece. But then the bevels are in the keeper wood, which I feel diminishes sawing accuracy.

Ugh, too complicated! The conical points are simple, consistent, and what I recommend. I can accurately set them to a routed mortise by widening the gap between the points to where they just barely no longer fit into the mortise slot. Then I aggressively attack the resultant layout lines when sawing the tenon by hand. The points can be similarly gapped to the width of a mortise chisel by looking for zero to trace clearance of the pins across the chisel. Keep the same setting for the tenon and saw to the layout aggressively.

Also note that filing the 1/16″ diameter conical points that are on most mortise gauges into half-conical tiny knives may weaken them too much.

Marples deluxe gauge

I am mostly happy with my Marples deluxe gauge, pictured here. It has a full brass fence face and nice heft. The screw-feed adjustment is, I feel, far easier to set than the slide adjustment on some mortise gauges.
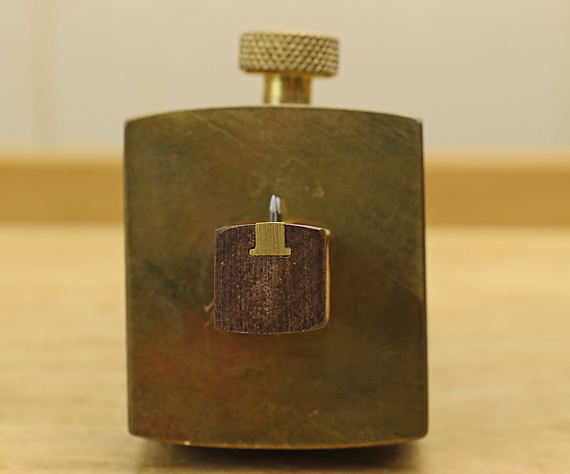
Marples mortise gauge

Look at how far off vertical the clamping screw is. Sloppy or intentional? [Tool vendors: any comments?] Though this does not seem to be present in the photos of the gauge on vendors sites, I hope it is intentional because the slightly angled screw presses (via a brass wear pad) off-center on the top surface of the stem, which is radiused. This shoves the stem into the opposite lower corner of the fence mortise, beautifully preventing any wobble of the stem. One alternative to prevent wobble might be to shim the fence mortise.

Tuning points

In tuning your mortise gauge, the point tips should enter the wood at same level with the fence held snugly against an accurately squared work piece. This will produce two marked lines of the same depth. In theory, the stem has to be perpendicular to the fence face (in the plane of the marking points) for this to happen at all extension positions of the points. If it is not square, and it probably is off a bit as is mine, just set the gauge in the most common position that you use it and file the points into true for that position. It does not have to be perfect.

Oh, and how about that annoying, useless third spur on the opposite side of the stem? I have never used it. As I write these posts, I think through my habits and rationales for doing things the way I do. So, I finally got around to grinding off that point.
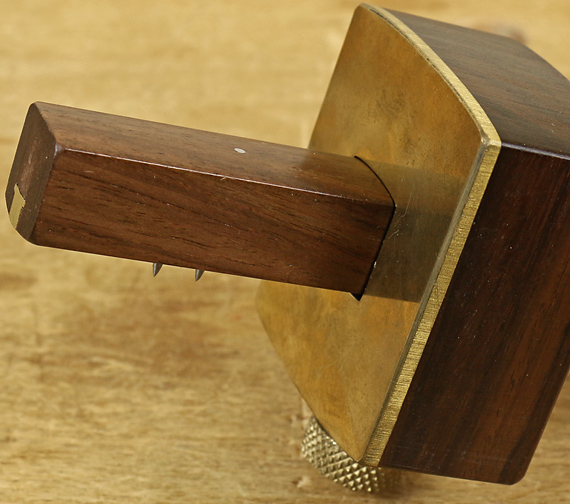
mortise gauge

That’s all for this series of five posts on gauges. Hard to believe I had 3,000 words to say on the topic but I have tried to keep the discussion beyond the basics that are churned out in most sources. Thanks for reading and I hope this helps your woodworking.

Author:
• Monday, January 02nd, 2017

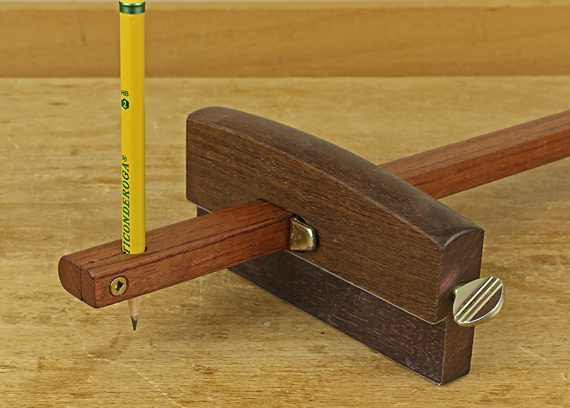
panel gauge with pencil

Sometimes, directly gauging a pencil line gives all the accuracy you need. Here are some options of various degrees of ease and precision.

Plain old #2

In the wooden stem of most gauges, you can drill a hole, saw a kerf, and locate a tightening screw to bind the walls of the hole around an installed ordinary pencil as I have in my panel gauge, above.

In the case of this panel gauge, the pencil cannot be gripped close enough to its point to allow the step in the fence to ride on the surface of the board. A simple solution is to hold a temporary shim block under the step to keep the stem parallel to the face of the board and the pencil in good contact with the surface.

A pencil holder is available as an option in the large Hamilton gauge.

Naked lead

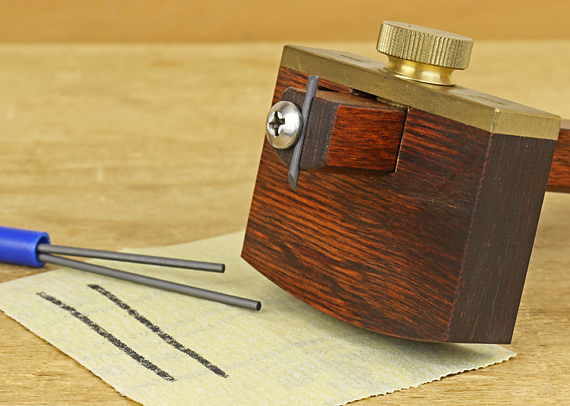
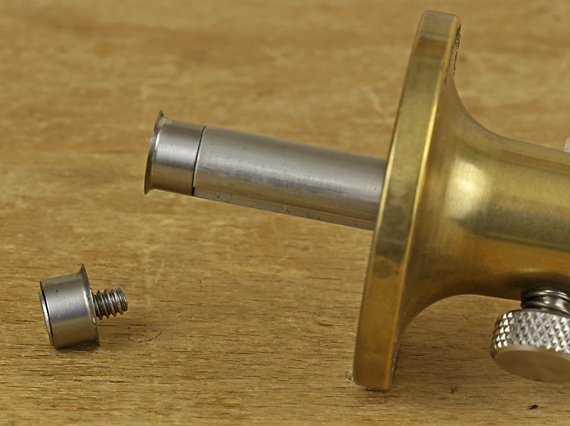
For a more precise pencil line in smaller scale work, install a 2 mm drafting lead in the little groove that held the conical steel marking point, as described in the previous post. Gently tighten the screw. Now you have a pencil marker at the end of the stem where it is easy to see in action, as discussed in part 1 of this series.

2mm leads in marking gauge

Sharpen the lead to a bevel point on 220-grit, or finer, sandpaper. HB lead with a light touch works well. 2H wears better but leaves a less prominent line.

Incra dinka doo

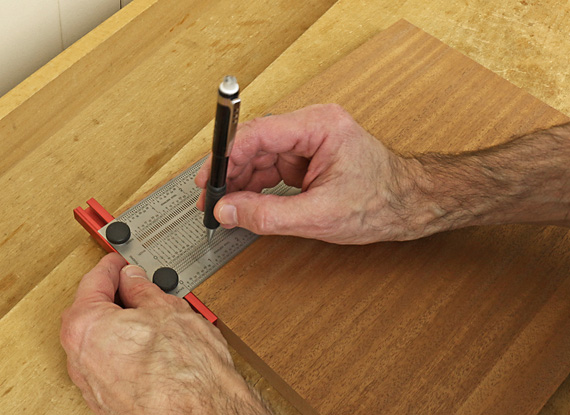
Incra T-rule

The Incra T-rule easily scribes pencil layout lines to very accurate absolute measurements in 1/64″ increments. Set the point of 0.5mm mechanical pencil lead in the desired hole and simply slide the fence along the edge of the board.

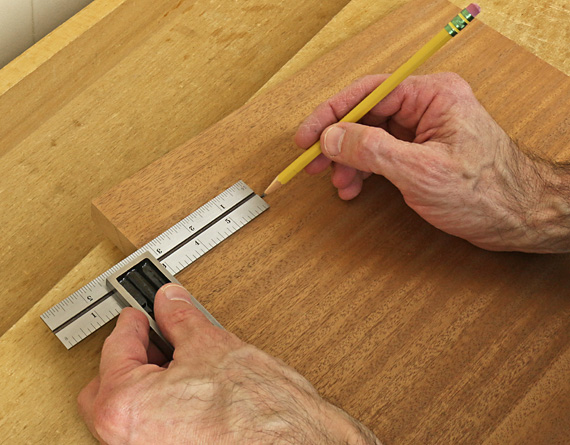
Combo square

Slide the stock of a combination square, large or small, set to the desired length, against the edge of the board as you hold a pencil point against the end of the blade.

square as marking gauge

It is a must to somehow clamp the work piece for these last two methods.

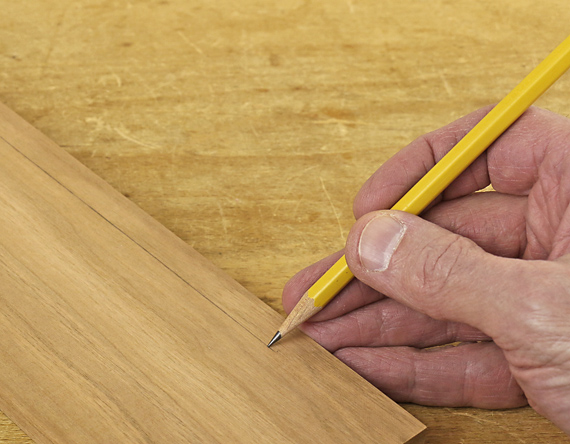
Look, only hands!

Simplest of all, hold a pencil in your hand and stiffen your extra fingers against the edge of the board so they act as a fence as you slide your hand along to mark the line. This is surprisingly accurate and suffices for many tasks.

hand gauge

Use a light touch. Also, beware of the possibility of splinters on a board with a roughsawn edge, especially in species such as wenge or Douglas fir.

As with everything else in woodworking, have a repertoire of tools and methods at your behest, and choose those that effect the ease and precision appropriate for the task. That is much of what is skill is about.

Next: mortise gauges

Author:
• Monday, January 02nd, 2017

panel gauge

These conical and half-conical markers are strictly for use along the grain. There they make a wider groove than a knife point that is easier to see on its own, and easier to fill with a pencil to improve its visibility.

panel gauge

I keep the half-conical marker installed in my panel gauge because it is a bit easier to pull through the wood than a full conical point, and its flat face makes one side of the groove nearly square. For marking out the width of a panel, it is slightly better to orient the flat side of the marker toward the fence (and the keeper wood) and thus the bevel will be in the waste wood.

half-conical point

As a further refinement, you can rotate the point to make the flat face angled slightly away from the fence in the direction of travel of the gauge. This will help pull the fence toward the edge of the board similarly to the Japanese cutting gauge discussed in part 1 of this series. I usually like to pull the panel gauge.

A panel gauge has a stepped fence that keeps the long stem parallel to the face of the board and square across it. However, this prevents you from tilting the fence – and the marking point – as you would with a regular gauge that uses a point marker. Thus, it is all the more helpful that the half-conical point offers less resistance.

To make the fence ride easier, I attached PSA UHMW plastic to the vertical and horizontal working faces. In use, clamp the work piece and use your second hand to support the marking end of the stem so it does not catch and wander.

using a panel gauge

The conical point is handy for general work. It can be ground to a slimmer tapered point to slightly reduce resistance in the wood. These can be made by grinding the shank of a 5/64″ (2mm) drill bit. The half-conical point is more difficult to make and to find. Mine came from a very old gauge.

marking gauge

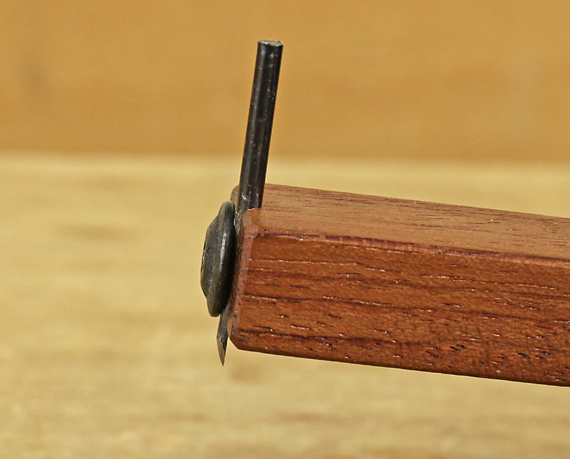
These marking points can be easily mounted to the end of the wooden stem of most gauges by simply sawing a small kerf and then refining it with a needle rasp. Locate a pan-head screw, or better, a lath screw, so a flat area on the underside of the head sits over the apex of the cylindrical portion of the marking point, thereby gripping it.

As I am demonstrating below with a mortise gauge, tilt a gauge that uses a conical marking point toward the direction of travel to make the marking action smoother. This avoids jumping, digging in, and inaccuracy.

using a mortise gauge

Next: some options for gauging with a pencil

Category: Tools and Shop  | Tags:  | Comments off
Author:
• Sunday, January 01st, 2017

Titemark gauge

Is there a gauge that works well both across and along the grain? Yes, but there are compromises and it depends on the wood. What we are looking for here is an all-around gauge.

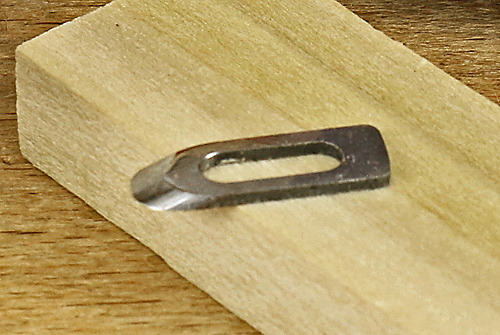
For this, I suggest the Titemark gauge or one of the gauges made by Jeff Hamilton of Hamilton Woodworks. The Titemark has a round blade, while the Hamiltons use a fingernail-shaped blade. I have used the Titemark in my shop for many years. I do not own a Hamilton gauge (on my wish list), however, I have used them – they are excellent – and I use a Hamilton blade retrofitted into a Cullen gauge, as shown above.

In any case, it is the properties of the blades that are the focus of this discussion. Here are close up views:

Titemark gauge

Hamilton gauge cutter

Let’s consider how these blades perform in a fine, diffuse-porous wood like cherry and a coarse, ring-porous wood like oak. Mahogany and walnut would be somewhere in between on the spectrum.

Across the grain

Both cutters work well across the grain in cherry and oak. The fingernail cutter more readily bites deeper. By the way, I prefer to push or pull, not roll, the Tite-Mark gauge, and then use a slight roll only near the end to meet a layout line. Neither easily bites a line as deep as the Japanese V-point gauge, nor are they as easy to bring up to a layout line.

Along the grain

The round and fingernail blades work fairly well marking along the grain in cherry. In oak, however, the line is difficult to see and can be especially obscure on a quartersawn surface.

In all woods, the marked lines with both blades are thin; the fingernail blade is the better of the two. You can improve visibility by running a fine pencil point in the groove, though the pencil can sometimes jump out of the groove, especially in oak. Therefore, I generally prefer a conical or half conical point for medium to large scale marking along the grain. They make a bigger groove that is easier to see and easier to fill with a pencil line.

Still, it can be tough to smoothly mark a long visible line along the grain in oak even with a slim conical point. I find that the most practical solution is to mark directly with a fine pencil or lead point. In a later post, we’ll discuss options for that.

For detail work, including along the grain, such as marking out for hinges, the rounded cutters are just fine. I especially like the Tite-Mark’s micro-adjustment feature for this work.

For situations where you want the bevel facing away from the fence to keep it in the waste, such as when gauging width to rip a panel, a reverse bevel cutter (bevel facing away from the fence) is available for the Tite-Mark (see photo above). The Hamilton blade can be installed with the bevel facing either way.

The Tite-Mark gauge affords an excellent sense of control with your fingers right up against the trumpet-shaped back of the fence. The small Hamilton gauge gives a similar sense.

It should be noted that Woodjoy makes a compact gauge with a V-point, and Lie-Nielsen makes a panel gauge with a V-point. I do not have hands-on experience with these but each has its cutter at the end of the stem, which is good, and of course, both companies make great tools.

In summary, I suggest the Tite-Mark or Hamilton gauges as good all-around gauges with the reservation that one gauge is not ideal for everything.

Next: conical markers

Author:
• Friday, December 23rd, 2016

marking and cutting gauges

In this series, we will take a close look at gauges, sorting out their useful features and subtle refinements. Though basically simple tools, they deserve our attention because it is awfully difficult to do fine work without clean and accurate marking out.

Notice the common feature among these gauges: the point or cutter is at the end of the stem. I prefer this because it makes the marking action easily visible. The starting and stopping locations, and the depth of the mark are plain to see. This feature also makes it easy to set the gauge to an edge or mark in an existing component of the construction.

Most of the available gauges, like the one below, have the point (or cutter) placed well in from the end of the stem where it is less visible. True, tilting the gauge in use, as one should, can give you some view of the point if you push the gauge, but not much if you are drawing the gauge toward you. True also, depending on the situation, attention may be better paid to the registration of the fence against the edge of the board. Still, in my view, it is better to always have the option of easily seeing the point.

marking gauge

The mortise gauge is another matter in this regard, which will be covered later in this series.

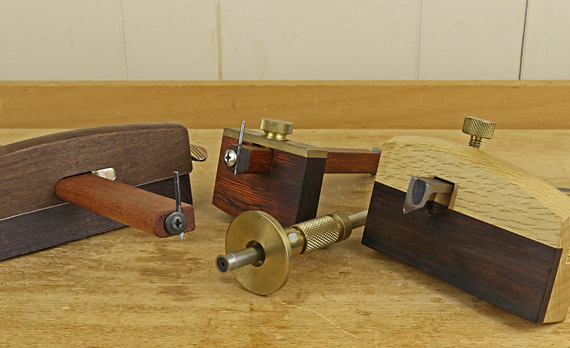
I have modified the two gauges on the left in the photo at the top. Leftmost is a Japanese gauge that originally used a cutting knife but is now a 12″ panel gauge. Second from the left, in the back, is a modified Cullen gauge. In front is the Titemark gauge. More on these later in this series.

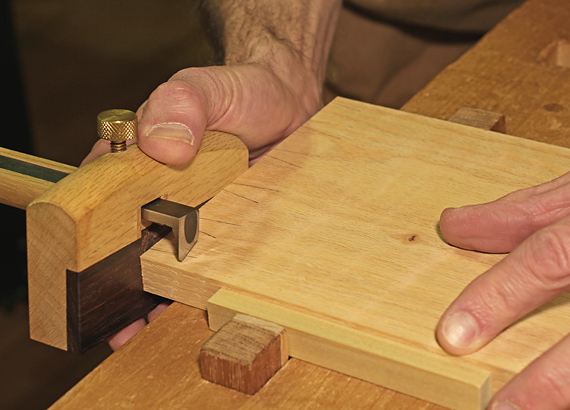
On the right in the photo at the top is a wonderful Japanese cutting gauge that is just about perfect. This is the gauge I always use for dovetailing. It has a broad, beefy fence that is easy to grip in varied ways. The hard exotic wood inlay glides smoothly on the work piece and resists wear.

Japanese cutting gauge

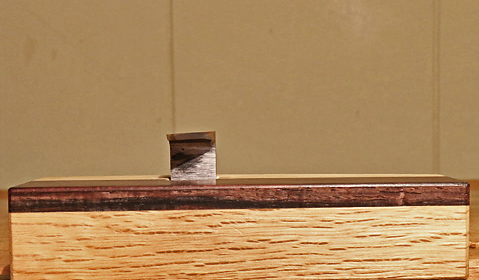
The knife has a modified V-point with the bevel toward the fence, which places it in the waste wood. This gauge is primarily used on the pull stroke. Accordingly, the plane of the face of the knife is slightly angled away from the fence on the side near you. (See the side-view photo, below.) This tends to draw the fence inward, helping to keep it snug against the edge of the work piece. This angle does not at all reduce the quality of the cut.

blade angle

I much prefer to avoid leaving gauge marks in finished dovetails. One way to do this is by making the gauge cut shallow but I prefer to eliminate that variable by gauging the cut only where it is needed and thus where it will be automatically eliminated. This goes for tails and pins. This way I can gauge a substantially deep cut, which helps when chiseling out the waste, and not worry about having to later plane away any marks.

The short arm of the V-point is very helpful to bring the cut up to the penciled tail lines and the squared pin lines by nudging the gauge forward.

cutting gauge for dovetails

The laminated Japanese blade takes a very sharp edge and holds it very well.

I bought this gauge about 15 years ago, as best I recall, but similar ones are quite expensive now. Suzuki-ya sells a model with double blades, Iida with a single blade, and Tools from Japan sells a much less expensive double-blade model without the V-point, but perhaps that could be worked in by the user.

One more thing. I clamp the work piece for any major gauging such as dovetail and tenon layouts. It makes no sense to me to do the cool, casual whip of a gauge across a work piece that is grasped with one arm, like we see in some videos. Gauging is important, just like sawing and chiseling, so it is worth the time and effort to clamp the work piece.

Next: Is there a gauge that works well both along and across the grain?