Tag-Archive for ◊ choose a finish at the start series ◊

Author:
• Thursday, January 28th, 2010

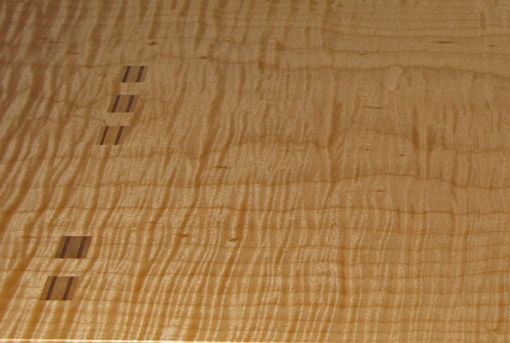
It is a good thing to bring out the figure in wood, but there can be too much of a good thing. There can be a fine line between beautiful figure and blotching. The big leaf maple pictured above has knock-out curl. In experimenting with oil-varnish, I found that the curl became too exaggerated and areas of random blotching arose that detracted from the curl. Gel varnish avoided the problems and was enough to wonderfully bring out the curl. This beauty would have suffered from too much makeup.

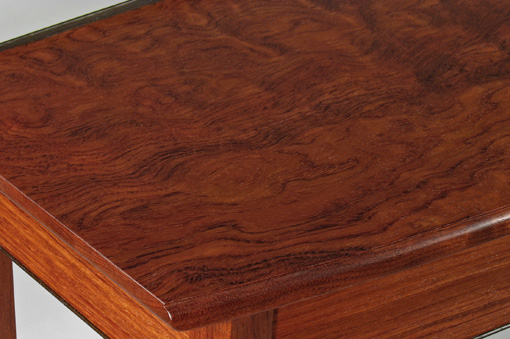
The figured bubinga, below, on the other hand, is so rich and wild that oil-varnish (Minwax Antique Oil) worked well to deepen the overall color and bring out the dark elements in the patterns. Gel varnish over that produced a nice satin sheen. The darkened wenge trim (seen in the upper and lower left) further enhances the dark parts of the figure.
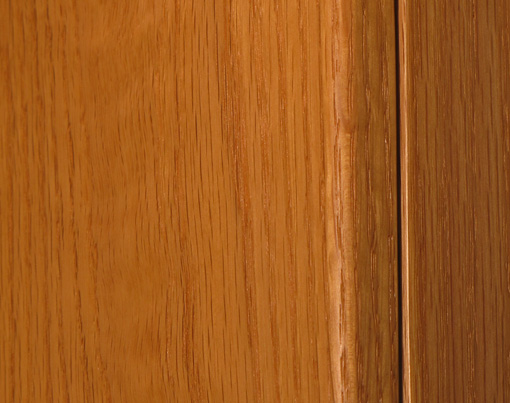
The red oak in the cabinet below, does not need more than gel varnish. In my opinion, the attractive rugged texture of oak looks best preserved with a thin film finish or just oil-varnish, rather than filled in like a sheet of ice on a black road. Sometimes, less is more.
In planning the finish for a piece, the long term should also be considered. Woods darken over time to varying degrees. Also, the wear to which a piece is subjected will alter its character.

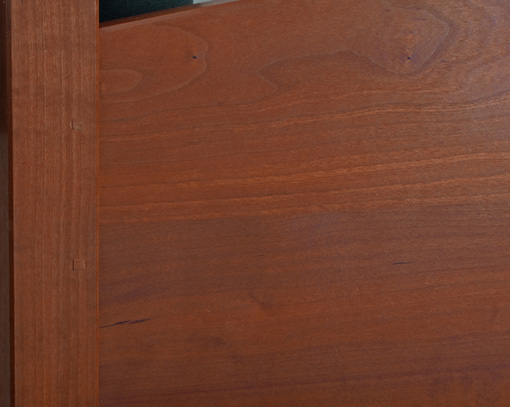
Cherry continues to darken to rich colors over the years. While this somewhat muddies its figure, most people like the look of old cherry. The cherry headboard, below, finished with oil-varnish years ago, developed a strong beauty which I captured on camera only somewhat successfully. Plan for what cherry will become.
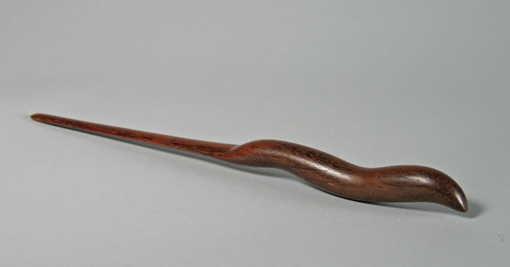
The bubinga letter opener, below, got a very fine finish sanding and a single coat of Watco Danish oil (which is actually an oil-varnish blend) years ago and has fended for itself very well with daily use since. Handling has burnished this dense species to an honest sheen. A film finish probably would have broken down irregularly and looked worn out instead of worn beautifully.
I still can’t say I’m fond of finishing, but I like the results. Working out finishing issues early in the project with testing and clear intention makes the process much more pleasant and reliable. And the project ain’t over till it’s finished.

Happy woodworking, dear readers.

Author:
• Tuesday, January 26th, 2010

Here are examples to illustrate the value of considering the finish in the design stage of a project, as discussed in an earlier post.

[Note: The appearance of these samples is influenced by many factors including the lighting on the objects when I photographed them, the properties of my camera, image processing for presenting on the internet, your monitor, your eyes, and your brain’s visual processing. I tried to adjust the images, including the colors’ hue, saturation, and brightness, to make them look to me, on my monitor, as close as possible to how the actual pieces look to me in the room.]

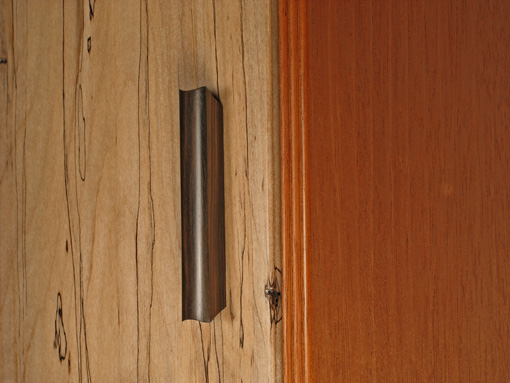
In the piece pictured above, I wanted to keep the spalted maple close to its unfinished appearance so I used water base poly-acrylic. Oil would have darkened and blotched the light color and ruined the contrast of the black-line spalting. The mahogany has a padded blonde shellac finish (applied to most areas before assembly) with wax over it. The plain mahogany sets off the spalted maple and has its own delicate sheen which also enhances the play of light on the beading. Water base would have made it look lifeless. The Macassar ebony handle gets an accented sheen from wiping varnish and coordinates with the black spalt lines. No single finish would have done justice to this group of woods. This has to be tested and worked out early in the project.

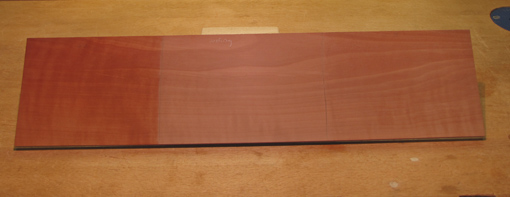
When finishing, I want to keep, not kill, the good qualities the wood already has. Pear has a dignified, almost precious aura. The sample of unusually dense German pear below, unfinished in the center section, looks greasy and artificial to my eye when oiled as on the left side. The water base finish on the right is just enough to bring out the curl and protect the wood without overwhelming it.  No finish might look best but, practically, dirt and grime might eventually detract from the appearance of handled parts.

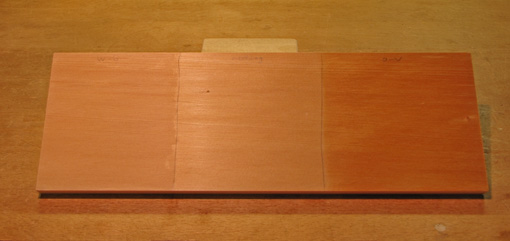
Port Orford cedar, especially when quartersawn, has a meditative, simple beauty that is difficult to capture in a photograph. When planning this species into a project, consider not only it appearance but its pleasant, spicy aroma. For panels in the interior back of a cabinet, for example, it is best left alone after it is smoothed with a hand plane. For parts that will receive wear, the thin water base poly-acrylic on the left is barely different in color from the unfinished middle section. The oil-varnish on the right section is brutal – looks like it came out of a 1950s barber shop. 

In all of this, opinions will vary. The main thing is to decide what you are trying to achieve in a project and make the finish part of that as you design, not an anxiety-provoking puzzle to consider after the piece is built when, teetering on disappointment, you might finish yourself into a corner.

In an upcoming post, I’ll present more samples including: pop the figure but not too much, less can be more, and consider the long term.

Author:
• Sunday, January 17th, 2010

I enjoy sawing, chiseling, and planing wood more than finishing it. However, with few exceptions, the Yogiism of woodworking holds true: the project ain’t done till it’s finished.

An earlier post discussed the importance of considering finish options and testing them in the design stage of a woodwork project. Here I will present an overview of the finishes I use most. This is by no means to suggest that these are the best finishes or what you should use, but is simply a list of one person’s preferences which might be useful to others.

Plastic, oil, and wax are less attractive than wood so I view their role as enhancing what the wood has to offer. I like relatively low key finishes that enliven the wood’s assets without being obtrusive. In this way, one is struck by the beauty of the wood and not the finish itself.

So, while there are always bench players and new draft picks to consider, here is my starting line up of finishes, complete with capsule scouting reports:

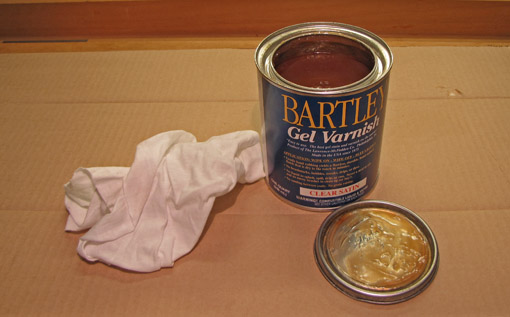
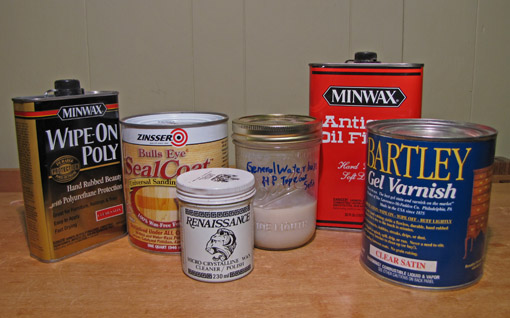
1. Bartley’s Gel Varnish, Satin. Very easy to apply, good solids content, warm sheen, over 15 year track record of durability on my projects. The player most likely to take the shot in crunch time.

2. General Finishes High Performance Polyurethane Water Based Top Coat, Satin. I use this when I want to minimize the color change to the wood. I usually pad it on quickly, use two coats, and add a final rub out with Mirlon 2500 pads or Fibral fine “wool.” A role player, but the best in the league at this position.

3. Shellac. Blonde flakes (Behlen’s/Rockler) or Zinsser Sealcoat. I usually pad on a one-pound cut, maybe thinner, and build it until it looks right which for me means not too much. Wax over it. This is the finesse player with a style like no other.

4. Oil-varnish blends. Watco Danish Oil is a bit lighter in color than Minwax Antique Oil Finish. This is a workhorse player. However, it should be used thoughtfully for an intentionally modest finish and not by default just to get the job done. Beware of blotching some woods.

5. Renaissance wax. Quality player but only rarely can create his own shot. For using over some finishes, especially shellac. Use a darker wax on woods such as walnut.

6. Minwax Wipe-on Poly. Comes from Home Depot U. so doesn’t get a lot of respect but can sometimes get it done without taking up much cap space.

7. Nothing. Sometimes that’s all you need and a tie gets you to the playoffs.

Stains or dyes rarely make the cut. Occasionally a black pigment stain is useful to ebonize small accents such as beading strips, and some oaks seem to respond well to some dyes and stains. Sometimes a brush-on varnish is useful for a table top that needs extra protection.

Coming soon will be some photos to demonstrate the value of choosing finishes early on in planning a project. Game on.

Author:
• Monday, January 04th, 2010

It can often be read or heard in discussion among woodworkers that the construction of a project having been completed, it is time to decide on a finish. Yet therein lies the problem: that is not the time to decide on a finish!

Just as careful selections of wood species and specific boards are critical to creating quality woodwork, so is the finish placed on that wood. Because the character of wood is altered with a finish, it is a design choice that should be integrated into the entirety of the piece. Furthermore, harmony among species and figures can be enhanced or devastated with the choice of finish.

The tenor of a piece should be thought through and envisioned early on, and though it may be altered a bit as realizations come forth during building, one must maintain a solid sense of the essence of what one is trying to create. The finish should not be a surprise or a disappointment, but rather a crowning touch that is unified with the whole – a “finish” to what was begun.

As a practical matter, the construction process is often altered depending on the finish that is planned. For example, a padded shellac finish can go a lot easier when some of the components are finished before assembly, thus avoiding inside corners and narrow crevices. Also, the anticipated finish will be a key factor in the final surfacing of the wood, such as whether to hand plane or to sand to a certain grit. This in turn will alter how flatness and trueness of components are managed as construction proceeds. Decisions will vary significantly if, for example, one is choosing a pigment stain covered with varnish versus a plain oil finish.

In all of this, there is an inviolable rule in finishing: test first. Save some cutoffs to test, compare, and coordinate finishes. Ignore this rule at your own peril.

In an upcoming post, I’ll present some photo examples.

By the way, though there are many excellent books and articles on finishing, my favorites are those by Bob Flexner. I think his book Understanding Wood Finishing is not only one of the best books in the woodworking field, but one of the most lucid books I’ve read on any subject. His magazine articles are wonderfully concise and informative.