Archive for ◊ April, 2017 ◊

Author:
• Sunday, April 30th, 2017

plane iron camber

Revisiting this matter, there need be no confusion as long as you keep in mind that the amount of camber that belongs in a plane blade is a function of how the plane will be used, and particularly, the kind of shavings the plane will take. Without getting hung up on numerical absolutes, here are three reliable guidelines that I use, which I hope readers will find helpful.

I wrote about camber in 2009 but I think some of it bears restating, and there are a few things I would like to add.

For a smoothing plane blade: Make a very small camber to allow the plane to produce very thin shavings, perhaps .001″, that are thickest in the middle and feather out to nothing at barely less than the full width of the blade. This produces only imperceptible scallops on the wood surface. The finer the shavings you intend to take, the shallower the camber should be.

For a jack plane blade: Use more camber to take thicker shavings without producing stepped-edge “gutters.” Vary the camber according to how aggressively you want to remove wood with the plane. The camber also makes it easier to direct the cut to take down the high spots on the surface of the board.

For a jointer plane blade: Make a very small camber to make the plane capable of correcting an out-of-square edge by laterally shifting the plane without tilting it. Position the deeper part of the camber over the high side of the edge to bring it down, and thus incrementally work toward a square edge. The camber also creates a miniscule concavity across the width of the edge of the board, which ensures there is never any convexity there, which would produce an inferior joint.

So, there’s the essentials. Coming up, I’ll revisit the bevel-down/bevel-up issue (that I brought up in 2009) in a quantifiable but intuitive way, look at the effects of skewing the plane, present a thought on chipbreakers, and maybe another thing or two that popped into my head while I was in the shop but forgot to mention so far. Then, we’ll take a look at the Tormek SE-77 jig, which I’m liking a lot.

Category: Techniques  | Tags:  | 4 Comments
Author:
• Sunday, April 30th, 2017

woodworking hardware

When installing hardware, it is important to have precise control of the location of the pilot holes for the screws. The options are to start with a mark made by a scribing point or awl, then use that to locate the drill bit, or drill the hole directly without a preceding mark. Here is my approach.

I mark first, and most of the time, I try to center the mark in the countersunk hole of the hardware. Sometimes, however, I will intentionally very slightly decenter the mark to laterally “pull” the hardware tightly into the mortise, or to one side of a mortise that was made a bit too large. In any case, I do not want a mark that will result in the screw pulling the hardware in the wrong direction.

The key is that you want that control. It’s that one-sided tolerance thing again. I love that concept.

Here is my low-tech, reliable method.

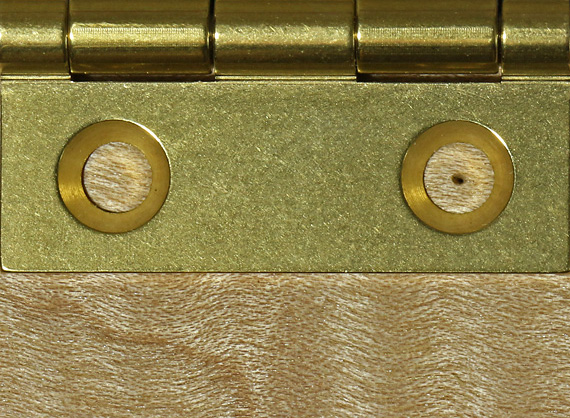
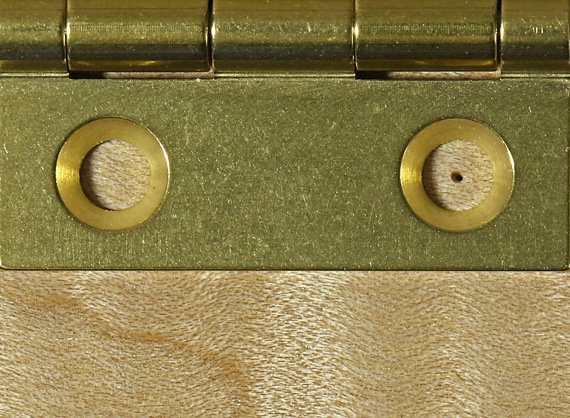
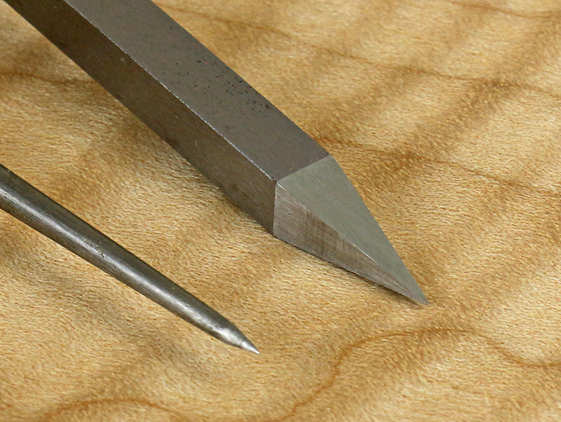
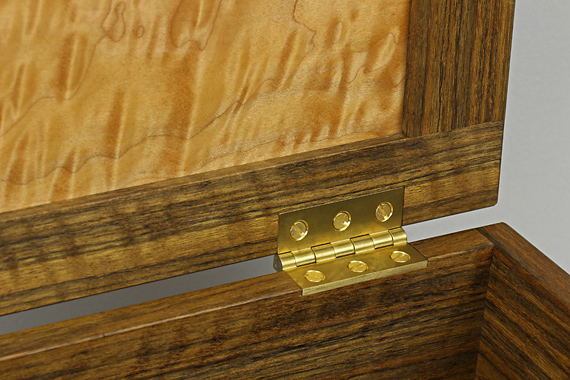
I use a scriber point or pyramidal awl to prick a starting mark for the drill bit. It is surprisingly easy and accurate to judge just by eye if the mark is centered in the hole in the hardware. Good lighting is essential, as in the first photo below. A crescentic shadow on the side of the hole will cause you to misjudge the center of it.

locating hardware screws

The mark in the photo below is actually centered but the shadow interferes with judging it.

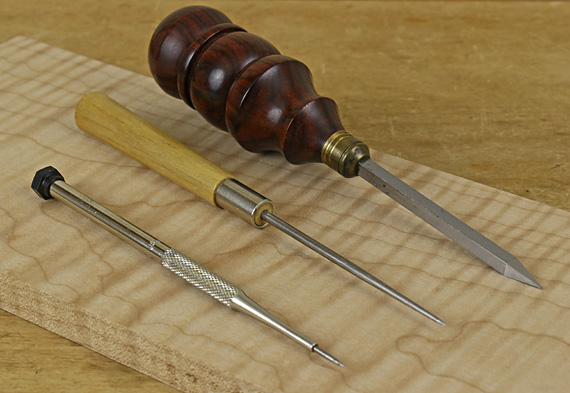
Sometimes I use a fine point scribe (the two tools to the left in the photo below) to make a tiny mark to seat the point of a brad point bit. Other times I use my wonderful Czeck Edge awl (at right in photo) to start and enlarge a hole suitable to seat a twist bit. Twist bits are commonly available in more sizes than brad point bits, which is particularly helpful for using tapped holes and machine screws to mount hardware in wood.

marking awls

This simple approach makes it easy to reliably make a deliberately off-centered mark. Just as important, it is also easy to move a mark made with a scriber or awl. Just stab the sharp point into the sidewall of the original mark and push or swish the tool to make a slightly bigger mark with a new center location.

woodworking awls

How about self-centering bits (one brand is Vix bits)? In all the brands I have tried, there is always a bit of wobble of the drill bit within its housing. Even though I would drill squarely to the work surface, there is some random error in the location of the hole. The errantly drilled hole is then nearly impossible to “move.” Furthermore, there is no reliably controlled way to produce a deliberately off centered pilot hole. Depth control is also difficult or the depth is inadequate. Such bits have been banished from my shop for some time.

How about center punches – those that you tap and those that are spring-loaded in various ways? They avoid some of the disadvantages of self-centering drill bits, but all of the ones I have tried, even Starrett’s, also have some wobble of the scriber within its housing. They are faster than the low-tech approach I use but less consistent and, again, there is no good way to make deliberately off-center marks. Such tools also have been banished from my shop.

In summary, to accurately locate pilot holes for hardware screws, go low tech, use your skills, keep in mind the one-sided tolerance concept, and use the skillful adjustability of craftsmanship.

Category: Techniques  | 9 Comments
Author:
• Friday, April 21st, 2017

perfection?

Perfection. We might think we want it in our woodworking, yet it does not exist. But for the craftsperson, concern with perfection, far from being a benign wish, has a dark side – it can distract you from understanding excellence.

Consider the example of a simple straight line, such as the straight edge on a board. You may think you are at least trying to plane that edge “perfectly” straight. Upon inevitably failing, you say, “OK, I’ll try again,” this time harder and more carefully.

But where is the end point? It certainly is not perfection. You have failed in that pursuit, and you always will. The perfect becomes the enemy of even the good as hesitancy, frustration, or obsessiveness creep in. Continuing this way will retard your growth in the craft.

There is a better way. It is to understand and pursue excellence. There is a range of excellence, and you ought to recognize when you achieving within it. It is also important to accept when you have fallen short – of excellence, not perfection – and then take realistic corrective action.

So, that straight edge is not, in fact, ever perfectly straight but instead has a trace of concavity along its length because you know any convexity would result, for example, in an inferior edge joint. Excellence in this case is understanding an appropriate range of camber, and being able to reliably produce and assess it.

The same principle can be applied to nearly every critical process in woodworking.

One of the worst manifestations of the perfection delusion is the “perfect every time” come-on used by tool marketers and, particularly regrettably, in some instructional materials. A woodworker who then inevitably achieves something less than perfect is apt to incorrectly suppose that he did something wrong, or doubt his capability.

Awaiting perfection, your work is never finished, or maybe never again attempted. Better to work toward excellence. Certainly, distinguish it from mediocre. That is the realistic and hard work required in the real world of craft.

Category: Ideas  | 4 Comments
Author:
• Saturday, April 01st, 2017

I was asked not long ago by a major software development company, whose product line includes architectural and design software, to consult on an exciting project that is now in the latter stages of development. Of course, I cannot name the company, which I will call “G, Inc.” (No, not them). However, I do not need to hide my excitement – this has the potential to change how we approach our woodworking.

It is a furniture genome project of sorts. G, Inc. has compiled an enormous data bank of the elements of style of countless pieces of furniture. This includes proportions, motifs, woods, hardware, characteristic curves, secondary materials, joinery, carvings, and much more.

I worked with two G, Inc. project leaders, an architect and a programmer, who explained that the data is drawn from sophisticated visually mapped analyses of furniture from numerous sources. The data exists as visual files with verbal tags such as “cabriole legs,” or “hand-hammered hardware,” and so forth. There are also broader categorizations such as “few curves,” or “carvings,” and so forth.

Here is how you interact with the software. Again, I think this is really exciting.

You start with a piece of furniture that you want to make such as a “tea table,” or, simply, a “small table.” Then, to move quickly in narrowing your preferences, you enter a style category such as American Queen Anne c. 1740, Arts and Crafts, or Nakashima.

But here is the really cool part. If you lack any appreciation for style, you can sift through displays of furniture elements, accepting those that appeal to you and rejecting those that do not. You do not have to conjure anything of your own. The software detects your style tendencies and through the magic of Artificial Intelligence decides what you really like. In short order, you will have your table design. All that remains is to build it.

And even for building, it coaches you through everything. You set a slider scale for joinery ranging from strictly traditional (e.g. mortise and tenon joints) to anything-goes modern, which might include pocket screws, for example. The result is a 3D CAD rendition of the table, plan and elevation drawings, and full-scale drawings of the joinery and details.

The developers are giddy that you will not have to use your imagination at all. After all, your job is to follow the Masters and this program makes it pleasantly easy to do just that. This way, you can be assured that you will spend your efforts making only real furniture – the tried-and-true good stuff. There is no need to work through your own ideas, which are probably inferior anyway.

As with all software, this currently contains a glitch, which is that it only seems to be operative on one calendar day of the year.

Today.

“You just have to try; you have to use your imagination.”

–Sam Maloof

Category: Ideas  | 8 Comments