
Sometimes, directly gauging a pencil line gives all the accuracy you need. Here are some options of various degrees of ease and precision.
Plain old #2
In the wooden stem of most gauges, you can drill a hole, saw a kerf, and locate a tightening screw to bind the walls of the hole around an installed ordinary pencil as I have in my panel gauge, above.
In the case of this panel gauge, the pencil cannot be gripped close enough to its point to allow the step in the fence to ride on the surface of the board. A simple solution is to hold a temporary shim block under the step to keep the stem parallel to the face of the board and the pencil in good contact with the surface.
A pencil holder is available as an option in the large Hamilton gauge.
Naked lead
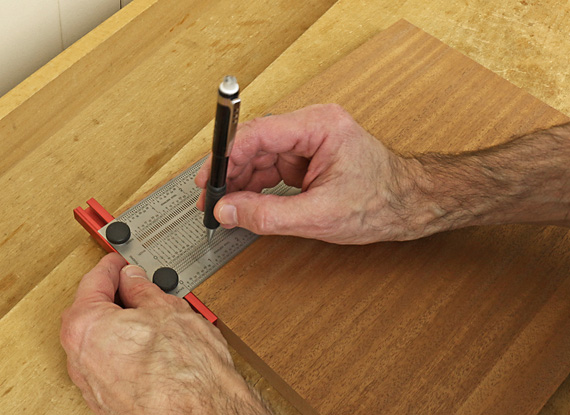
For a more precise pencil line in smaller scale work, install a 2 mm drafting lead in the little groove that held the conical steel marking point, as described in the previous post. Gently tighten the screw. Now you have a pencil marker at the end of the stem where it is easy to see in action, as discussed in part 1 of this series.

Sharpen the lead to a bevel point on 220-grit, or finer, sandpaper. HB lead with a light touch works well. 2H wears better but leaves a less prominent line.
Incra dinka doo
The Incra T-rule easily scribes pencil layout lines to very accurate absolute measurements in 1/64″ increments. Set the point of 0.5mm mechanical pencil lead in the desired hole and simply slide the fence along the edge of the board.
Combo square
Slide the stock of a combination square, large or small, set to the desired length, against the edge of the board as you hold a pencil point against the end of the blade.
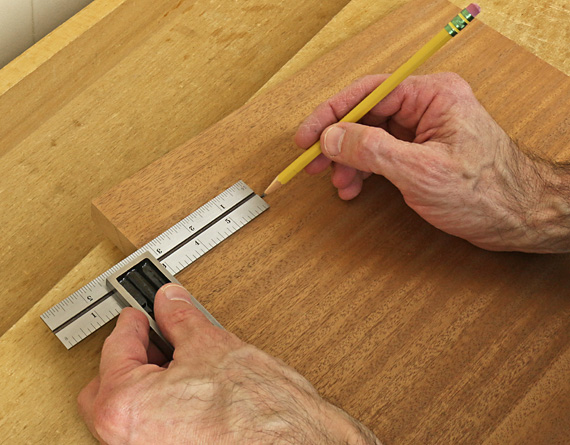
It is a must to somehow clamp the work piece for these last two methods.
Look, only hands!
Simplest of all, hold a pencil in your hand and stiffen your extra fingers against the edge of the board so they act as a fence as you slide your hand along to mark the line. This is surprisingly accurate and suffices for many tasks.
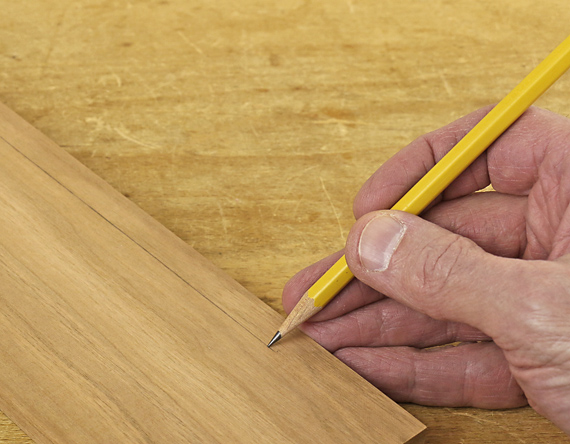
Use a light touch. Also, beware of the possibility of splinters on a board with a roughsawn edge, especially in species such as wenge or Douglas fir.
As with everything else in woodworking, have a repertoire of tools and methods at your behest, and choose those that effect the ease and precision appropriate for the task. That is much of what is skill is about.
Next: mortise gauges

On a longer board I typically use the combination square to mark lines on either end and then connect them with a straightedge.
Hi, thanks a lot for that series. Healthy new year!
The lead on the 2nd foto could be hold by a thin washer, couldn’t it? Interesting for me was to mount all the marking pins at the end of the stem, not inside… The last foto is the right conclusion :-)
Bernhard,
Yes a washer could be used but I prefer to minimize the number of parts so a pan-head screw, lath screw, or washer head screw is a simple solution.
Rob