In this series, we will take a close look at gauges, sorting out their useful features and subtle refinements. Though basically simple tools, they deserve our attention because it is awfully difficult to do fine work without clean and accurate marking out.
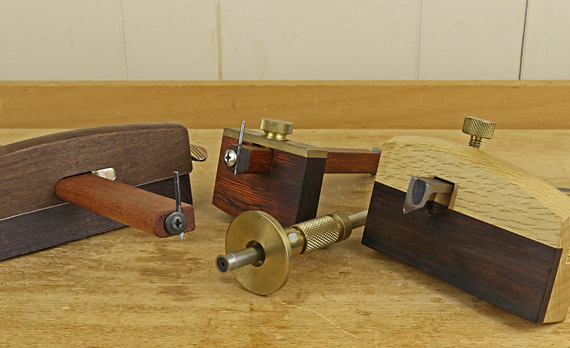
Notice the common feature among these gauges: the point or cutter is at the end of the stem. I prefer this because it makes the marking action easily visible. The starting and stopping locations, and the depth of the mark are plain to see. This feature also makes it easy to set the gauge to an edge or mark in an existing component of the construction.
Most of the available gauges, like the one below, have the point (or cutter) placed well in from the end of the stem where it is less visible. True, tilting the gauge in use, as one should, can give you some view of the point if you push the gauge, but not much if you are drawing the gauge toward you. True also, depending on the situation, attention may be better paid to the registration of the fence against the edge of the board. Still, in my view, it is better to always have the option of easily seeing the point.
The mortise gauge is another matter in this regard, which will be covered later in this series.
I have modified the two gauges on the left in the photo at the top. Leftmost is a Japanese gauge that originally used a cutting knife but is now a 12″ panel gauge. Second from the left, in the back, is a modified Cullen gauge. In front is the Titemark gauge. More on these later in this series.
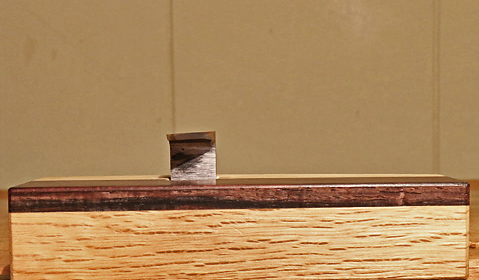
On the right in the photo at the top is a wonderful Japanese cutting gauge that is just about perfect. This is the gauge I always use for dovetailing. It has a broad, beefy fence that is easy to grip in varied ways. The hard exotic wood inlay glides smoothly on the work piece and resists wear.
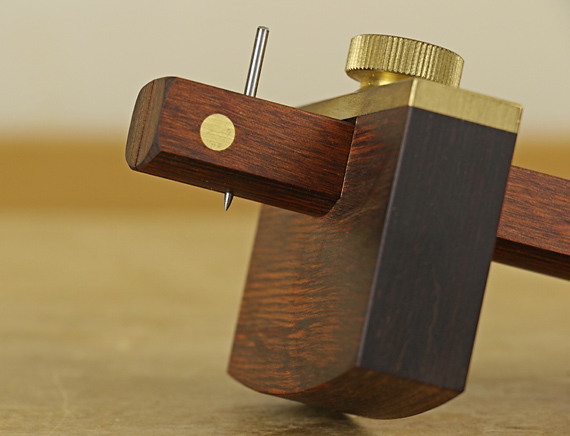
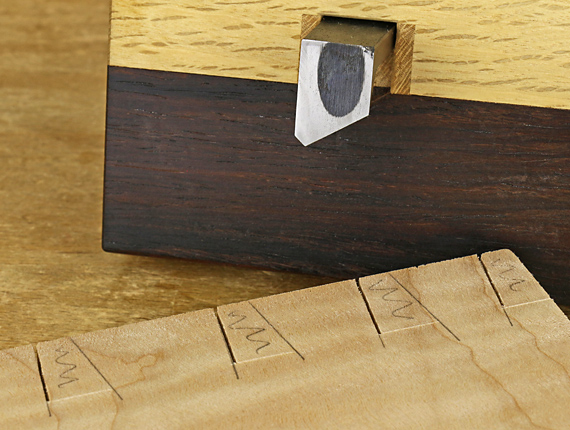
The knife has a modified V-point with the bevel toward the fence, which places it in the waste wood. This gauge is primarily used on the pull stroke. Accordingly, the plane of the face of the knife is slightly angled away from the fence on the side near you. (See the side-view photo, below.) This tends to draw the fence inward, helping to keep it snug against the edge of the work piece. This angle does not at all reduce the quality of the cut.
I much prefer to avoid leaving gauge marks in finished dovetails. One way to do this is by making the gauge cut shallow but I prefer to eliminate that variable by gauging the cut only where it is needed and thus where it will be automatically eliminated. This goes for tails and pins. This way I can gauge a substantially deep cut, which helps when chiseling out the waste, and not worry about having to later plane away any marks.
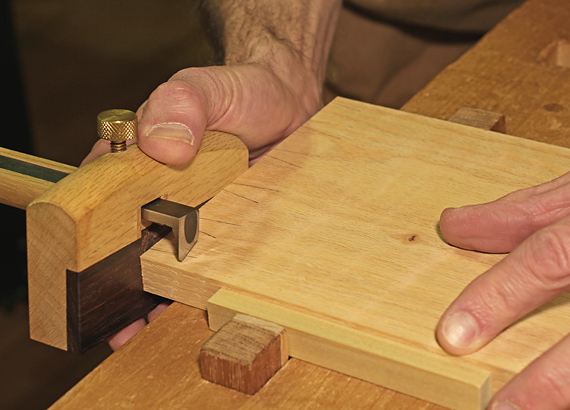
The short arm of the V-point is very helpful to bring the cut up to the penciled tail lines and the squared pin lines by nudging the gauge forward.
The laminated Japanese blade takes a very sharp edge and holds it very well.
I bought this gauge about 15 years ago, as best I recall, but similar ones are quite expensive now. Suzuki-ya sells a model with double blades, Iida with a single blade, and Tools from Japan sells a much less expensive double-blade model without the V-point, but perhaps that could be worked in by the user.
One more thing. I clamp the work piece for any major gauging such as dovetail and tenon layouts. It makes no sense to me to do the cool, casual whip of a gauge across a work piece that is grasped with one arm, like we see in some videos. Gauging is important, just like sawing and chiseling, so it is worth the time and effort to clamp the work piece.
Next: Is there a gauge that works well both along and across the grain?

I just want to say I find your writing so informative and educational. At least for me. You are a true gem. And I read quite a lot of blogs regarding woodworking.
I’ve just started using marking gauges as I’ve been getting increasingly into hand tool methods. It would be a huge understatement to say that they are incredibly better than a pencil. Anyway, I made several myself, of different styles (cutting, marking, mortise, etc), but I really like this design you show of capturing the pin right at the end with a pan head screw or washer. duh! even easier than drilling a hole through the middle! I think I will make a couple with this design, since I agree it’s better to have clear visibility. Not a deal breaker, but this is definitely an improvement.
Good article, Rob. I’m looking forward to the rest of the series. Being fairly new to hand tools, I only have one cutting gauge and I loathe using it. I’ve pondered making some modifications to it, but haven’t done so yet.
The pin is too tall, is set back from the end (like you mention), the fence is small and difficult to register with, and the locking screw/action causes the stem to shift both out of square and back a little bit. And don’t get me started on the mortise marking side of it…
Luckily, this gauge was given to me and I didn’t spend any money on it. I have some cherry and padauk I’ve considered using to make my own gauge. Would those be good, stable woods to use?
Blaz, thanks for the kind words, they are encouraging.
Aaron and Jared, stay tuned, more info coming up on different styles of gauges that I think will help with buying and making decisions.
Jared, sure, those woods, if straight-grained, would be fine.
Yes, it is amazing how functionally awful are some of the gauges that are sold under the guise of being decent tools. So often, people learning woodworking think their abilities are at fault when it is really crappy tools that are holding them back.
Rob
Thanks again for some excellent information. The Japanese gauge reminds me of a spear point router plane cutter, I wonder if one of these could be employed in a home made version.
Sydney,
Yea, similar. I suggest save the time and hassle of making your own. If cost is an issue, you’re better off trying one of the inexpensive options from Tools from Japan (see link in the post) and adding your own modifications. Then, make more furniture with the time that you saved.
Rob
Rob,
Your Tools from Japan link takes you to a very inexpensive version but if you do a search for “kegaki” on the web site it will lead you to a much better gauge, a machine made version of a Kinshiro.
I have a couple and they are very good.
ken
Rob,
“…Yes, it is amazing how functionally awful are some of the gauges that are sold under the guise of being decent tools.”
I couldn’t agree more. I’ve marking gauges stuck in every corner of the shop and most are unusable for one reason or the other. The most common problem is a lose/moveable stem.
ken
Ken,
Thanks very much for the comments. That’s an interesting gauge in that the two blades can be locked relative to each other and then locked as a unit. I assume the inner blade can be fully recessed within the fence so that the outer blade can function as a regular cutting gauge. I can’t tell from the photo but if that feature is not built in, it seems easy to make your own recess in the fence. Great find!
Readers, here’s the direct link: http://www.toolsfromjapan.com/store/index.php?main_page=product_info&cPath=356_599_609&products_id=2036
As for the junk gauges you mentioned in your second comment – yea, bad tools are just evil things, aren’t they?
Rob
Rob,
Yes both blades can be retracted into the body so the gauge can be used as either a cutting gauge or a mortise gauge. It is a very good cutting/mortise gauge at a fair price.
Great series of posts, good information well presented.
Yes they are,
ken