This simple jig gives greater control for trimming tenon shoulders and eliminates breakout of end grain at the back edge of the rail as the plane exits. I have been using it in my shop for many years.
A tenon shoulder is correctively trimmed with a shoulder plane used on its side and registered against the cheek and the shoulder of the tenon itself. The correction usually involves just a few critical strokes of the plane.
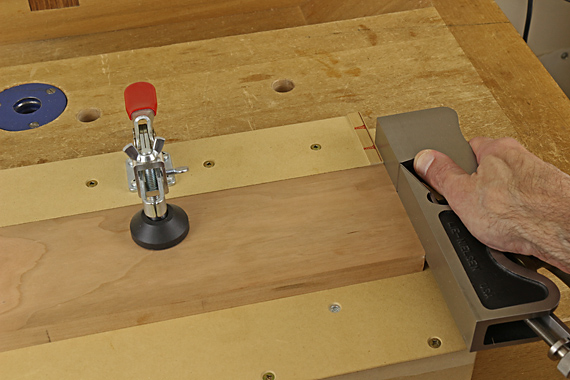
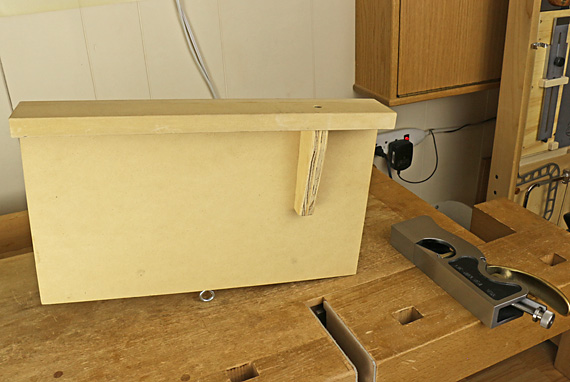
The jig easily installs in the tail vise, clamps the rail quickly and firmly, provides the essential support at the back edge to eliminate spelching, and allows planing without obstruction. Two earlier steps in forming the tenon, sawing the shoulder and trimming the tenon cheek, can also be done on this jig by simply clamping the rail so the shoulder line is positioned a bit beyond the backstop.
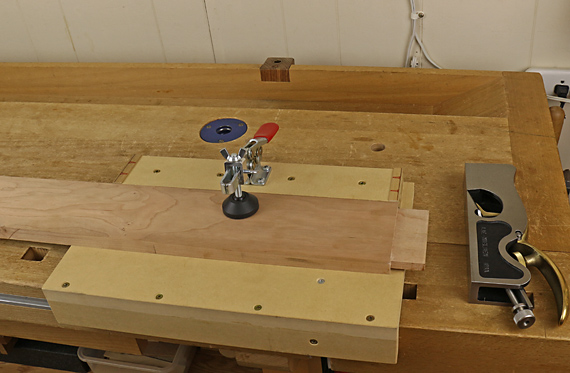
The jig is easily made from 3/4″ MDF. The base is 15″ wide x 9″ deep. The main portion of the backstop is 13″ x 2 1/2″, laterally centered on the base and attached with glue and screws.
A 500-pound capacity, 6 1/2″-long toggle clamp with a large retrofit foot pad is screwed to the midpoint of the backstop. The depth and outward projection of the pad are adjusted according to the thickness and width, respectively, of the work piece rail. Other types of quick-set clamps could also be used.
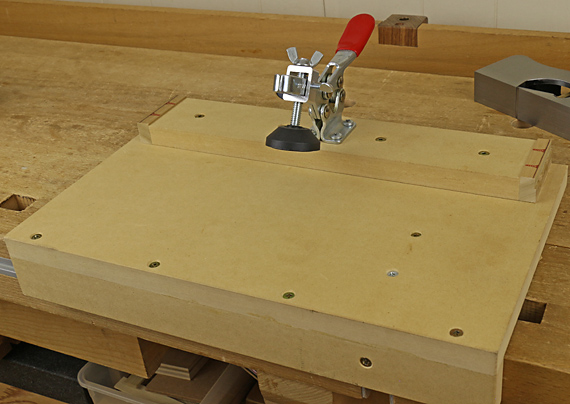
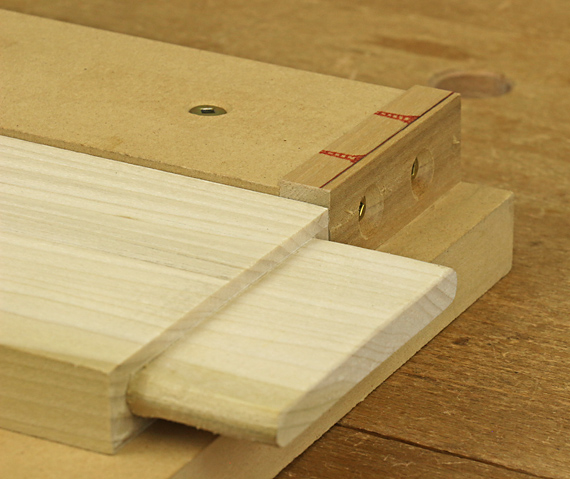
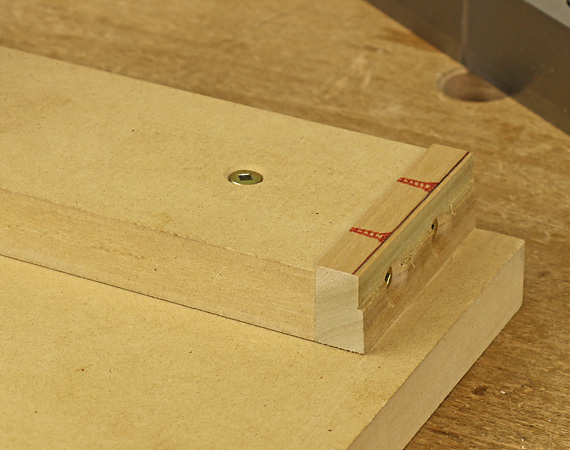
Key features are the hardwood caps on the backstop. These are 2 1/2″ in the long grain direction and 1/2″ wide, and simply screwed to the ends of the MDF. Countersink, or better, counterbore, the screws deeply enough to keep them out of the path of the plane blade. Note that I have marked a line at the depth of the screw heads and drawn pictures of the screws in red as reminders of their presence. I would hate to run a plane blade into them.
By the way, I am right-handed and never use the left side of the jig but it is useful for lefthanders at classes and demonstrations.
For securing the jig in the workbench, a 1 1/2″-wide strip of MDF is glued and screwed to the front of the base where it will butt against the front of the bench. Further, a 4 1/4″ x 1 3/8″ x 3/4″ plywood cleat is glued and screwed to the base and front stop. The cleat fits into the tail vise, which is then tightened to secure the jig.
To trim a tenon shoulder, align it with, or very near, the edge of the hardwood backstop cap. Plane the shoulder and continue the stroke through the cap as needed. Of course, the cap gets slowly depleted over time, as shown here, but it is easily replaced.
I think you will find this jig increases your comfort and control in the precision job of trimming tenon shoulders.

Like all your other jigs and techniques, this one looks well thought out and useful.
I’ve been using your table saw sled design for a while now, it’s easy to adjust when needed, simple & cheap to build and very handy.
Thanks
Steve
Thanks, Steve. It’s encouraging to know that these posts help woodworkers make things. I think you’ll find this jig helpful too.
Rob
I’m a weekend hacker, I have needed this very jig on several occasions. Can’t wait to build it! You have a beautiful website. Thanks for sharing.
Thanks for the comment, Wakon. I hope the jig helps you build fulfilling woodwork.
Rob