Archive for ◊ January, 2016 ◊

Author:
• Sunday, January 31st, 2016

wood finishes

Good job! You developed a compelling design, skillfully employed sound construction techniques, and lavished care on your baby – I mean woodworking project. And of course, you applied a finish that made her look fabulous when she – uh, it – left the shop.

Well, it’s not over because it’s a jungle out there. Consider especially that pretty finish in which you sent your furniture/accessory oeuvre out into the world.

Think about the likely use and possible abuse of the piece. Sure, a wall cabinet for art objects will not suffer as will a dining table, but will that hall table display family photos or have keys and wet umbrellas tossed onto it? Will later owners of the piece value it as much as the original owner?

A key issue is that the durability and reparability of a wood finish are generally inversely related. For example, oil-varnish mix is not very durable but is easy to repair, while a tough polyurethane film finish is more difficult to repair.

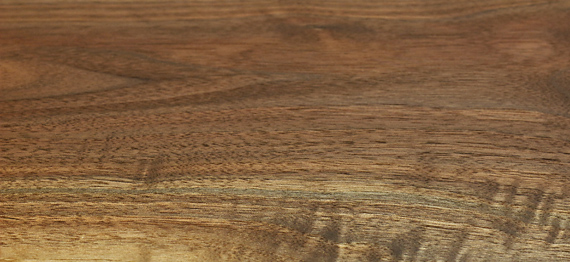
I think in many cases it comes down to which is more tolerable: dented, scarred wood or a dented, scarred thick film finish. Ultimately, water, abrasion, and ultraviolet light can break down any finish, resulting in something like the table top below. When dirt and grime get into the grain of the wood, restoration gets even more difficult.

deteriorated finish

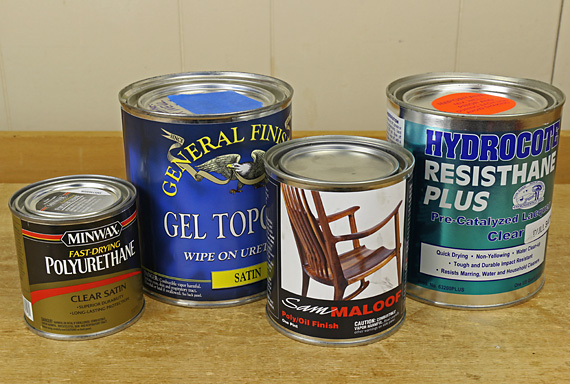
One approach, which is gaining appeal with me in some cases, is to take it easy and apply a few coats of oil-varnish mix. I like Rockler’s Sam Maloof poly-oil because of its high solids content and amber color that is not too dark like some oil or varnish products such as Waterlox. It leaves a low-key sheen that allows one to “take pleasure in the wood surface,” as the late, great Sam said.

The car key abrasions probably will look better – and maybe even add character – in a wood surface finished with oil-varnish mix that can be easily touched up by anyone, than in the layers of a heavy film finish that will probably never be repaired by anyone.

There are always trade-offs. The point is to think it through the long term when choosing a finish.

walnut finish

Category: Techniques  | 5 Comments
Author:
• Saturday, January 30th, 2016

Corradi rasps

These Corradi rasps are the ones I reach for most often. Several years ago, I wrote on choosing and using rasps, highlighting the excellence of hand-cut rasps, specifically the Auriou brand, based on the feel and feedback they provide.

In this regard, for a 10″ cabinet rasp in the finest grain, I still prefer the Auriou #13. However, I’ve come to prefer the Corradi rasps in the coarse and medium ranges. Furthermore, I don’t think there is a big difference between the finest Corradi #10 and its close equivalent, the Auriou #13. Practically, I tend to save the Auriou for the most sensitive work, much like a carefully tuned smoothing plane.

The Corradi rasps have uniform, densely packed, machine-cut teeth with a surface hardness of Rc 65-66, which the manufacturer claims is harder than the best hand-cut rasps at Rc 59-60. In my experience, which is not controlled testing, the Corradi rasps have indeed maintained their sharpness better than the Aurious.

The swirl pattern of the teeth produces a very smooth cutting action, though again, just slightly lacking the superb feedback of the Auriou in the finest grain models. In the medium and coarse grains, I prefer the consistent smoothness of the Corradis. I do, however, wish the Corradi cabinet rasps were shaped to a point like the Aurious.

Heresy, some may say, but I’m only telling you what the wood and my hands have told me. These comments, unsolicited and uncompensated, are only meant to help readers make their own choices.

Corradi 5, 8, 10 grain

My set of Corradi 10″ half-round cabinet rasps consists of the “Gold” #10 and #8, and the Cabinet #5, from right to left in the photo above. This set is an excellent value at a current total price of $134. By comparison, a single 10″ half-round Auriou #9 costs from $110 – $135, and the finer grains cost still more.

For reference, in 10″ rasps, I estimate the Corradi #10 about the equivalent of the Auriou #13, though the latter is probably a trace finer. Either allows a very easy transition to scraping or sanding.

At the coarse end, the Corradi #5 is about equivalent to an old Nicholson #49 (below, at left and right, respectively), but broader and better. (The Auriou #9 approximates a Nicholson #50.) Looking at the photo above, it seems like a fairly large jump from the Corradi #5 to the #8 but in practice the transition works well.

Corradi 5 grain vs Nicholson #49

The three 10″ half-round Corradis – #5, 8, and 10 – plus an inexpensive Shinto double-sided “saw” rasp and a cheap Surform Shaver, with the modification described in an earlier post, form a versatile basic set. I wish Corradi made “ironing” rasps in the form I described in a recent post.

Aside from cabinet rasps, I like the Corradi Gold 6″ #10 flat (“hand”) rasp with one safe edge for smaller scale work such as rounding over tenons. The 4″ Auriou half-round #14 remains the finest rasp in my drawer.

Rasps are often underestimated but high quality versions, skillfully employed, are capable of sensitive, refined work.

Author:
• Monday, January 25th, 2016

reference constructions

When designing and making a particular joint or subassembly, an actual sample of it is a great aid to spatial thinking. I keep a bunch of these brain helpers in the shop, including various mortise and tenon configurations, sliding dovetails, a section of a web frame, some curved legs, and, of course, a drawer or two. Most are unglued to permit study.

In the design phase of a project, when considering proportions, thicknesses, and surface relationships, the models help in a way that drawings cannot. Later, they are useful when strategizing construction methods. They are particularly helpful if it’s been a while since I last incorporated such an assembly into a piece.

A reference model does not have to be very neat or even complete. Most likely it will be one section of an assembly or the critical parts that are just enough to direct your thinking. I often write notes and dimensions on the reference models, especially if there’s something that I’m not likely to notice later. Basically, give yourself all the help you can; woodworking is hard enough already.

Accumulate the models from practice joints, experiments, or extras from a past project. It’s amazing how some in my shop of have aged and then jog my memory when needed. “Oh, that’s how that frame went together,” or whatever, in some project from the past. A piece that you completed long ago may be unavailable to you now but even if it is, you can’t disassemble it.

Since virtually all of my woodwork is one-of-a-kind, the reference models serve as brain assistants, not formulas. I benefit from my former efforts but I’m still thinking things through as they pertain to the project at hand. I really enjoy that combination!

If accumulating reference constructions is not a woodworking habit of yours, consider giving it a try. I think you’ll find it pays off.

Category: Jigs and Fixtures  | Comments off