Archive for ◊ August, 2015 ◊

Author:
• Monday, August 31st, 2015

dovetail instruction guide

I wrote this 42-page, step-by-step guide to making the through dovetail joint for Craftsy. Compiled from a series of blog posts I wrote for them last year, it is available for free here. I think you will find it helpful.

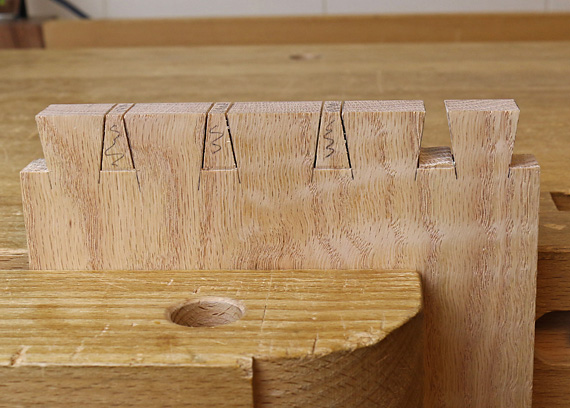
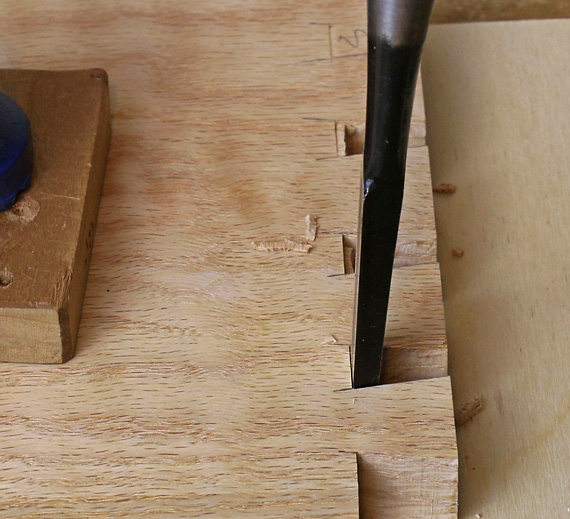
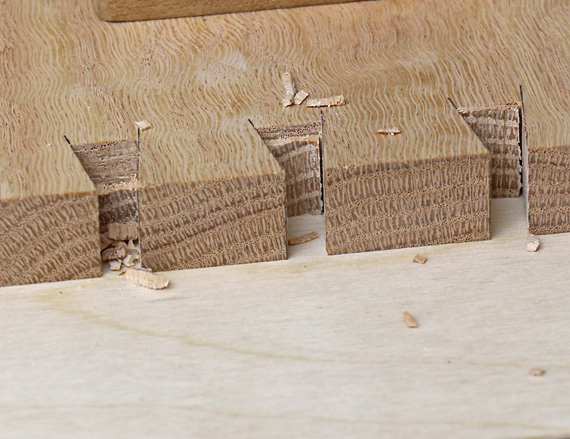
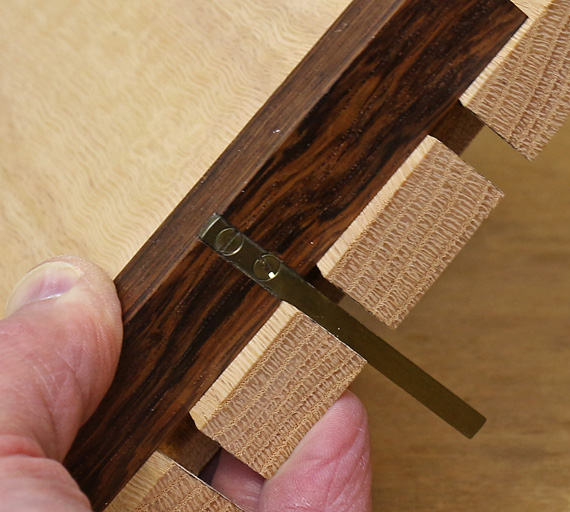
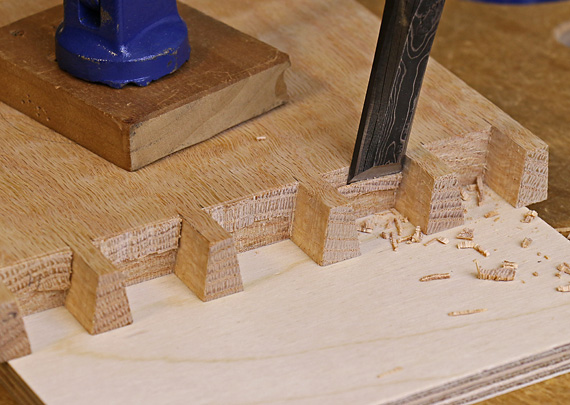
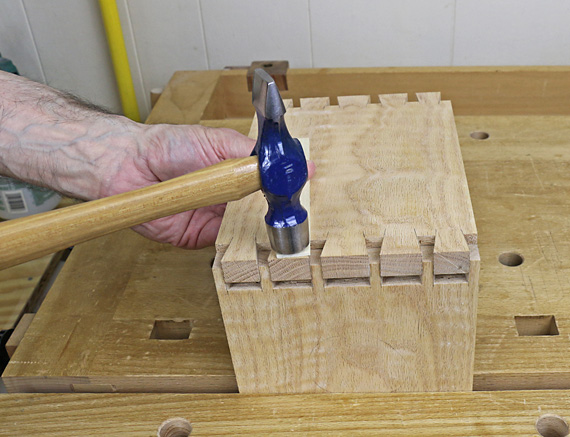
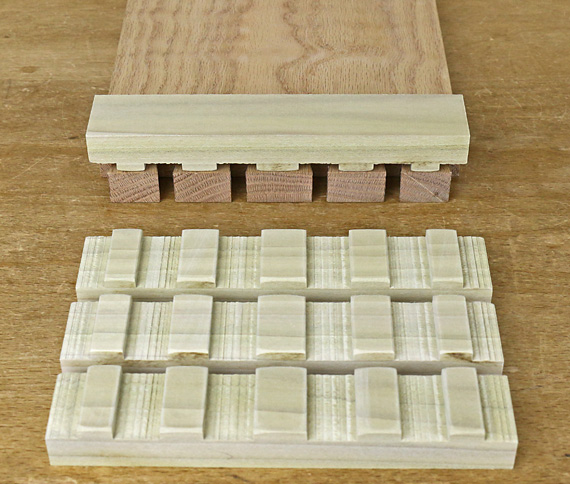
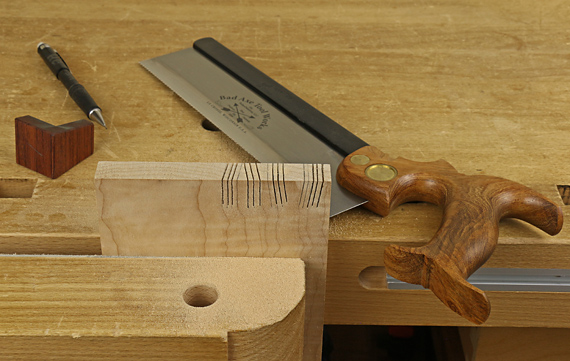
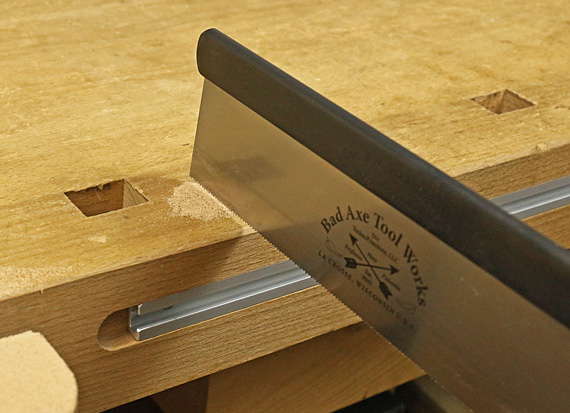
With over 8000 words and 75 detailed photos, the guide walks you through the process. I don’t just say what to do but show you how – exactly how – and what it looks like in detail, right at the workbench. I explain it so you can truly understand it.

If you’ve wondered about matters such as how close is close enough when sawing to layout lines, just how much to angle the chisel when chopping to the baseline, and what are the critical junctures that make or break success, this guide is for you. There are also several nice tricks in there, including an expedient method for making clamping cauls.

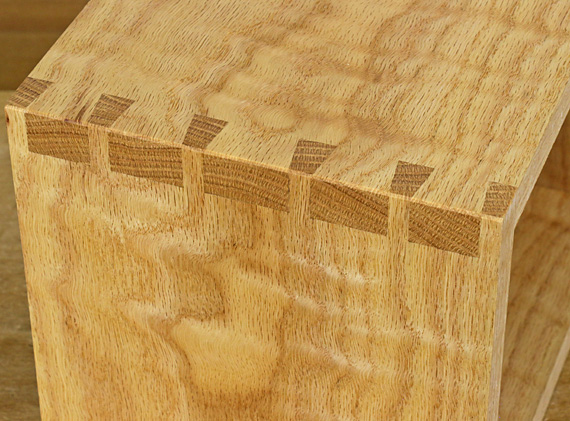
Below, and at the top of this post, is a sampling of the photos in the guide.

Novice and intermediate woodworkers will find in the guide an effective progression to make the joint, while more advanced woodworkers may find useful alternatives and refinements to their techniques. Many will find some things with which to disagree, but I think almost all will find it to be solid information. In any case, I use the demonstrated techniques in my shop and they work for me. There is more than one good way to do almost everything in woodworking.

By the way, the preview to the guide on the Craftsy site shows a cover photo of an awfully proportioned, machine-cut joint. Don’t let it dissuade you; it is not mine and not part of the guide. It was added by an editor and not yet removed.

I hope you enjoy the dovetail guide and find it helpful.

Happy woodworking,

Rob

dovetails

chopping dovetails

chopping dovetails

dovetail square

sawing dovetail pins

chopping dovetail pins

fitting dovetails

dovetail cauls

Category: Resources  | 8 Comments
Author:
• Sunday, August 16th, 2015

sawing warm-ups

There are lots of recommendations available for warming up to saw joinery but here I will concentrate on two aspects:

  • The progression of the warm-up
  • Core muscle activation

The progression

Any good warm-up should include aspects of the main event. To prepare for sawing dovetails, for example, saw to a series of lines that mimic dovetails. As you begin, recall and concentrate on basic technique and mechanics without being primarily concerned about hitting the lines perfectly. You’re like a baseball player before a game, at first taking easy batting practice pitches while just trying to execute sound form and make good contact. Address any neglect of the fundamentals.

Then bear down and try to make a couple of dead-on cuts. Observe the results, sharpen your mind, and clean up your technique accordingly. Find your familiar physical and mental groove.

Make sure there are no deficiencies in your tools and setup, including the lighting. The warm-up also gives you a chance to sense the density and grain of the particular wood at hand and make appropriate adjustments in technique.

For work that you do frequently, the warm-up should be very brief. Even if you’re a bit rusty, it should only take a few minutes, provided your skills are fundamentally sound.

An exercise to engage the core

sawing warm-up

Only when the core – glutes, hips, upper back – is strong, engaged, and balanced, can the peripheral parts – shoulder, arm, and hands – move with accuracy and precision.

Try this exercise. Make a small, shallow pile of sawdust on your benchtop or scrap of wood. Attempt to create “kerfs” in the pile by pushing the dust with the teeth of your saw without the teeth making contact with the benchtop.

It can only be done with your core muscles engaged, along with a balanced stance.

When sawing joinery with a backsaw, the saw should not be helping to support you. If it is, it is being partly diverted from its primary function, which is to make a kerf, and it won’t be as consistently accurate.

The hand without the saw can rest on the bench or work piece to aid in balance. It should bear the weight of no more than itself and the arm.

By the way, core activation does not mean being stiff. Think of the shock absorbers on a car. They are very strong but allow movement, always maintaining an equilibrium that allows all the other parts of the car to function smoothly and precisely. This discussion is about sawing with a backsaw but even with a handsaw where the entire body moves more, the core is still in primary control of all the motions.

Note to readers: Uncommon tips 1-6 can be found here. More on the way.

Category: Techniques  | Tags:  | 5 Comments