Archive for ◊ January, 2015 ◊

Author:
• Saturday, January 31st, 2015

wood floor

If you are working in a shop with a concrete floor, such as in a basement, consider installing a wood floor. It may be easier than you think.

If you are working in the garage, consider coming indoors and using your hard-earned living space for what really matters to you. For example, banish the TV set to an obscure corner somewhere.

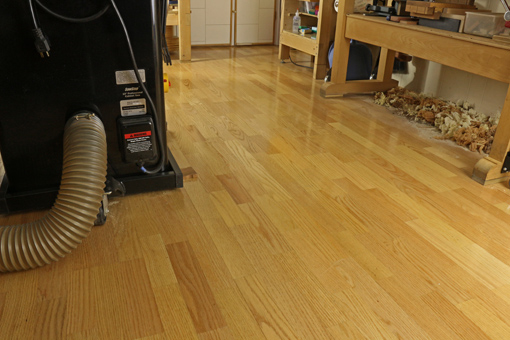
A wood floor is easier on your feet and back. It is also much kinder to a dropped tool, especially an edge tool. The wood floor dampens sound so it’s easier on your ears, and it certainly is a whole lot easier on your eyes. You’ll feel better in a shop with a wood floor and enjoy your time there more. Take it from someone who spent too long here:

concrete floor

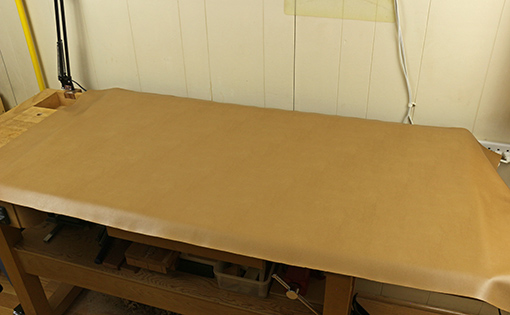
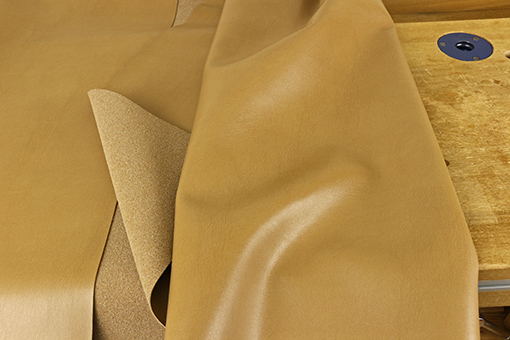
Consider a floating installation of engineered flooring. The material is basically plywood topped with a thick ply of beautiful hardwood of your choice, pre-finished with a very heavy duty finish. It comes in strips about 5″ to 7 1/2″ wide, which can contain multiple sections across the width, as seen in my floor in the top photo. The planks are attached to each other but not to the floor below, upon which they simply sit. The planks connect to each other with tongue and groove plus glue, or with a super easy “click lock” connection without glue.

Not tough enough for a workshop? I can tell you my experience. Twelve years ago, I installed an engineered floating red oak floor over concrete in my workshop, which is a few feet below grade. It has held up very well, including no cracks and no separation of the planks, with 600-pound machinery rolling over it, big planks of hardwoods dragged over it, sawdust, dropped tools, and so forth.

I do note that the finish of the particular brand that I installed was later assessed to be more susceptible to denting but it is minor, and the floor still looks great. I also find the finish rather slippery, though this has diminished over time, so I would also keep that issue in mind when choosing material. Ask the experts, let them know you are putting the floor in your workshop, and consider the denting and slippery issues.

Installation involves first, a simple moisture test. Then the concrete floor will probably need to be leveled with leveling compound. Next, a heavy poly plastic sheet is laid down and a thin foam sheet goes on top of that. Then the floor is laid down. Finally, molding and thresholds are installed. The biggest issues are strategies to facilitate laying the flooring, such as starting from the correct side of the room, baseboard heating appliances, and so forth.

You can do this; you’re a woodworker for goodness’ sake.

You do, however, need professional advice. Here in eastern Massachusetts, Hosking Hardwood is well-known (you may recall them from their appearances on the “This Old House” PBS TV series), has an informative website, and offers expert advice.

Category: Tools and Shop  | 4 Comments
Author:
• Saturday, January 31st, 2015

tail vise liner

The jaws of the traditional tail vise on my old Ulmia workbench seem to the eye to meet accurately but there must be a minute misalignment because in use the grab on the work piece was slightly inconsistent across the full area of the bare jaw surfaces. Paring or scraping tiny corrections on the end grain surfaces of the jaws would have been difficult if not impossible to get right.

Then too, the opposite faces of the work piece not being precisely parallel may also cause an imperfect grip. And the smooth end grain of hardwood does not have much gripping power anyway.

The solution is to line the jaws with material that is firm but with a just bit of give to compensate for such those slight misalignments. It should also be somewhat grippy but not too much, which would prevent adjusting the work piece position when the vise is partially loosened.

I’ve tried various liners such as thin rubbery material and cork but there is no equal to leather – real leather. Cowhide lace leather works very well. This is tough, firm leather, almost 1/8″ thick (thick enough to make laces). Here is one source.

lace leather

lace leather

I applied it with Nexabond 2500M CA glue, rough side out. A little experimenting showed that the rough side grips better than the smooth side, though surprisingly there is not much difference. The rough surface does not seem to make impressions even in soft species like poplar.

The tail vise now has a monster grip. Yet backing off the pressure on the vise makes it easy to reposition the work piece, such as when adjusting the angle when sawing tenons.

tail vise

Category: Tools and Shop  | 4 Comments
Author:
• Saturday, January 31st, 2015

bench blanket

As the parts of a project approach completion, dings and scrapes are increasingly interrupting and protection becomes a greater issue. For relaxed efficiency it sometimes helps to cover the workbench or assembly bench with cushiony material during glue ups or other work toward the end of a project.

Over the years, I’ve tried various materials with mixed success:

Velour fabric and felt work fairly well. These are inexpensive and widely available in 54″ widths. Downsides of fabrics are the tendency to hold sawdust and small wood chips, and soak up glue drips.

Router mats are another option but their grip and open weave are not always desirable. Mover’s blankets (try Harbor Freight) are economical and cushion very well but are actually too mushy for my liking. Wood parts do not register firmly on the surface and their corners can catch in the soft blanket when you try to slide them.

Finally, I think I’ve found a near perfect solution: upholstery grade bonded leather. Made of shredded real leather and polyurethane, it is the better-looking MDF of the leather industry. It costs about $24 per yard at 54″ wide so you can get a single piece to cover even a large assembly bench.

bonded leather

The top (working) side looks and feels very similar to fine leather and the underside is similar to the rough side of real leather. Just 3/64″ thick, it nevertheless is resilient enough to provide protection for wood parts without being too spongy.  Glue drips can be easily wiped off the surface. It seems like it will be very durable.

The photo at the top shows a piece draped over a 24″ x 48″ sheet of MDF placed on the workbench for assembly work.

This material also makes good clamp pads. Cut it to size and apply it to clamp heads with spray adhesive.

Category: Tools and Shop  | Comments off
Author:
• Friday, January 09th, 2015

Craftsy

Dear Heartwood readers, have I ever asked you for anything? No? Well, here then is my first small request.

As you know, I have been writing for Craftsy, the excellent online video craft instruction site since April. There I’ve posted more than 33,000 words and 260 original photos of genuinely useful woodworking information.

Now Craftsy is honoring their bloggers and I’d appreciate it if you could take a minute to vote for your dear humble scribe, aka me, by clicking here or on the badge at the top of the left sidebar and then scroll down the Craftsy page, which explains it all, and click on the small orange banner. Or go directly to the form, and please enter my Craftsy blog URL: http://www.craftsy.com/blog/author/rob-porcaro/ and check the category “Woodworking” and the “Tutorial” and “Photography” boxes. [This has been completed. Thank you for your support.]

In my 38 posts so far, you’ll find tutorials on making dovetails (8,000 words and 74 photos!), mortising by hand and with the router, using paring chisels, building a Moxon vise, and more. There’s information on choosing a bandsaw, shooting, various wood species, and more.

Yes, of course, Craftsy creates traffic to their online offerings with all of this. But the online course videos are superb. I recommend my fellow woodworkers to take a look. They’ve added woodworking courses by Jeff Miller, Paul Anthony, Mike Seimsen, and other outstanding instructors.

Thank you,

Rob

Category: Resources  | 9 Comments