(Part 4 of Clamps and clamping)
Here is a rack that is easy to build and will efficiently store parallel-jaw clamps.
Almost all of the racks for this type of clamp that I have seen, including commercial versions, store each clamp facing forward in an individual slot, a design that wastes space and is harder to build. This rack, like most shop-made woodworking fixtures, is likely the progeny of multiple sources but credit should at least be given to Andy Rae, who described such a rack in his book The Complete Illustrated Guide to Furniture and Cabinet Construction (The Taunton Press, 2001). The version that I built adds modifications, particularly some safety features.
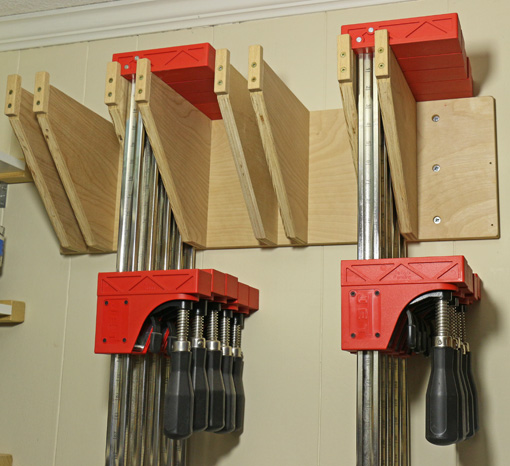
As seen in the photos of the rack in my shop, the clamps are stored sideways. Two of the bins have been emptied to show the construction. All of the main components are good quality 3/4″ plywood. The back panel is 8 1/2″ high.
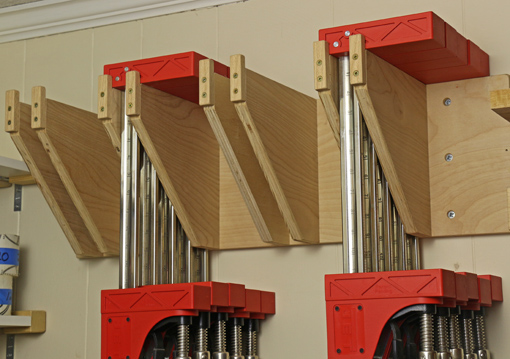
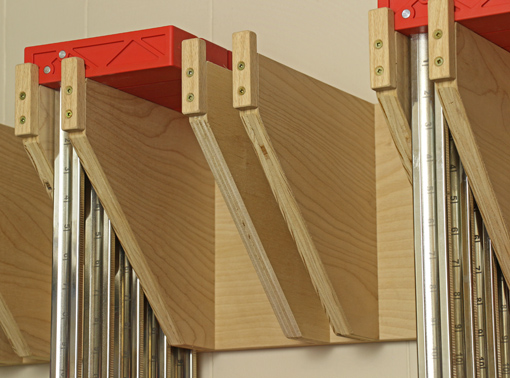
Each bin is made with two support pieces 8 1/2″ in height – same as the panel height. These are glued and screwed to the panel from the back with three or four #10 x 2 1/2″ deep-thread, square-drive, flat-head wood screws. An 8 1/2″ horizontal dimension for these pieces will accommodate five Jet clamps. The jaw of the clamp furthest to the back will actually overlap the back piece. You can work out the horizontal dimension for your brand of clamps and how many you want to store in each bin. The front of each support piece is cut at a 45° angle, 2″ from the corners, as you can see in the photos.
The distance between the two support pieces should be 1 1/4″ for Jet clamps, which have 1 1/8″ wide bars. The Jet jaws are 1 7/16″ wide. Thus, this spacing is wide enough for easily placing clamps in the bin but narrow enough to prevent clamps from sliding about or falling through.
For added safety, I attached with two screws a 1/2″ thick x 2 1/2″ long hardwood stop on each support piece to extend 3/4″ above the support surface.
4″ between bins allows plenty of room for the jaws of the Jets. Based on this, adapted for your brand of clamps and the desired number of bins, you can work out a width for the back panel, keeping in mind the extra width at the ends.
Attach the rack to studs with appropriately sized screws or with fasteners suited for the wall in your shop. Use your judgment, keeping in mind that it will bear a lot of weight.
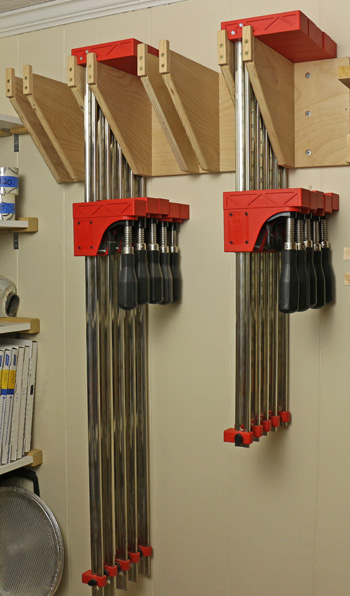
The rack works best when the clamps are hung by the upper jaw only. The moveable jaw of the Jets has a clutch so it will not move inadvertently. Bessey and others do not use a clutch but instead use a tilt-grab system, which perhaps can slip if you happen to bump the handle, causing the lower jaw to suddenly slide down. It is probably better to store those with the lower jaw all the way down.
After the posts so far on clamping, there have been more inquires regarding clamp racks than clamps. Emails are always welcome but keep in mind that I will respond to inquiries made in comments on the blog and that way more people will share and may contribute to the response. As always, thanks for reading.

I’m heading out for some ply this morning. It’s tough setting up a new shop. So many things to do. But your guidance is always appreciated.
Now a need a better rack for my chisels. Can you accommodate that?
Steve,
This may help: http://www.rpwoodwork.com/blog/2012/01/23/a-practical-tool-cabinet-part-4/
I just put my chisels on a shelf in my tool cabinet as described above. This way uses little space, the chisels are easily accessible, and there is nothing special to build.
I suggest set up the shop with an initial plan but it does not have to be complete in all details, just an overall layout. Then let it evolve and add details.
Above all, don’t get bogged down in making a shop. Instead, build stuff – furniture or whatever. That’s what it’s all about!
Good luck and let me know if I can help.
Rob
Hello Rob.
I’m a novice woodworker.. I’ve checked out the forums like Lumberjocks, woodworktalk etc, but of what I’ve been through, this is one of THE BEST posts when it comes to explanation.
Moreover, Can you recommend a good glue which should be used for household tasks and projects?
Thanks. Keep up the woodwork LOL :D
Daniel,
Thanks for the kind words and thanks for reading.
A good all-around glue would be Titebond III. It’s widely available in a range of sizes, easy to use, pretty good open time, and good water resistance.
Enjoy your woodworking,
Rob