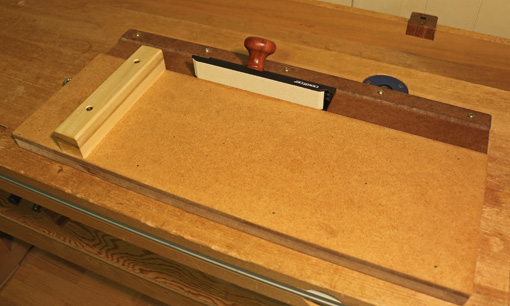
The Veritas Shooting Sander uses the principle of shooting – a guided vertical cutter is pushed to engage a work piece that is stably oriented by a surface and a fence – but uses sandpaper instead of a plane blade as the cutter. It’s simple and useful.
Though it certainly is not intended to replace shooting with a plane and a good shooting board, I’ve been so far finding it handy for odd-shaped parts that cannot be fully backed by a conventional shooting board fence, and for small parts.
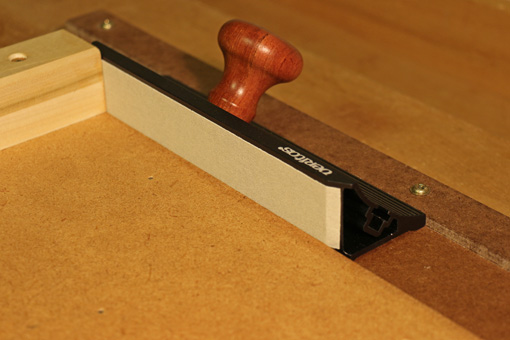
As we would expect from Veritas, the tool is well made and thought out. The accurately made anodized aluminum extrusion body and the nifty adjustable wooden handle are good reasons to forego a shop-made attempt at this low-cost tool.
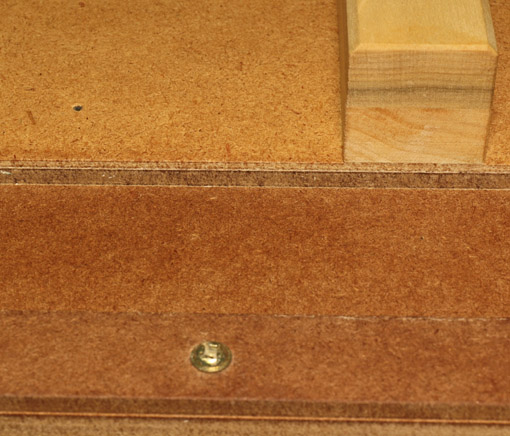
The shooting board I made for it is straightforward but there are a few fine points. The base is 3/4″ MDF, 23″ long. The work surface is 7 3/4″ wide with a nice straight edge against which the sander runs. The track for the sander is 2 1/8″ wide with a 1″-wide outer guide rail.
The work surface must be elevated at least 9/32″ above the track surface for the sandpaper to meet the lowest part of the work piece. I made the work surface from two pieces of MDF (just what was handy) for a total thickness of 11/32″, which gives a little margin for error when applying the sandpaper to the tool. That is, the bottom edge of the work piece is sure to be within the width of the sandpaper, even if I don’t apply the PSA paper to the tool perfectly accurately.
The fence is about 1 3/8″ high, screwed down 3 1/2″ from the end of the board with slightly oversized clearance holes that allow fine tuning for squareness.
Break in the shooting board just as you would for a plane shooting board by running the sander along the edge of the work surface so that a tiny width of sandpaper, say 1/16″, cuts a miniscule rabbet along the edge of the work surface. Then screw down the 1″-wide guide rail on the outside of the track so it is snug against the sander for the full length of the track.
A generous amount of oil-varnish finish toughens the MDF surfaces. Finally, I waxed the track. It all works well.
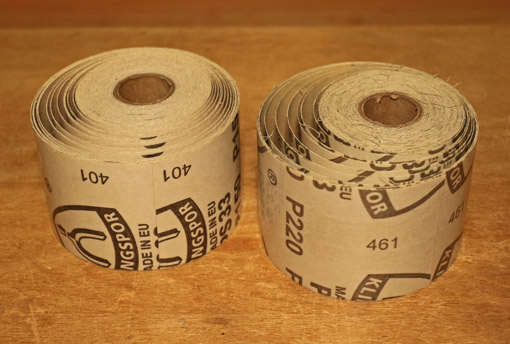
1 1/4″ wide adhesive-backed sandpaper strips are used for this tool. These are most economically made by slicing 2 1/2″ Klingspor PSA abrasive roll paper down the middle of its width. The paper strips that Lee Valley supplies are Klingspor’s.
After removing the first piece of sandpaper from the tool, I cleaned the residual adhesive off the tool with a citrus-based remover, but did not then clean off the slightly greasy residue of the remover. I found that subsequent sandpaper stuck plenty well enough and left hardly any residual adhesive when removed.
The tool is very easy to use but there are a few caveats. The sandpaper leaves grooves that are surprisingly deep for a given grit. That is simply because the tiny grits on the sandpaper are running in the same tracks over and over, unlike with regular hand sanding where the slight variations in movement erase most of the tiny grooves.
The work goes slower than shooting with a plane, especially since sandpaper seems to cut slowy on endgrain. Also, the thickness (height) of the work piece is limited to just under 1 1/4″.
The tool can be used ad lib to sand odd angles without using the fence by holding the work piece very firmly and offering its edge at the desired angle (such as indicated by a scribed line) to the sander running in the track.
All in all, this so far has been a worthwhile addition to the shop. My sense is that it will increasingly become a valuable quick “problem solver” tool that I’m very glad to have.
