Archive for ◊ April, 2021 ◊

Author:
• Friday, April 30th, 2021
handle mock-up

Like most furniture makers, I am not a sculptor, artist, or serious carver. However, I do want interesting handles to truly enhance the woodwork in which I have invested so much time and effort. With few exceptions, generic handles just will not do. 

I will first discuss how I make handles, step by step, and later consider design. The goal here is to transmit a practical approach to making unique wooden handles accessible to most any woodworker. For much more on designing for woodworkers, see this extensive series

1. Sketch

I sometimes start by briefly drawing ideas on paper but sketching on a small block of wood is the principal starting point. The wood gives me a better sense of size, partly because I am holding the wood as I sketch, and it is, after all, a handle that I am making. There are two requirements for sizing the handle: it must coordinate with the woodwork (drawer, door, etc.) and with the human hand. Use an easy-working wood like poplar or pine. 

2. Mock-up

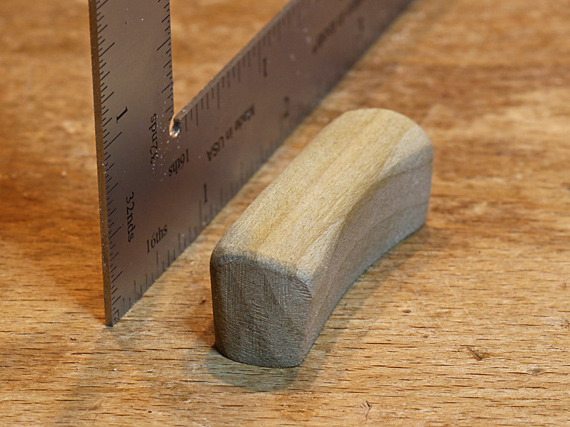
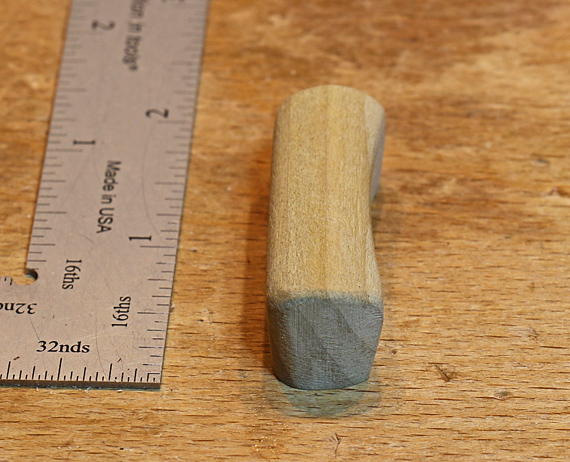
Once I have a decent three-dimensional sketch on the wood, I hack away at it with carving knives, rasps, and a coping saw – whatever it takes. Here again, it is not only appearance that is developing but also hand feel. CAD is not the answer here. Like all mock-up work, this should be a relaxed, fun process with some happy anticipation. Maybe you will be lucky on the first try or maybe it will take a several tries. No problem. And the last mock-up does not have to be perfect or great. For example, you might end up with something like: “It’s good except just a quarter inch longer and a bit thinner.”

The finished handle is going to look a lot better but this mock-up will do for now.
mock-up

3. Analyze 

Now I analyze the mock-up to decide on a wood species and the specific section of a board to be used. Further, I figure out how to machine blanks from which the handle can be efficiently produced. At this point, I also decide on the joinery – usually a tenon – to attach the handle, and how to make the joinery as I machine the blank.
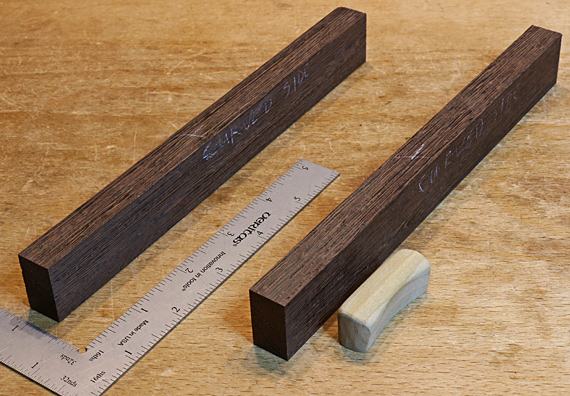
handle blanks

Above, each wenge blank is about 8″ long, wide enough to allow the handle to be shaped from it, and tall enough to incorporate the tenon. The extra length allows for safer machining, easier handling later when shaping, and mistakes. 

4. Machine the blanks

The offset tongues, produced on the router table, will later become tenons. Use whatever your good judgment indicates at the router table, such as featherboards, push blocks, etc. If you have enough wood, work the tongue near the edge of a board, then rip away the blank, but think ahead to end up with nice figure for the final handle.

The key is to essentially make the joinery now. These tongues are a precise barely fat 1/4″ thick. 
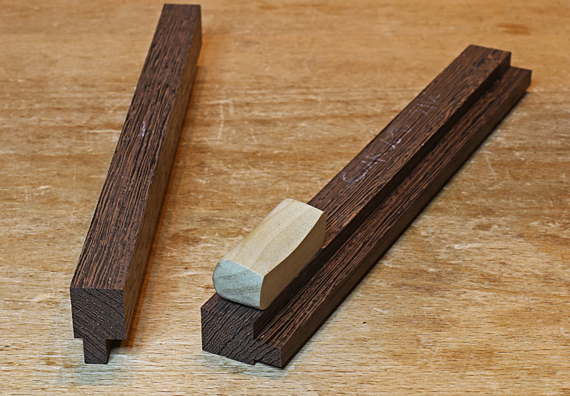
blanks with tenon

Next: Sculpting the handles to look and feel good.

Category: Techniques  | Tags:  | Comments off
Author:
• Thursday, April 22nd, 2021
joint failure

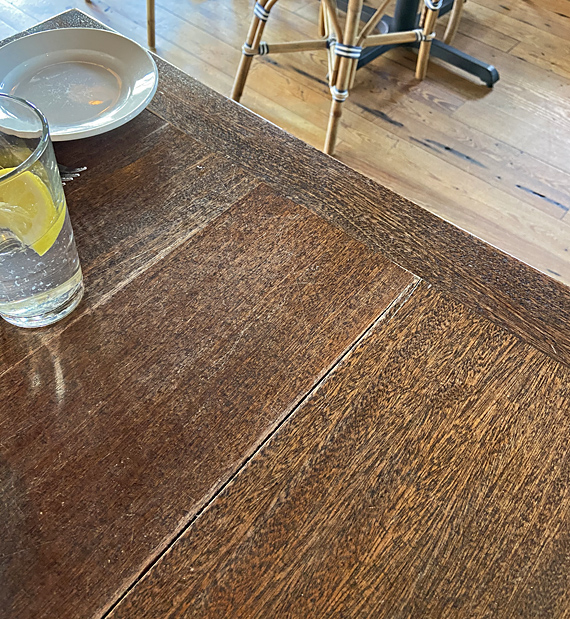
The companions seated at a restaurant table with an avid woodworker may find it odd that while they are studying the menu, the wood guy is studying the table. But much can learned by observing wooden structures in the wild, and so it was at a recent outing – just a few moments to choose the sashimi, but now let me see what’s going on with this table.

The big split (above) is easy to diagnose. There is a breadboard end cap running cross grain to the main section, and is no doubt glued along its entire length. It probably took only a year or less for the wood, probably dark red meranti, to split during a dry season when it was restrained from shrinking across the grain by the long grain length of the end cap.

Was the maker unaware of the problem inherent in the construction? Was it made just to look good at delivery without regard for its fate? One wonders. 

The split appears to be along an edge joint. As I have discussed in an earlier post, this is not a coincidence. The edge joint was weaker than the wood, a situation with many possible causes and that woodworkers try hard to avoid. My extensive series on the edge joint can help prevent this from happening to your work! 

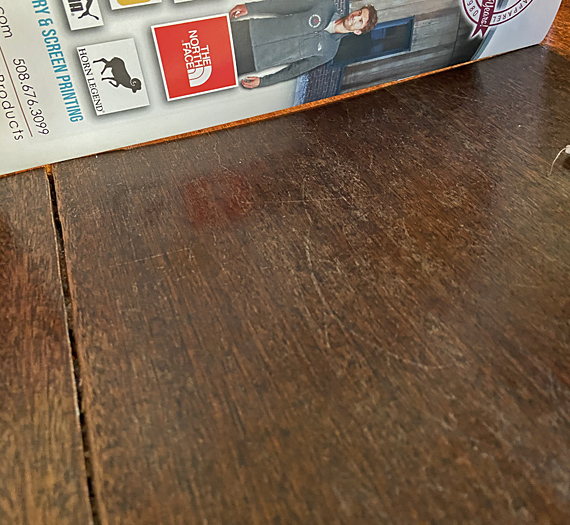
table top warp

What about the concavity in the top surface? In the photo just above, I am demonstrating the warp in the surface using the straight edge of the spine of a brochure. (Sorry, I didn’t have my Starrett with me.) Seasonal movement of flatsawn wood perhaps? No, the wood does not look flatsawn, and I am almost certain this same cup is present year round, and eventually in most of the tables there. 

The finish on the tabletop eventually deteriorates from repeated wetting, scratches, and perhaps ultraviolet light exposure. Liquid water, inevitably and repeatedly on a restaurant table, can then enter the wood fibers near the top of the board and swell them. The top surface of the board wants to get wider across the grain. But each time the fibers swell, they are compressed against each other, probably aggravated by the top of the board being relatively restrained from expanding by the drier bottom of the board, along with other aspects of the construction. The fibers undergo permanent deformation; they get crushed. This is compression set.

Later, when the top of the board re-equilibrates to a drier state, the crushed fibers want to shrink the width of the board. The board thus becomes concave on its top surface. This effect is irrespective of the usual come-and-go of flatsawn cupping, which may be additive to it. 

It is important to realize that these hygroscopic forces of wood movement are stronger than the wood structure itself. 

Taking a walk on a wood deck later that day, the boards showed another example of this.

We have to consider how the woodwork we make will fare long after it has left our hands. It is good to remember Yogi Berra’s advice, the title of this post.

[Who is the player with the most World Series championshhips in Major League Baseball history? Yup, it’s the great philospher himself, Yogi.]

Category: Wood  | 6 Comments