Like most furniture makers, I am not a sculptor, artist, or serious carver. However, I do want interesting handles to truly enhance the woodwork in which I have invested so much time and effort. With few exceptions, generic handles just will not do.
I will first discuss how I make handles, step by step, and later consider design. The goal here is to transmit a practical approach to making unique wooden handles accessible to most any woodworker. For much more on designing for woodworkers, see this extensive series.
1. Sketch
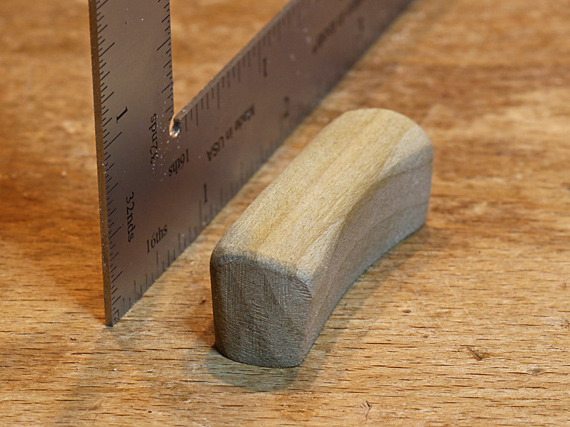
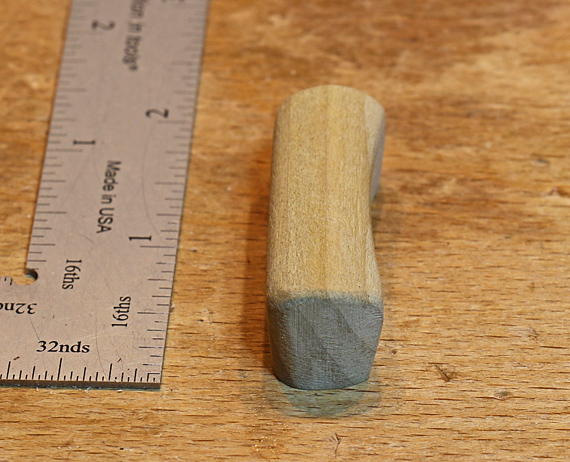
I sometimes start by briefly drawing ideas on paper but sketching on a small block of wood is the principal starting point. The wood gives me a better sense of size, partly because I am holding the wood as I sketch, and it is, after all, a handle that I am making. There are two requirements for sizing the handle: it must coordinate with the woodwork (drawer, door, etc.) and with the human hand. Use an easy-working wood like poplar or pine.
2. Mock-up
Once I have a decent three-dimensional sketch on the wood, I hack away at it with carving knives, rasps, and a coping saw – whatever it takes. Here again, it is not only appearance that is developing but also hand feel. CAD is not the answer here. Like all mock-up work, this should be a relaxed, fun process with some happy anticipation. Maybe you will be lucky on the first try or maybe it will take a several tries. No problem. And the last mock-up does not have to be perfect or great. For example, you might end up with something like: “It’s good except just a quarter inch longer and a bit thinner.”
The finished handle is going to look a lot better but this mock-up will do for now.
3. Analyze
Now I analyze the mock-up to decide on a wood species and the specific section of a board to be used. Further, I figure out how to machine blanks from which the handle can be efficiently produced. At this point, I also decide on the joinery – usually a tenon – to attach the handle, and how to make the joinery as I machine the blank.
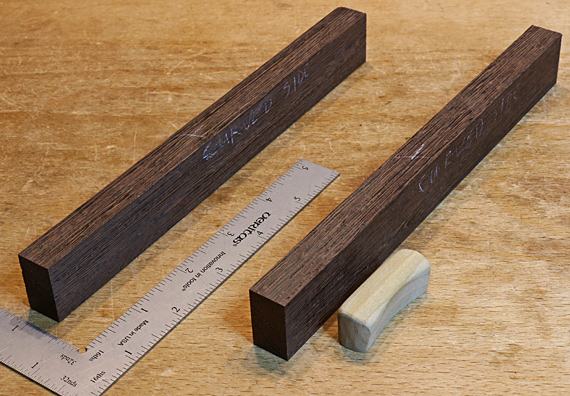
Above, each wenge blank is about 8″ long, wide enough to allow the handle to be shaped from it, and tall enough to incorporate the tenon. The extra length allows for safer machining, easier handling later when shaping, and mistakes.
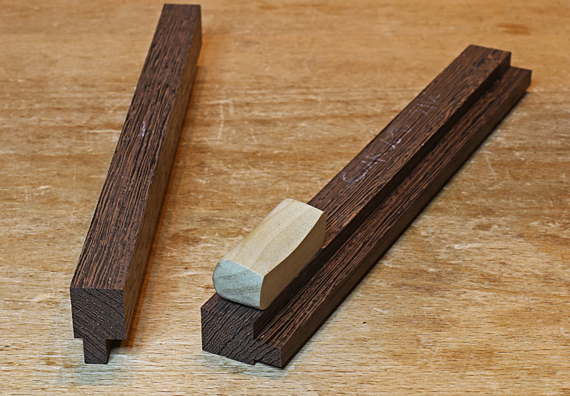
4. Machine the blanks
The offset tongues, produced on the router table, will later become tenons. Use whatever your good judgment indicates at the router table, such as featherboards, push blocks, etc. If you have enough wood, work the tongue near the edge of a board, then rip away the blank, but think ahead to end up with nice figure for the final handle.
The key is to essentially make the joinery now. These tongues are a precise barely fat 1/4″ thick.
Next: Sculpting the handles to look and feel good.
