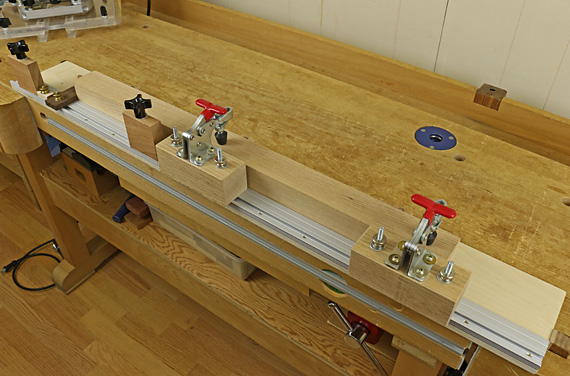
Now let’s work through the elements of the jig. The top photo again shows an overall view with a leg blank in place.
Basic construction:
The jig is built on a piece of plywood about 5″ wide and 39″ long. Screwed down along one edge is a double-width T track with the groove placed up at the outer edge. The wide T-track allows the sliding stops to be far enough away from the leg blank to make room for the router fence. (See previous post.)
Workpiece registration:
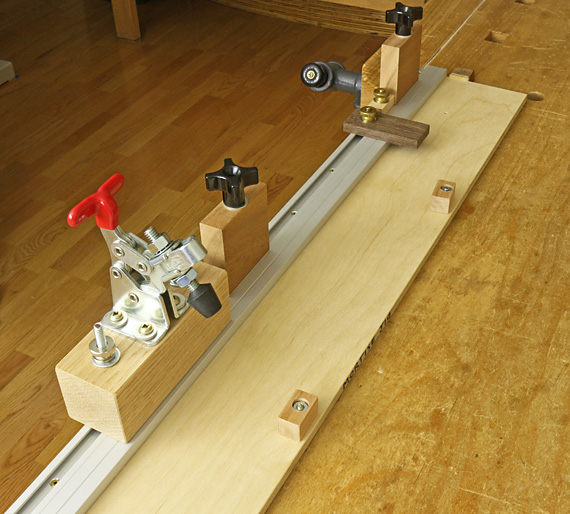
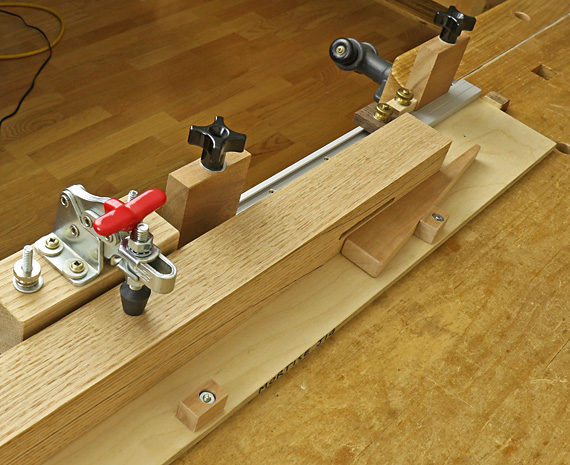
The side of the leg blank registers against the track, and the end registers against the moveable tab stop that you can see sticking out sideways from the track in the photo below. (It is dark wood – wenge – with a brass knob.)
Clamping the workpiece:
Two toggle clamps are mounted on 1 7/8″ square x 5″ moveable blocks, which are secured in the track with T bolts. These clamps provide lots of holding power and can be positioned away from the routing action.
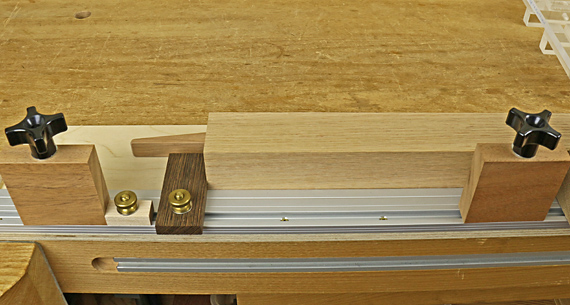
For use in addition to, or instead of, the toggle clamps, there is a wedge system, seen in the photo below. This consists of three 5/8″ square x 1″ blocks, distributed along the length of the plywood, that are bolted to the plywood but free to rotate. Wedges, 5/8″-thick x 8″-long with a 1:7 slope, secure the workpiece.
Stops for limiting the length of the mortise/haunch:
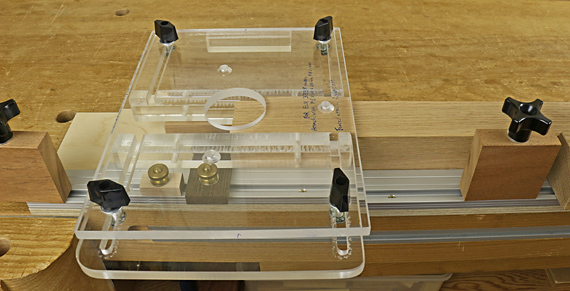
These are 3/4″ x 2 1/2″ x 2 1/2″ blocks that position in the T track and lock down with T bolts and star knobs. You can see them at the sides of the photo below.
At the right of the photo below, the router fence jig meets the stop to define the bottom of the mortise.
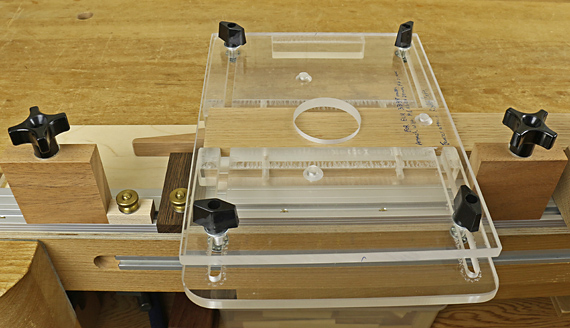
At the left of the photo below, the router plate jig meets the stop to define the bottom of the haunch (the limit of the full-depth mortise).
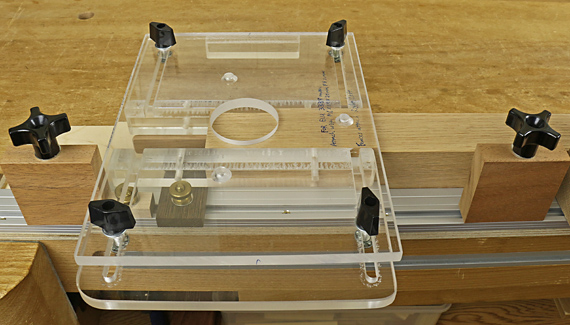
In the photo below, the left-side stop has been moved out of the way create the haunch all the way to the end of the leg. In practice, you would rout this first. Then you would move the left-side stop into place to define the top of the full-depth mortise, as seen just above. That location is “remembered” by the little maple stop with the brass knob.
In summary:
- Understood in its separate elements, the jig is not difficult to make.
- In practice, the whole thing is very intuitive to set up from mortises marked out in the traditional manner on one leg only.
- The mortising work moves along quickly.
- The jig can handle most common leg blank sizes that you will use to prepare the joinery before cutting the shape of the leg.
- It can also be used with rail and stile work but workpieces thinner than about 1 1/4″ will need to be paired with thicker wood to better support the router. The jig was designed mainly for mortising table legs.
[Skip this paragraph if you want; it will be apparent when you work with the jig. Depending on the circumstances and personal preferences, you can rout four corresponding mortises with the leg registered at one end of the jig, retain the router fence setting, and then reset the mortise jig to register the legs at the opposite end of the jig to make the other four mortises. Alternatively, you can retain the mortise jig settings and reset the router fence.]

Thanks for showing this. It gives me ideas . . . I have been gradually refining my own version of Tage Frid’s original plywood “trench” mortising jig, first by adding a “window” in the bottom to allow mortising on the ends of workpieces, gradually adding fences and stops and better workholding . . . When I see what you have done, and what Pat Warner has done, with jig making, it reminds me that even though it might be nice to have a Leigh FMT, there are still applications where the jig-making mindset, applied carefully and with iteratively refined, can take us places Leigh can’t! I love my 90’s-vintage DW 625 for this work, EXCEPT for the long spin-down time after the cut.
Thanks, Jim. As I mentioned, I hate complicated jigs but this one is really very intuitive to use.
Yea, an electronic brake would be nice on that router.
Rob