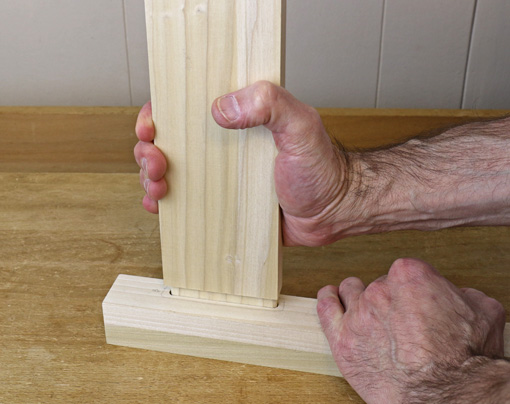
A good fit of the tenon to the mortise can be described as a comfortable swish fit. You should not need to pound the joint together, nor should the tenon simply drop into the mortise, nor should the tenon wobble in the mortise.
This matters because a mortise and tenon joint derives its strength from the restraining effect of the shoulders transferring stress to the bond between the tenon cheeks and the walls of the mortise. Against this shear stress, a well-made bond has great resistance, stronger than the wood itself.
To create a square assembly, M&T joints must also be true – the tenon cheeks should be in planes parallel to the reference face of the rail. Also, ideally, the tenon should have a good fit over the entire surface area of the cheeks, though perfection is not necessary because the glue does permit some leeway.
Whether the tenon is made by hand or machine, it is very helpful to have reliable ways to adjust the fit using hand tools. Test the corners of tenon into the mortise and feel for tight areas, then check the cheeks for burnishing. Look for bumps and steps from inaccurate sawing.
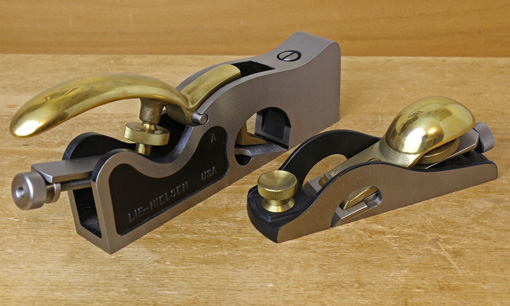
A rabbet block plane is one of my two favorite tools for trimming tenon cheeks. It starts easily, works right up to the shoulder, and automatically makes a flat surface. Pictured next to it is Lie-Nielsen’s big 1 1/4″ shoulder plane, which also can be used. Though it’s a great plane for other tasks, it and other shoulder planes are a bit tippy for this work.
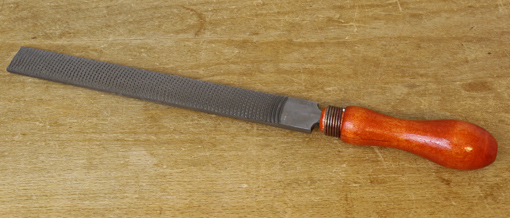
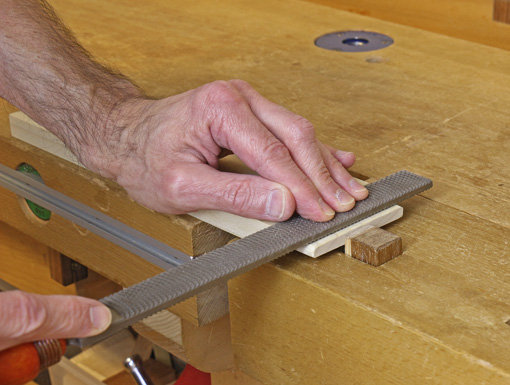
My other favorite is the Iwasaki 10″ coarse float. One might expect a file or rasp to round over the surface but this tool has such a decisive bite it can be controlled very well. What’s more, it leaves an incredibly clean surface, without tearing, for a tool with such big teeth. The safe edges prevent damage to the shoulder. I use three fingers on top of the tool for feel and control. I like this tool a lot.
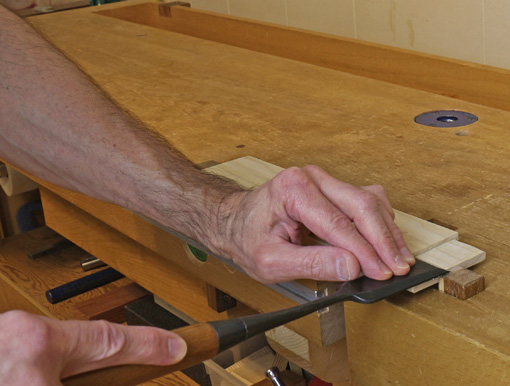
A wide paring chisel is another good option, especially for localized clean up. The length of a paring chisel offers considerably more control than a bench chisel. Pressure with left hand fingers on top coordinates with the right hand, which transmits depth of cut via the handle. Still, for a thin shave down of the whole tenon, the rabbet plane works better.
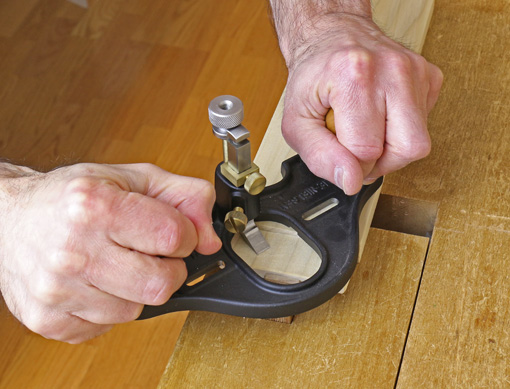
Yet another option is the router plane. I only use this if I think I’ve messed up the trueness of the tenon and need to establish a cheek into a plane parallel with the face of the rail.
Press the sole of the plane onto the face of the rail and start by setting a light cut at the most prominent part of the cheek, then work down from there. Mostly swing the plane, pivoting on the rail face, more than push it, to maintain steady contact and thus depth control. The tool is acting as a gauge to make the cheek face parallel to the rail face.
I generally hand saw tenons because setting up machines is usually not worth it for me for one-of-a-kind pieces. Even with several good options for fine tuning the tenon cheeks, I strive for a good fit directly from the saw, maintaining a one-sided tolerance to avoid having to patch up a tenon.
