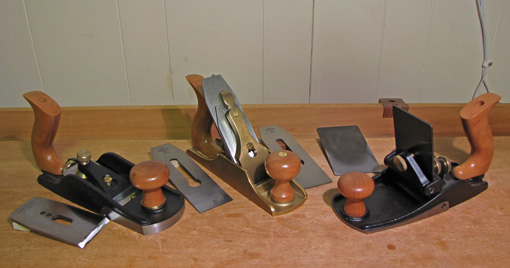
Hand planing can leave a superb final surface on wood. However, the beautiful figured woods that are one of the great joys of woodworking often cause tearout and play havoc with our efforts. This is the first in a series of posts that will explore a compendium of options for achieving an excellent finished surface on difficult woods.
When planning a project, I consider early on how to put the final surface on the wood, along with which finish to apply. Understanding an arsenal of options, and testing the tools and methods beforehand, gives me the wherewithal to use the woods I love.
There are several prefatory issues:
1. The topic of these posts is finish planing or “smoothing,” not planing for stock preparation. For the latter, even highly figured woods such as tight curly maple, can be successfully worked with a conventionally configured jack plane: bevel-down on a 45° frog with a 30-35° honing angle, or bevel-up on a 12° frog with a 38° honing angle. The key is to plane at about 60-90° to the grain, which means across the curls. (This is not skewing the plane; it is pushing the plane diagonally across the grain.) This leaves a somewhat rough surface but one that is adequate for dimensioning, and there is little or no tearout to clean up with the smoother.
This method may not work for swirly figure, such as waterfall bubinga. For that, a toothed blade in a bevel-up jack plane, planing with progressively shallower blade projections, works wonders. Clean up the surface with a conventional blade.
My preference for dimensioning figured stock is the DW735 with the Byrd Shelix carbide spiral cutterhead. Then comes smoothing with a hand plane.
2. Why use a plane at all for smoothing? Why not just sand? Well, for some woods and in some circumstances, I think sanding is the better option. However, I prefer to smooth plane when I can because, compared to sanding, it is faster, more pleasant, and better retains the trueness of the surface. Furthermore, for some woods (walnut comes to mind), the final surface is distinctly superior when hand planed. I also recognize that for some woods (bubinga comes to mind), depending on the type of finish to be applied, sanding is just as good as planing.
3. Sharpness is king. Using a very sharp blade, properly cambered, solves so many planing problems. Conversely, using a dull or poorly shaped blade edge for smoothing will create problems regardless of the type of plane, the angles used, and so forth.
4. Skewing the plane helps with almost all of the plane and blade configurations that will be discussed for smoothing. The physics of why it works is an interesting topic for another time, but beyond the scope of these posts.
5. For some woods and some circumstances, light sanding with fine grit such as 320 or 400 is appropriate after smooth planing. The main thing is to be sensitive to what you are trying to achieve with the wood, and not be governed by purist dogma.
So, in this series we’ll look at different tools and setups, their advantages and disadvantages, but with the theme that there are multiple good ways to get excellent results. The key is to know your options.

