Archive for the Category ◊ Tools and Shop ◊

Author:
• Monday, January 14th, 2013

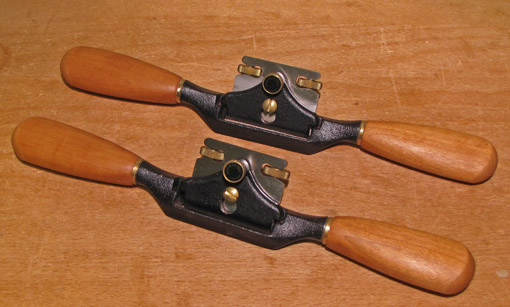
The Veritas flat and round metal spokeshaves are excellent tools that have performed well for several years in my shop. However, I greatly dislike the handles on these tools as supplied by Veritas. I will explain. 

The OEM handles are round in cross section, and rather small. This makes it difficult to control the spokeshave in the most critical aspect – its rotational pitch on the long axis of the tool with respect to the wood surface. This means how you tip the spokeshave to effectively engage the blade into wood. The smallish round handles make it hard to find and maintain proper positioning. The tool tends to rotate unless it is gripped tightly, leading to undue fatigue.

This is true even if you place your fingertips on the body of the spokeshave, as many woodworkers prefer. The fingertips are fine tuners, while stability and power comes from the body of the hand against the handles.

Fortunately, the Veritas design facilitates installing user-made replacements, which I did soon after I bought the tools, using hardware available from Veritas.

I made my handles larger and, most importantly, flatter – vaguely like a chubby beaver tail or an elongated cactus branch. I can feel and maintain the registration of the spokeshave against the wood better than with the OEM handles. My handles originally were longer but I shortened them, so now I can tuck the rounded end against the outer part of my palm.

The flatter handles are a tricky to install because you want them to attach in a specific orientation, unlike the round-cross section OEM handles. One end of the hanger bolt used to attach the handle goes into the tool body with machine threads. Coarse wood threads on the other end go into the wooden handle. The wood threads must enter just right amount into the handle so it will be in the desired position when the machine threads are tightened into the body. There are right hand threads on both sides of the body, and therefore they tighten in opposite directions as they face each other.

I eventually got it right after trial and error. Making the two faces of the handle symmetrical doubles the opportunities to align the two handles.

Perhaps a tang with machine threads on one end that attach to the body would make it easier to align user-made handles that are not round in cross section. I wonder if Veritas would consider such an accessory.

I made the handles from cherry. I like a woody, not slick, feel to tool handles so I applied a single coat of oil-varnish.

As always, woodworkers will have their personal preferences in these matters of the hand and the tool, but here I have explained the reasons for my preferences. Now the Veritas spokeshaves are just right in my hands!

Category: Tools and Shop  | 5 Comments
Author:
• Sunday, October 28th, 2012

It is usually difficult to accurately concentrically enlarge a hole, especially when working with unpowered or electric hand-held drills instead of a drill press. Furthermore, the sides of the previously drilled hole tend to grab the larger bit and pull it in faster and deeper than desired, sometimes creating a ragged rim at the top of the enlarged hole. A simple tool that has saved the day for me a number of times over the years is the step drill bit.

The one I use, pictured above, has 13 steps, each 1/32″, from 1/8″ to 1/2″. Simply seat the appropriate diameter step in the original hole and drill down to the step of the desired size. It may be helpful to mark the desired step. The resulting shallow hole at the top can now concentrically register a regular bit for the new hole size. Of course, this won’t manage every situation, but it is a helpful option to have in the shop. I have never found a bit with 1/64″ steps.

These bits, sometimes called “drill tree” bits, are designed for drilling in thin metal and plastic, and for that I have found nothing better. They advance smoothly and produce a very clean hole with none of the grabbing or tearing common with regular twist bits.

They are available at home centers and hardware stores. It pays to keep an eye out for tools that are not intended for woodworking but which can nonetheless be useful in the wood shop. “Step drill” can also refer to concentrically ground twist bits, similar to those used for drilling pocket holes. W.L. Fuller in Rhode Island makes an incredible selection of step twist bits, including custom tooling.

Correcting one’s mistakes and finding a way out of jams are like every other skill: with enough practice, you get good at it. I’ve given myself plenty of practice, so I hope passing on these little tips will be helpful to you.

Category: Tools and Shop  | 3 Comments
Author:
• Saturday, September 15th, 2012

It is tempting to judge this saw on its looks, and there it is certainly a winner. Moreover, the range of choices available in the handle wood, saw nuts, and back allow the customized aesthetics of this tool to be especially pleasing. More substantively, the fit and finish are magnificent; there isn’t a hair out of place. My Bad Axe 10″ dovetail saw has a .018″ plate, 16 tpi rip teeth, set about .002 each side, with a mesquite tote, blued steel back, and brass saw nuts.

However, a tool must be ultimately judged by its performance, which simply means how it can help you make things out of wood. I’ve used this saw for about nine months now, and, despite some excellent Western and Japanese alternatives to which I had become accustomed, the Bad Axe has become my clear favorite.

When I pick up this saw and approach the wood, it feels just right in my hand. Though relatively beefy for a dovetail saw, the handle contour, low hang angle, and especially the balance work together to impart eagerness to go at the layout lines. When the saw does bite into the wood, the truly superlative sharpening completes the functional integration. In many side-by-side tests with my other saws, I  have gotten the most consistent accuracy and feel the most confident with the Bad Axe. It is now the saw I reach for.

A bit of relaxed tooth rake toward the toe of the saw helps start the cut. The tooth line is canted about 1/8 from toe to heel. These are both helpful features, though, to find quibbles with the design, my preference would probably be an increase in both of these.

The Bad Axe Tools Works website gives detailed technical information on the saws, and, ultimately, you will have to get one of these saws in your hand to appreciate how well it works.

There is something more important that I want to tell you about this tool. I think of it similarly as my Japanese Daitei chisels and French Auriou rasps. The Bad Axe saw is a tool with a soul, but in this case it is a characteristically American one. This is born of the personal commitment of its maker, Mark Harrell, a man who has spent much of his life serving America. Mark understands saw making history, listens to the input of many woodworkers (disclosure: including me), and is passionate about innovation, refinement, and excellence in producing a saw that you will not mistake for any other. Further, he allows for a range of your choices in saw plate, filing, handle size, and materials.

Yes, the soul of the tool is meaningful and I sense it when I bring the Bad Axe saw to the wood.

Author:
• Saturday, September 08th, 2012

I don’t mean to complain but . . .

1. Ulmia used to make a little vise that I’ve only seen in The Fine Art of Cabinetmaking by James Krenov, and months too late on Ebay. It is an Ulmia “Hilfs-Spannstock” (auxiliary vise) model #1812. [Note: One vise jaw is stamped “LSP-2816-4” and the other “LSP-2817-4” but I don’t think those are model numbers.] It can be clamped to the workbench top for holding small work, but, more usefully, can be secured in the tail vise to hold thin, small, and narrow parts. I have a shop-made alternative plus another option to be discussed in a future post.

2. The Lie-Nielsen convex sole block plane gets plenty of use in my shop since almost everything I make involves multiple curves. I like the shallow 27″ radius along its length, but it would be more useful for me if the 3″ radius across its width were shallower. Thus, even better would be a few different models with different radii. The plane is very handy to use but, for my taste, could still could be a bit bigger overall, and would be easier to grasp with grooves on the sides as finger grips.

3. I wish the Lie-Nielsen #2 had an option of a 50° frog as do most of their other bench planes. I think 50° is the best basic go-to angle for bevel-down smoothing planes and would make the handy 7 1/2″-long #2 more valuable.

4. The rose-head countersink with radially-asymmetric flutes that Lee Valley used to make is just about perfect, but as far as I know, has disappeared from their product line.

5. Veritas (Lee Valley) makes saddle squares and other, similar, markers which are very nice except for the annoying cut-away on the inside of the angle which is supposedly to vault saw whiskers. Who has these big saw whiskers and why would you want to preserve them? The cut away causes your layout line to deviate at the corner, often just where you need it most. This type of feature is found on machinist squares to vault metal burrs but is a disadvantage on tools used for marking continuous layout lines on wood.

The above suggestions are made here with great respect for these excellent companies.

6. The old Disston “Stronghold” style file handles are unbeatable. I have a supply in different sizes but, as far as I know, they are no longer manufactured. I wonder if the patent status would permit their manufacture again by some company.

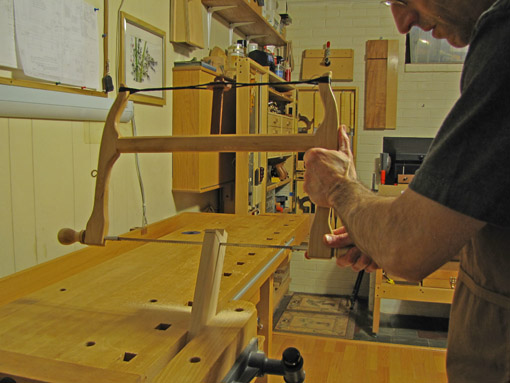
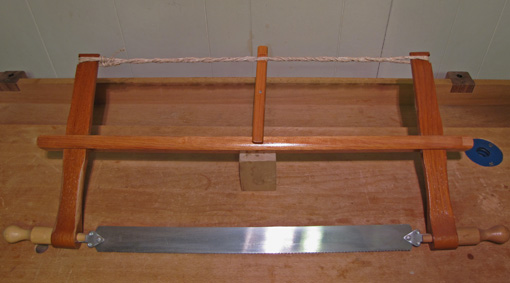
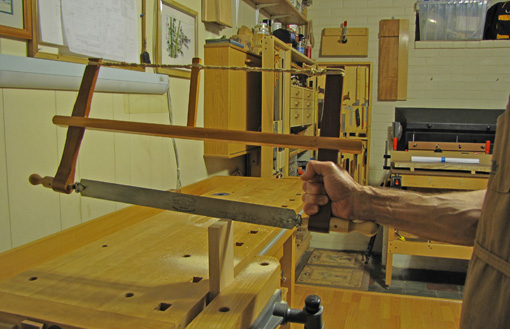
7. I don’t know about you, but my hand gets tired using a coping saw or fret saw, even of the best quality. Because the handle is parallel to the blade, one is forced to use it with a bent wrist. There ought to be some way to rig a handle which is nearly perpendicular to the blade, much like a backsaw. I suspect this would also make it a more accurate tool. Uh oh, I think I just put a bug in my ear.

8. Finally, I request a magic lantern which grants me just these three wishes: an instant sharpening system which requires no time or effort whatsoever, a board stretcher (especially for width), and, most of all, a clock that doesn’t move unless I want it to. I’ll pay for shipping, no problem.

Readers, you undoubtedly have your own lists, and if I thought about it longer, my list could certainly exceed this one. Thanks for reading.

Category: Tools and Shop  | 11 Comments
Author:
• Monday, August 27th, 2012

The saw pictured in the previous post, and above, is the Gramercy dovetail saw but that is not the original handle.

In this blog, I have praised the Gramercy saw, and I still think it’s a great saw. However, the original handle is set rather high – a high hang angle – and I have come to dislike that feature. I understand and respect Joel Moskowitz’ reasons for designing it that way but, partly because I’ve reworked some of my sawing mechanics, I now find it just does not best suit me. I’m using a lower stance with my shoulder and elbow more downward.

So, I made a handle from some spare Claro walnut. (In the process, I increased my appreciation of the skill level exhibited by professional tool makers. I needed some shimming to get the fit right.) In the photo below, the Gramercy handle is placed in its original position, a hang angle of 35°, for comparison with the 66° of the replacement handle. This is a large difference which, to me, makes the replacement feel significantly better in use. I also like the beefier grip of the replacement better than the skinnier original.

Mark Harrell of Bad Axe Tool Works deserves most of the thanks for my evolution. I have been using his dovetail saw this year and it has become my favorite. The hang angle of the Bad Axe is about 61° and the tote feels just right in my hand. I outlined its basic shape and adapted the front to fit the Gramercy. As Mark explains, the hang angle of his saw “gets you behind the push stroke.” [To be clear, converting the Gramercy saw was not done at the suggestion of, in consultation with, or to the knowledge of Mark. Reading Mark’s ideas and using his saw were informative, but the responsibility for the conversion is mine alone.]

In a future post, I will discuss the Bad Axe saw more, but the summary for now is that it’s wonderful. Mark’s passion for excellence has raised the game for saw making.

Here are a few more thoughts on saw hang angles:

The Disston D-7, pictured below, has an angle of 74° which puts the power more behind the saw, which is needed for heavy ripping with an aggressive tooth rake.

Tilting the wrist can compensate for an undesirable saw hang, but, as any tennis player knows, the wrist is most firm in its unbent position.

Finally, what is the hang angle of the saw below? Defying just about everything discussed here, the Japanese pull stroke saws demonstrate that there is more than one good way to do things.

Category: Tools and Shop  | 2 Comments
Author:
• Monday, August 27th, 2012

A saw that feels just right in your hand and sails through the wood with ease and control is a wonderful thing. An important factor in this is the angle formed by the handle (tote) of a saw and its tooth line – the “hang” of the saw. Though it gets relatively little attention among the details of teeth-per-inch, plate thickness, set, rake, and so forth, the hang is the foundation of your interface with all the other aspects of the saw.

I propose that it is important enough to be routinely specified by the makers of top quality saws along with the other parameters of the saw. True, it can be estimated by simply looking at the saw, but quantifying it would facilitate its manipulation in designing the saw, just as is done with tpi, for example. Of course, similar to all the other quantifiable elements of a saw, the hang defies formulaic prescription because the many factors all work together to produce the desired sawing mechanics, comfort, and effectiveness.

In the saw above, the hang angle is 66°, defined by the white tape lines. Note that the line on the tote connects the two rounded forward-most points on the surface against which your palm rests. This discussion should not be misconstrued as suggesting that a saw handle can be defined simply by a number. Similar to the weight of a tennis racket, the number gives you some information, a manipulable parameter, but does not negate the importance of balance, shape, and numerous other factors, many subtle.

The rake angle of the teeth, essentially the aggressiveness of the front of the saw tooth meeting the wood, is a particularly important influence on the effectiveness of a given hang angle. Other influences include:

  • The height of the work, your bench, and you
  • The balance of the saw
  • Crosscut vs rip
  • Wood hardness
  • Tooth sharpness
  • Your wrist, preferred grip, stance, and body mechanics

The interaction of all these factors will decide what hang is right for you. The main point is that the hang angle is an important element to be aware of when considering a saw. Of course, this is not something to determine with a computer model in an armchair. Try different saws in different cutting situations and see what works right for you. Nowadays, woodworkers are so fortunate to have tremendous saw makers producing magnificent tools.

Next: I will show an example of a saw hang that I decided I did not like, and what I did about it.

Category: Tools and Shop  | 4 Comments
Author:
• Tuesday, July 31st, 2012

This is a tool that we all use but gets little attention. As usual with tools, there is a range of quality from barely usable to excellent, and to do quality work, it pays to know the differences.

Let us consider the tools in the photo at the top, from left to right:

1. This type is the ubiquitous hardware store/home center DIY countersink which has little role in quality furniture making. Its five flutes are symmetrically arranged and present a thick, dull cutting wedge to the wood. For these reasons, it chatters badly, meaning that it bumps and jumps as it cuts, producing radial bumps on the countersunk wood surface. Save this one for home carpentry projects with CDX.

2. This is a countersink/deburring tool which is excellent for metal working, but also cuts quite smoothly in wood. It cuts fairly slowly in wood compared to the other designs, but it does not tend to chatter and leaves a good surface.

3. This is a quick-change hex shank bit which is quite sharp and generally cuts fast and well, though it has some tendency to tear the wood and chatter a bit, especially if it is pushed hard.

4. The Beall countersink is an excellent quality tool and a favorite of many woodworkers. The design and weight virtually eliminate chatter, and it cuts smoothly. I find it somewhat bulky for most work though. It certainly is handy for large holes.

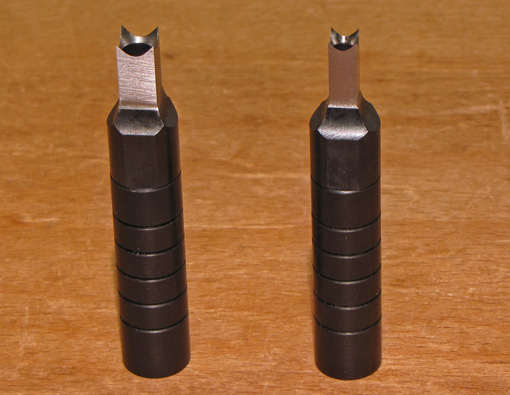
5. This is the best one. Lee Valley used to make these but I cannot find them anywhere now. As seen in the photo below, on the right, it has radially asymmetric flutes which present sharp, narrow cutting wedges to the wood at low angles. These design elements produce a countersink that never chatters or tears. It can be sharpened with a small diamond paddle. I wish Lee Valley would make them again.

The DIY clunker is on the left in the photo below.

Hey, I counted 18 countersinks here. Hmm, is it possible that I have a, ah, countersink problem?

The Fuller set, below, are countersinks that attach with set screws to drill bits. These are most useful in a drill press to bore a hole and countersink in one pass to a specified depth. They can also produce a clean counterbore for plugging. They run chatter-free but have a tendency to clog. Excellent quality.

Below, left, is a narrow (about 1/4 inch) Weldon countersink, similar in design to #2, above. It is handy in tight spaces, using narrow screws. To the right is a piloted countersink that I use only for remaking holes in hardware. Lee Valley sells them in various sizes and they can really save the day for hardware problems.

Finally, below are some more DIY tools for a quick change chuck available from Lowe’s. These are certainly not at the quality level of the Fuller tools, but are not bad for fast, less finicky work.

As always, match the tool to the job. And, again, hey Lee Valley, I wish someone would make a nice countersink like #5, above. If any readers have found one, please comment. In the meantime, the Beall is probably the best choice, or, for a smaller tool, the countersink/deburring design (#2, above).

Category: Tools and Shop  | 7 Comments
Author:
• Tuesday, July 17th, 2012

It’s time . . . for the table saw-bandsaw matchup for building a table. Most of this applies to other post-and-rail or leg-and-apron construction such as cabinets-on-stand, beds, benches, and frame-and-panel casework. I’m afraid this is going to be a brutal mismatch, but don’t worry, the referee is nearby.

The bandsaw has decisive advantages over the table saw for making the legs. First, it allows for the artful selection of long-grain figure unrestricted by its original orientation to the edge of the board.

Equally important is the orientation of the end grain. As discussed in an earlier post, this is critical for shaped legs. In most cases, diagonally oriented annual rings in the leg blanks give the best look. Even if suitable riftsawn stock is unavailable, the effect can be created from thick flatsawn stock by ripping it at appropriate angles, as shown in the photo below. The 12/4 mahogany can be ripped as indicated by the squares drawn on its endgrain to yield the same desirable ring orientation of the maple leg blanks. (The markings on the maple are not cut lines.)

Of course, the ability of the bandsaw to cut curves allows infinite options beyond simple straight tapers. However, straight cuts in the thick stock usually used for legs are also more comfortably done with the bandsaw, used in conjunction with a jointer (hand or machine). Ripping 10/4 bubinga with even a 3HP cabinet saw is not fun.

Now just in case the faint of heart are wincing at this lopsided bout, I point out again that it is best to have a bandsaw and a table saw. As discussed in the previous posts, this match-up is really about the priorities that guide one’s approach to woodworking.

Moving on to the aprons and top, figure selection and options for resawing are again important. You might consider a bookmatched solid wood top for small tables. Curves in the rail members are also more likely to come from bandsaw thinking. Interesting designs can be created with thick veneer which can readily be produced with the bandsaw. The photo below shows 11″ wide ribbon-stripe khaya directly from my bandsaw. The pieces to the left will finish to 3/16″ thick after minimal planing, suitable for false drawer fronts, and the pieces to the right will finish to 3/32″, suitable for thick veneer. 

For mortise and tenon joinery, the heart of leg and apron construction, both the table saw and the bandsaw can make good tenon cheeks, though the table saw can also easily cut clean shoulders. Otherwise, there are few straight, clean, critical crosscuts required in building most tables, thus neutralizing one of the table saw’s strengths.

Don’t forget that in the design stage, as you unleash your creativity, the bandsaw makes mock-ups wonderfully fast and fun.

The referee steps in to stop the carnage and declare a TKO. (And, thankfully, also puts a stop to this ridiculous metaphor.)

Some woodworkers may be concerned that the bandsaw takes more setup, learning, and tuning. I do not think it is harder to set up a new bandsaw than a new table saw. Learning the bandsaw is mostly fun, with less intimidation than posed by the table saw. Further, there are many excellent sources of information, including books by Mark Duginske, Lonnie Bird, and Roland Johnson. I admit, however, that changing and cleaning bandsaw blades are among the least pleasant jobs in the shop.

I suggest get a steel frame bandsaw with at least 12″ of resaw height with motor power to match. Fortunately, bandsaws do not take up much space. Minimax and Agazanni are among the makers of excellent machines, and Grizzly and Rikon make very good, less expensive ones. If you have any money left over, consider buying a table saw; I hear they’re quite handy.

Finally, consider the wisdom of the late James Krenov, who wrote in The Fine Art of Cabinetmaking, “Of all my machines, the band saw has done the most to help me use wood the way I really want to.”