Author Archive

Author:
• Thursday, March 12th, 2015

Mini Gorilla dust collector

For many years, dust collection in my shop had been the basic bag-over-bag single-stage collector familiar to most of us small shop woodworkers. A few years ago I upgraded to the Oneida Mini Gorilla, a cyclone collector, and it has been excellent. I’ve received many inquiries about it from woodworkers considering upgrading their dust collection system, so I hope this report will be helpful.

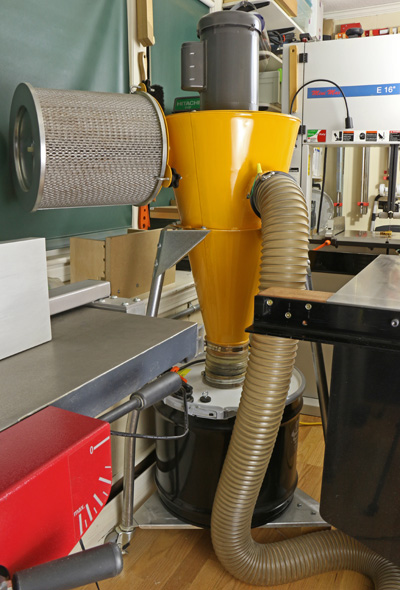
A cyclone collector is more efficient that a single stage collector because it involves two stages of collection based on particle size. Here’s what happens. The impeller fan whips around the intake material in the big sheet metal cone that give these machines their characteristic appearance. The chips and larger dust particles that constitute almost the entire volume of the intake fall into the collection drum below the cone.

Thus, only the finest dust – the most unhealthful – gets passed on to the air filter, the cage-like cylinder sticking out the side of the yellow cone in the photo above. This permits the use of an incredibly efficient sub-micron pleated HEPA filter without it getting continually overburdened and clogged with debris.

What all this means is that my shop is cleaner, and more important, healthier.

The Mini Gorilla easily handles the biggest producers of chips in my shop, the Hammer A3-31 12″ jointer-planer and the DeWalt DW735 planer. The only limitation is the dust gathering efficiency at the source. Fortunately, the A3-31 and DW735 are great in this regard. The Minimax bandsaw is good while the Saw Stop table saw (vintage 2005) is just fair.

Oneida rates the noise produced by this machine at 76dB(A) at 10 feet. As a practical matter, it seems noisier than what I remember of the old bag-on-bag collector but it’s not bad and certainly not a deal breaker. The Mini Gorilla is very space-efficient – notice the motor on top of the cone – so its footprint is smaller than most small single-stage collectors.

It’s not cheap. The base price is now $780, according to Oneida’s website. A mobile stand or wall bracket, steel drum, and shipping push the total over $1 large.

Oneida’s website has details about the Mini Gorilla and the rest of their large line of dust collectors. This review is unsolicited and uncompensated.

Grunt machines like a good dust collector are not glamorous and there is a natural reluctance to invest in them. However, I think they support a sense of freedom in the shop because they take good care of the dirty work and produce a better working environment. That freedom, in turn, produces more creativity, which is what this is all about.

Next: How I set up the Mini Gorilla in my small shop.

Author:
• Saturday, February 28th, 2015

expansion washers

These are so eminently practical that it seems they should have been around for a century but it has been just several years since Lee Valley started manufacturing Chris Becksvoort’s clever idea. Since then, I’ve been using them whenever there is a need for a substantially long slot to accommodate the movement of a screw caused by dimensional changes in wood related to humidity.

One of the most common uses is for screws that go through cross grain support pieces and secure a table top. Another is at the back of drawer runners that are cross grain to the sides of a case.

The washers come in two sizes, designated #10 and #14, and both are thoughtfully made to convenient dimensions. The #10s shown here are slightly less than 1/2″ wide and 1″ long, with a slot slightly greater than 3/16″ wide. They are 3/64″ thick.

It is possible to rout slots for these but I find it easier to simply drill two 1/2″ holes with their centers 1/2″ apart using a Forstner bit in the drill press. Pare away the remaining web with a 1/2″ chisel. Next, without changing the fence setting, drill 3/16″ through holes on the same two centers. Then drill overlapping holes in between and gradually drill away the waste to form the slot.

The finished slots, and the washer and screw in place are shown below.

expansion washers

expansion washers

expansion washers
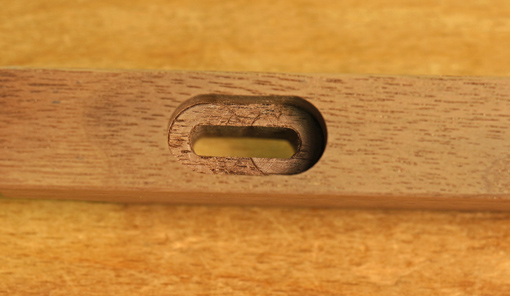
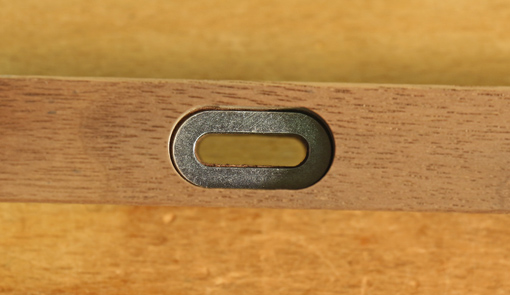
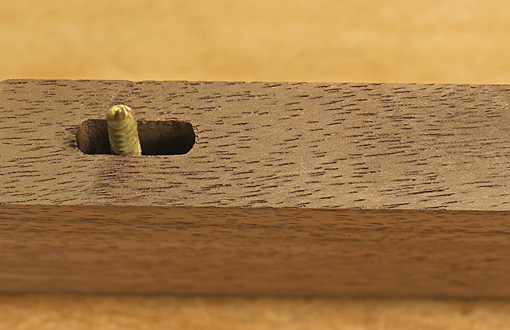
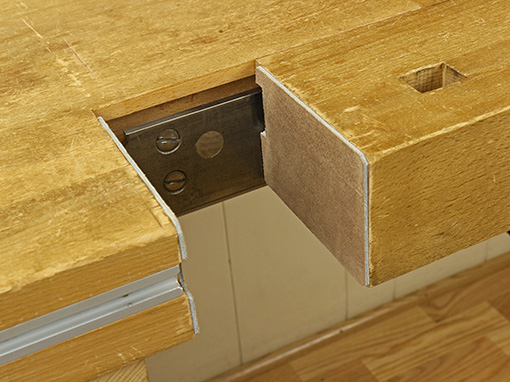
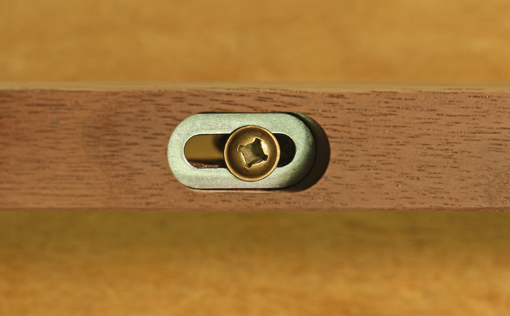
For this type of assembly, I prefer square drive, hardened, deep-thread, washer head screws, #8 in this case, available from McFeely’s. (Technically, this is a combo drive head but who in his right mind, given the choice, would use a Phillips driver instead of a square driver.) Of course, the depth of the large slot must be worked out according to the thickness of the stretcher or runner, the thickness of the piece that the screw will bind to, and the length of the screw. The view from the other side is shown below.
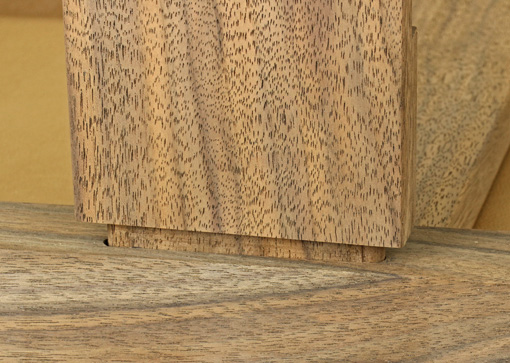
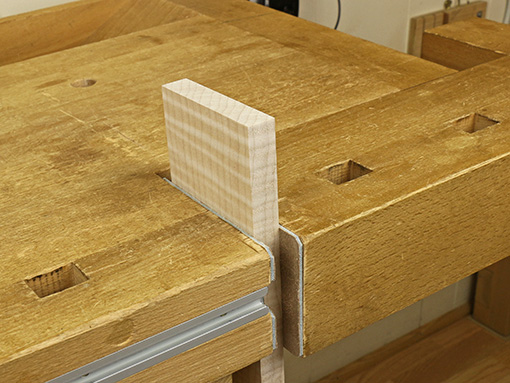
expansion washers

True, the same slot construction can be done without the washer and in fact, those that I have so made have functioned well for many years. And there are other good approaches to this issue. However, when sizable dimensional swings must be accounted for, it has always been too careful a setup done with some doubt about the possibility of the screw head binding. Perhaps if it was socked down too tightly in dry wood, I’ve wondered, it might get stuck in the swell of wood around it and not slide.

These washers make things simple and remove any doubts. The screw head will not catch on the metal washer. The construction is clean and sure. Thanks to Chris and Lee Valley for this handy hardware item that should be in routine use.

Category: Techniques  | 4 Comments
Author:
• Saturday, February 21st, 2015

mortise and tenon

The glue line of a properly constructed mortise and tenon joint will almost never break from external load. Other things might break but not that.

To get a good sense of this, let’s think about what’s going on in just a small joint with a tenon 3″ wide by 1″ long. There are 6 square inches of glue surface, which is equal to that in an 8″-long edge joint between ¾”-thick boards. Now imagine trying to break that edge joint, not in tension as in hammering down on the unsupported joint line, but in shear! The wood will break, the glue line will not.

The mortise and tenon joint is strong because even in a fairly small joint there is plenty of glue line and it is stressed in shear. So if you’ve fit that decently, don’t worry; it is very unlikely to break. The tenon shoulders transfer much of the stress to that glue line. (By the way, the glue line of a half-lap joint can be stressed in tension if, for example, a frame undergoes severe twisting forces.)

The tenon itself is stressed mostly in tension and compression along the grain, which are also quite strong. So don’t worry there either, because a reasonably sized tenon is also very unlikely to break.

Furthermore, for the purpose of strength, there is no point in fitting the tenon tight to both ends of the mortise. That does not make the joint strong.

If something is going to break, it is most likely to be the wood of the stile or leg, which can succumb to stress in tension across the grain. This is especially so if the joint is designed with injudicious distribution of wood among the components.

Thus, make sure the stile or leg will be strong around the joint. In general, the walls of the mortise ought to be at least as strong as the tenon. And though it seems less popular lately, a haunch is a good idea when joining an apron at the top of a leg.

Also, hygroscopic cycle changes in the wood will stress every mortise and tenon but don’t let this be any more than it must. Don’t let a tenon and excess glue bottom out in the mortise and don’t jam a tenon to each end of the mortise (see above). Placing a peg too far from the shoulder will tend to make hygroscopic movement eventually produce a gap at the shoulder, though placing it too close to the shoulder will make the mortise wall more liable to break.

Inspecting old broken or cracked furniture and other wood structures, wherever you can find them, and thinking about why the failures occurred, is one of the most useful habits a woodworker can have. I’ve been doing this for several decades – I suppose because I would rather not have the same things happen to anything I make.

Category: Techniques  | 3 Comments
Author:
• Saturday, January 31st, 2015

wood floor

If you are working in a shop with a concrete floor, such as in a basement, consider installing a wood floor. It may be easier than you think.

If you are working in the garage, consider coming indoors and using your hard-earned living space for what really matters to you. For example, banish the TV set to an obscure corner somewhere.

A wood floor is easier on your feet and back. It is also much kinder to a dropped tool, especially an edge tool. The wood floor dampens sound so it’s easier on your ears, and it certainly is a whole lot easier on your eyes. You’ll feel better in a shop with a wood floor and enjoy your time there more. Take it from someone who spent too long here:

concrete floor

Consider a floating installation of engineered flooring. The material is basically plywood topped with a thick ply of beautiful hardwood of your choice, pre-finished with a very heavy duty finish. It comes in strips about 5″ to 7 1/2″ wide, which can contain multiple sections across the width, as seen in my floor in the top photo. The planks are attached to each other but not to the floor below, upon which they simply sit. The planks connect to each other with tongue and groove plus glue, or with a super easy “click lock” connection without glue.

Not tough enough for a workshop? I can tell you my experience. Twelve years ago, I installed an engineered floating red oak floor over concrete in my workshop, which is a few feet below grade. It has held up very well, including no cracks and no separation of the planks, with 600-pound machinery rolling over it, big planks of hardwoods dragged over it, sawdust, dropped tools, and so forth.

I do note that the finish of the particular brand that I installed was later assessed to be more susceptible to denting but it is minor, and the floor still looks great. I also find the finish rather slippery, though this has diminished over time, so I would also keep that issue in mind when choosing material. Ask the experts, let them know you are putting the floor in your workshop, and consider the denting and slippery issues.

Installation involves first, a simple moisture test. Then the concrete floor will probably need to be leveled with leveling compound. Next, a heavy poly plastic sheet is laid down and a thin foam sheet goes on top of that. Then the floor is laid down. Finally, molding and thresholds are installed. The biggest issues are strategies to facilitate laying the flooring, such as starting from the correct side of the room, baseboard heating appliances, and so forth.

You can do this; you’re a woodworker for goodness’ sake.

You do, however, need professional advice. Here in eastern Massachusetts, Hosking Hardwood is well-known (you may recall them from their appearances on the “This Old House” PBS TV series), has an informative website, and offers expert advice.

Category: Tools and Shop  | 4 Comments
Author:
• Saturday, January 31st, 2015

tail vise liner

The jaws of the traditional tail vise on my old Ulmia workbench seem to the eye to meet accurately but there must be a minute misalignment because in use the grab on the work piece was slightly inconsistent across the full area of the bare jaw surfaces. Paring or scraping tiny corrections on the end grain surfaces of the jaws would have been difficult if not impossible to get right.

Then too, the opposite faces of the work piece not being precisely parallel may also cause an imperfect grip. And the smooth end grain of hardwood does not have much gripping power anyway.

The solution is to line the jaws with material that is firm but with a just bit of give to compensate for such those slight misalignments. It should also be somewhat grippy but not too much, which would prevent adjusting the work piece position when the vise is partially loosened.

I’ve tried various liners such as thin rubbery material and cork but there is no equal to leather – real leather. Cowhide lace leather works very well. This is tough, firm leather, almost 1/8″ thick (thick enough to make laces). Here is one source.

lace leather

lace leather

I applied it with Nexabond 2500M CA glue, rough side out. A little experimenting showed that the rough side grips better than the smooth side, though surprisingly there is not much difference. The rough surface does not seem to make impressions even in soft species like poplar.

The tail vise now has a monster grip. Yet backing off the pressure on the vise makes it easy to reposition the work piece, such as when adjusting the angle when sawing tenons.

tail vise

Category: Tools and Shop  | 4 Comments
Author:
• Saturday, January 31st, 2015

bench blanket

As the parts of a project approach completion, dings and scrapes are increasingly interrupting and protection becomes a greater issue. For relaxed efficiency it sometimes helps to cover the workbench or assembly bench with cushiony material during glue ups or other work toward the end of a project.

Over the years, I’ve tried various materials with mixed success:

Velour fabric and felt work fairly well. These are inexpensive and widely available in 54″ widths. Downsides of fabrics are the tendency to hold sawdust and small wood chips, and soak up glue drips.

Router mats are another option but their grip and open weave are not always desirable. Mover’s blankets (try Harbor Freight) are economical and cushion very well but are actually too mushy for my liking. Wood parts do not register firmly on the surface and their corners can catch in the soft blanket when you try to slide them.

Finally, I think I’ve found a near perfect solution: upholstery grade bonded leather. Made of shredded real leather and polyurethane, it is the better-looking MDF of the leather industry. It costs about $24 per yard at 54″ wide so you can get a single piece to cover even a large assembly bench.

bonded leather

The top (working) side looks and feels very similar to fine leather and the underside is similar to the rough side of real leather. Just 3/64″ thick, it nevertheless is resilient enough to provide protection for wood parts without being too spongy.  Glue drips can be easily wiped off the surface. It seems like it will be very durable.

The photo at the top shows a piece draped over a 24″ x 48″ sheet of MDF placed on the workbench for assembly work.

This material also makes good clamp pads. Cut it to size and apply it to clamp heads with spray adhesive.

Category: Tools and Shop  | Comments off
Author:
• Friday, January 09th, 2015

Craftsy

Dear Heartwood readers, have I ever asked you for anything? No? Well, here then is my first small request.

As you know, I have been writing for Craftsy, the excellent online video craft instruction site since April. There I’ve posted more than 33,000 words and 260 original photos of genuinely useful woodworking information.

Now Craftsy is honoring their bloggers and I’d appreciate it if you could take a minute to vote for your dear humble scribe, aka me, by clicking here or on the badge at the top of the left sidebar and then scroll down the Craftsy page, which explains it all, and click on the small orange banner. Or go directly to the form, and please enter my Craftsy blog URL: http://www.craftsy.com/blog/author/rob-porcaro/ and check the category “Woodworking” and the “Tutorial” and “Photography” boxes. [This has been completed. Thank you for your support.]

In my 38 posts so far, you’ll find tutorials on making dovetails (8,000 words and 74 photos!), mortising by hand and with the router, using paring chisels, building a Moxon vise, and more. There’s information on choosing a bandsaw, shooting, various wood species, and more.

Yes, of course, Craftsy creates traffic to their online offerings with all of this. But the online course videos are superb. I recommend my fellow woodworkers to take a look. They’ve added woodworking courses by Jeff Miller, Paul Anthony, Mike Seimsen, and other outstanding instructors.

Thank you,

Rob

Category: Resources  | 9 Comments
Author:
• Wednesday, December 31st, 2014

For a craft or any pursuit that is meaningful to you, to do it really well, you must grant yourself freedom. And that takes courage.

Category: Ideas  | 4 Comments