Archive for ◊ May, 2013 ◊

Author:
• Thursday, May 30th, 2013

IMG_1085_edited-2

2. Taking the readings

Whether a moisture meter or your blood pressure, if you don’t take the readings properly, they won’t mean much. So let’s take a look.
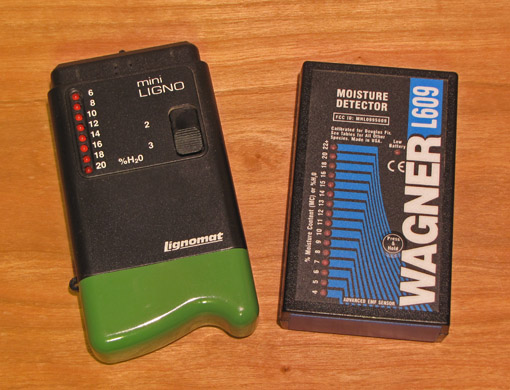
Pin meters:

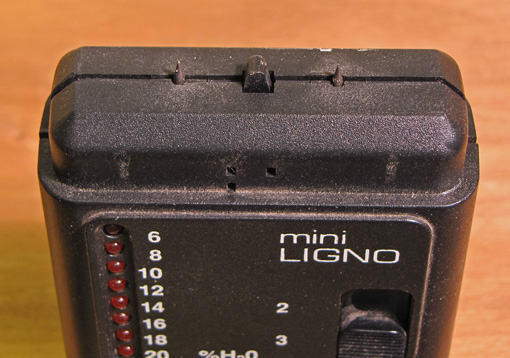
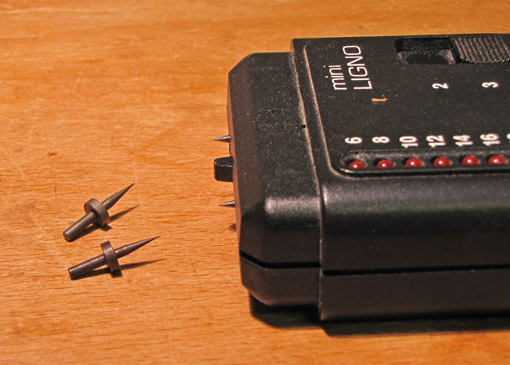
The pins must be inserted and held in without backing off, which will create a small air gap, or cause the spring-loaded activation button to release. This can take considerable force, especially if using longer pins. Though longer pins are available, even big hammer-in probes for some meters, I almost always use the default pins on my miniLigno that penetrate about 1/8″.

The pins at the left in the photo penetrate about 1/4″, and even those are difficult to push into dense woods, and I find they tend to break.

IMG_1083_edited-2

One of the advantages of a pin meter is its ability to check precisely for a moisture gradient through the thickness of a board that has not reached uniform equilibrium moisture content. In the photo at the top, my pinless meter, which has a measuring depth of 1/2″, could evaluate just about the full thickness of the 1 1/8″ Claro walnut board. Remember however, those would be readings of the average moisture content in the measured volume of wood. By crosscutting the wood, then promptly comparing pin readings taken in the end grain near the surface and near the center of the board, a moisture gradient can be detected. The same can be done, sometimes with dramatic results, in a stick like the 16/4 Doug fir in the photo.

I have found little or no difference in pin readings taken along versus across the grain. Furthermore, there is usually little or no difference in the readings for most species whether the meter is set on “wood group” 2 or 3 on the miniLigno meter.

Pinless meters:

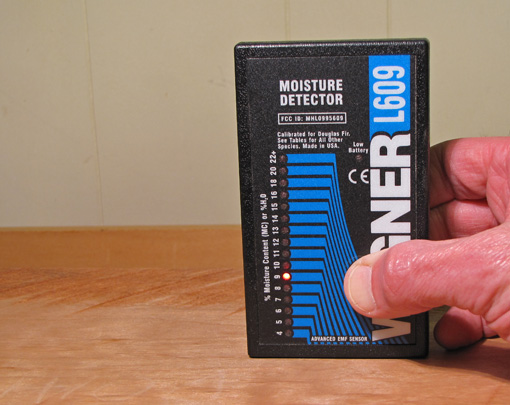
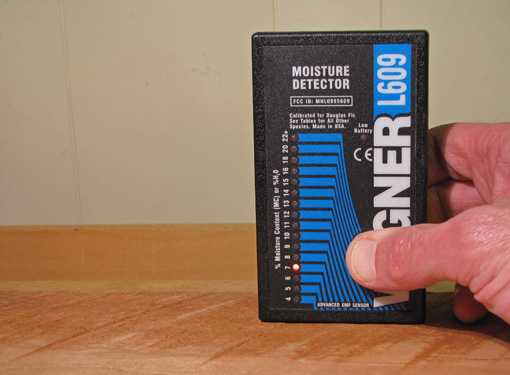
Readings are best taken on a smooth, flat wood surface with the length of the sensor aligned along the grain. In the photos of the cherry board, below, my Wagner L609 meter is reading 9% with the sensor along the grain of smooth wood, but 7% on the immediately adjacent rough surface. It read 11% with the sensor placed across the grain of the smooth, flat wood. These relationships are typical. Note also that if the wood surface is not flat in any case, the readings are likely to be relatively underestimated.

IMG_1081_edited-2

IMG_1082_edited-2

At the lumberyard, you probably won’t have the luxury of reading off a smooth surface, but at least you can make comparisons between similarly rough boards.

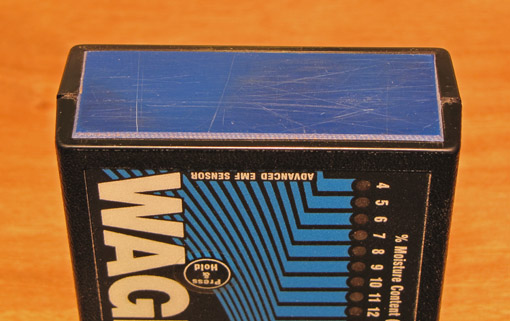
Pinless meter readings must be corrected for the density of the species. Some meters allow this to be programmed in before taking a set of readings, but with my meter I must hassle with having to add or subtract an amount based on tables in a little booklet that comes with the meter.

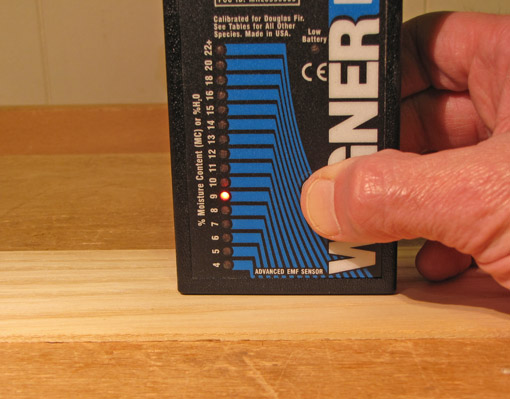
By the way, do not measure thin wood in the manner as shown below, unless you want to average it with the moisture content of your workbench!

IMG_1084_edited-2

Next: In part 3 of the series, we’ll look at important factors that affect the readings, especially for pinless meters.

Category: Wood  | Tags:  | Comments off
Author:
• Saturday, May 18th, 2013

WIAimage.php

Woodworking In America, the annual extravaganza hosted by Popular Woodworking magazine, will be held Friday through Sunday, October 18-20, 2013 in Cincinnati, Ohio (Covington, Kentucky, to be exact).

I’ll be there, and I’m stoked. Here’s why:

Most of all, I will meet many of my fellow woodworkers, including readers of this blog. Some I have communicated with for years and will finally meet in person.

I plan to do a lot of learning (and drooling) at the booths of the toolmakers in the Marketplace section of the conference. This will be a great chance to pick the brains of the small-scale, ultra quality toolmakers that I so greatly admire. I might even have a suggestion or two to offer.

The classes have first-rate presenters and useful topics. Among the many offerings, I have my eye on a carving class with Mary May, Sketch Up sessions with Bob Lang, the historical perspectives of Don Williams, and gleaning what I can from the brilliance of Silas Kopf.

As if all of that is not enough, I plan to take up saw maker extraordinaire Mark Harrell of Bad Axe Toolworks on his claim that he can transform any key on my keyring into a serviceable dovetail saw in five minutes with nothing more than a 5″ extra slim saw file.

Of course, Mark has said nothing of the sort, but I do know that WIA is going to be a great time, and I will gain knowledge and skills. I hope to see you there. Go to this link to register.

Category: Resources  | 4 Comments
Author:
• Tuesday, May 14th, 2013

IMG_1074_edited-2

The relationship between wood and water is of great concern to woodworkers. Specifically, we want to know how much water is in the wood, and what will happen to the wood when that amount changes, as we know it always will. A moisture meter tells us the percent moisture content of wood relative to its completely dry weight.

So, we all need a moisture meter, right? Well, on the one hand, great furniture was made for hundreds of years without moisture meters. On the other hand, a meter is a modern convenience that facilitates reliable management and use of valuable wood. I use mine regularly in the shop and when I buy wood at the lumberyard.

However, to be of value, a moisture meter must be used intelligently. That is the topic here, geared for the small shop woodworker. Reviews of specific brands and models can be found in the magazines, whose publishers have the wherewithal to do such testing.

There are four keys to making effective use of a moisture meter:

1. Understand how the meters work.

2. Take the readings properly.

3. Understand the main factors that affect the readings.

4. Interpret the information and use it. You are craftsman, not a data collector.

 1. How they work

IMG_1077_edited-2

“Pin” meters involve sticking two pins, from 3/16″ to 2″, into the wood. The meter works by conducting a small electric current through the wood from one pin to the other. The water in the wood conducts electricity well but the wood resists electrical flow. The meter measures the resistance, and from this, figures out how much moisture is in the wood.

It is important to realize that the meter measures the path of least electrical resistance between the pins. This means the wettest wood layer that is anywhere between the two pins. (The exception to this is the use of insulated pins that have metal exposed only at their tips.)

IMG_1078_edited-2

“Pinless” meters involve simply placing the base of the meter on the wood (no punctures). The meter produces an electromagnetic field in a three-dimensional volume of wood, defined by the functional base area of the meter and the depth to which the meter is designed to operate. The field is altered by the moisture content and density of the wood, and the meter uses that alteration to figure out how much moisture is in the wood.

It is important to realize that the meter is reading an approximately average moisture content throughout that volume of wood.

Later we’ll look at how the operating characteristics of the two types of meters affect the interpretation and use of their readings.

– – – – – – – –

Before moving on in the upcoming posts about the next three points listed above, a couple of no-tech maneuvers deserve mention.

First, when at the lumberyard, you can estimate the moisture content simply by holding your hand on the wood surface. Use this as a relative measure for boards of the same species with similar surface quality (rough or planed) in the same storage environment. The wetter wood will feel slightly cooler and damper. It is a subtle sensation, but you can use your pinless moisture meter (or borrow one) to calibrate your senses. It can be done, and it’s quick and cheap.

I’ve heard of using your lips on the wood instead of your hand to increase the sensitivity. Now, as much as I love wood . . . nah, I don’t think so.

Second, if you buy wood and want to let it reach its equilibrium moisture content for the humidity level of your shop, you can probably do well enough by simply being patient. Feel the wood right after you buy it, compare it to boards of the same species that have resided in your shop for a long time, and wait it out for a few weeks, depending on the thickness of the stock. You can also resaw a small chunk and feel the inside surfaces, and watch its movement later.

If you wait long enough, the wood is going to be OK. But how long? Well, that is why it pays to have a moisture meter – efficiency, ease, and reliability.

Next: part 2.

Category: Wood  | Tags:  | 2 Comments
Author:
• Friday, May 03rd, 2013

IMG_0989_edited-2

These saws solve problems.

The Japanese azebiki saw, at the top in the photo, has curved tooth lines designed to start a cut in the middle of a board. One side is rip, the other crosscut. The neck is thicker toward the handle, which, along with the short cutting length, makes this saw fairly stiff for a Japanese saw.

The azebiki works well cutting against a straightedge wood guide to make kerfs for starting grooves and dados, including sliding dovetail sockets. Use a chisel to clear the waste and a router plane to true the bottom. I prefer an electric router for this work but sometimes it is too risky or awkward, so it is good to have hand tool options.

For all sorts of odd small-scale sawing tasks, the azebiki saves the day. It is inexpensive and worth having in the shop.

The Z brand 6″ keyhole/compass saw (S-150), at the bottom in the photo, has Japanese three-bevel crosscut-style teeth (17 tpi) with variations in the set to help clear waste. This saw cuts more smoothly than other Japanese and Western keyhole saws that I have tried.

At .035″ thick, it is stiff enough to maintain control when sawing curves, as long as the stock is not too thick. Of course, it cuts on the pull stroke, which occasionally is a disadvantage when jabbing into a small hole to start a cut.

I bought the skinny keyhole saw with the wooden handle many years ago, and it hangs around waiting for an odd situation where there is only a tiny hole or narrow slot to sneak into with the nose of the saw. It would be expecting a lot for a saw of this size to cut smoothly, and indeed, it does not.

The little guy keeps his place on the roster because, though infrequently, he continues to make plays when needed. And he doesn’t take up much space on the bench.

Second from the top in the photo is a Z brand flush cut saw (S-150). You might not need this type of saw if you use the trick I discussed in an earlier post, but I still like having it as an option. The .016″ thick plate is very flexible, so it can be bent to allow the handle to be lifted away from the work surface, as you use the fingers of your other hand to press down on the saw blade.

To prevent scratching the work, the three-bevel crosscut style teeth (21 tpi) have no set whatsoever. I prepped the saw by lightly working each side on a medium sharpening stone to ensure that any trace of burr would be gone. As discussed here, binding can be a problem with this saw but it works well enough for shallow cuts.

Z brand saws are well made. The replaceable blades are inexpensive, so there is no worry if you occasionally abuse them when desperately trying to do an awkward job.

This part 8 concludes the My Saws series. Or does it? Our current woodworking world has some great saw makers at work, modern technology, and an expanding appreciation of the woodworking wisdom of our forebears, so a new saw for my shop is always a possibility. The bottom line will always be: how the tool can help me make things that I so dearly want to make.

Note: The entire series, parts 1-8, of “East meets West: My Saws” can viewed on a single page via this link.